How to Forward an Email: A Professional’s Guide

By Prosanjit Dhar
August 14, 2025
Last Modified: August 15, 2025


You got an email that needs to be forwarded to someone else.
Of course, it’s a one-click move, unless you leave that unprofessional “FW:” or “FWD:” prefix cluttering the subject line.
But there’s always a better way, which is clearer and professional.
In this blog, we’ll show exactly how to forward an email, what to say, and the common mistakes to avoid so you don’t waste time or damage your professional image.
What does forwarding an email do?
Forwarding an email means sending a received email to one or more different email addresses. It allows you to send the full format of the original email, including any attachments and formatting.
What happens when you forward an email?
When you forward an email, the original mail copy reaches the new recipient without notifying the original sender.
However, if the original sender is using email tracking tools, then they might detect forwarding through multiple opens from different locations.
Also, “FW:” or “FWD:” in the subject line can reveal the email forwarding if they check the email conversation later.
So far, you have gotten the basic knowledge about email forwarding. Now let’s move forward to the technical aspects.
What is email piping, and why is it important?
How to forward an email?
As people use different email clients, we’ll try to cover every aspect and medium possible to forward an email. Let’s start with a popular one.
Email forwarding in Gmail
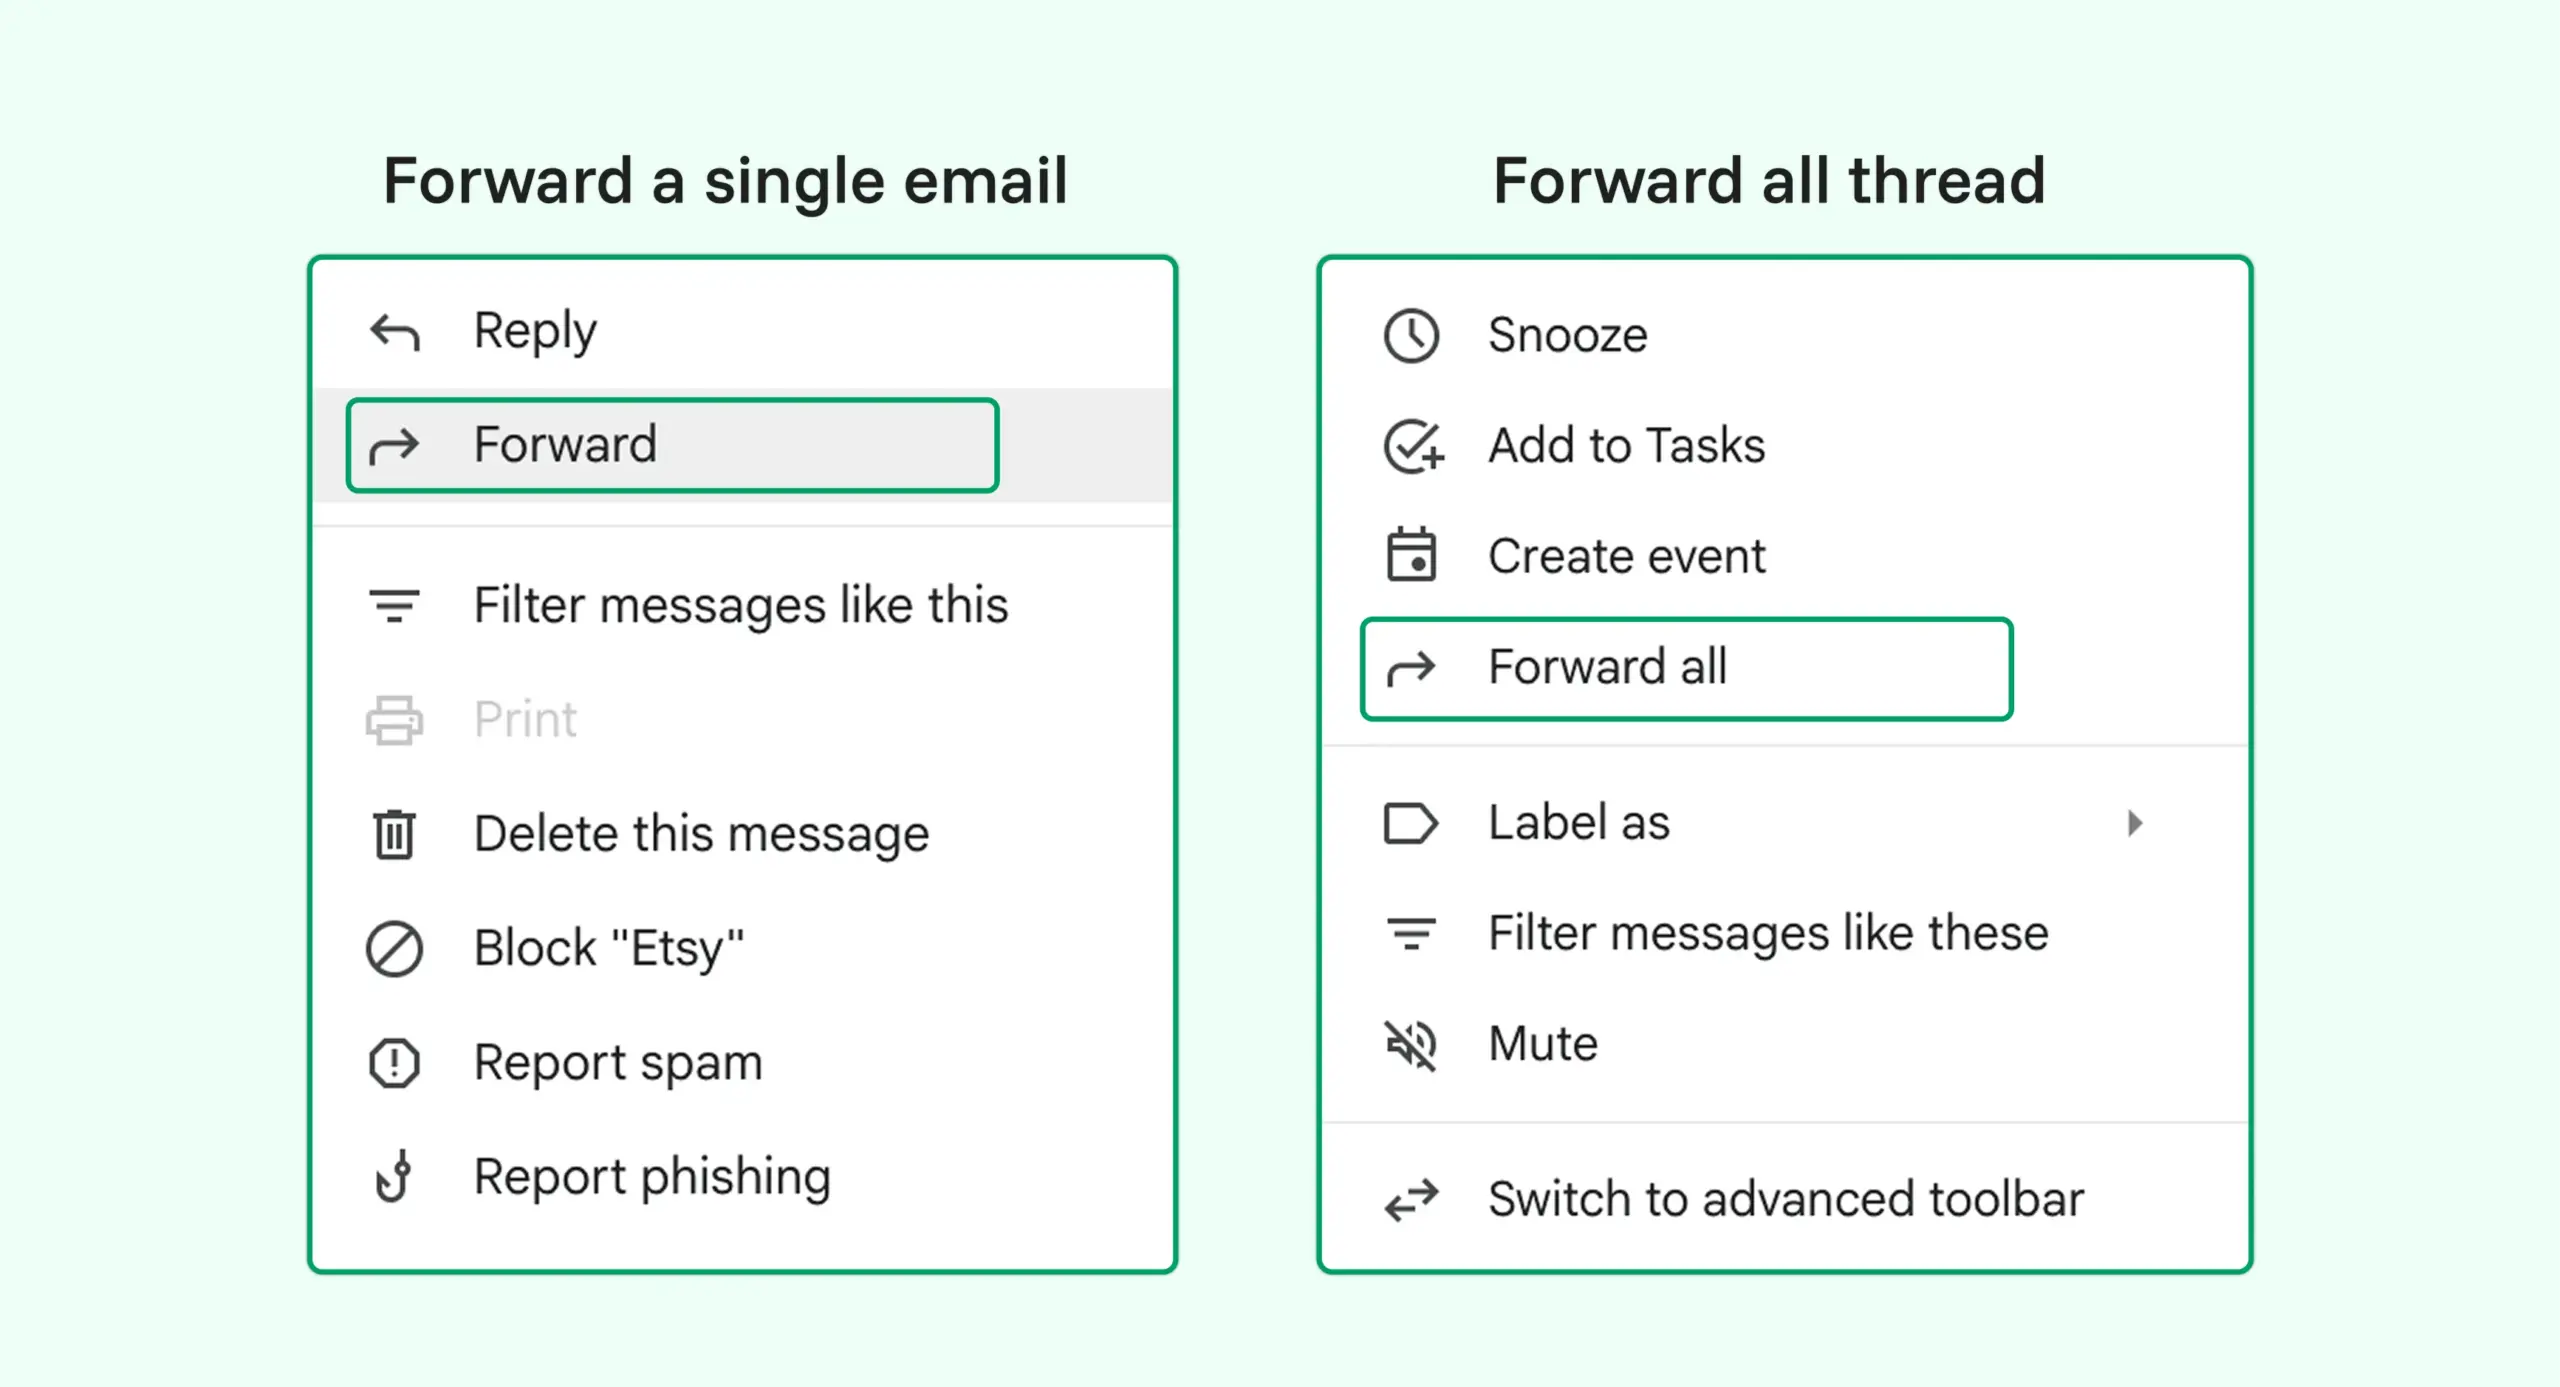
Follow these steps:
Forward a single email
Forward all thread
Note: Make sure Conversation View is turned on before forwarding a thread.
Now, let’s move on to Outlook.
Email forwarding in Outlook
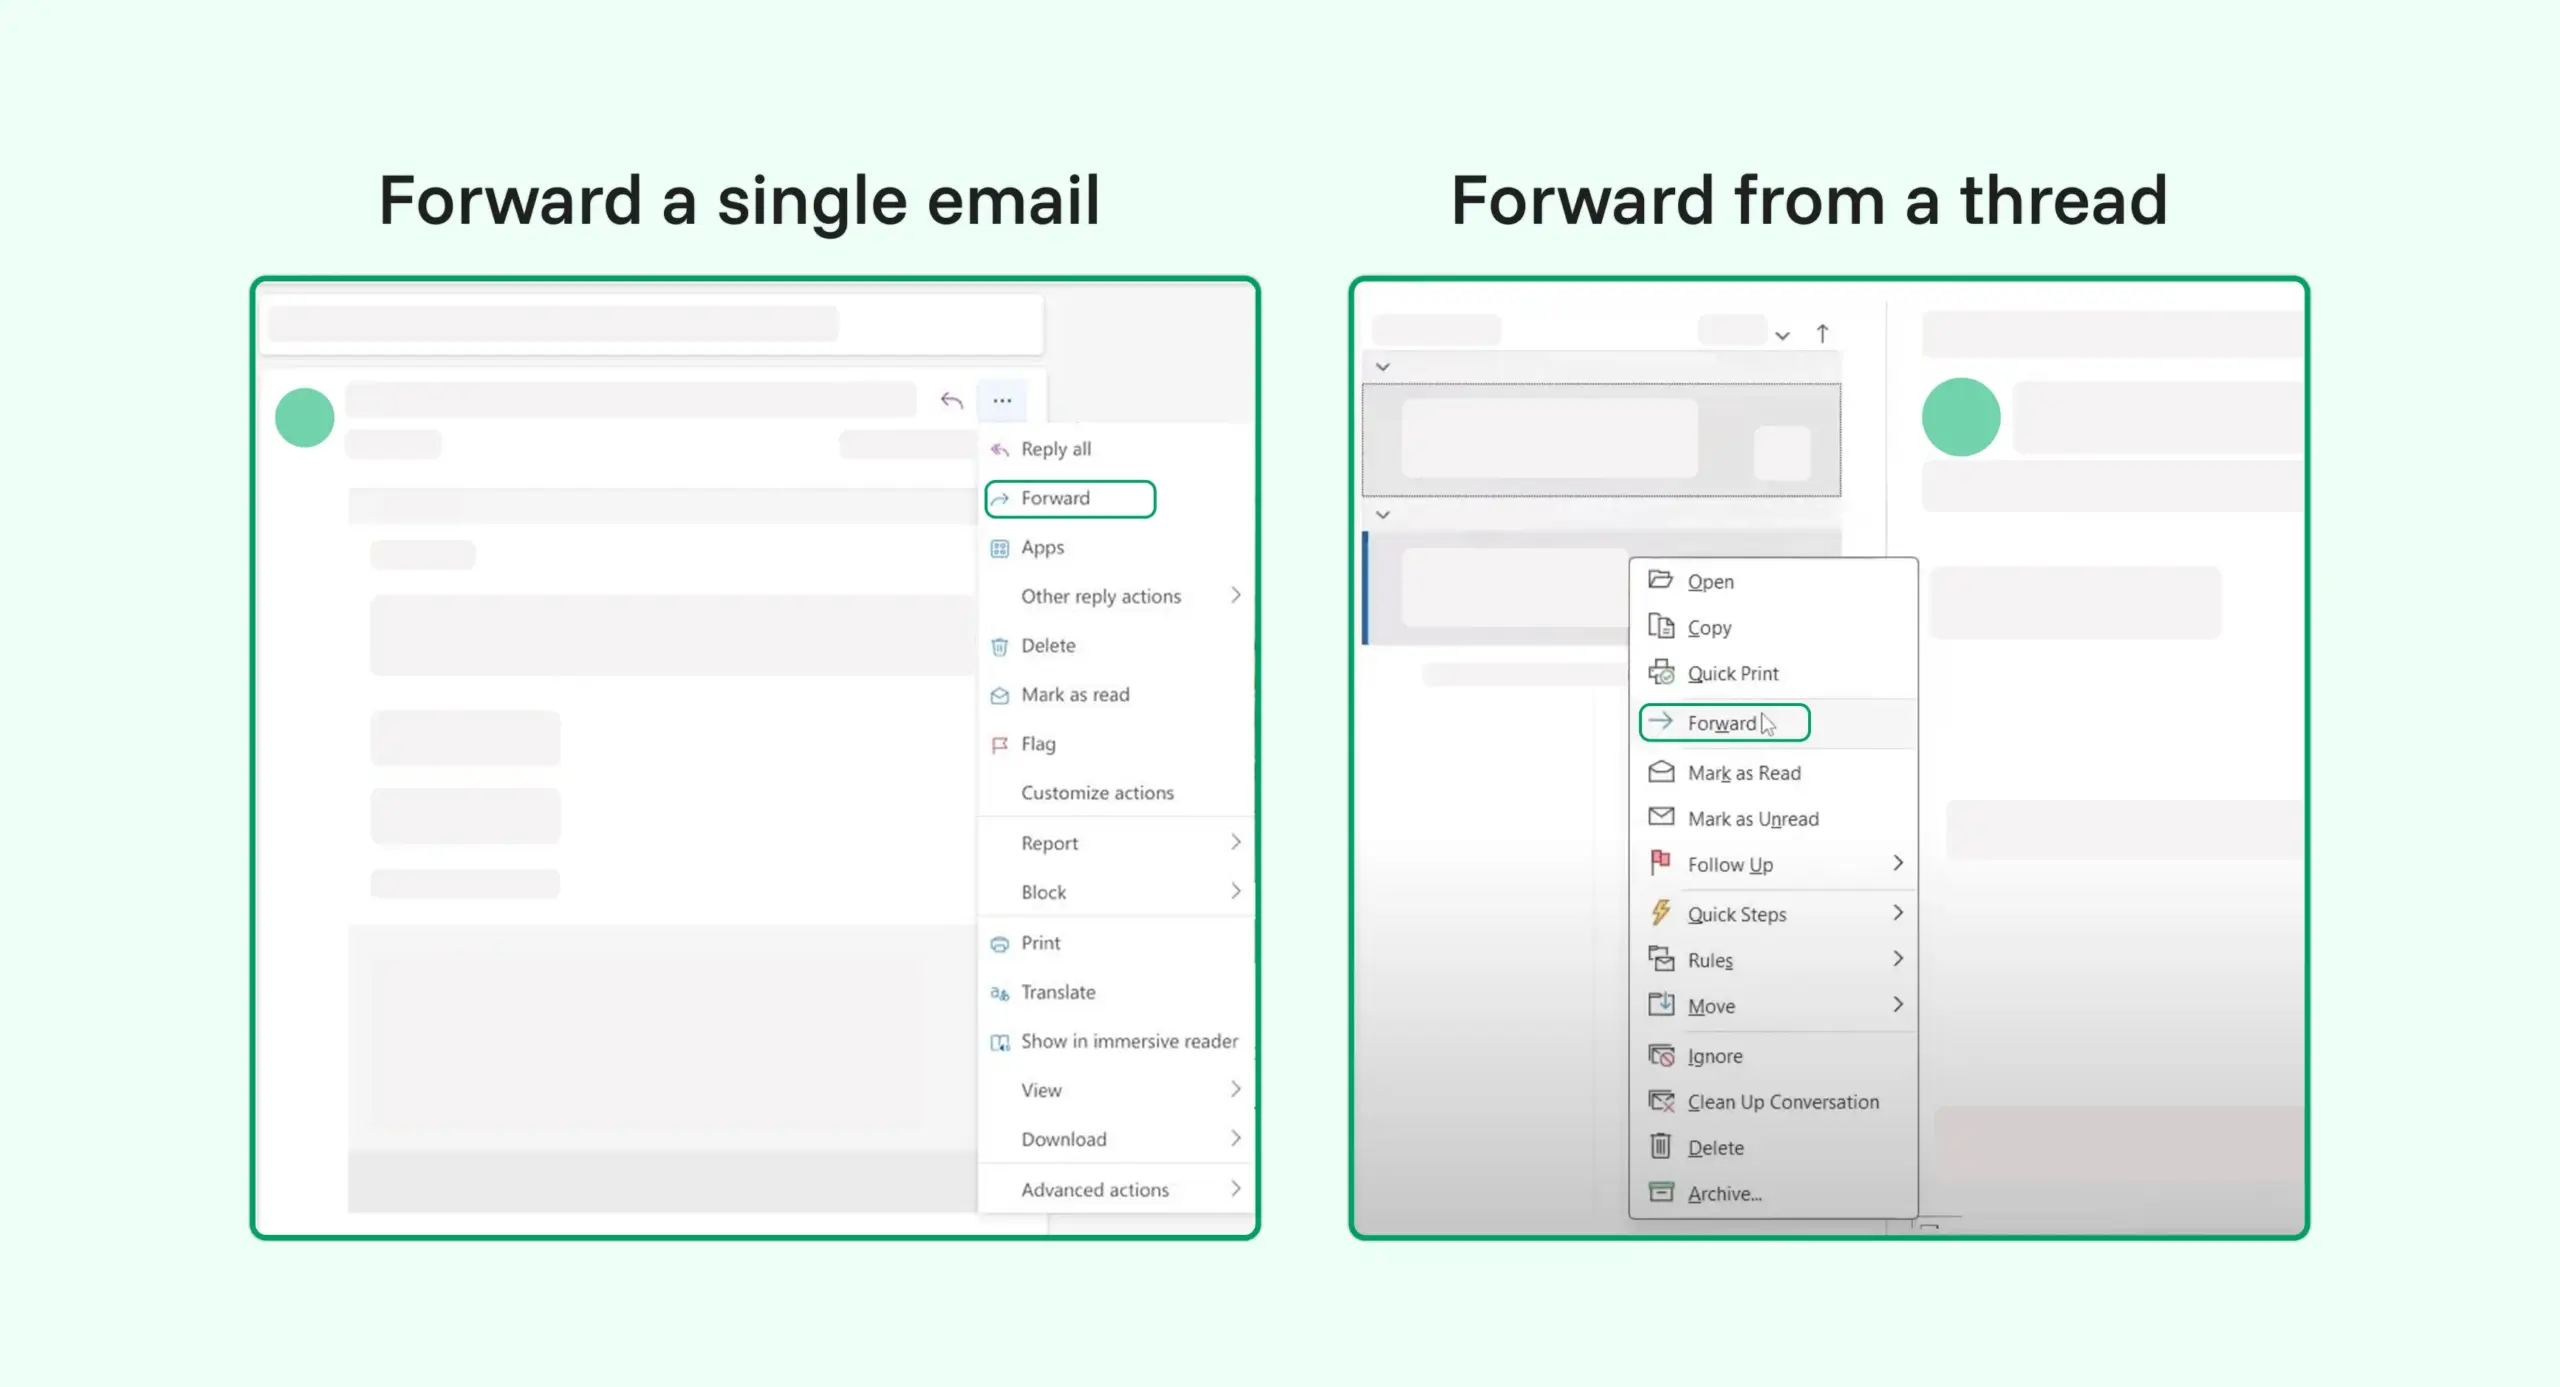
Follow these steps:
Forward a single email
Forward from a thread
And, now the last one.
Email forwarding in iCloud Mail
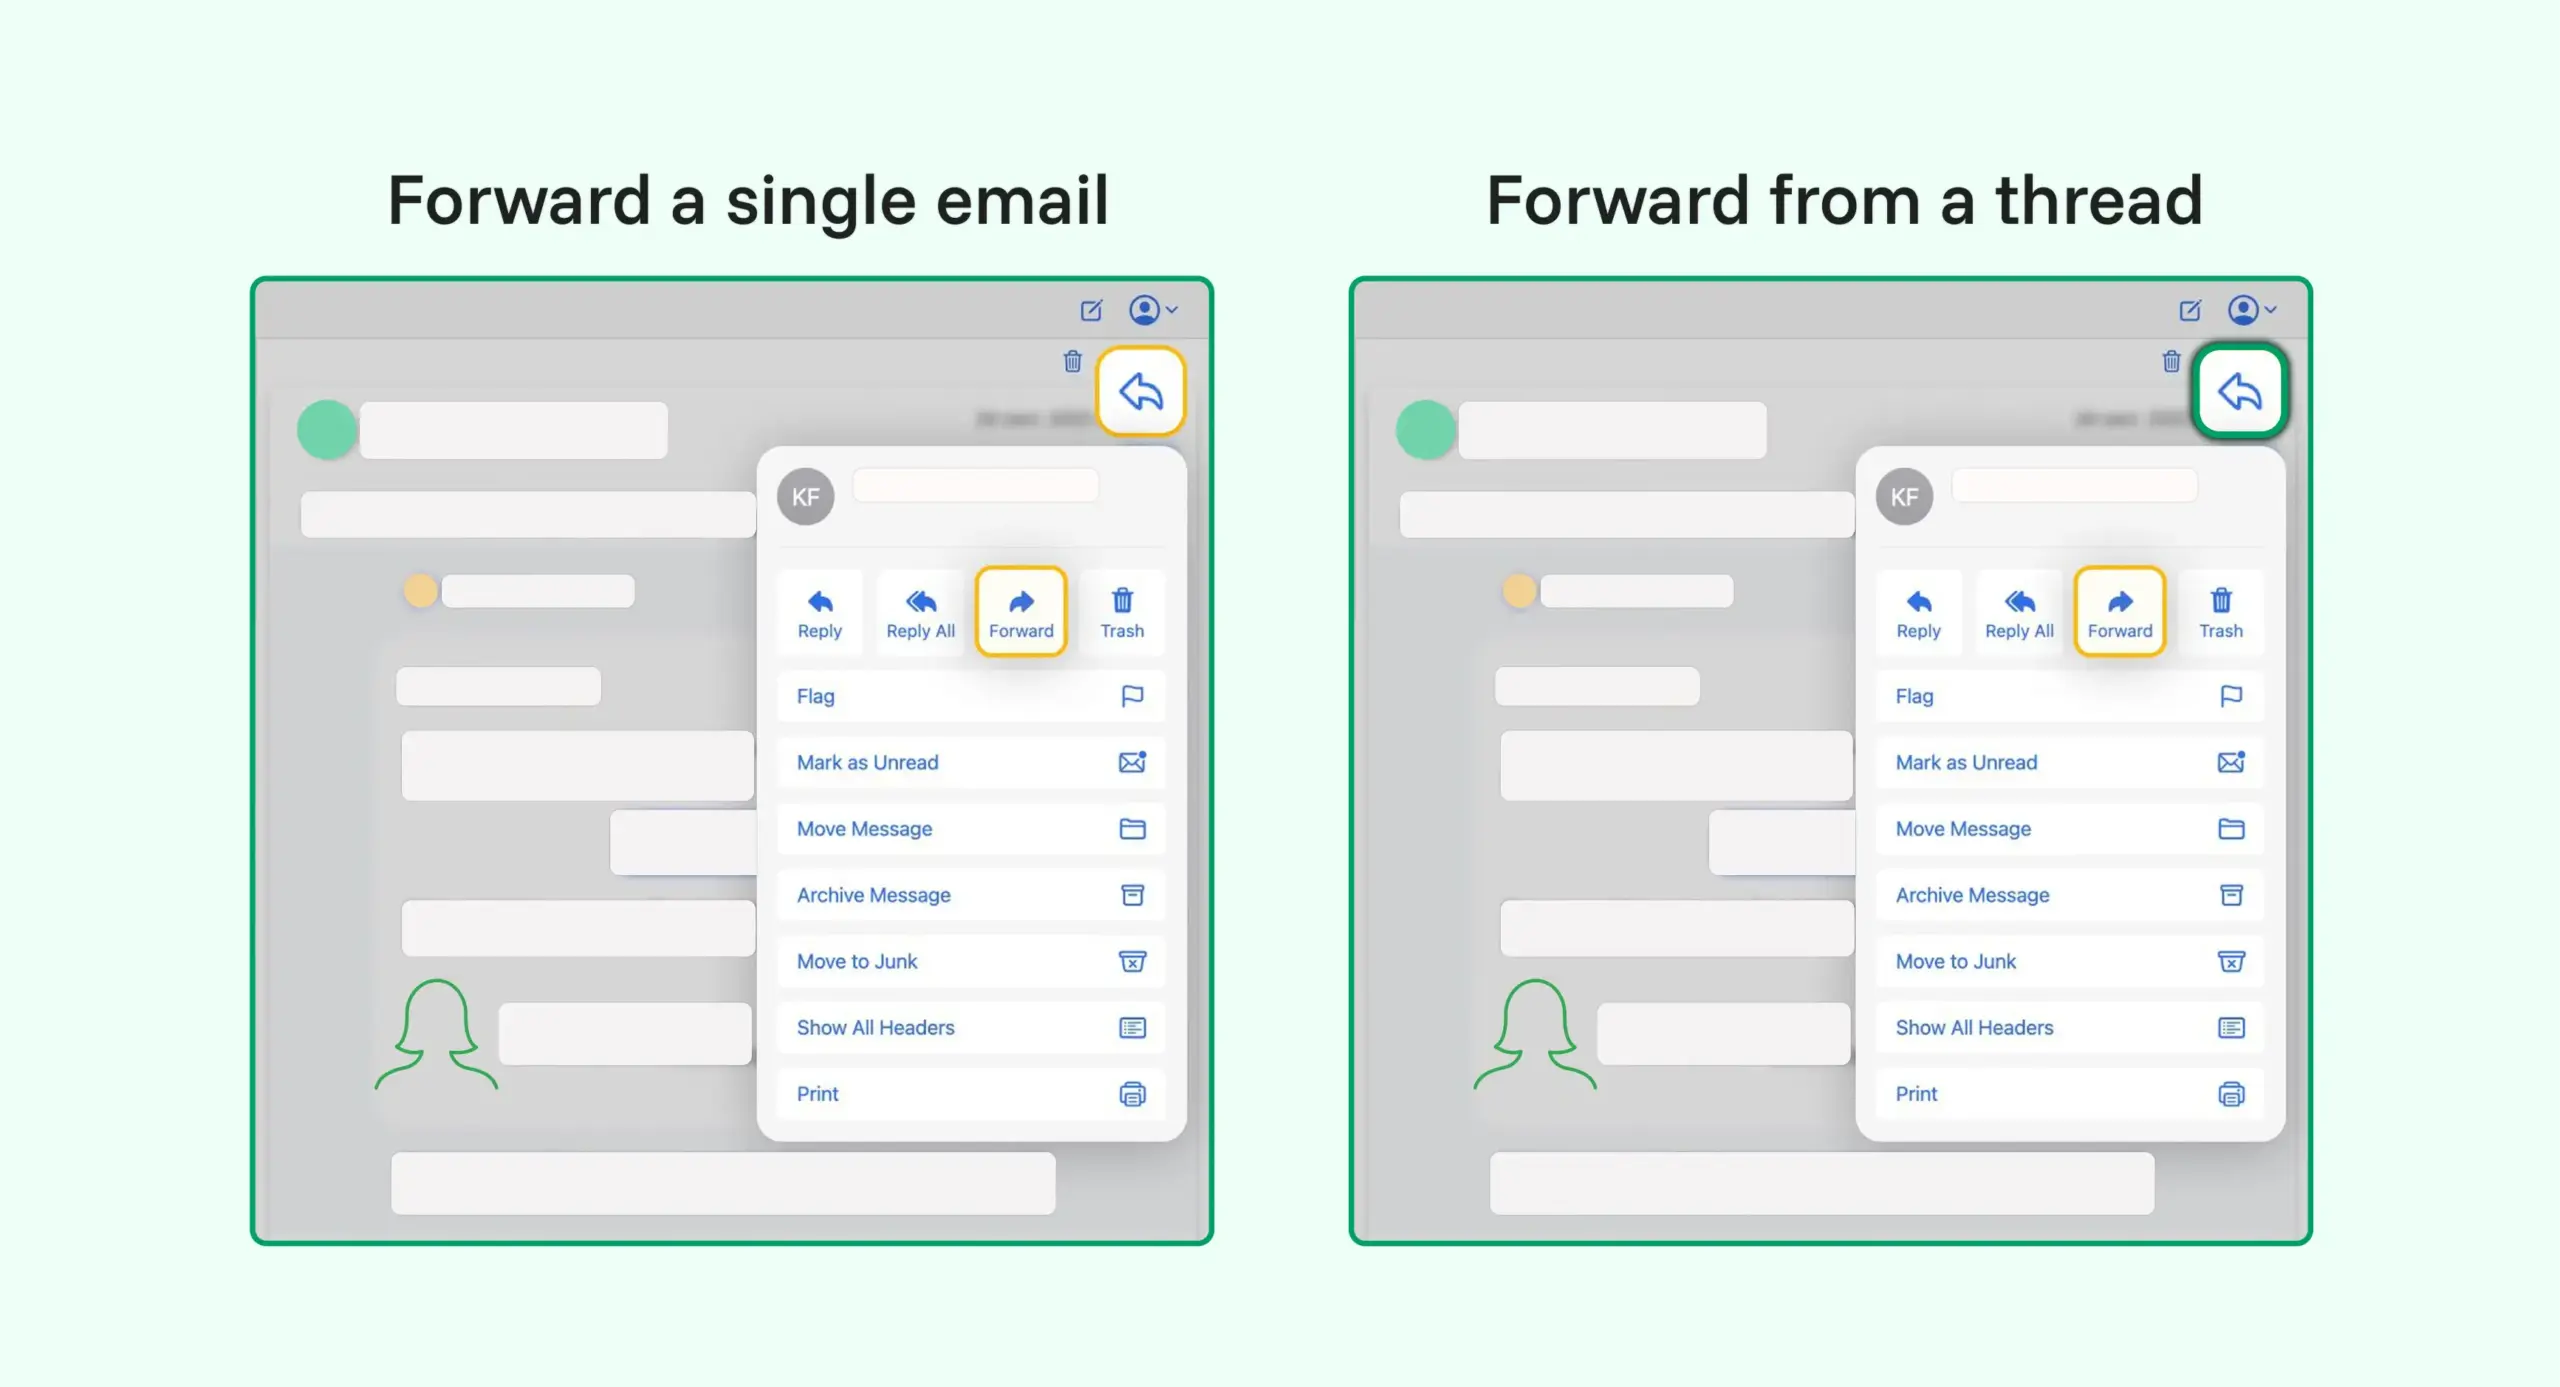
Follow these steps:
Forward a single email
Forward from a thread
There’s no “Forward All” menu in the web version, but on Mac Mail (connected to iCloud), you can do this.
Maybe you already knew these techniques if you’ve been using email for a while. But how do you make sure you’re doing it in the right way?
Let’s look at some best practices.
How to forward an email professionally?
Whether you’re sending it to a client, colleague, or manager, you always need to follow an appropriate method and tone.
These five rules will help you to show that you know exactly what you’re doing.
Always use the ‘Forward’ button where you are
Suppose you want to forward an email from the current message you’re reading. Despite sending a full thread, use the forward button of the specific message you want to send.
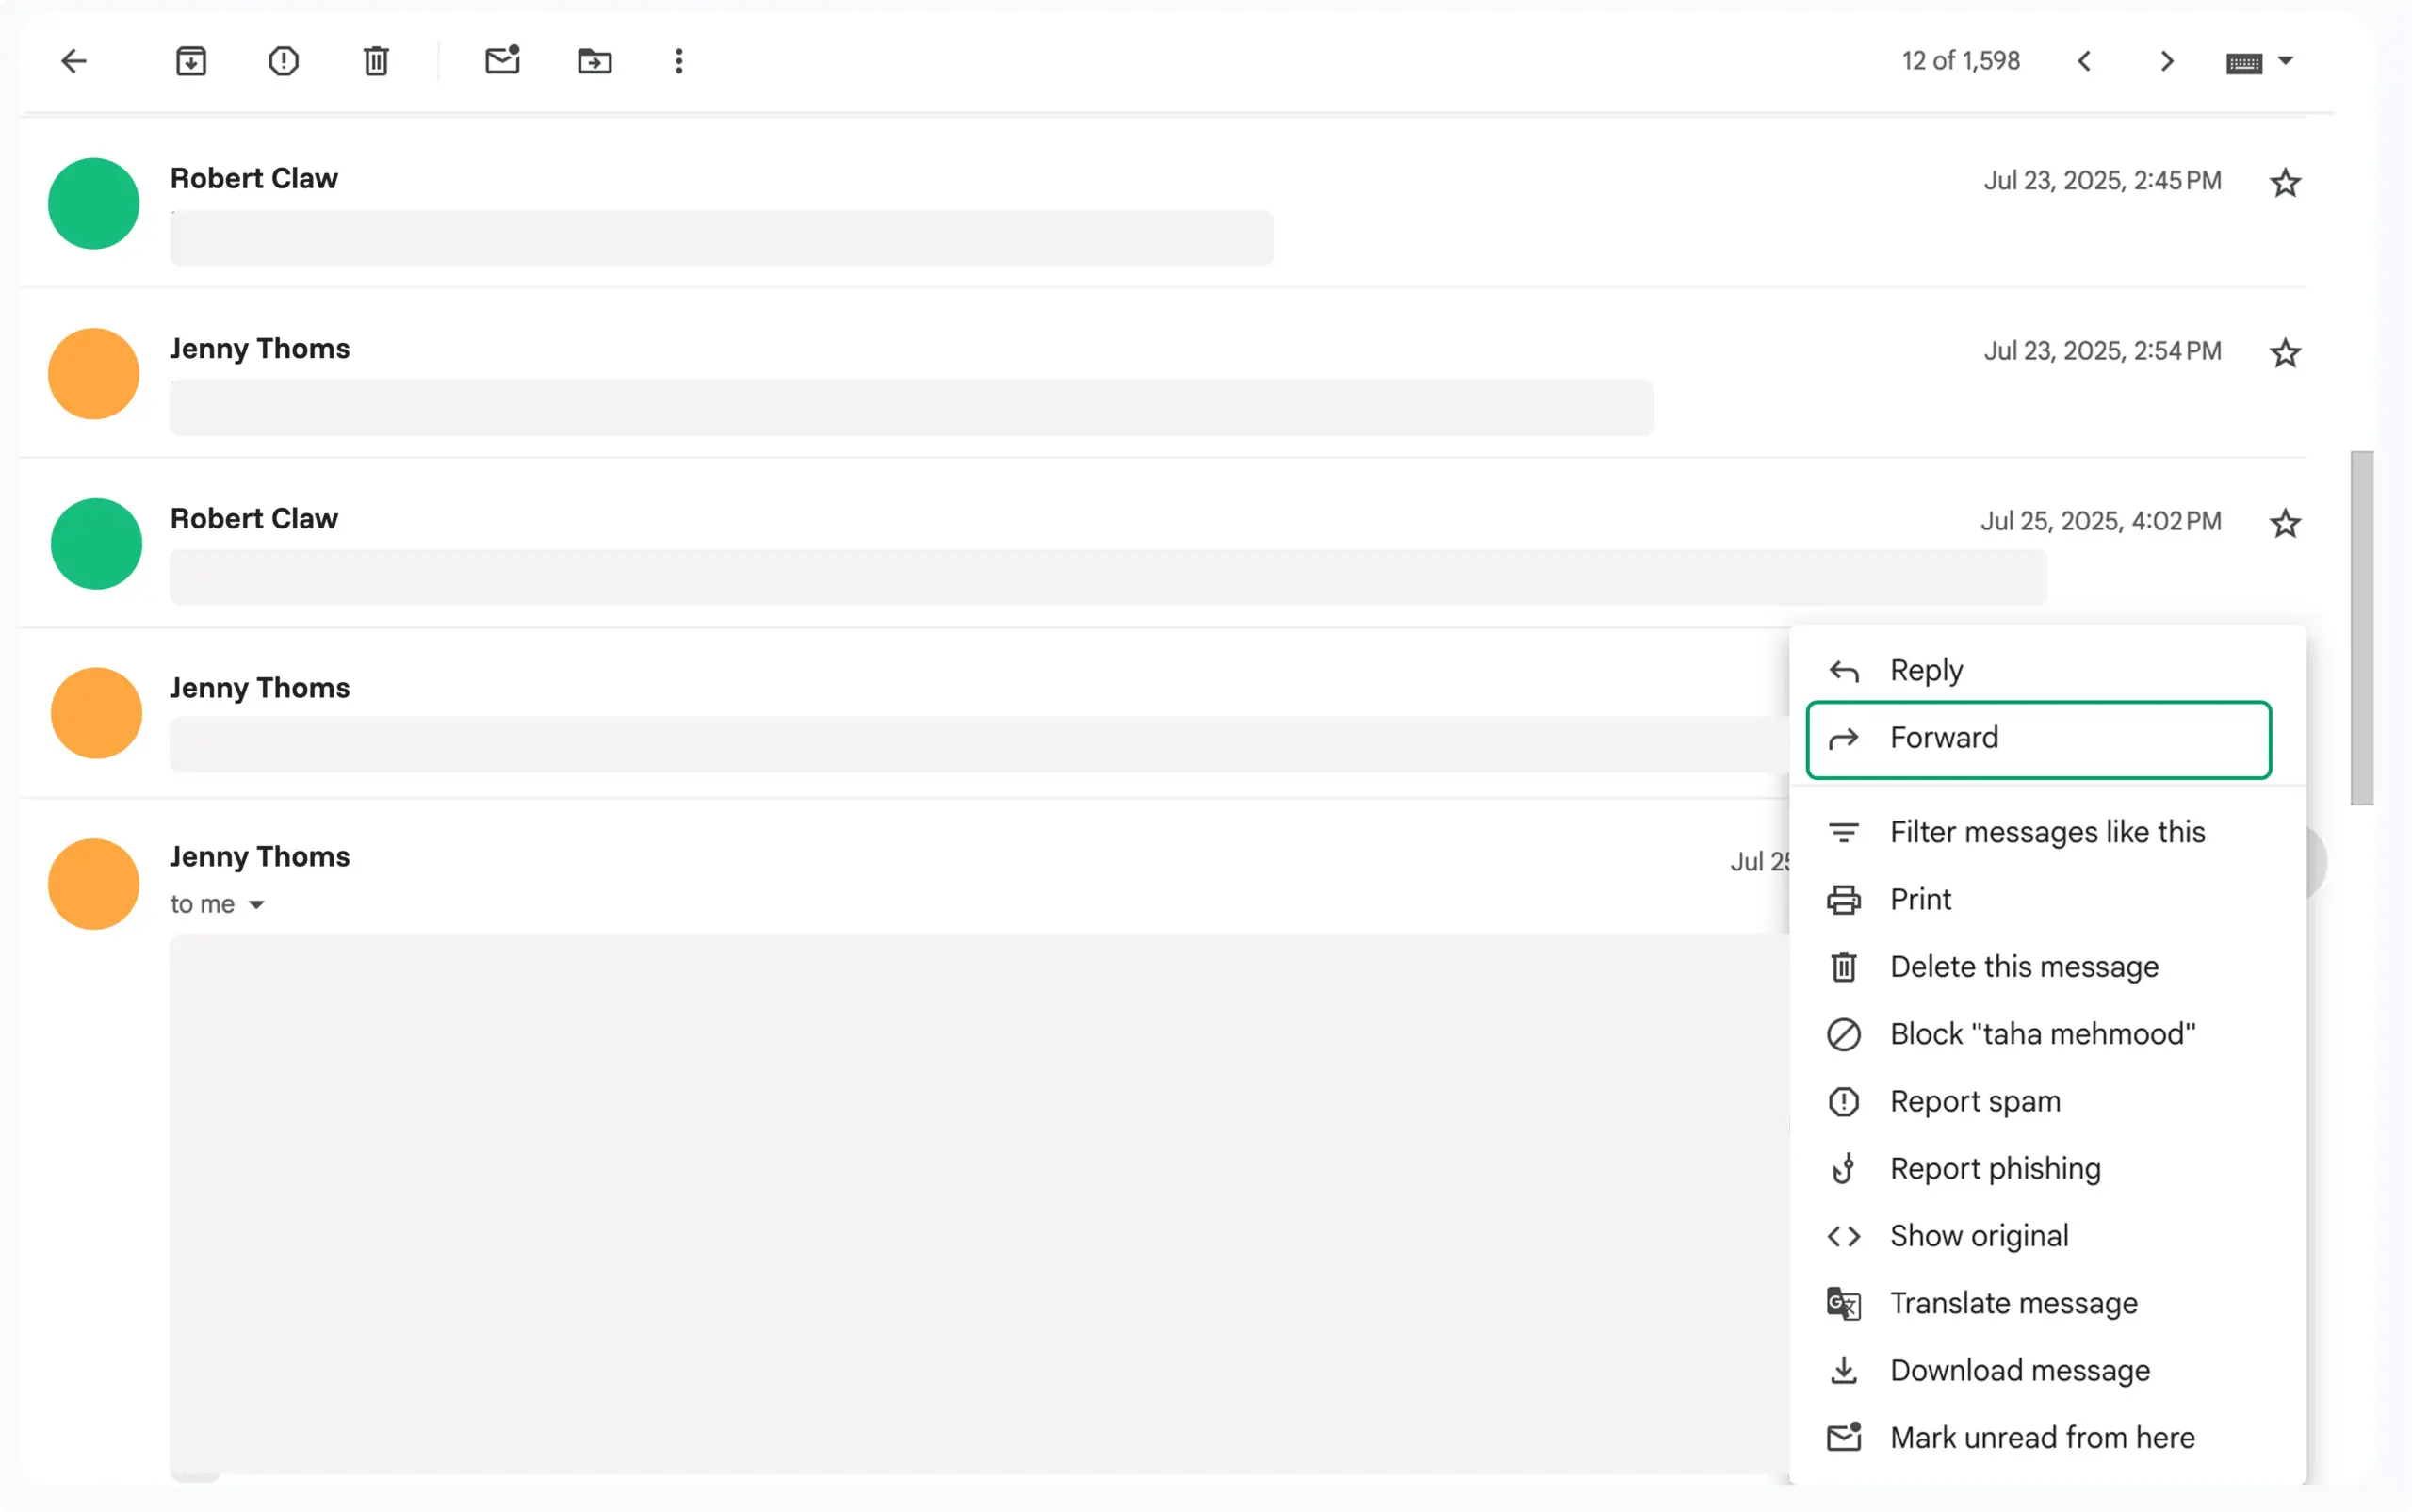
So, your recipient will immediately spot the message you want without wading through dozens of previous replies. But your task doesn’t end here!
Always include your context
You always need to clarify the reason while forwarding an email. Because anything without context isn’t appreciated in any corporate sector.
That’s why,
For example:
Hi Rasel,
I’m forwarding this client feedback from yesterday’s presentation. Please pay special attention to their concerns about the timeline in paragraph 3. Also, when you get time, you can review and let me know if the revised schedule works by Friday.
Thanks,
[Your name]
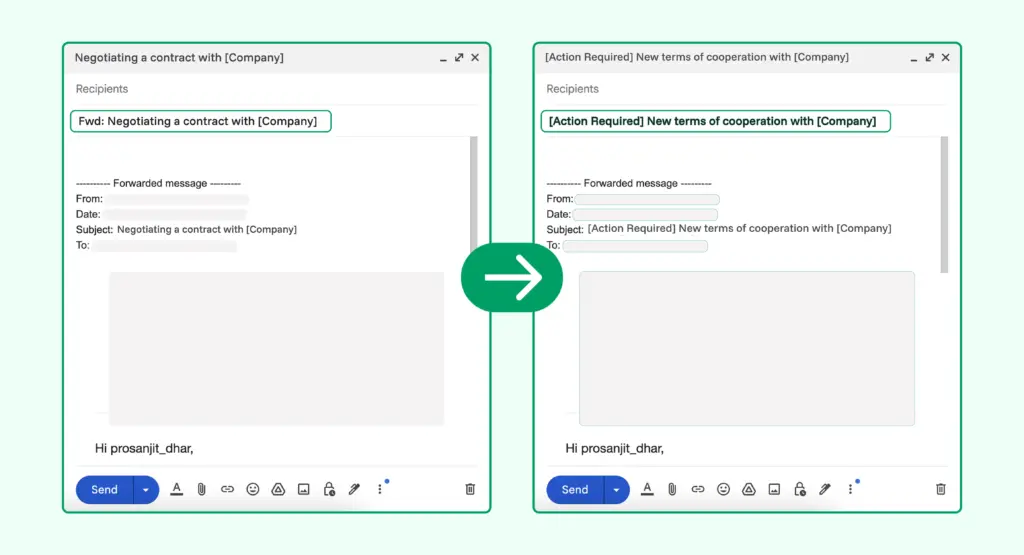
Clean up the subject line
Not editing the email subject line is one of the most common mistakes of professionals. Because in every email client (Outlook, Gmail, and Apple Mail), there’s a “Fw:” or “Fwd:” prefix added while forwarding an email.
So after a couple of forwards, this might end up with a “Fw: Fw: Fw:” stack. Leaving your subject line messy and unprofessional.
That’s why edit the section to make it clearer and actionable.
For example:
Replace:
Fwd: Negotiating a contract with [Company]
With:
[Action Required] New terms of cooperation with [Company].
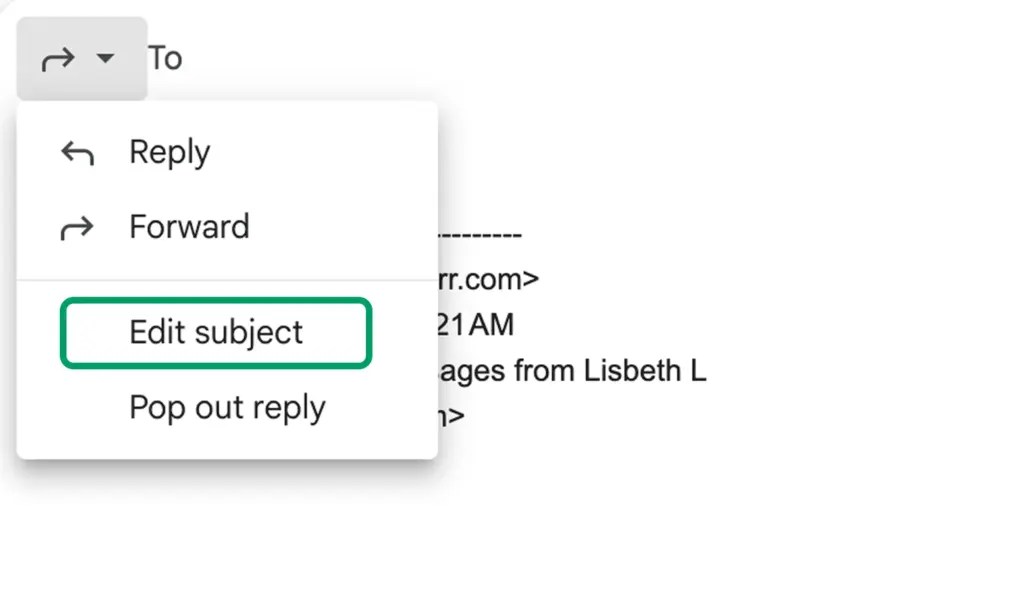
And to edit your subject line, follow this process according to Gmail.
As your email subject line is sorted, the next element is your email format.
Format the email copy properly
While forwarding emails, you might have noticed some unwanted formatting like extra indents, quoted text, mismatched fonts, and repeated signatures.
This especially happens with design or media-rich emails, where forwarding can break the layout.
So, before you hit send, every time:
- Remove extra spacing from nested replies.
- Delete extra signatures and email disclaimers.
- Remove irrelevant email addresses from the header.
- Clean up font inconsistencies and random bold/italic text.
These changes will keep your forwarding email neat, aligned, and easy to read.
Handle attachments correctly
Lastly, your email attachments can get lost or lose quality while forwarding. That’s why forward them in a way that keeps them clear and accessible.
But there are some other mandatory fields that you might encounter while forwarding an email.
Understanding different email fields
Every email client carries different fields like To, Cc, and Bcc. That’s why knowing how these fields work can save you from awkward mistakes.
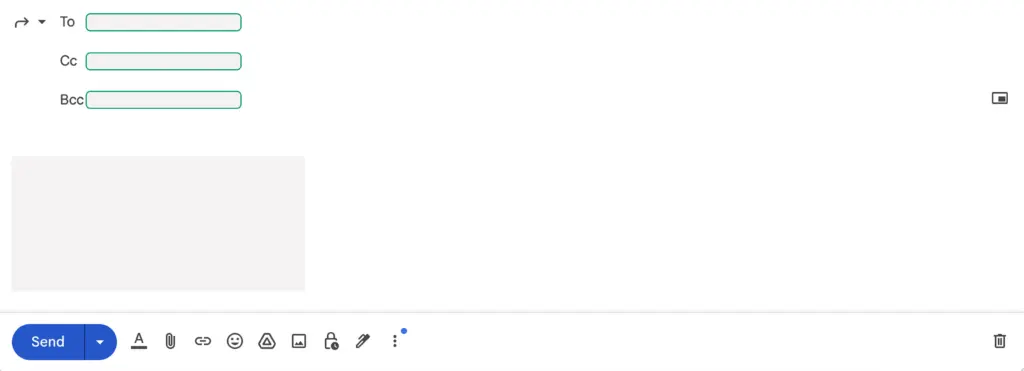
“To” field
The “To” field is where you add the main recipient(s) address. Recipients in this field get an email directly, making it clear that they are expected persons to read and respond.
‘Cc’ field
“Cc” field, also known as Carbon Copy, is for recipients who should be aware of the email. But they are not the decision-makers. This field is useful when you have to keep multiple people in the loop without assigning them directly.
‘Bcc’ field
“Bcc” or blind carbon copy is the field that hides recipients from everyone else on the email. Recipients in this field can see the email copy but not who else received it. This field is very useful to hide others’ email addresses or to protect privacy.
So, you can use any of these fields according to your different work needs.
Wrapping up
By now, you’ve got a clear idea about the right way of forwarding an email. You might already know some of them. But the actual value is learned in applying these in both professional settings and personal exchanges.
Because using the right techniques ensures your emails stay clear, respectful, and effective.
Start off with a powerful ticketing system that delivers smooth collaboration right out of the box.
Related Articles
Follow the Sun Model: Run 24/7 Customer Support Smoothly
The follow the sun model is a support…Customer Service Experience: Meaning, Skills, and Real Examples
Learn what customer service experience means, why it…


Leave a Reply