The Outgoing Webhook feature of Fluent Support allows sending data from Fluent Support to other external platforms through Workflows. This article will guide you through the whole process of doing it.
Outgoing Webhook #
To learn how to send data using Outgoing Webhook, follow the steps with screenshots below —
You have to send data through either Manual or Automatic workflow. To ensure which one is appropriate for you, check this Documentation.
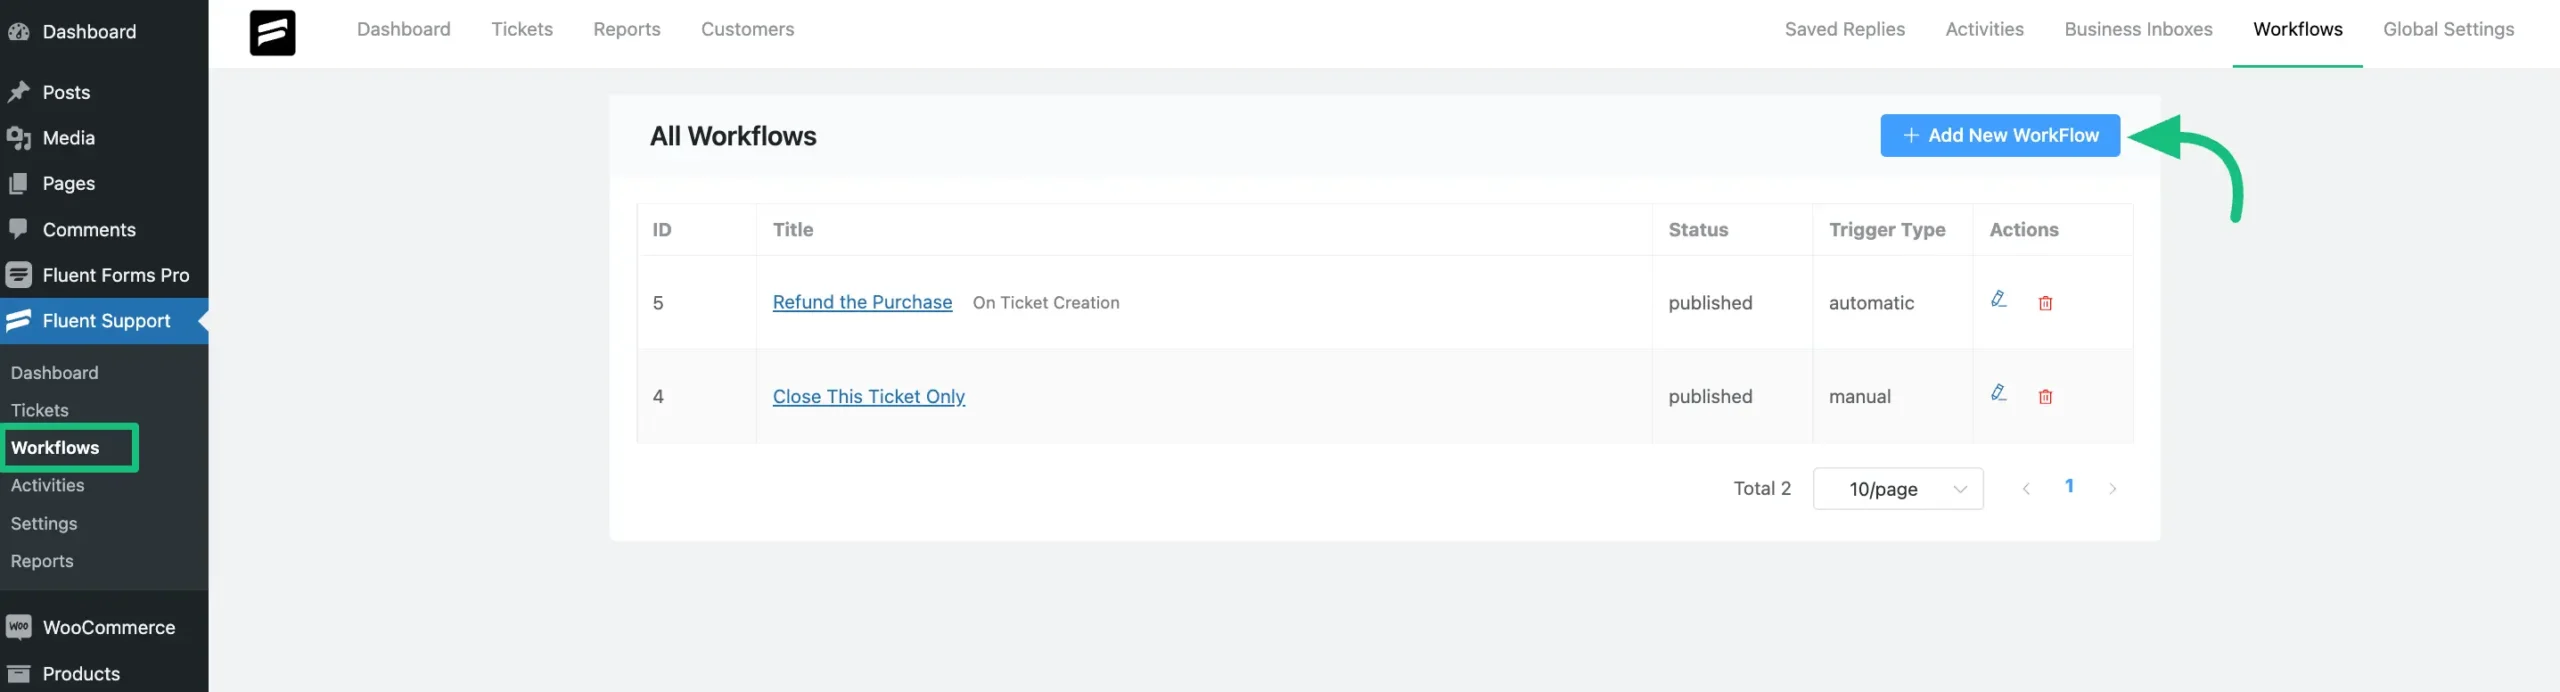
Go to Workflows from the Fluent Support Dashboard, and click the + Add new Workflow button and a popup will appear.
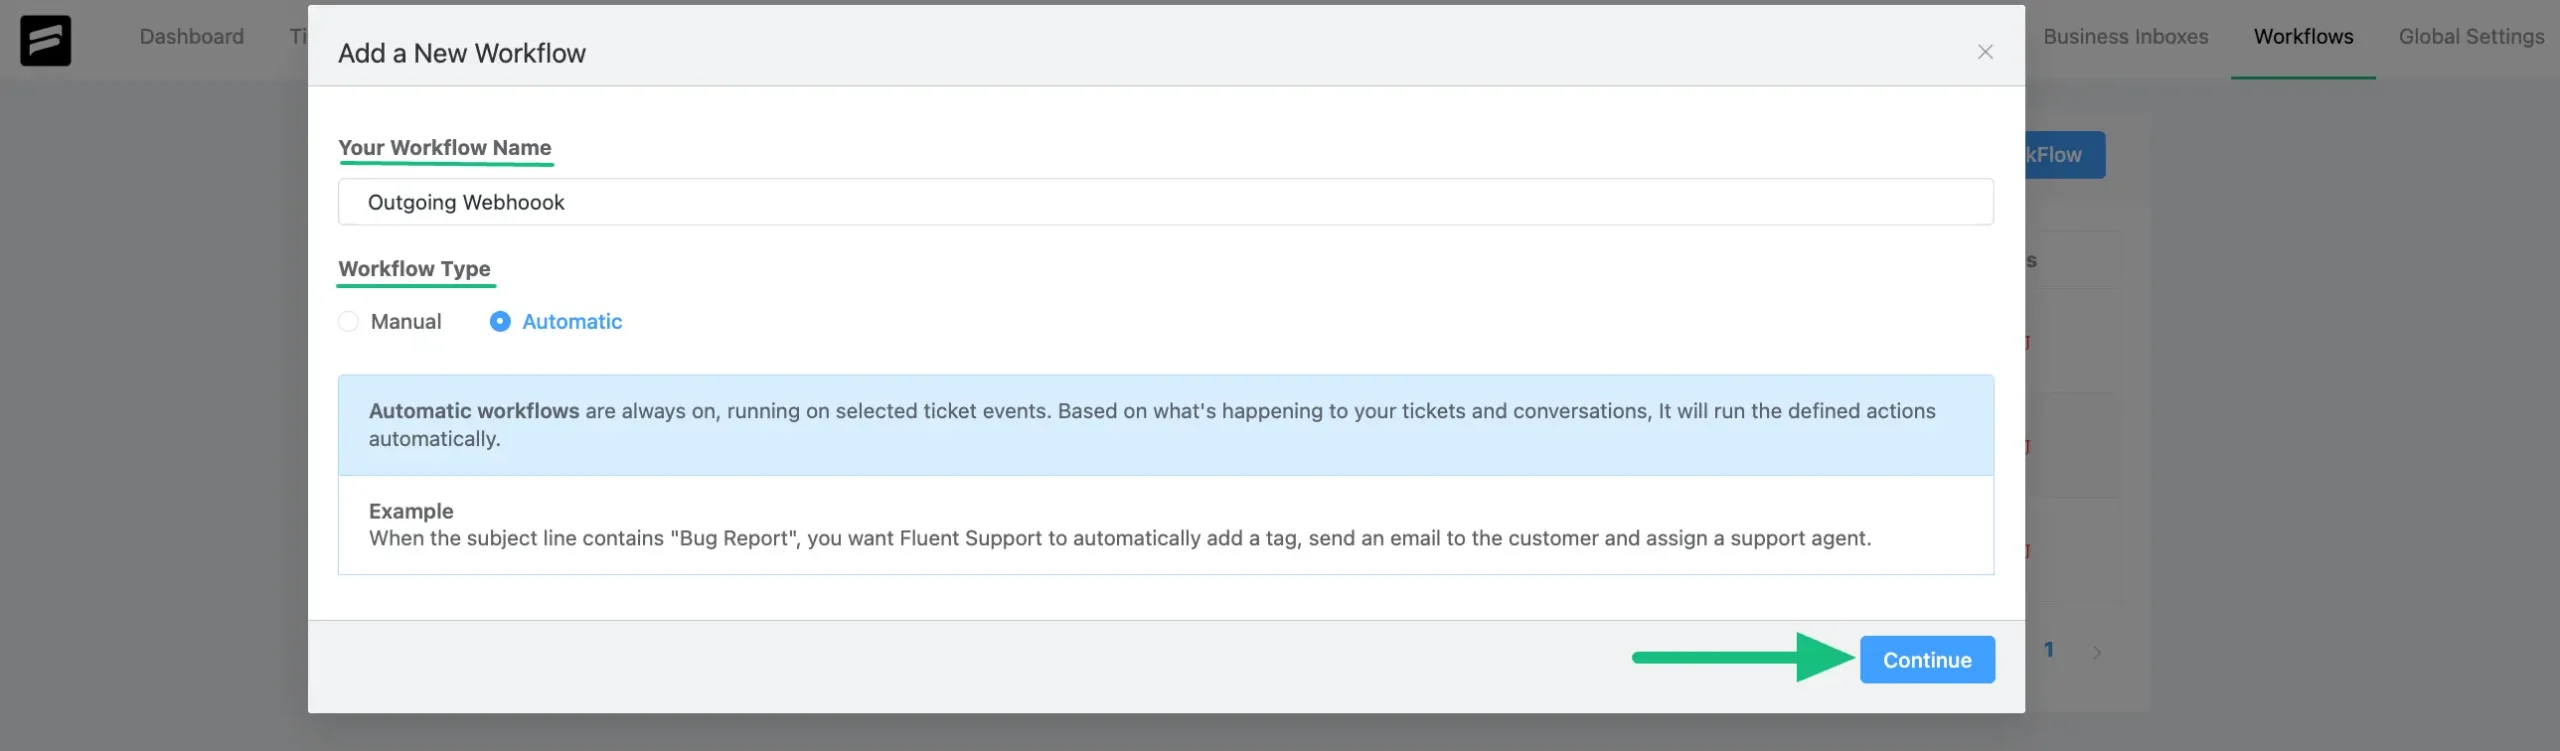
You can choose between Manual and Automatic workflows according to your needs (e.g., I selected the Automatic type to run the Workflow automatically).
Now, enter a Name for the WorkFlow, select the WorkFlow Type, and click Continue.
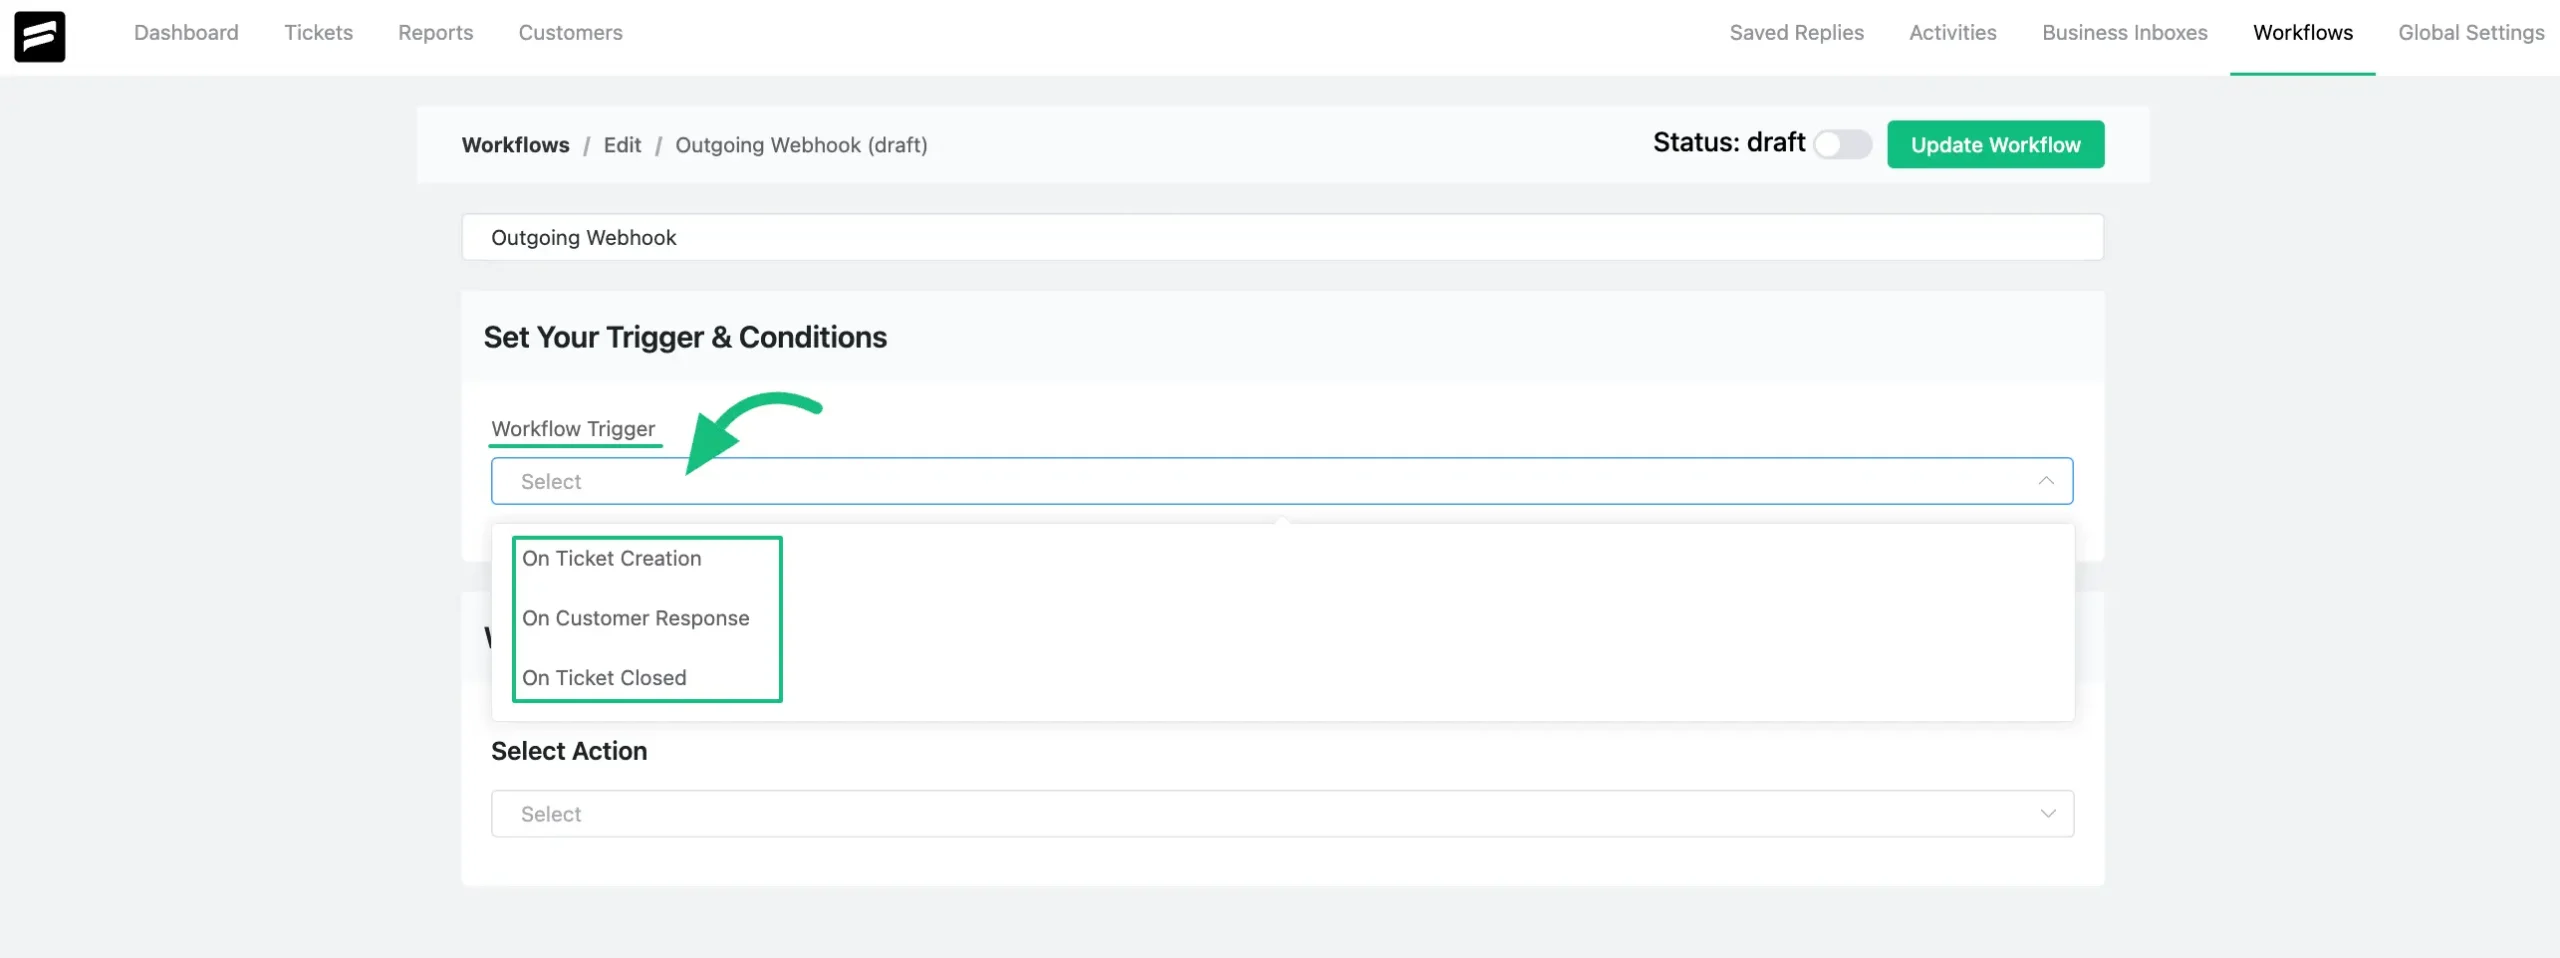
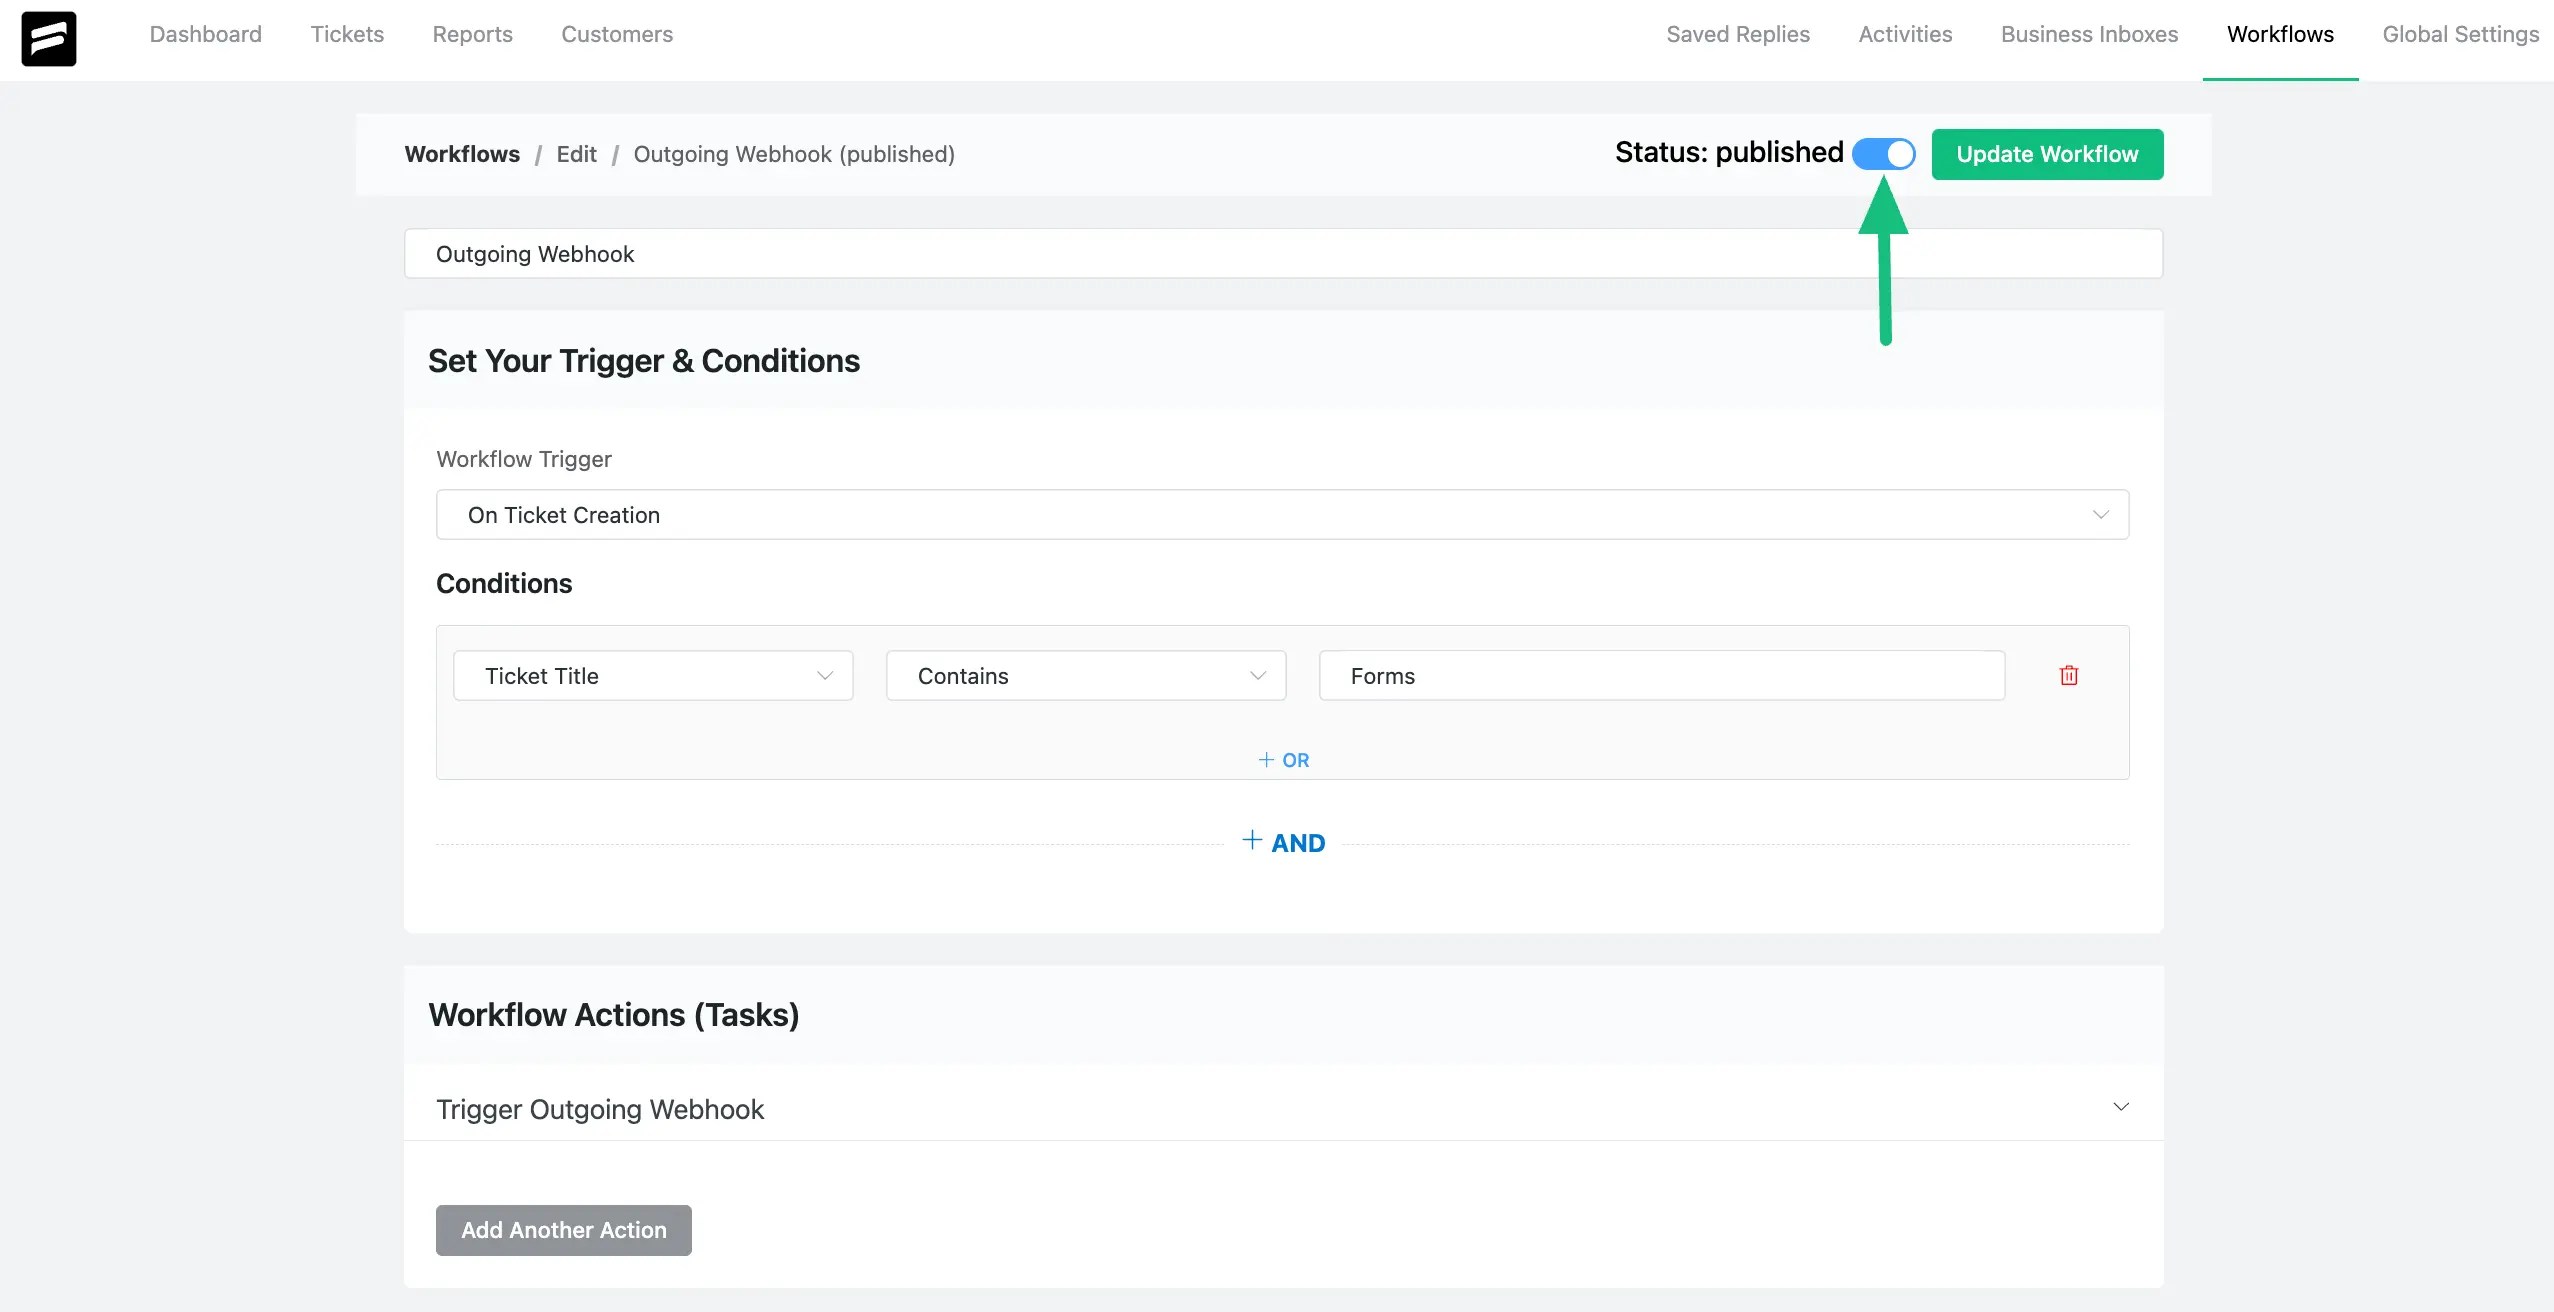
Now choose a Trigger from the dropdown list to decide when your Workflow will run.
For example, I chose the On Ticket Creation trigger so that the Workflow automatically runs each time a ticket is created.
Then, you have to set a Condition that will trigger the Workflow. Multiple conditions can be set using the + OR and + AND options. You can also delete any existing condition by clicking the Trash Icon button.
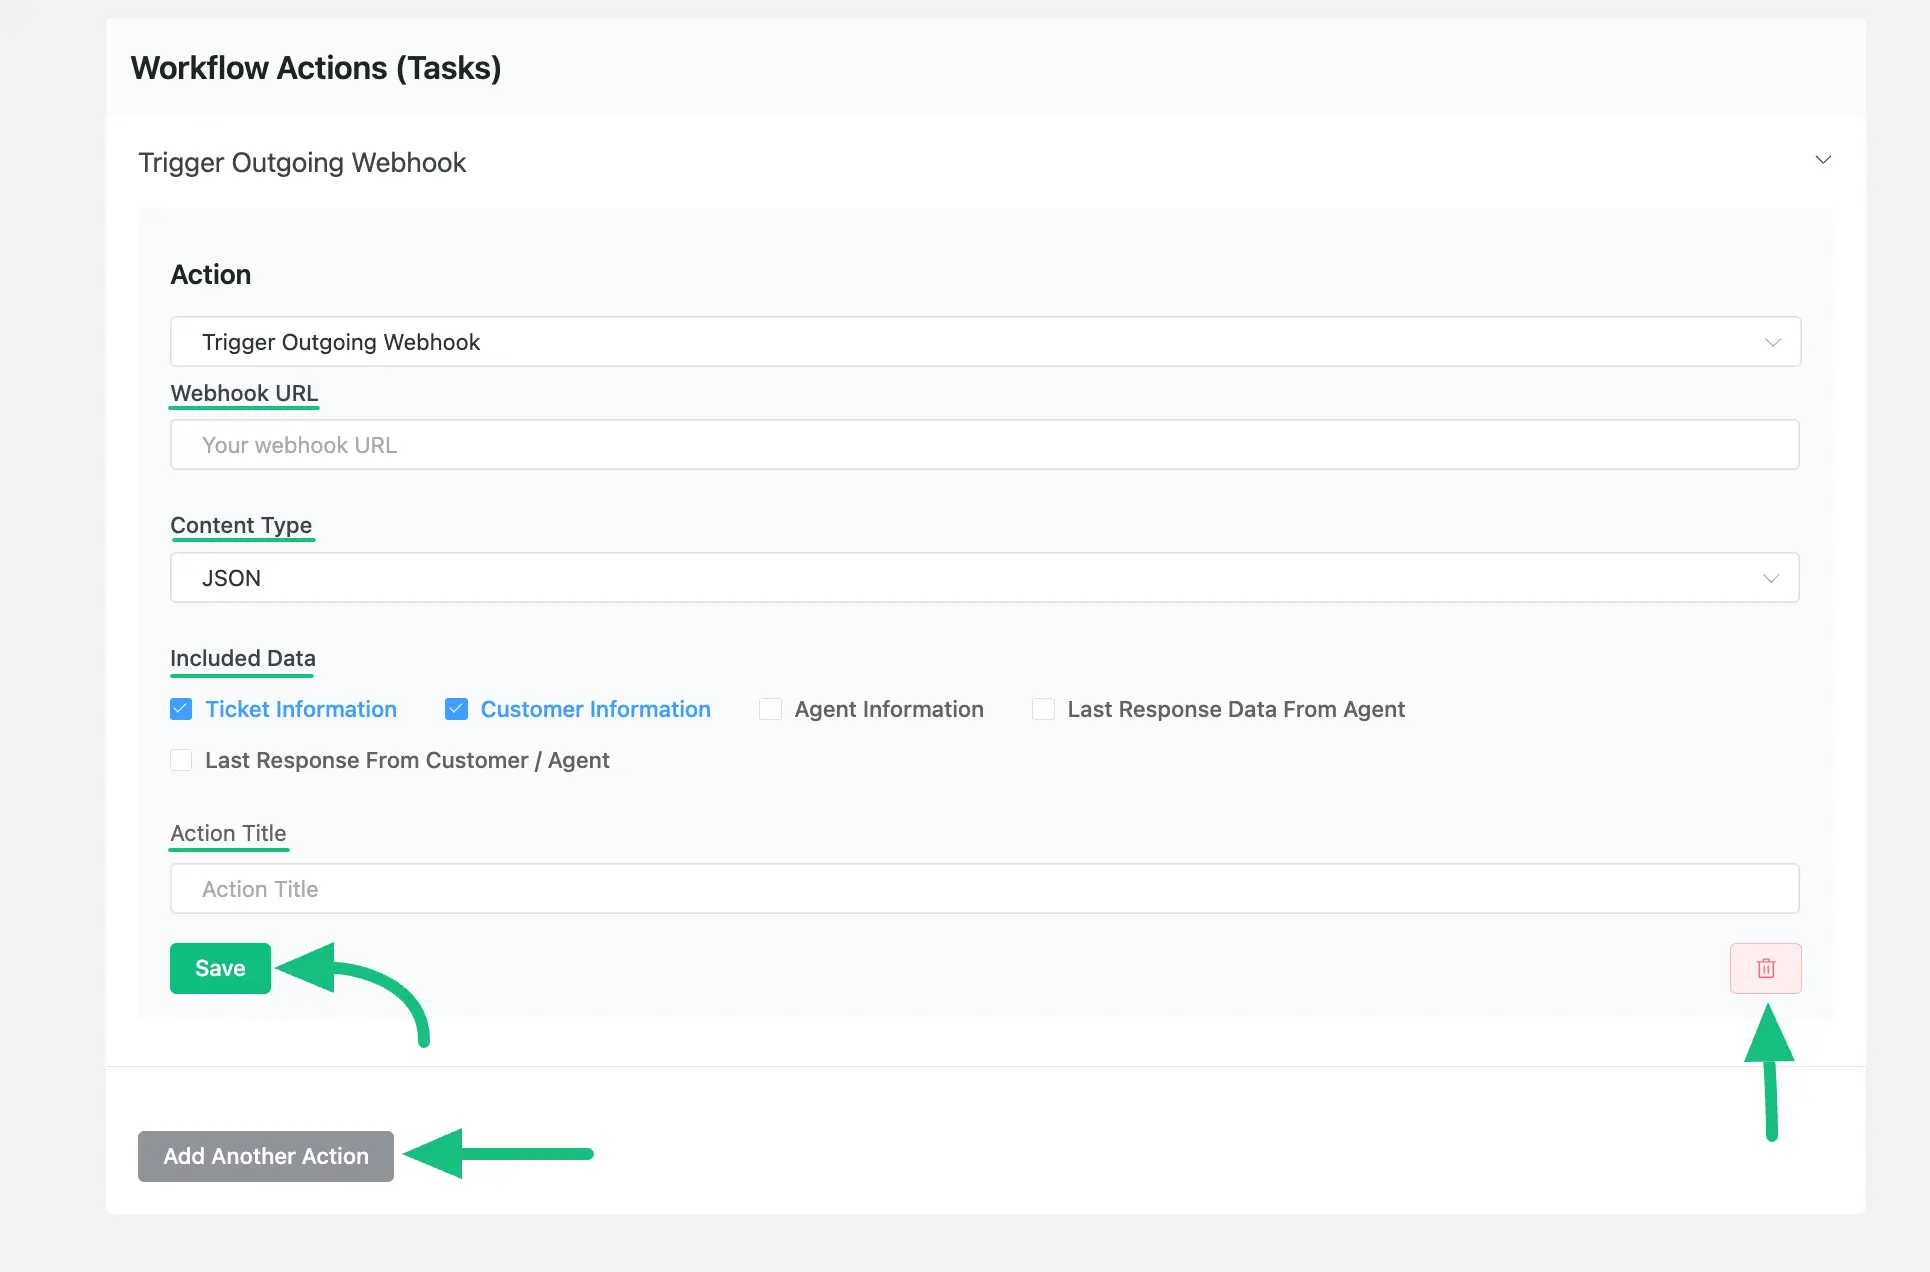
Now, select the “Trigger Outgoing Webhook” action from the dropdown list for Workflow to perform.
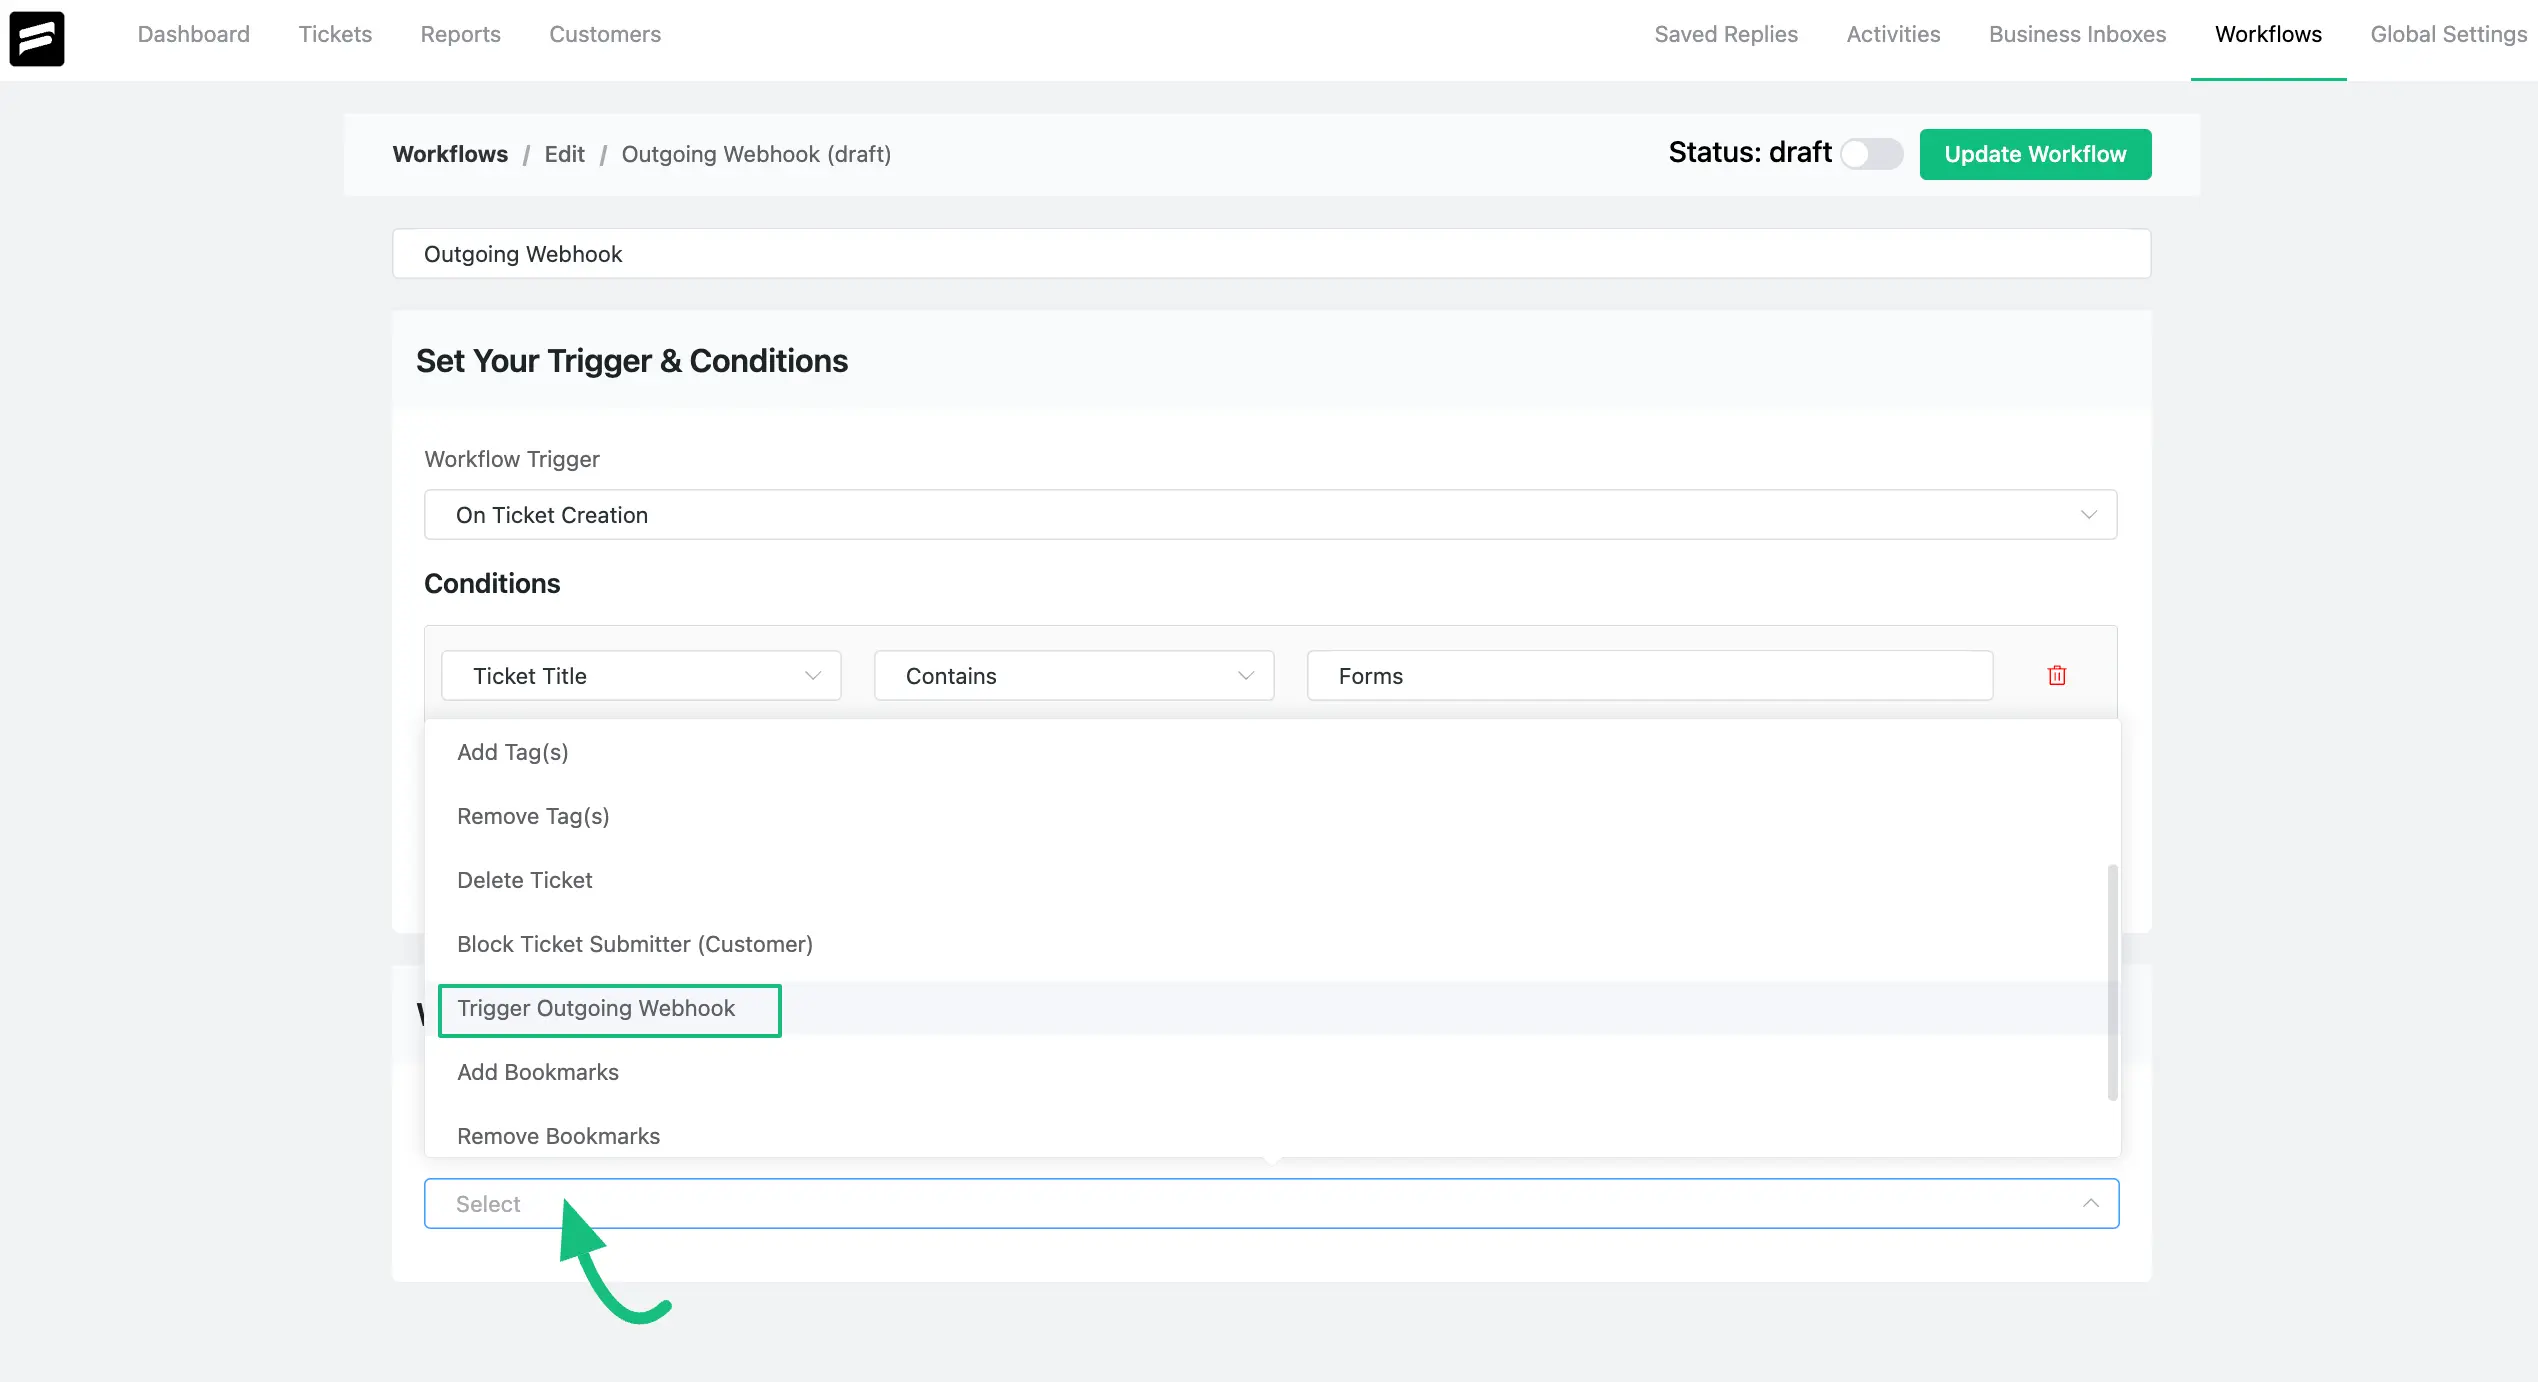
This will expand to show additional fields. Once you fill in all the necessary fields, click the Save button.
You will get the following Fields to fill in —
- Webhook URL: Enter the URL of your Third-party application (e.g., Zapier, Pably).
- Content Type: Choose the data type as Form if you want to map the form submission entries. Otherwise, use JSON.
- Include Data: Select the information you want to include for sending.
- Action Title: Lastly, add a name to the action.
Plus, multiple actions can be set by clicking the Add Another Action and following the same process. Also, you can delete any action by clicking the Trash Icon button.
Once you are done, setting up the actions, Publish this by enabling the Toggle button at the top right corner to run the workflow.
To save any new changes always press the Update Workflow button right next to the Toggle.
If you have any further questions, concerns, or suggestions, please do not hesitate to contact our @support team. Thank you.


