Advanced Filter in Fluent Support allows you to filter your tickets in advanced ways i.e., filtering tickets by setting different conditions. This article will guide you through the whole process.
Advanced Filter #
To learn how to use Advanced Filter in Fluent Support, follow the steps with the screenshots below —
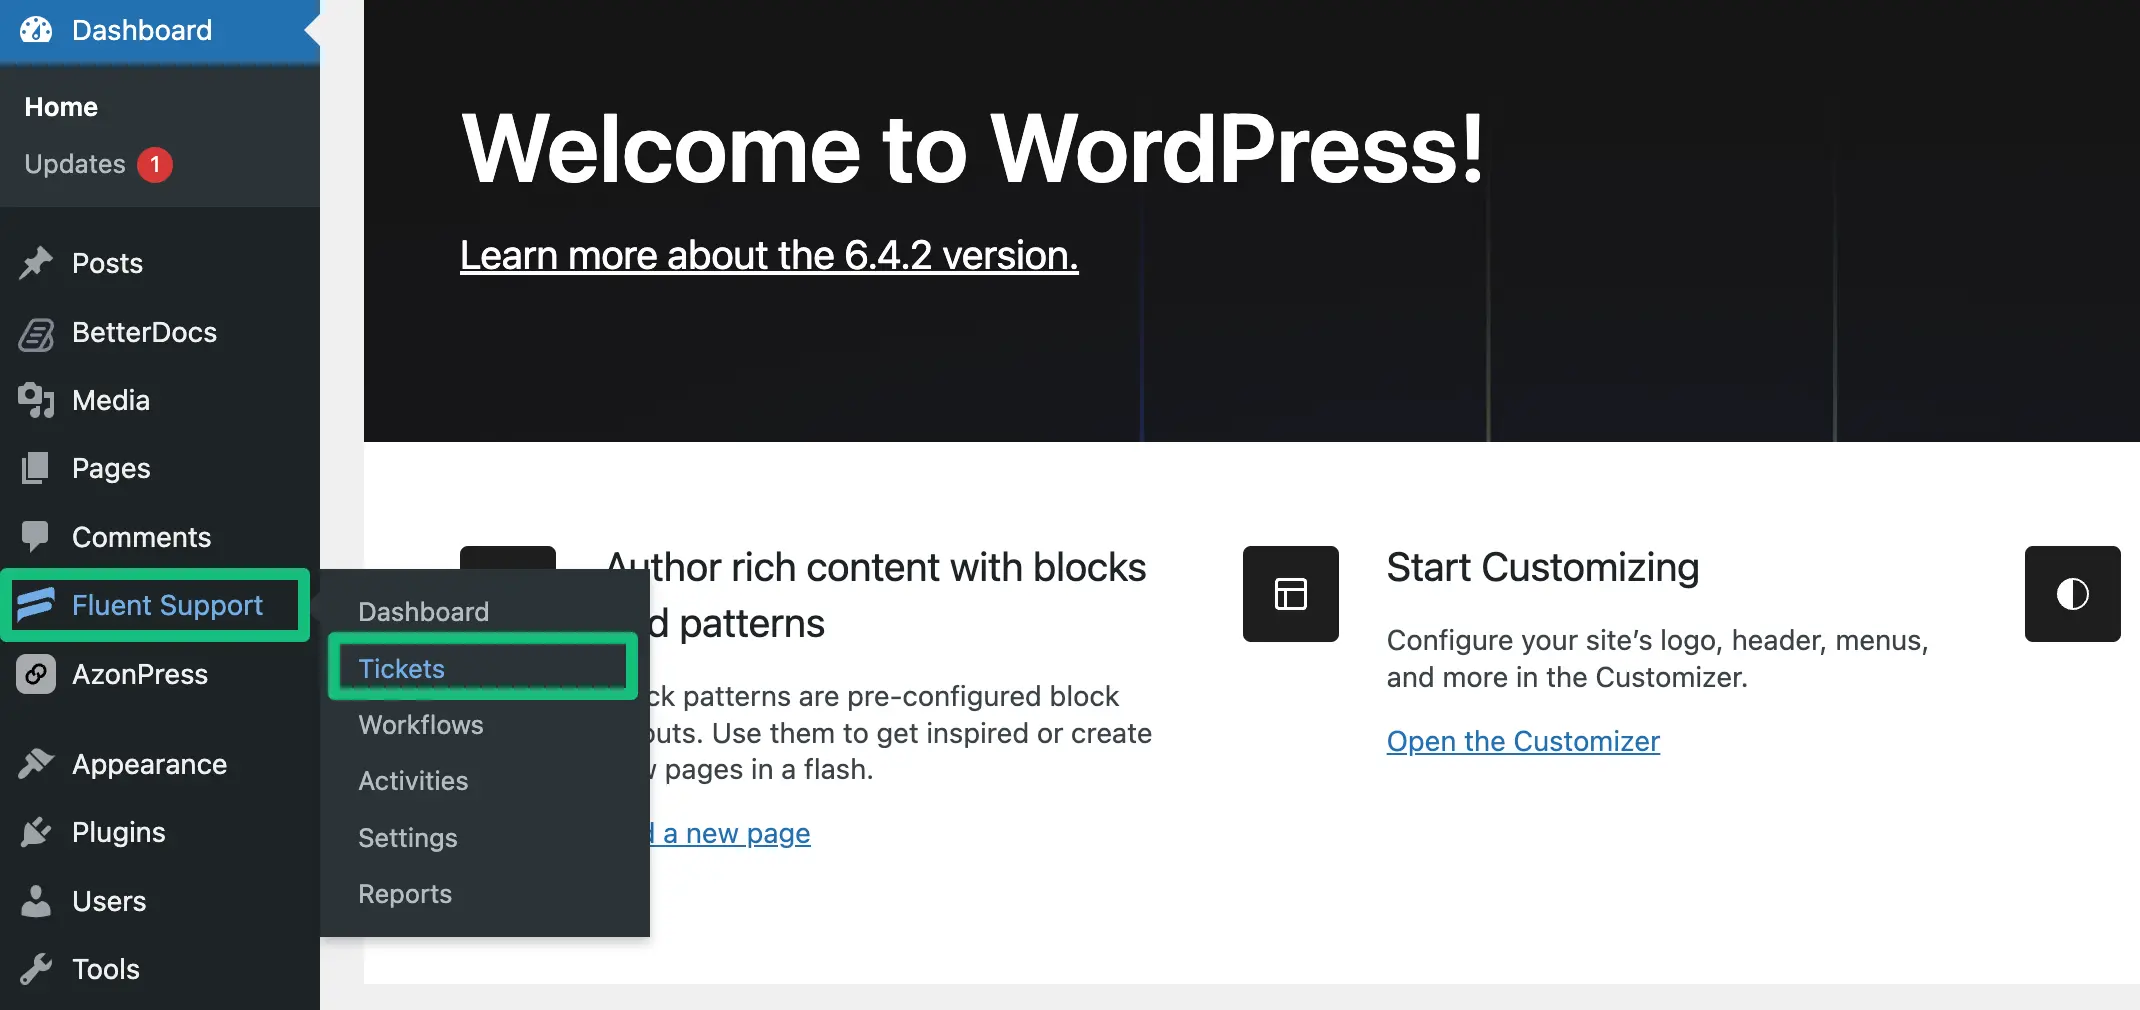
First, go to your Fluent Support and click on Tickets.
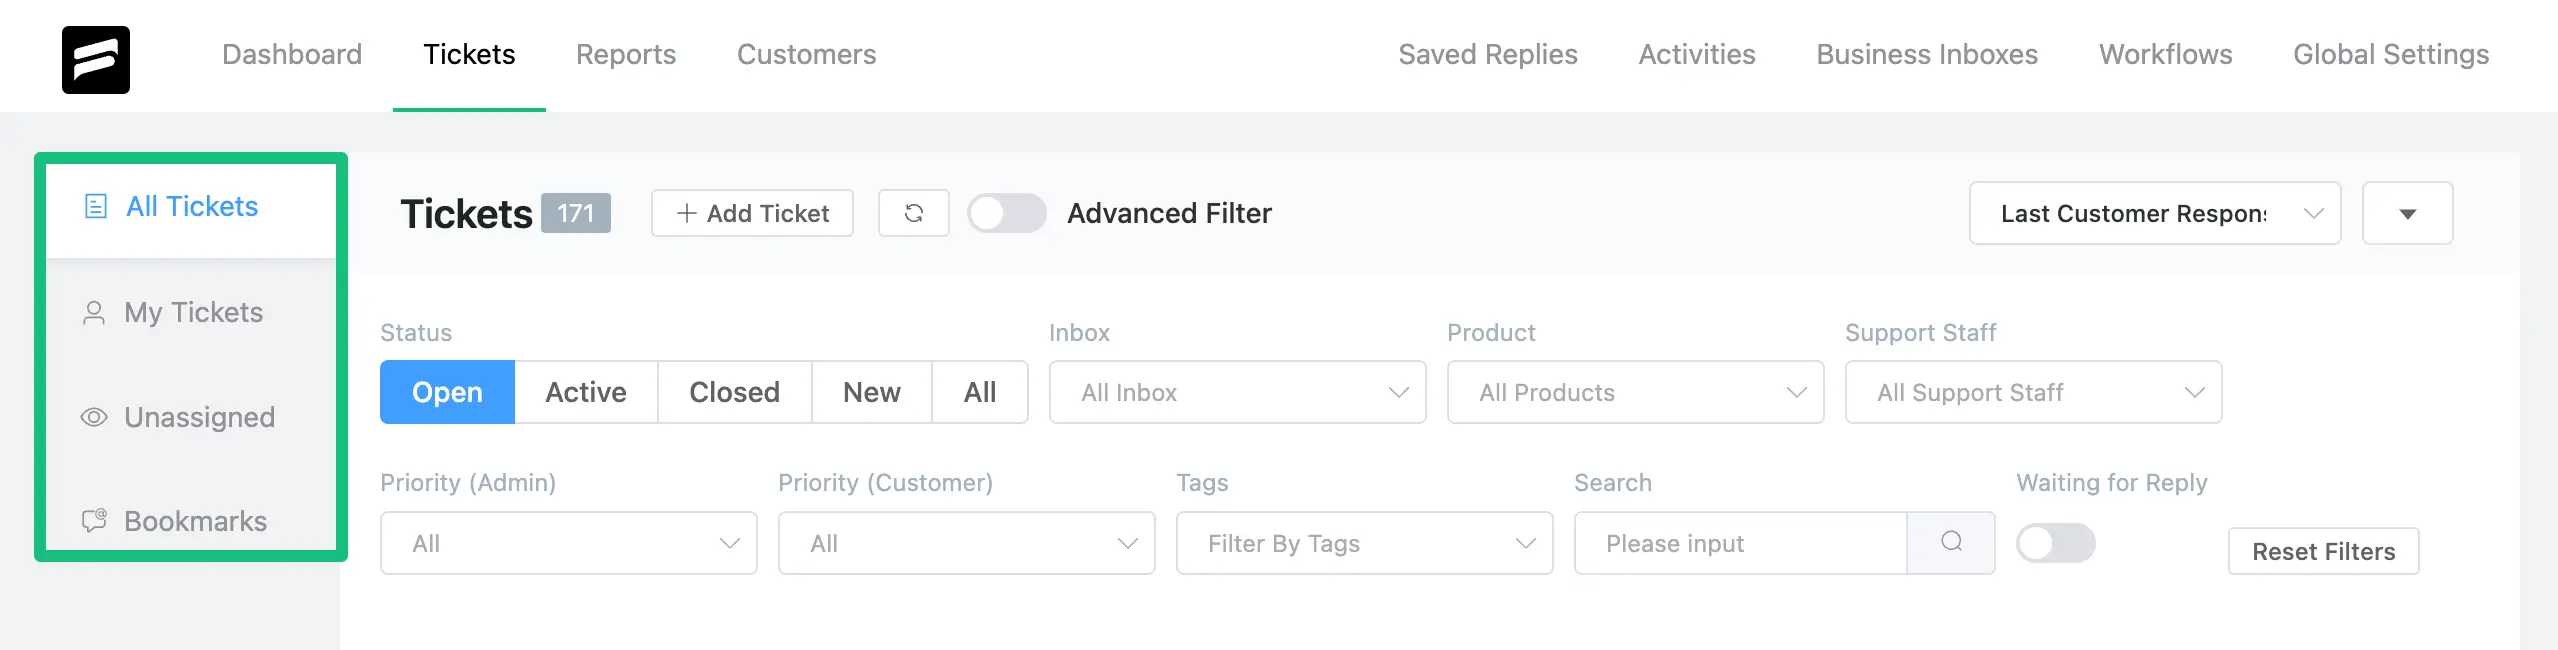
Now go to your desired ticket section from My Tickets, All Tickets, Unassigned, or Bookmarks.
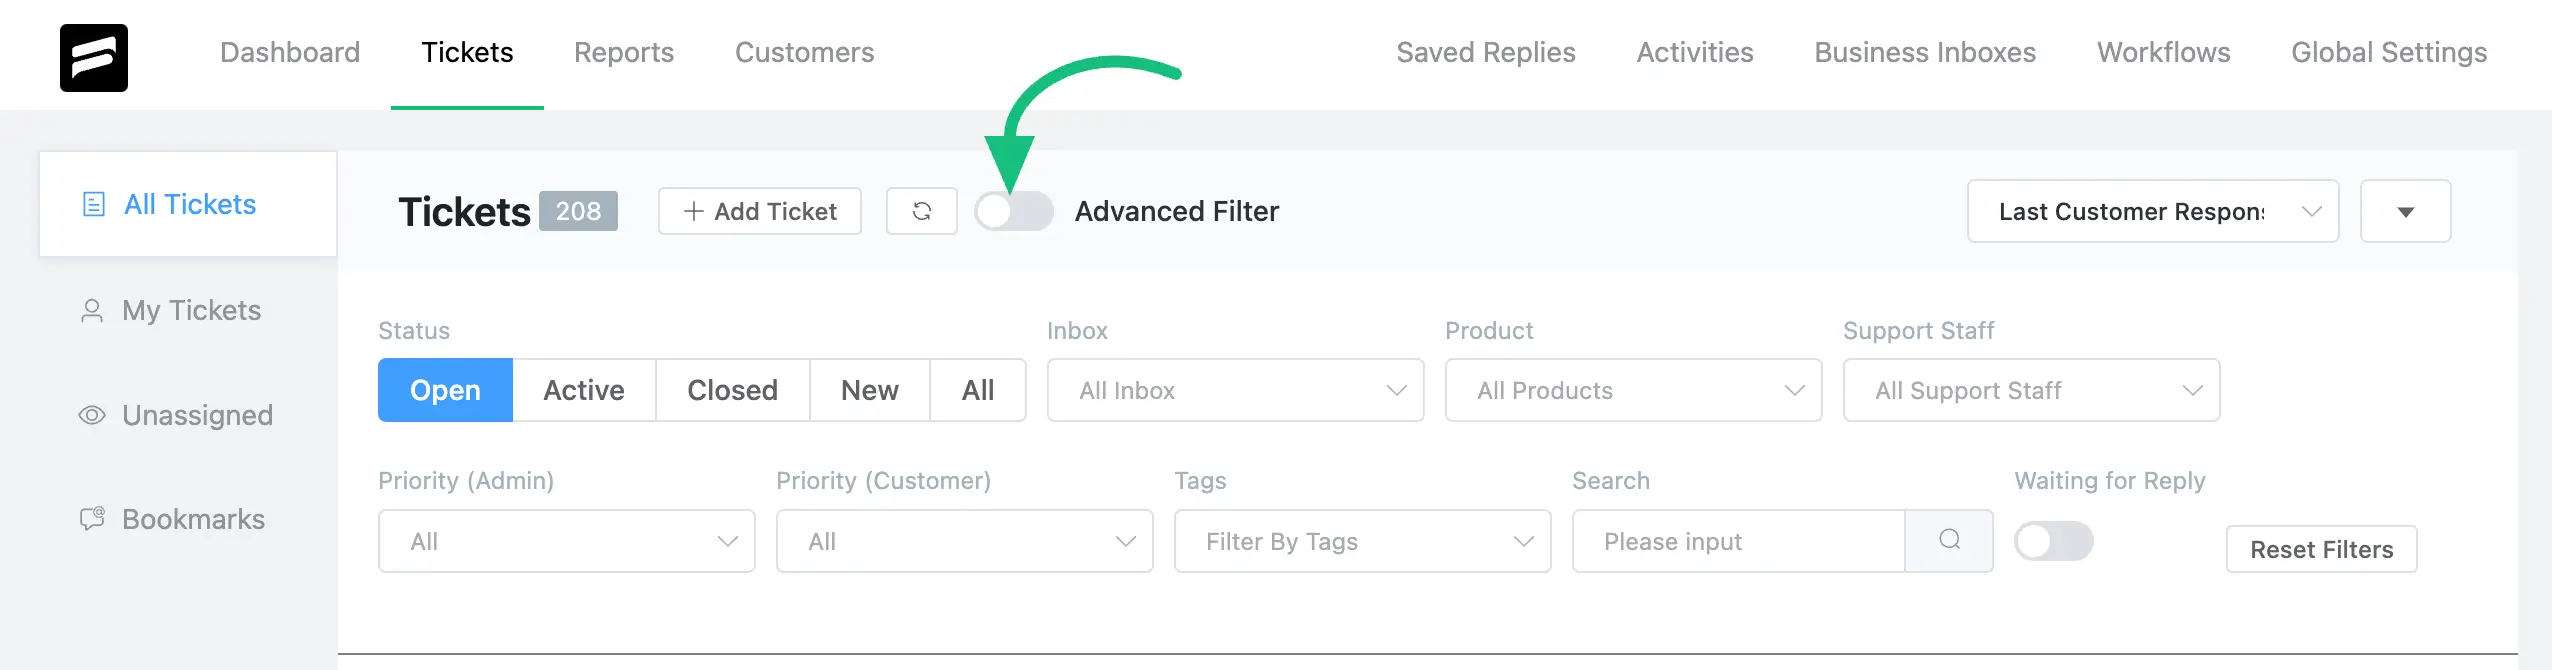
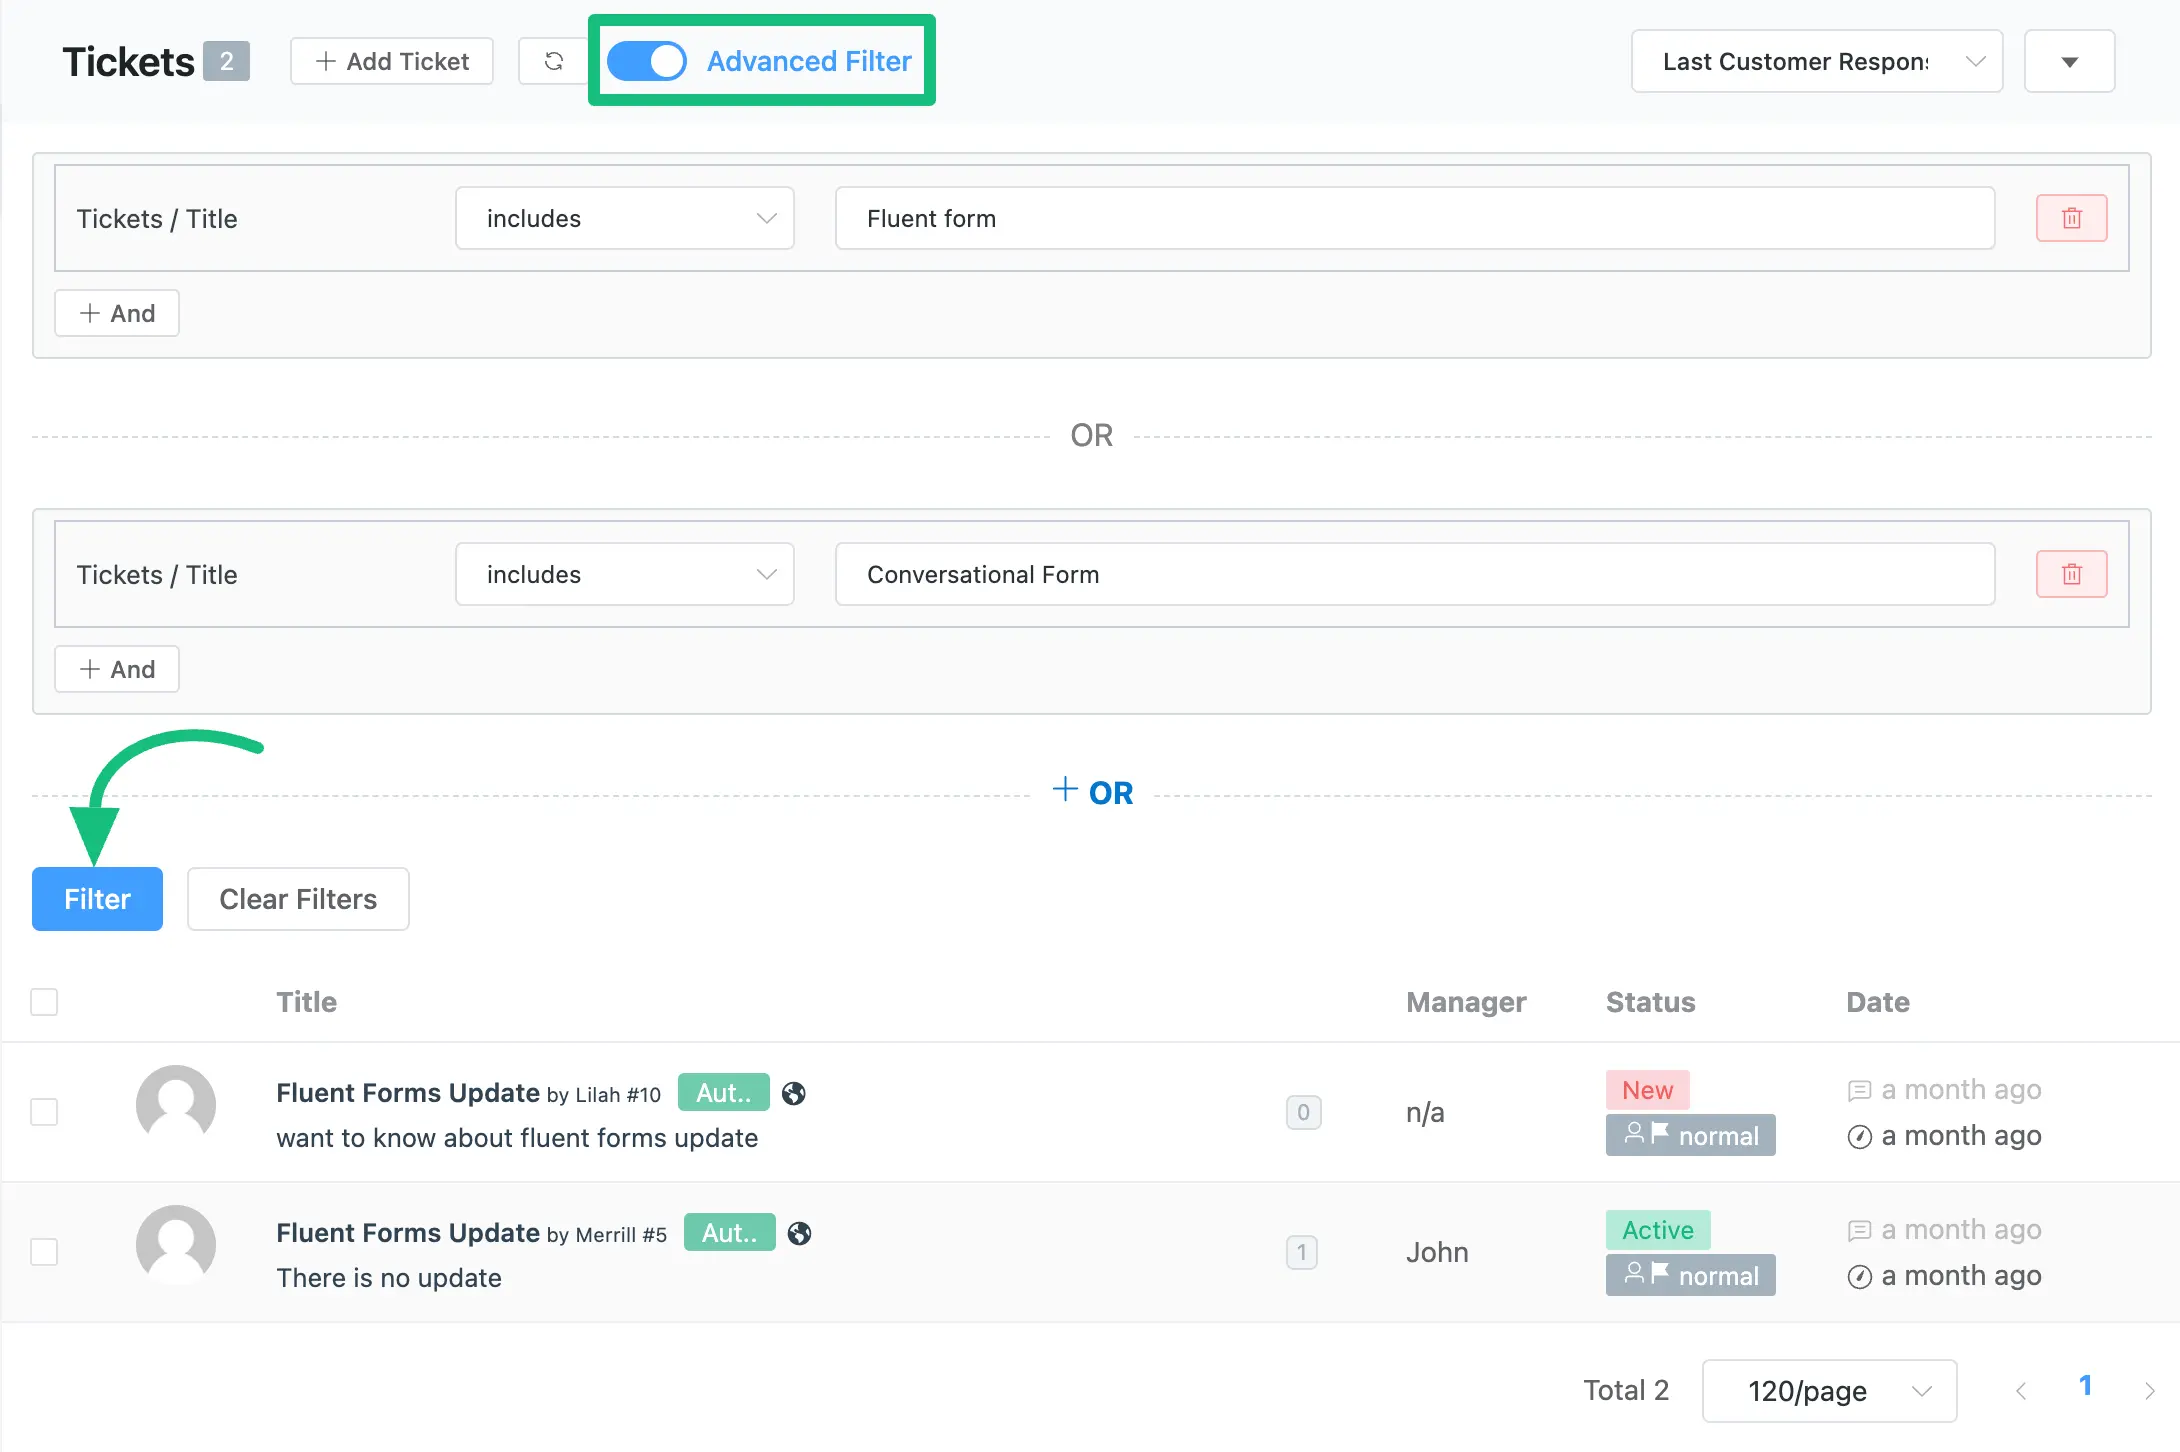
Enable the Advanced Filter toggle to activate the feature, and the advanced choices will appear.
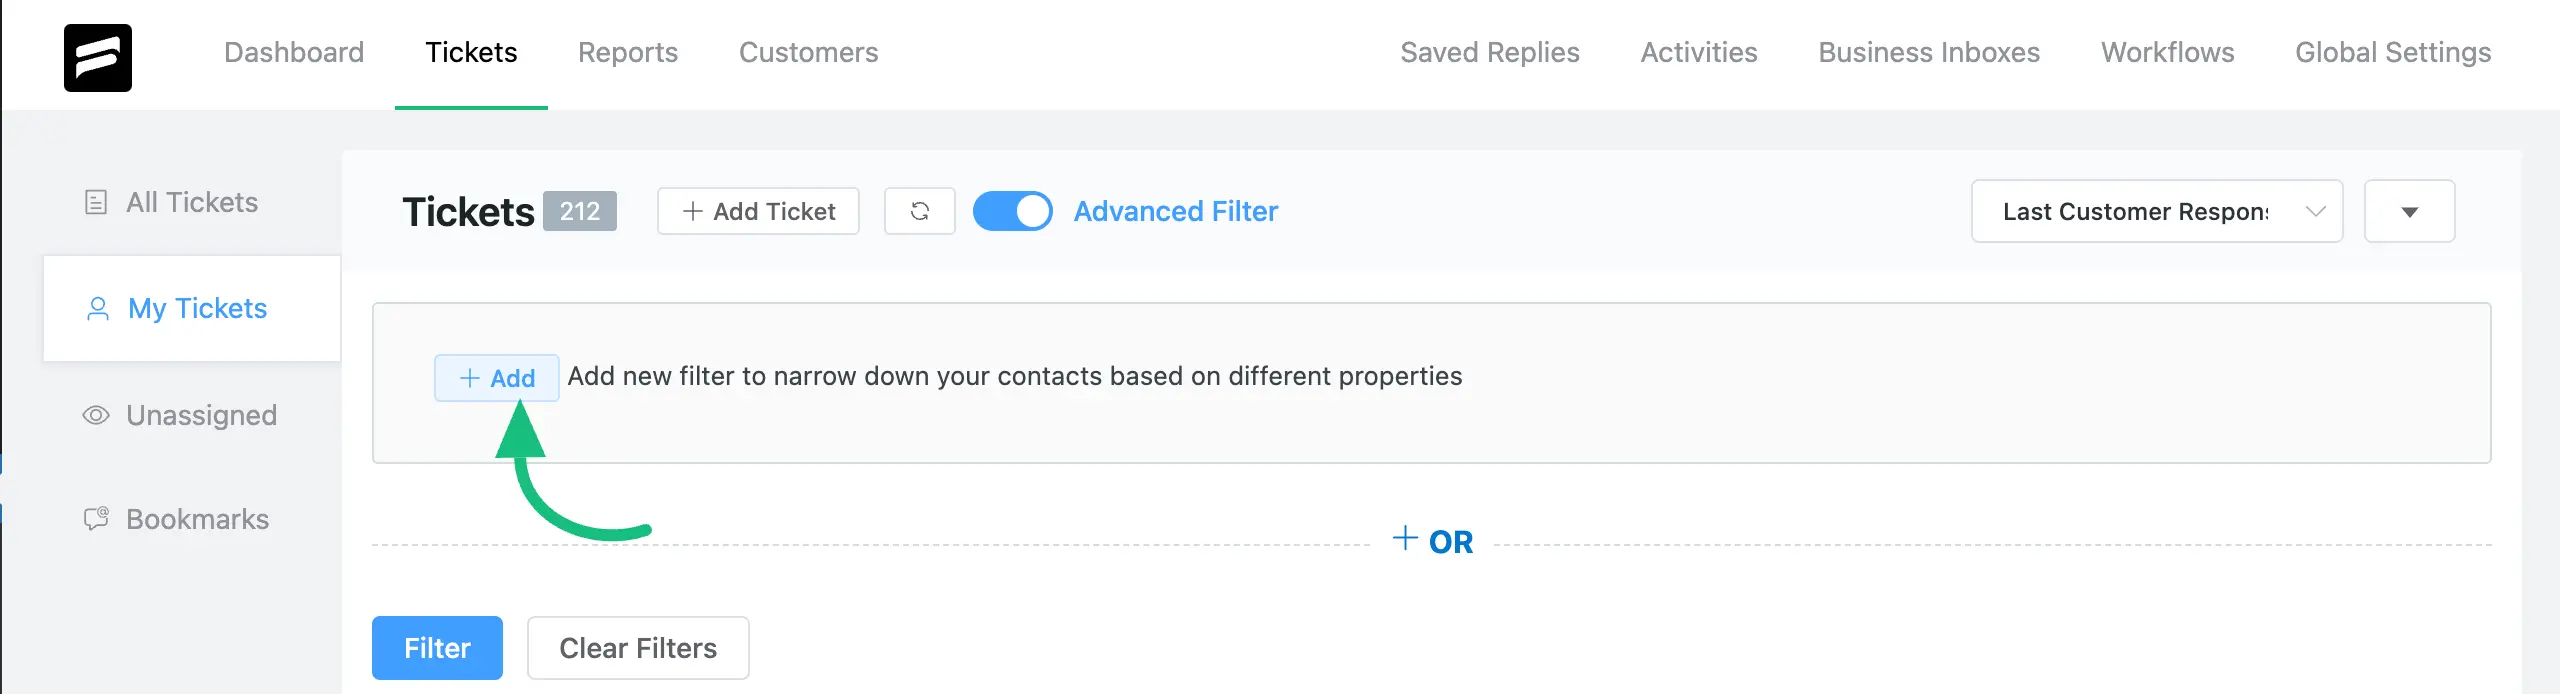
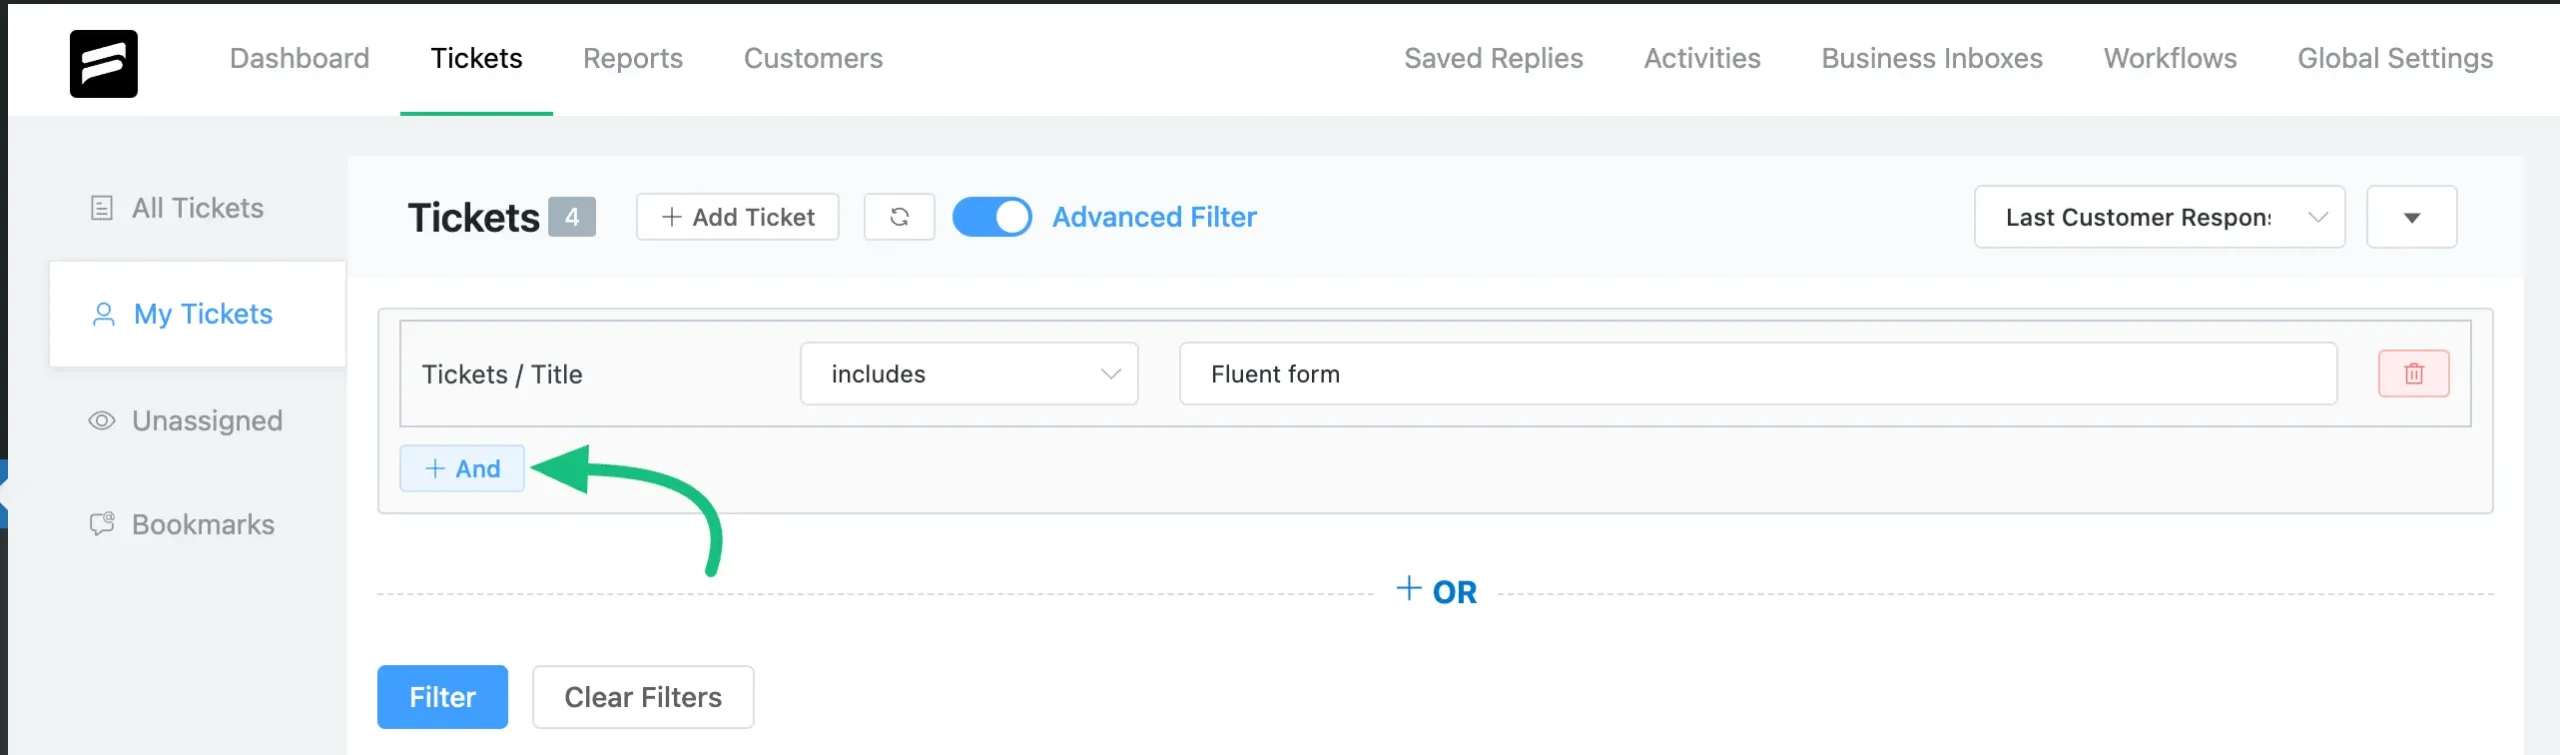
To begin, click the + Add button, and several Data Properties will appear in a popup.
Now, you can use these three properties to set conditions for advanced ticket filtering.

Click on + And to set another condition with the previous condition that you already set.
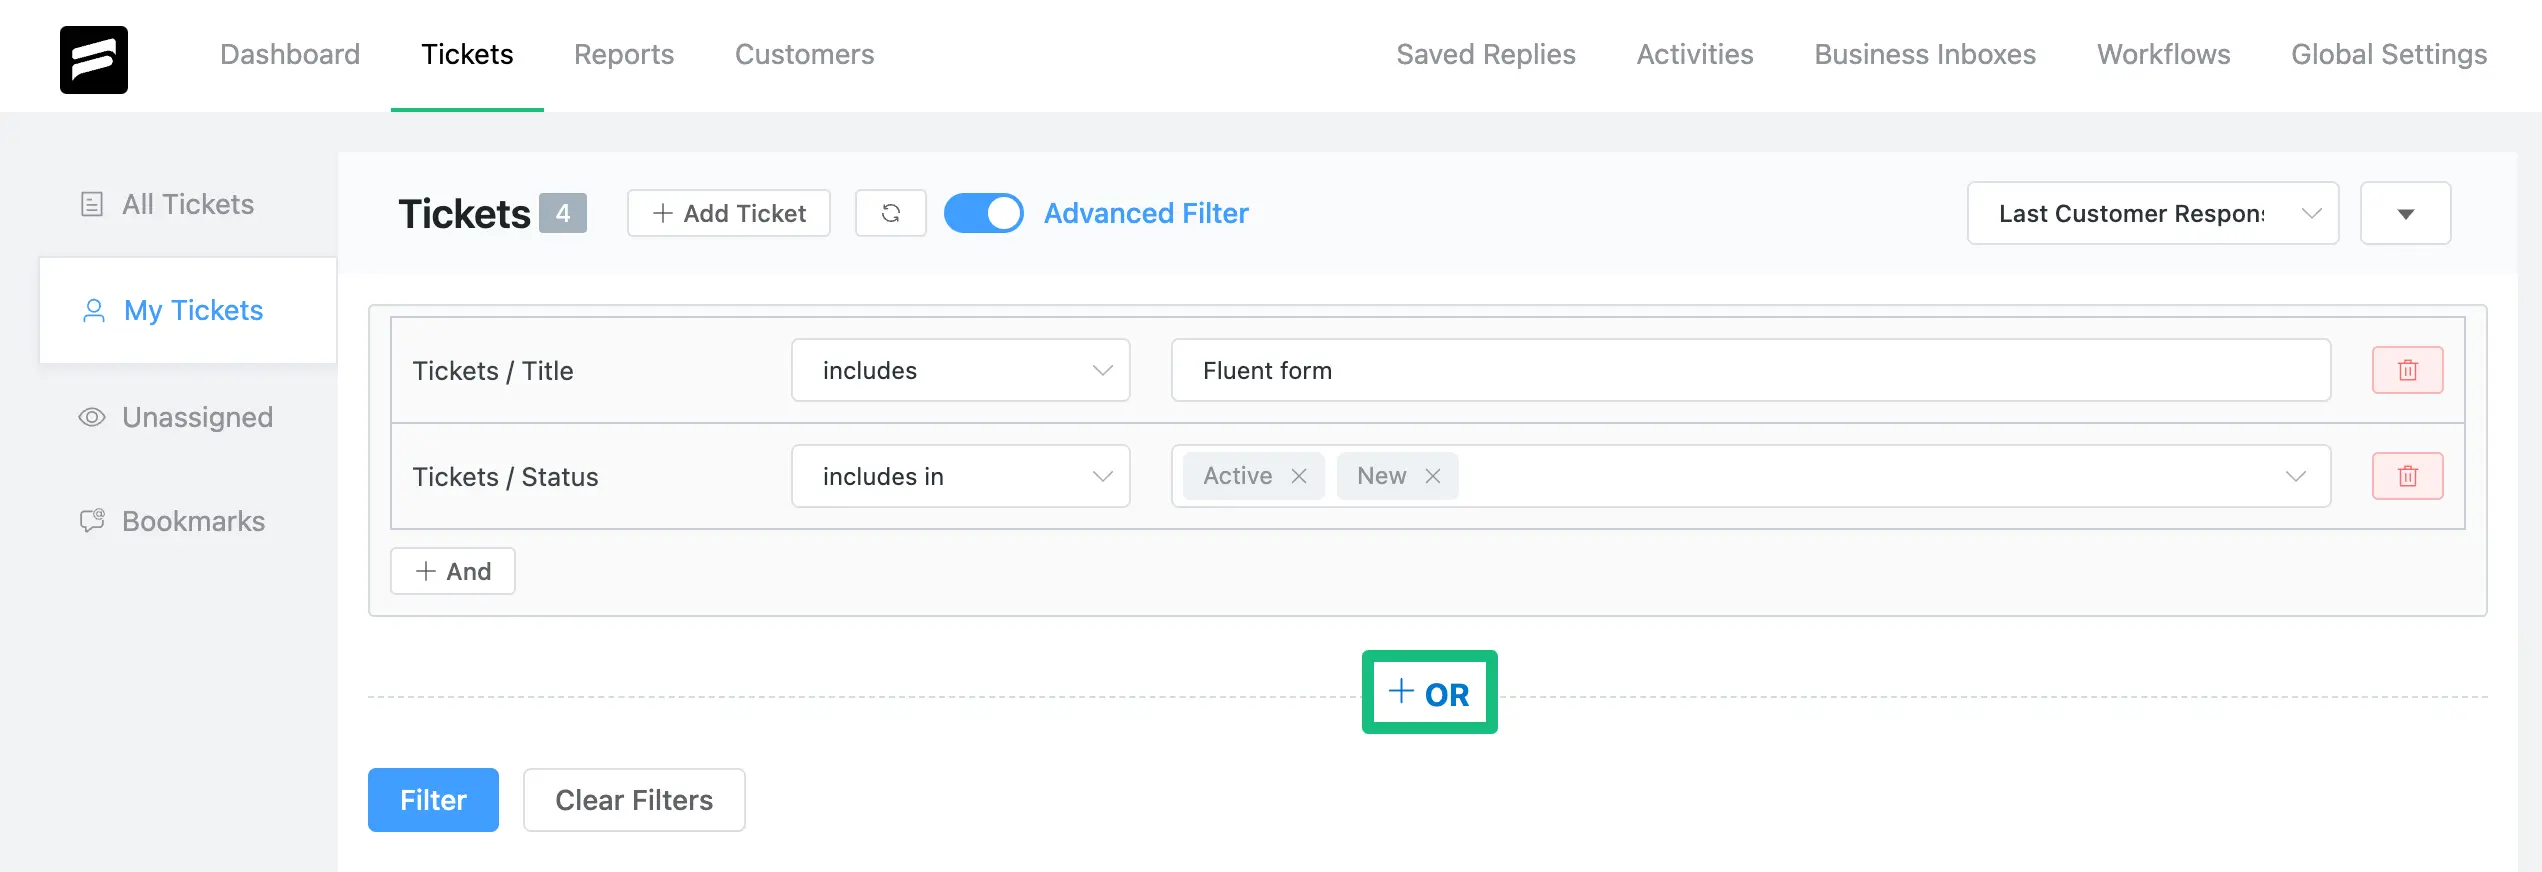
Or, click on + Or if you want to set conditions against the previous ones you already set.
You can delete any specific condition by clicking the Delete Icon. Or, you can clear all the conditions by clicking the Clear button.
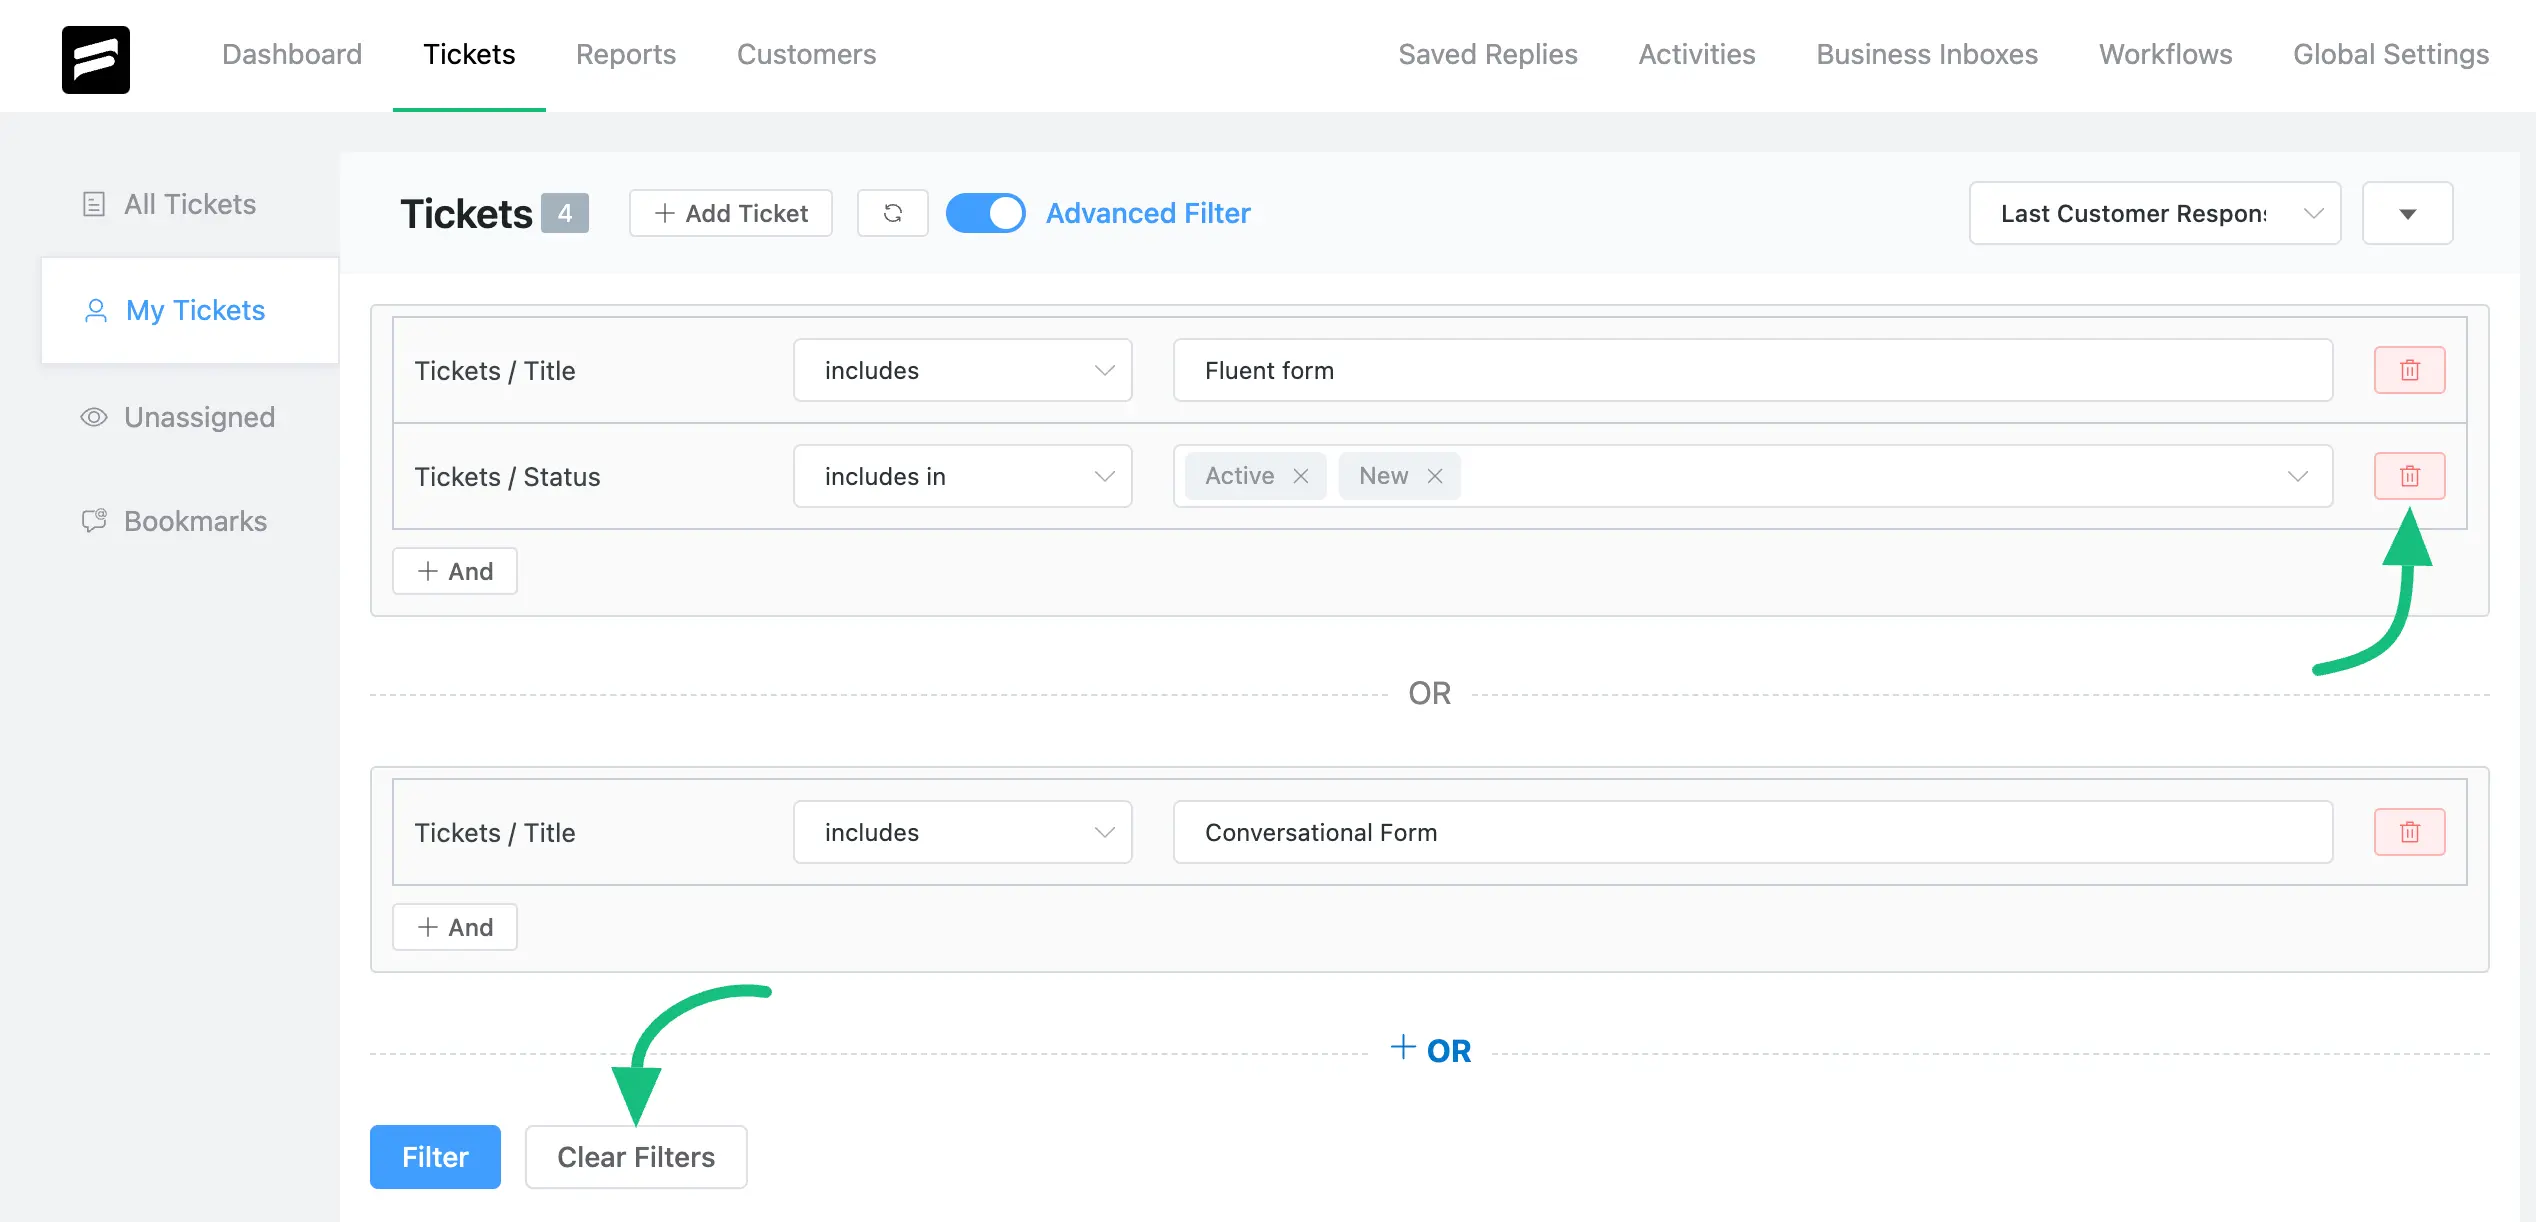
To run your conditions, always press the Filter button after completing the settings.
Properties And Their Items To Set Conditions #
In the “Advanced Filter” feature, you will get three general properties and lots of items inside the properties to set your conditions for filtering your tickets in an advanced way.
These are — Tickets, Customer, and Agent.
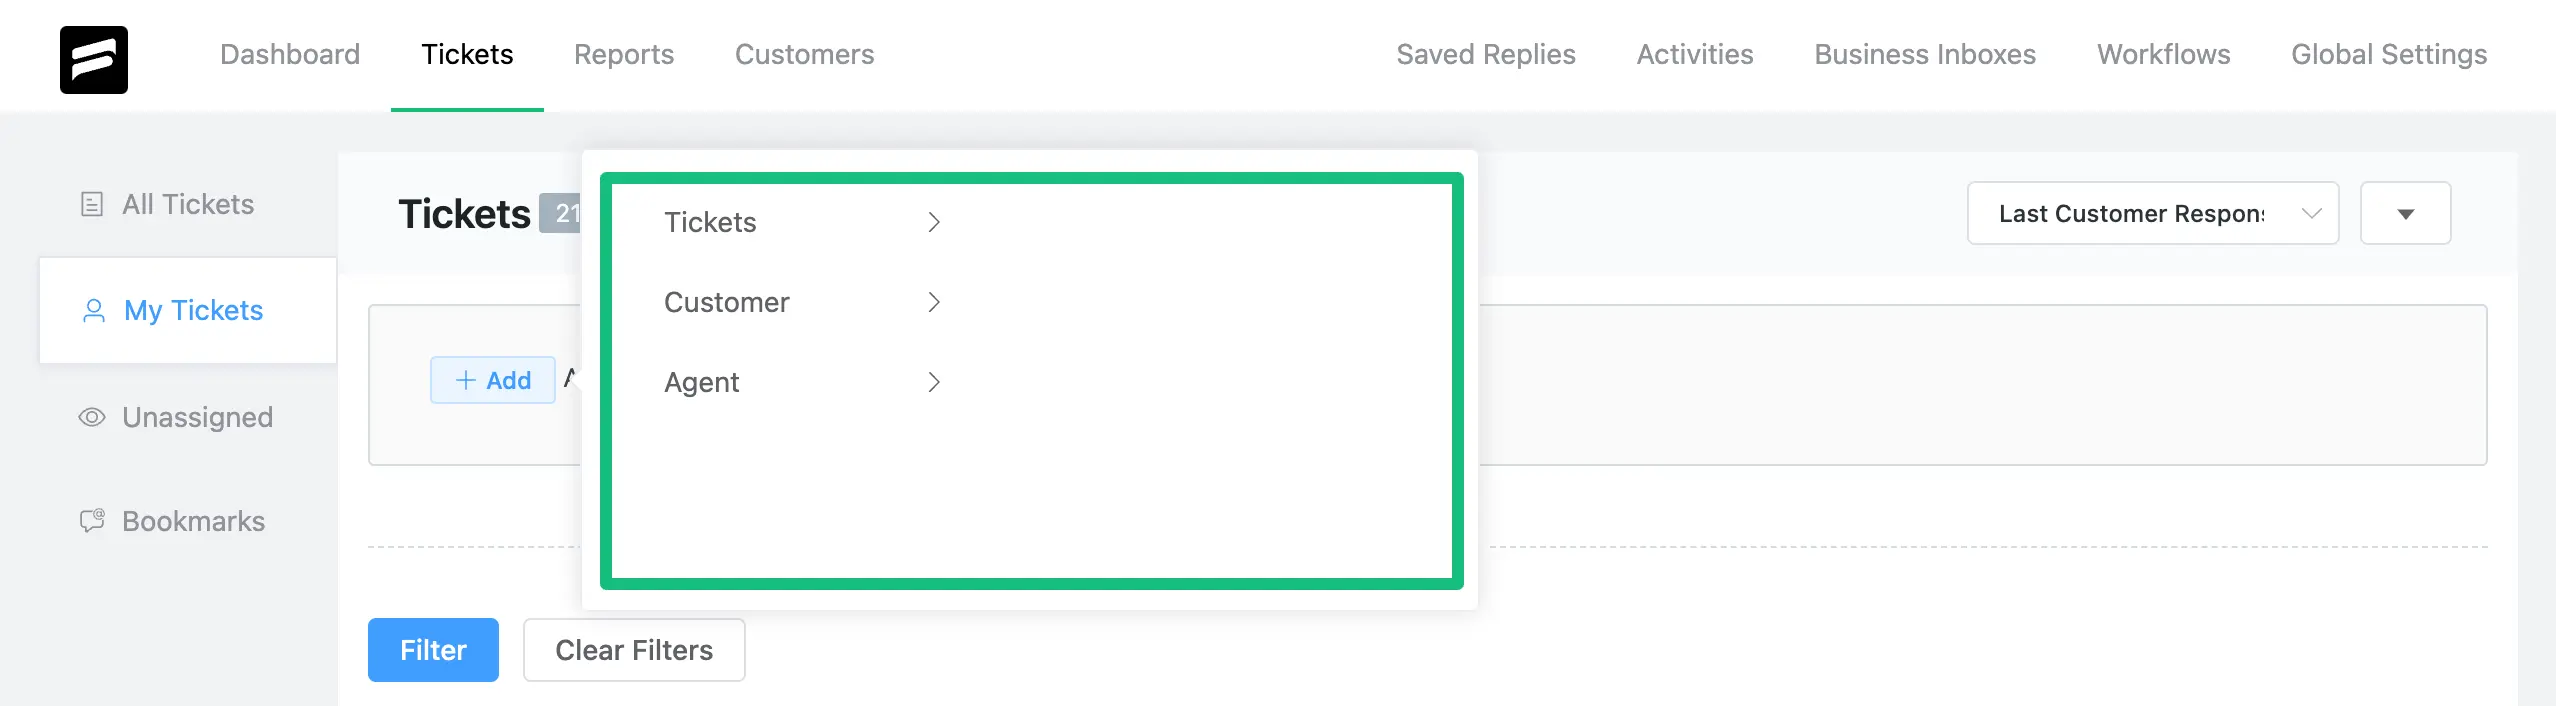
The properties shown in the screenshot above are explained below —
1. Tickets #
Inside the “Tickets” properties, you will get several items to set your values for advanced filtering. And these are —
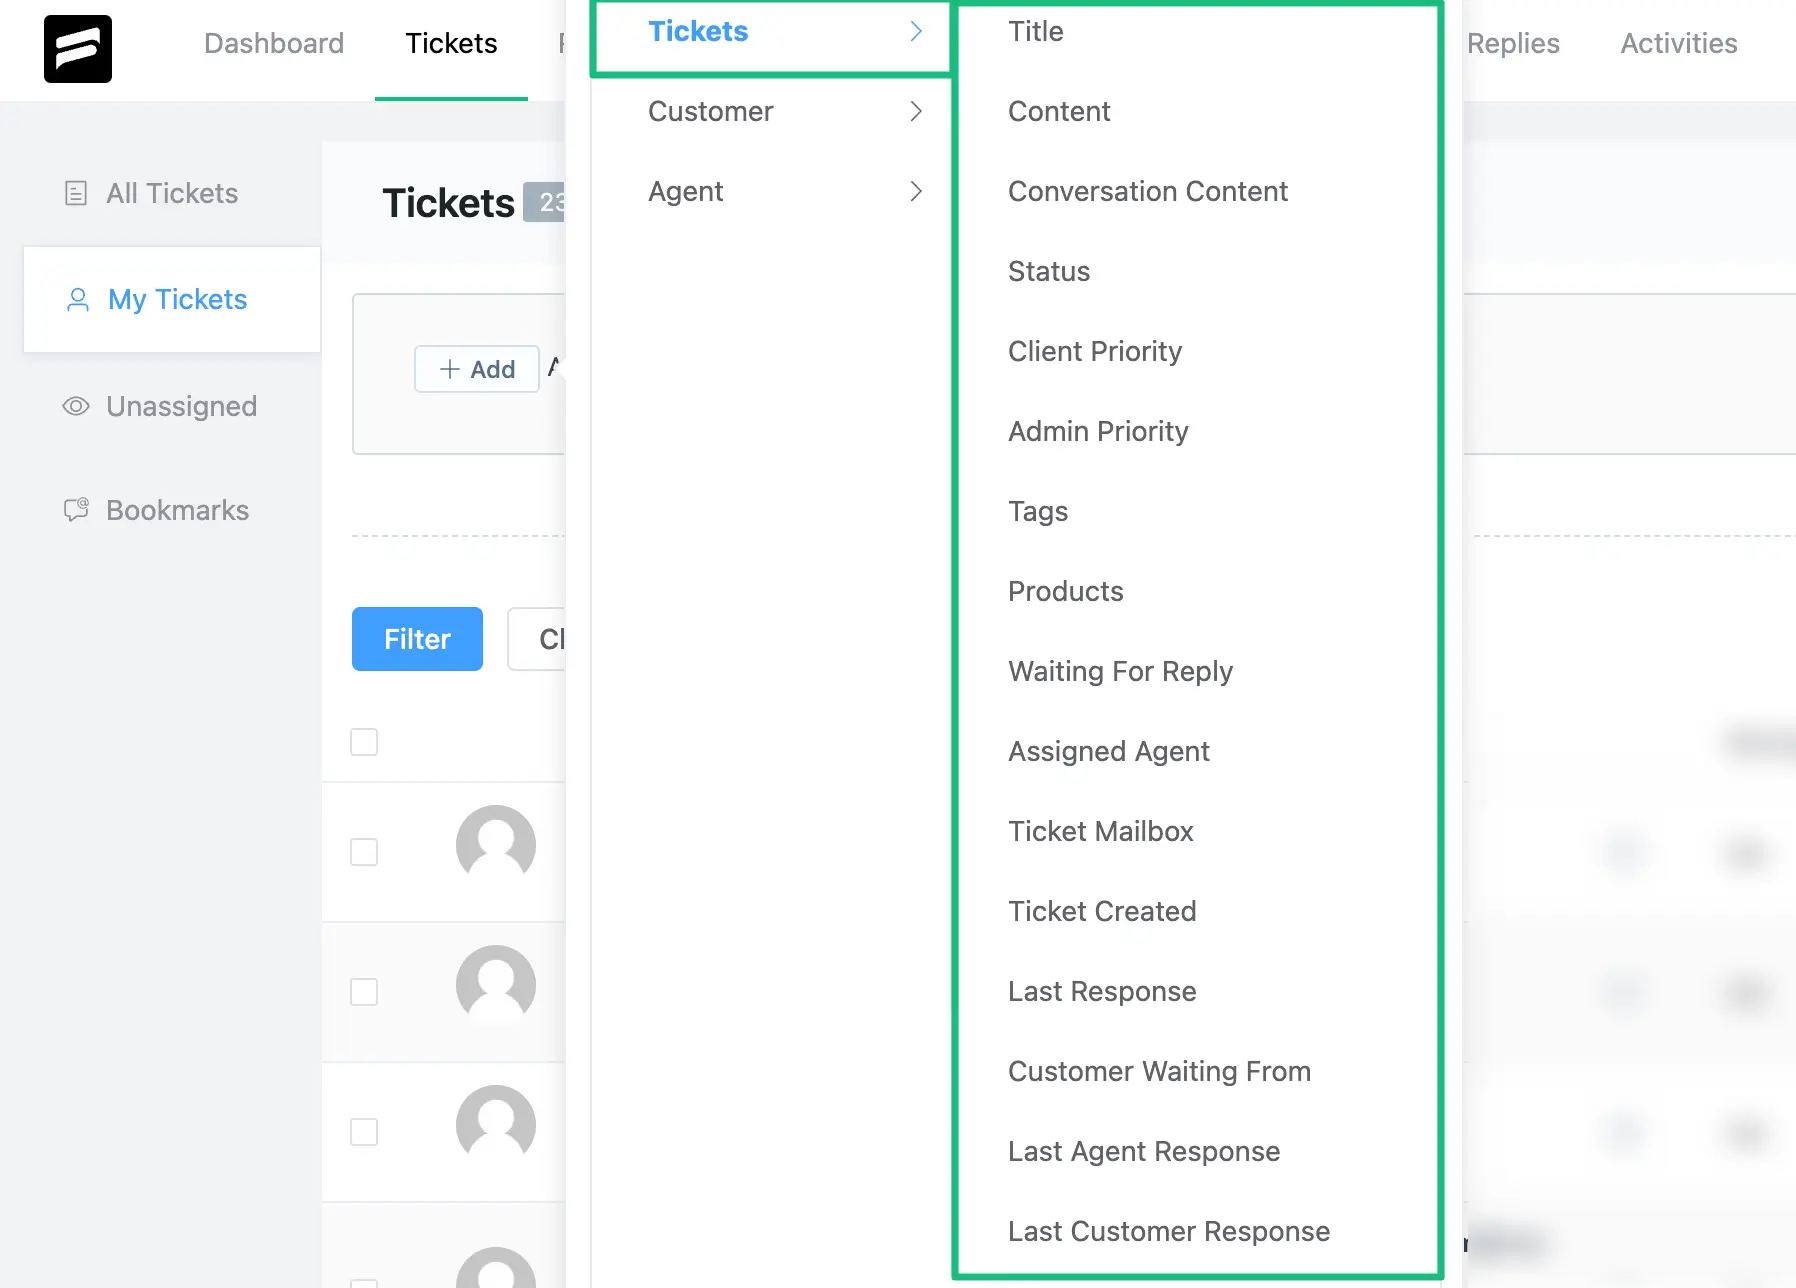
A brief explanation of the Items shown in the screenshot above is given below —
- Title: The title of the ticket.
- Content: All the things that are written on the ticket.
- Conversation Content: Participants refer to the topics discussed as conversational content.
- Status: This indicates if the ticket is new, active, or closed.
- Client Priority: The client determines the client’s priority based on his problem.
- Admin Priority: The admins who handle Fluent Support determine this priority.
- Tags: Agents of Fluent Support can assign any Tags based on their preference.
- Products: The name of the ticket’s product.
- Waiting for Reply: The waiting Tickets are currently awaiting a response.
- Assigned Agent: An assigned agent will filter the Assigned Agent category.
- Ticket Mailbox: The mailbox represents the normal, medium, or critical ticket.
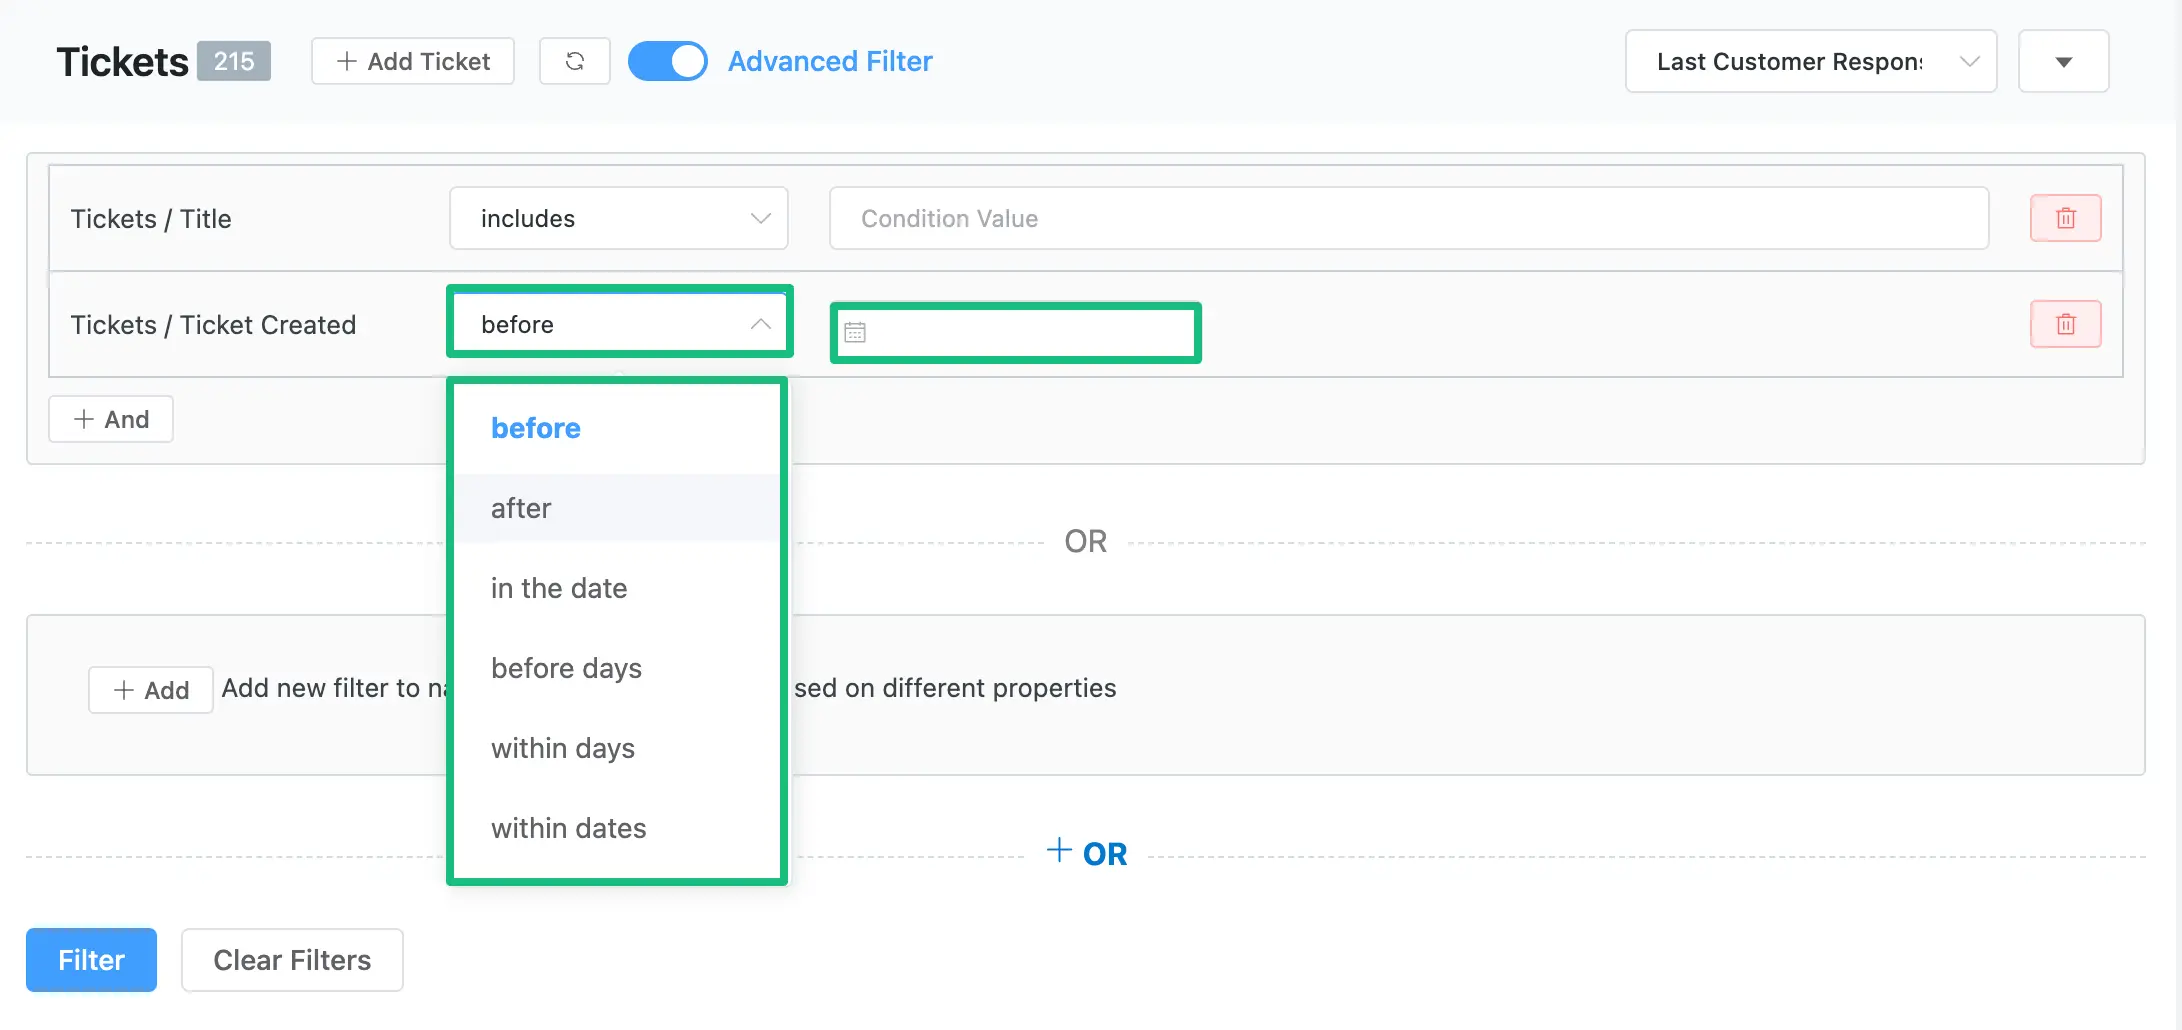
- Ticket Created: You will discover a customizable option and a calendar for choosing a certain date in the ticket that has been created.
- Last Response: Last responded ticket.
- Customer Waiting From: Customer queue tickets.
- Last Agent Response: The last agent who responded.
- Last Customer Response: The last Customer who responded to the ticket.
2. Customer #
Inside the “Customer” properties, you will get several items to set your values for advanced filtering. And these are —
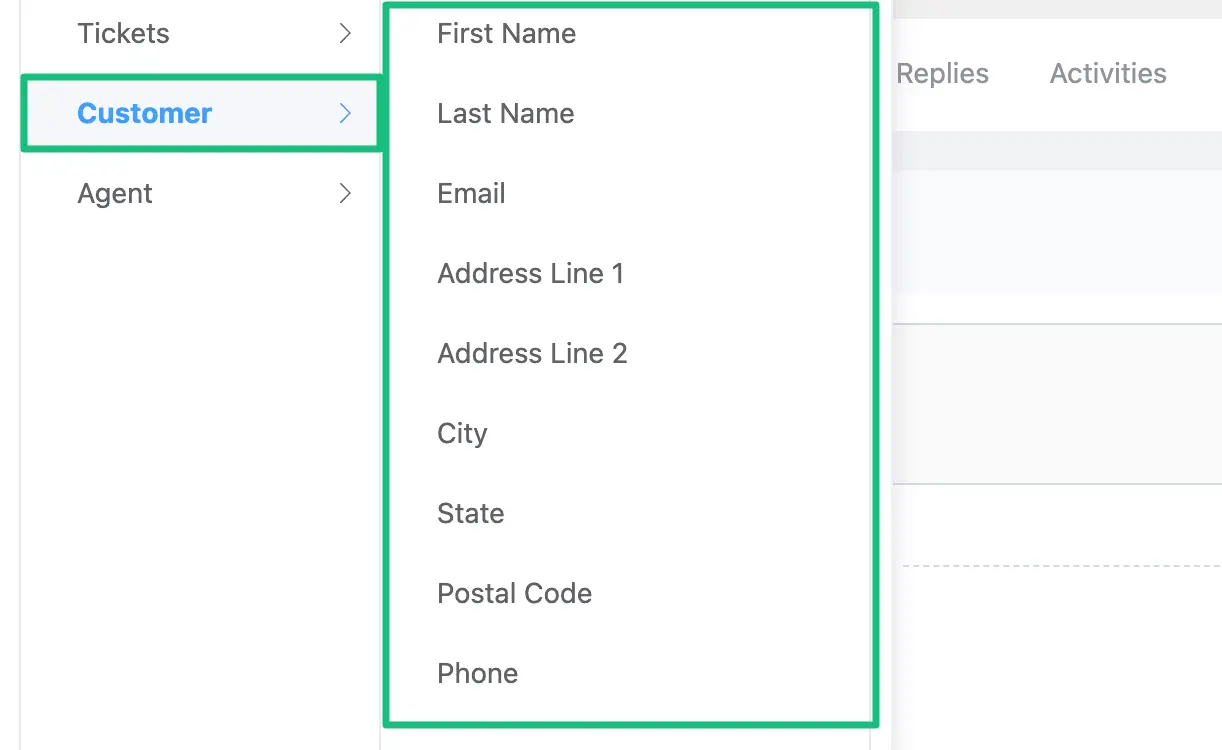
A brief explanation of the Items shown in the screenshot above is given below —
- First Name: The contact’s first name.
- Last Name: The contact’s last name.
- Email: Contact’s email address
- Address Line 1: The primary address field and also the minimum or default address information of the contact.
- Address Line 2: An extra field for address details.
- City: The contact’s city.
- State: The contact’s state.
- Postal Code: Information about the contact’s postal code.
- Phone: Client’s phone number or mobile number.
3. Agent #
Inside the “Agent” properties, you will get several items to set your values for advanced filtering. And these are —
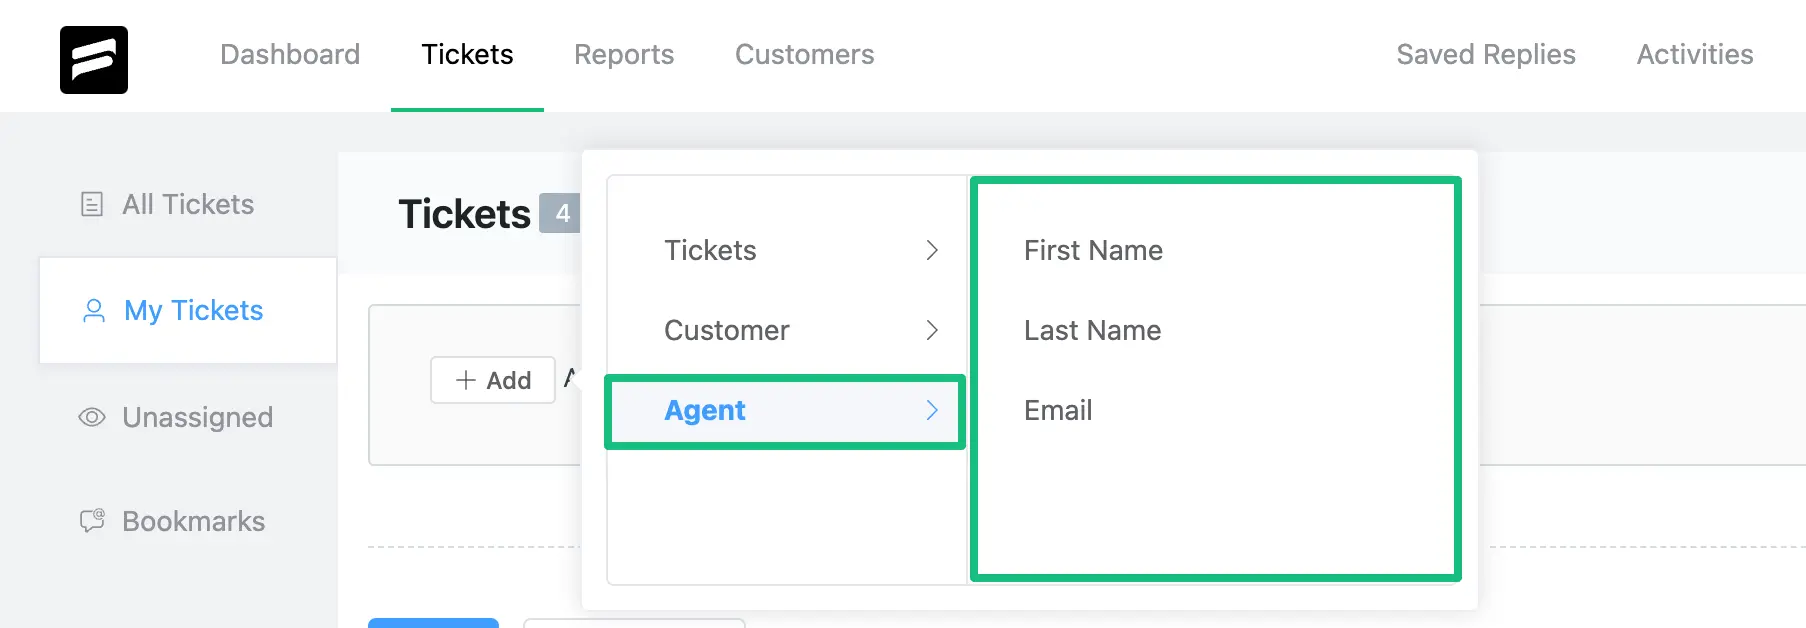
A brief explanation of the Items shown in the screenshot above is given below —
- First Name: The agent’s first name.
- Last Name: The agent’s last name.
- Email: The email address of the agent
You can use all the above properties and their items to set values for filtering your tickets in an advanced way.
Set Conditions #
To learn how to set conditions for advanced filtering, follow the steps with the screenshots below —
Once you click on the + Add or + And button, you will see a box with a dropdown.
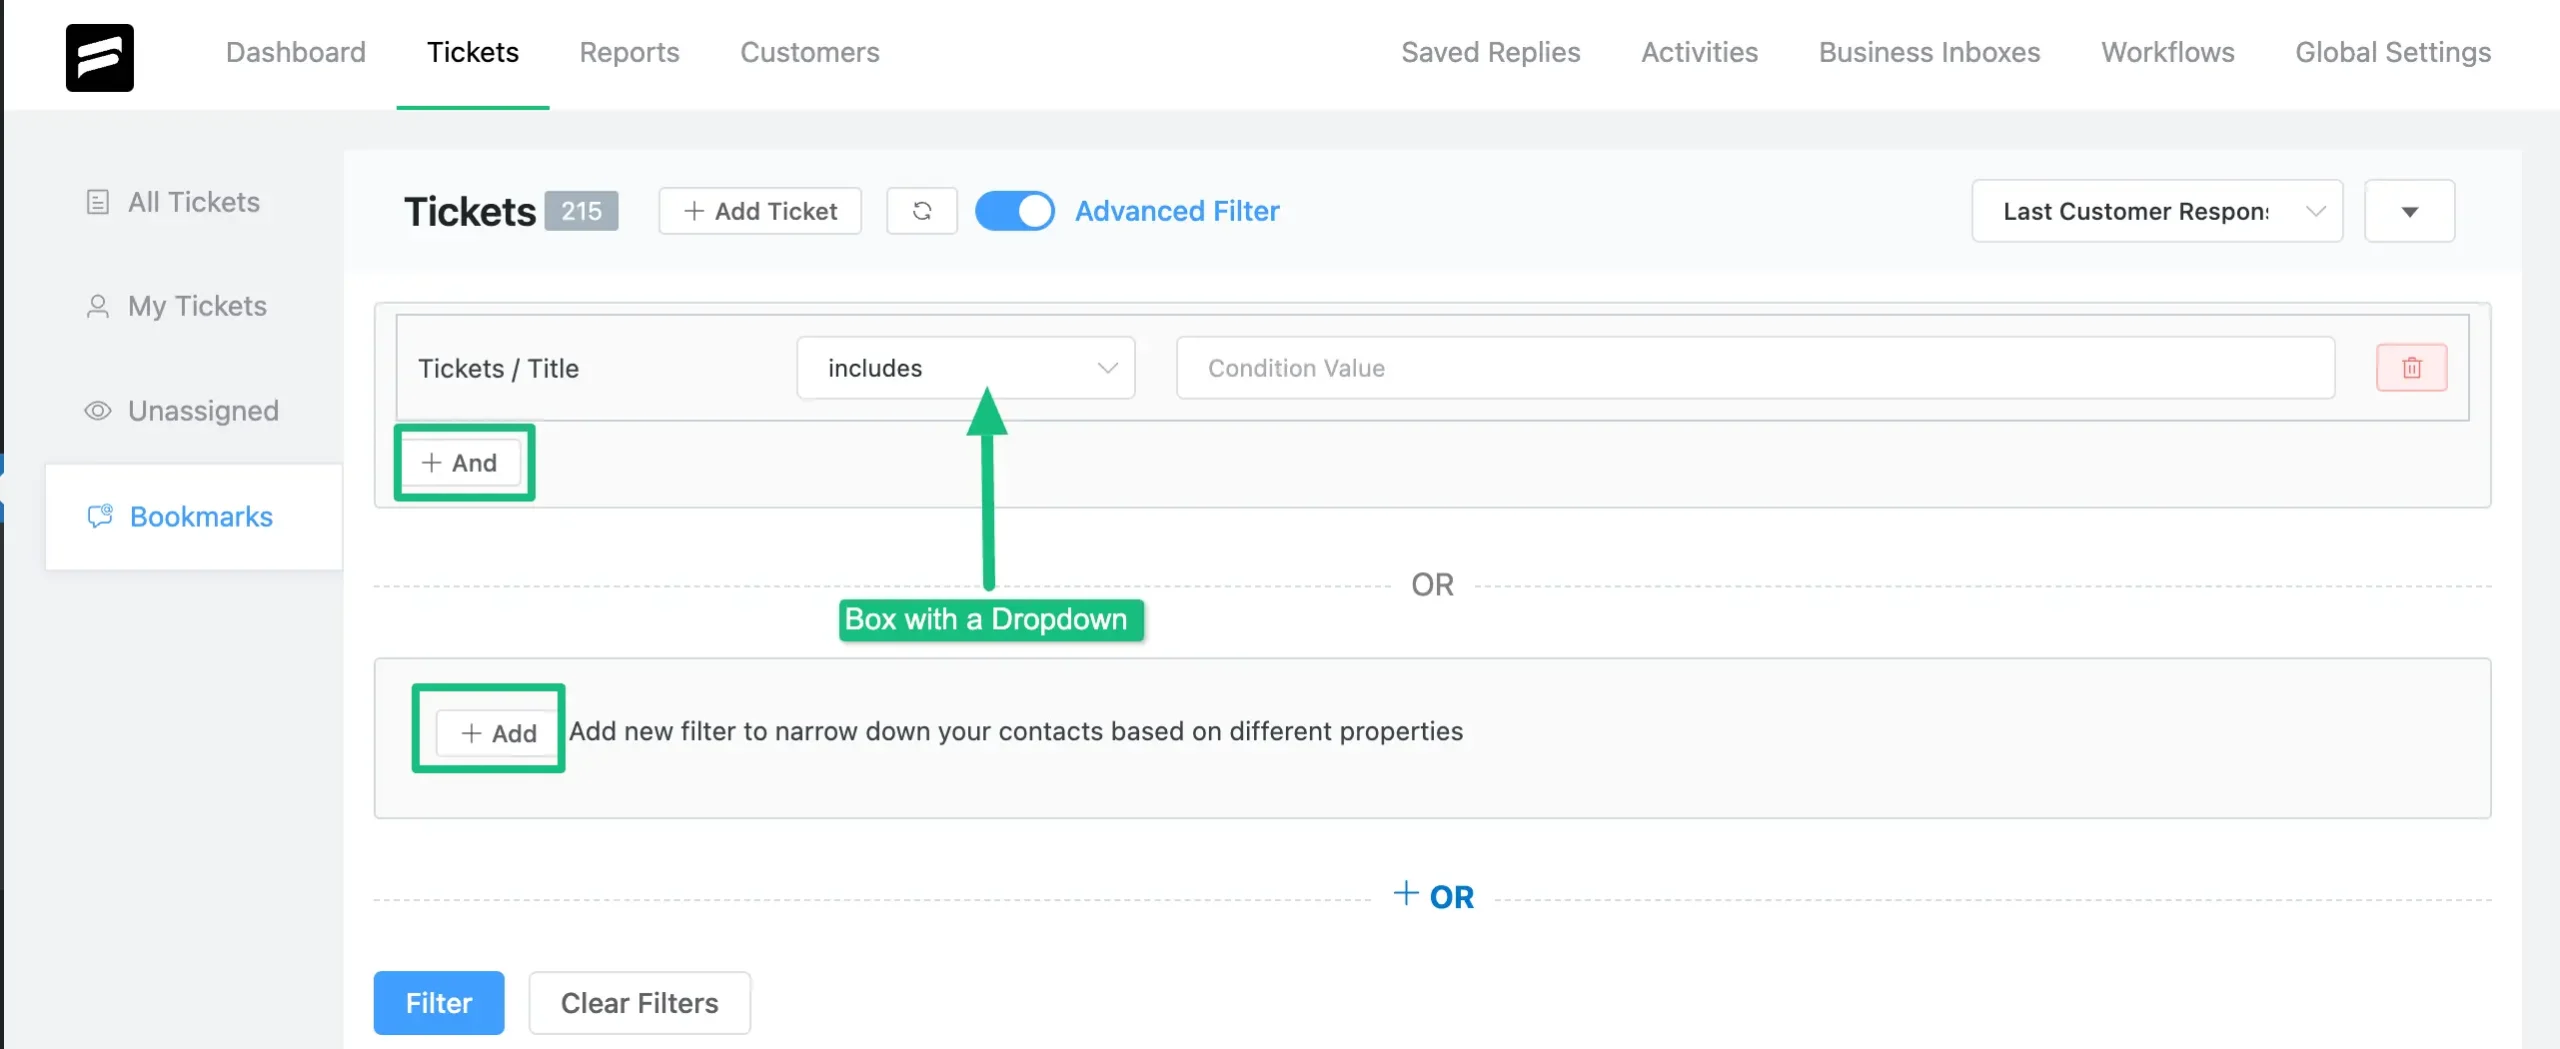
In this box, you will get a List of Default Conditions based on the value that you’ve selected.
For example, in the screenshot you can see, I selected the “Ticket Created” item under the “Tickets” property and I got the default conditions list. Now I can set any one of the conditions according to needs.
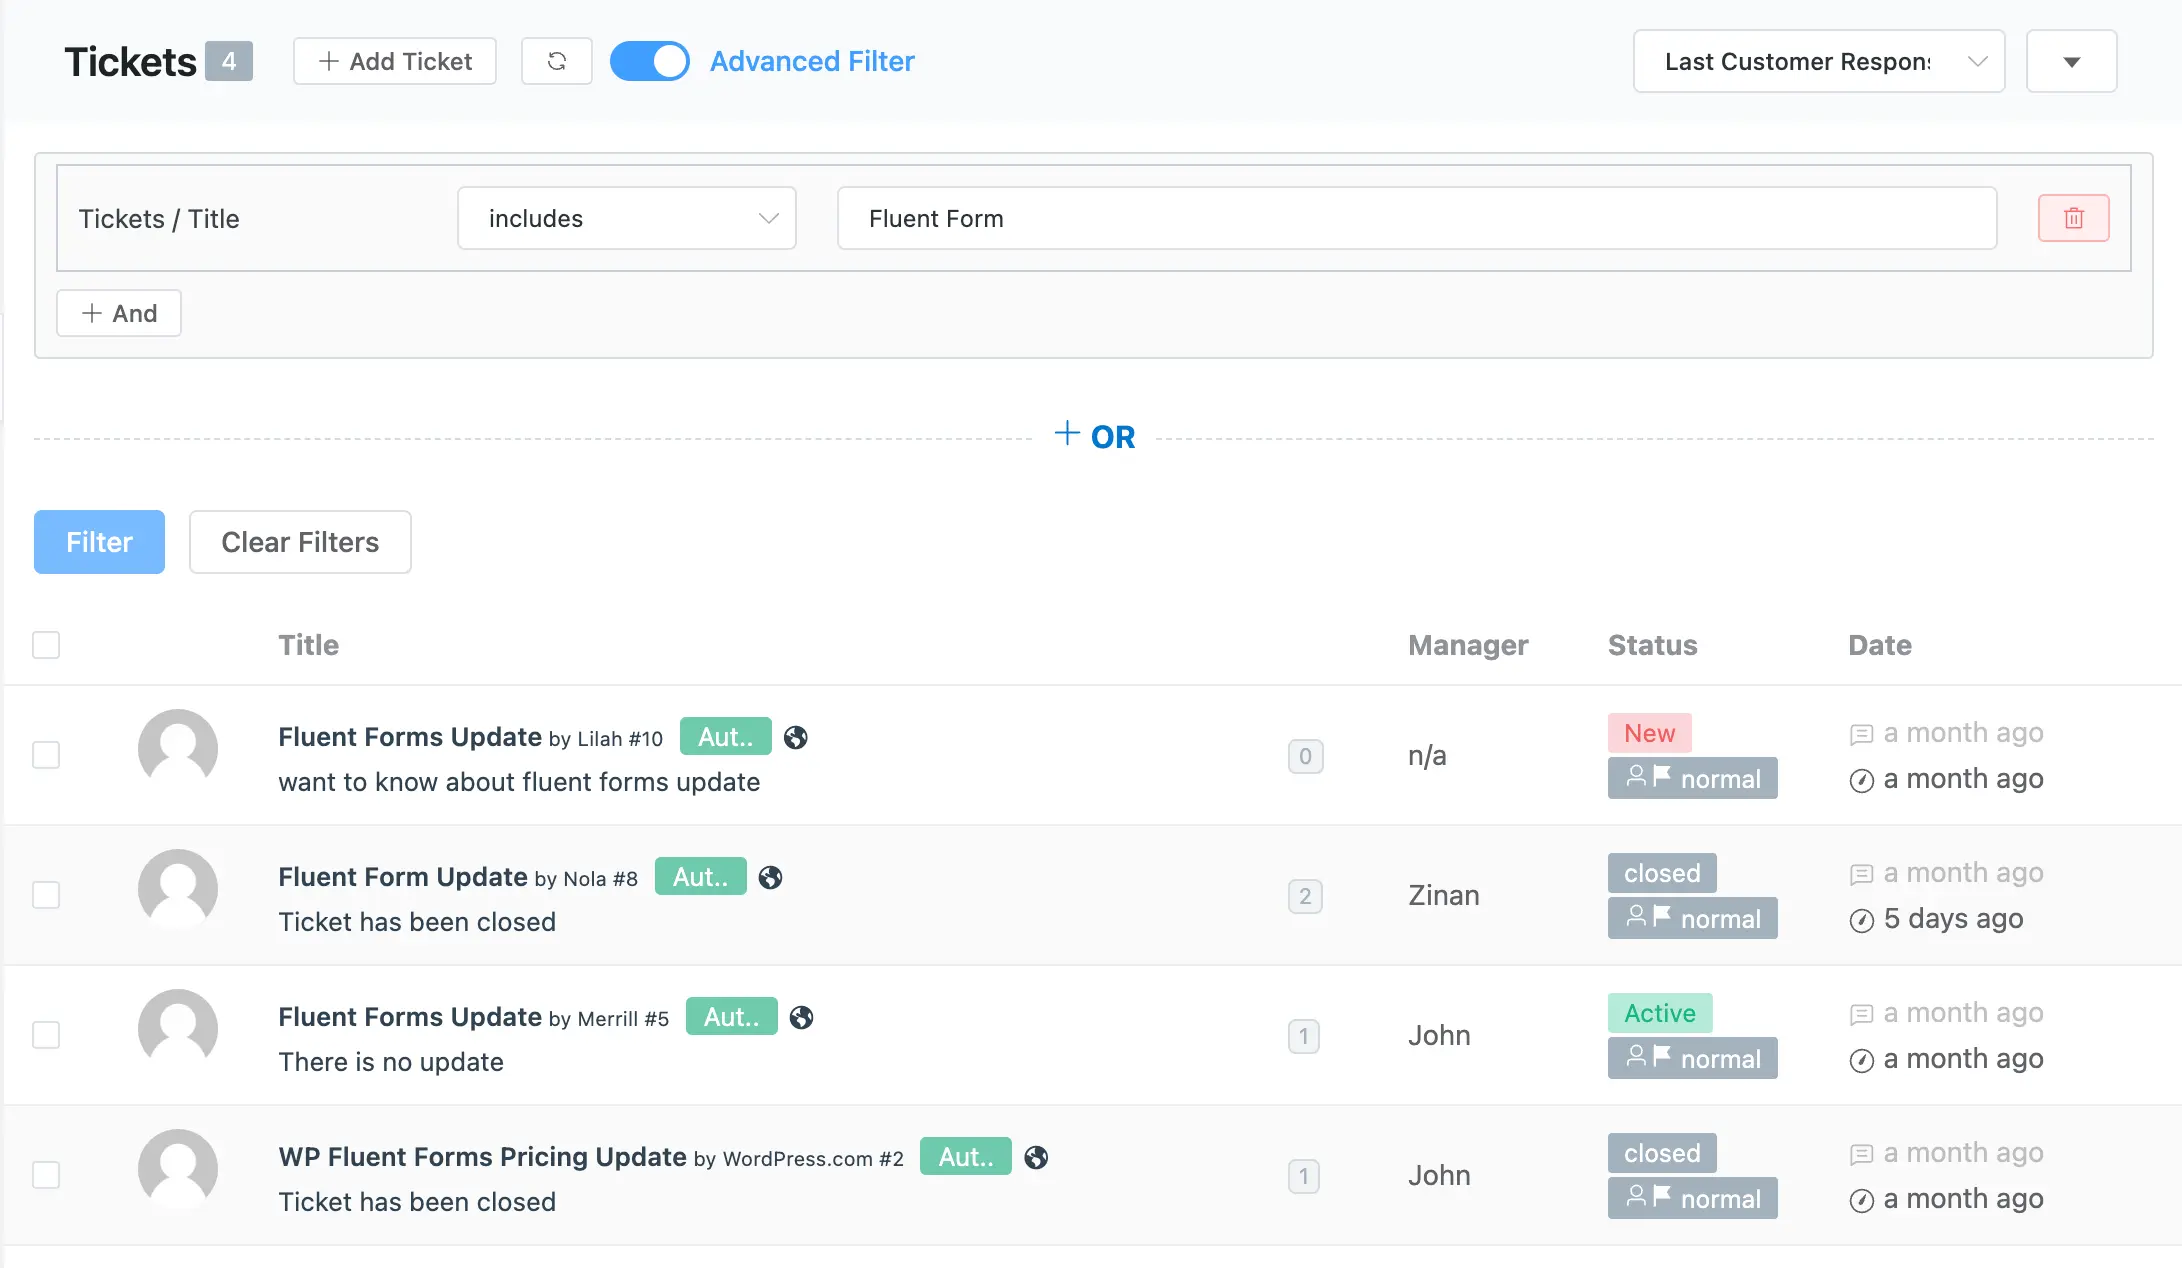
You can set any conditions from the given list according to your needs by using the Dropdown option as well.
For example, here I select the Ticket property, the Title item (where I put “Fluent Form” as value), and then the Includes condition. In this case, the filtering includes only those tickets that have Fluent Form words inside their title and appear on my ticket dashboard.
By following the same process, you set as many conditions as you want to filter your tickets.
If you have any further questions, concerns, or suggestions, please do not hesitate to contact our @support team. Thank you.


