Fluent Support allows you to manage your tickets using Slack. You can see your New Tickets notification in your Slack account and reply to your ticket from Slack. This article will guide you through how to connect your Fluent Support with Slack to manage your tickets in Slack.
Fluent Support Slack Settings #
To learn how to manage your Tickets using Slack, follow the steps with the screenshots below –
Slack App #
First, go to the Slack API and log in to your account to create an App in Slack. If you don’t have an account in Slack create one.
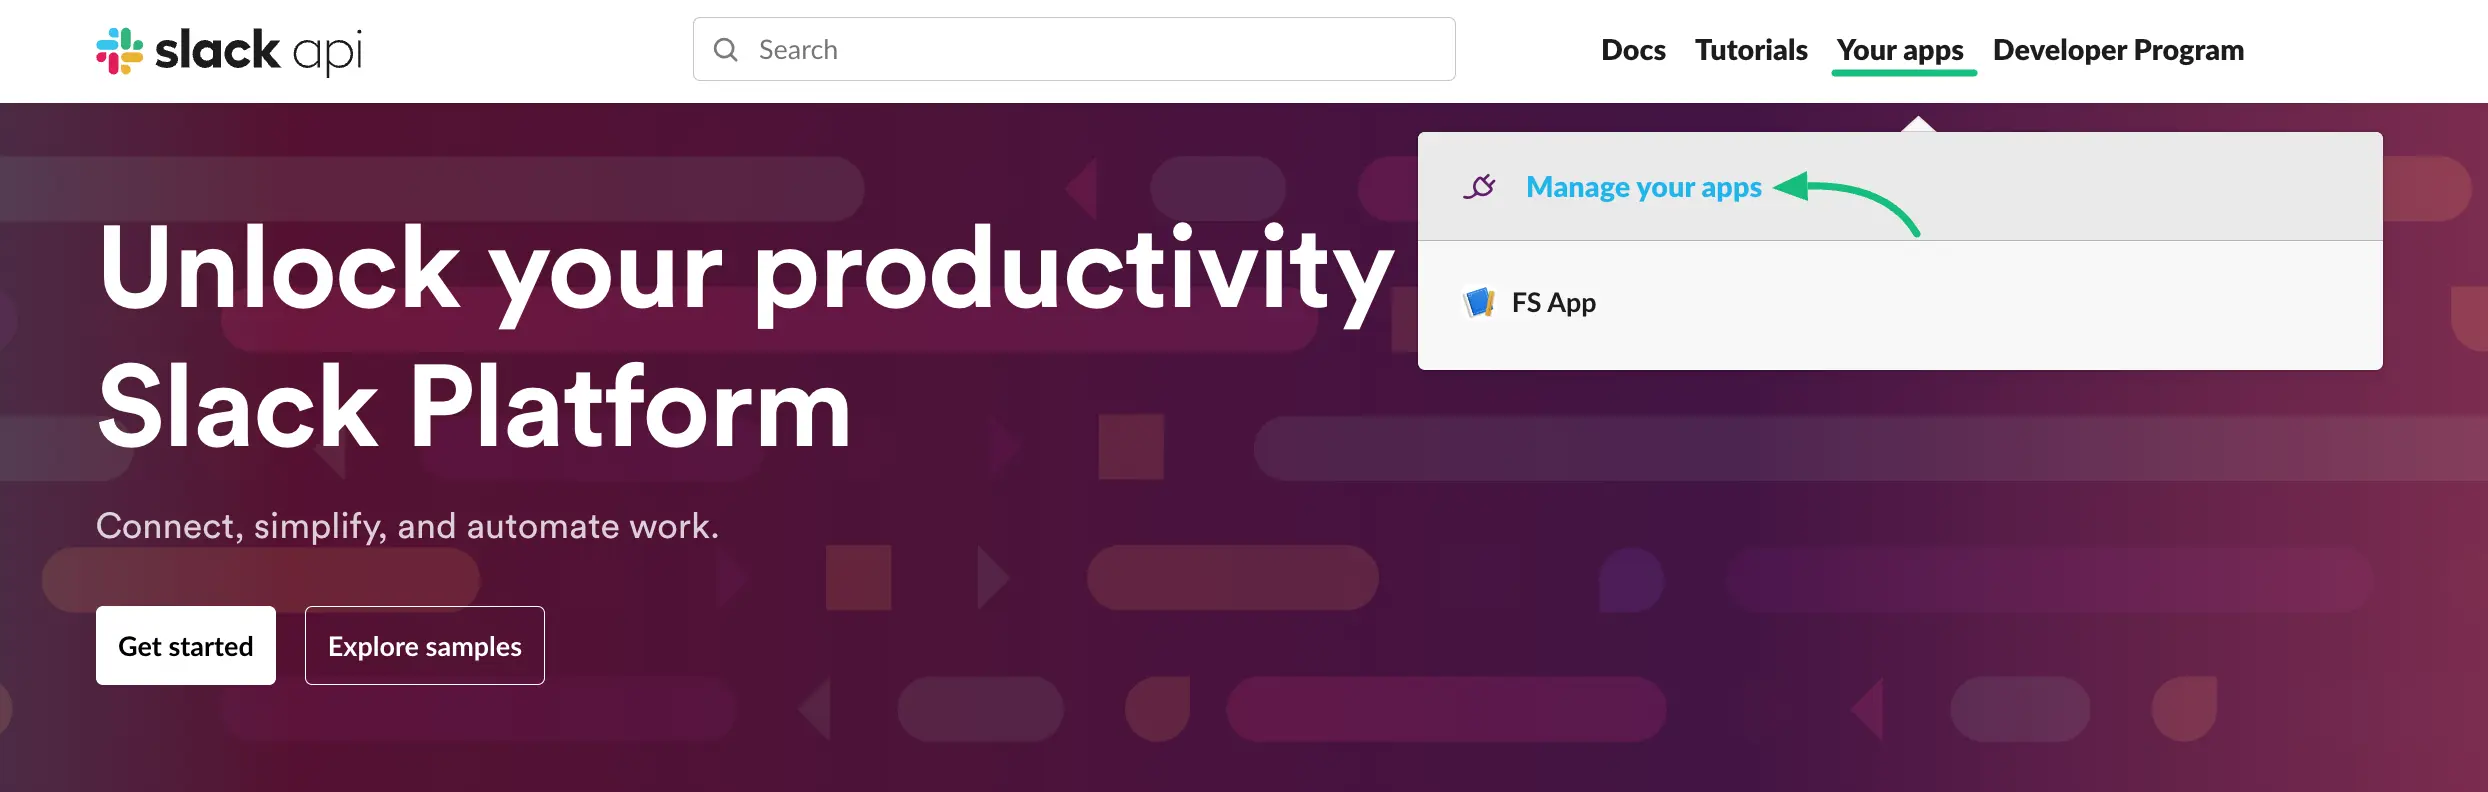
After logging on to your account click on Your Apps from the nav bar and click on the Manage your apps button.
You will be redirected to the Slack app creation page.
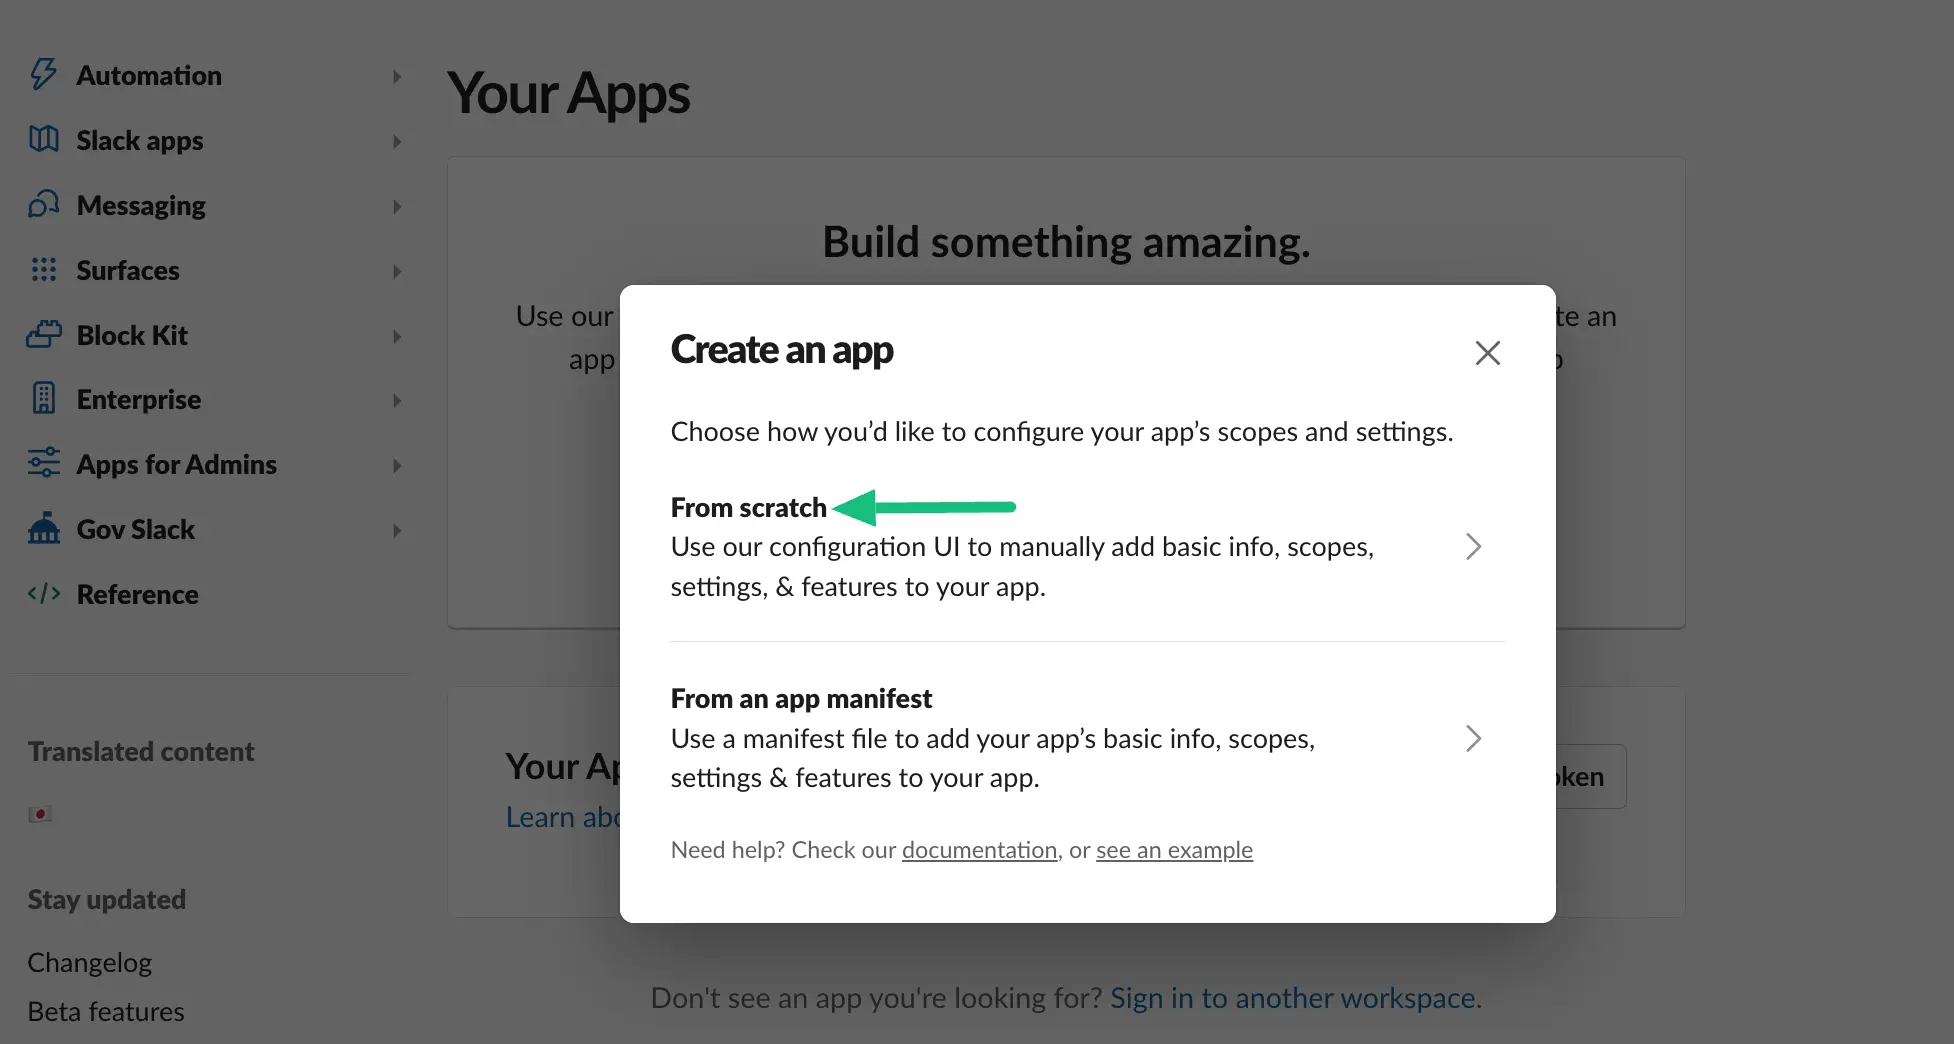
Click on the Create New App button here.

Select From Scratch to configure your app.
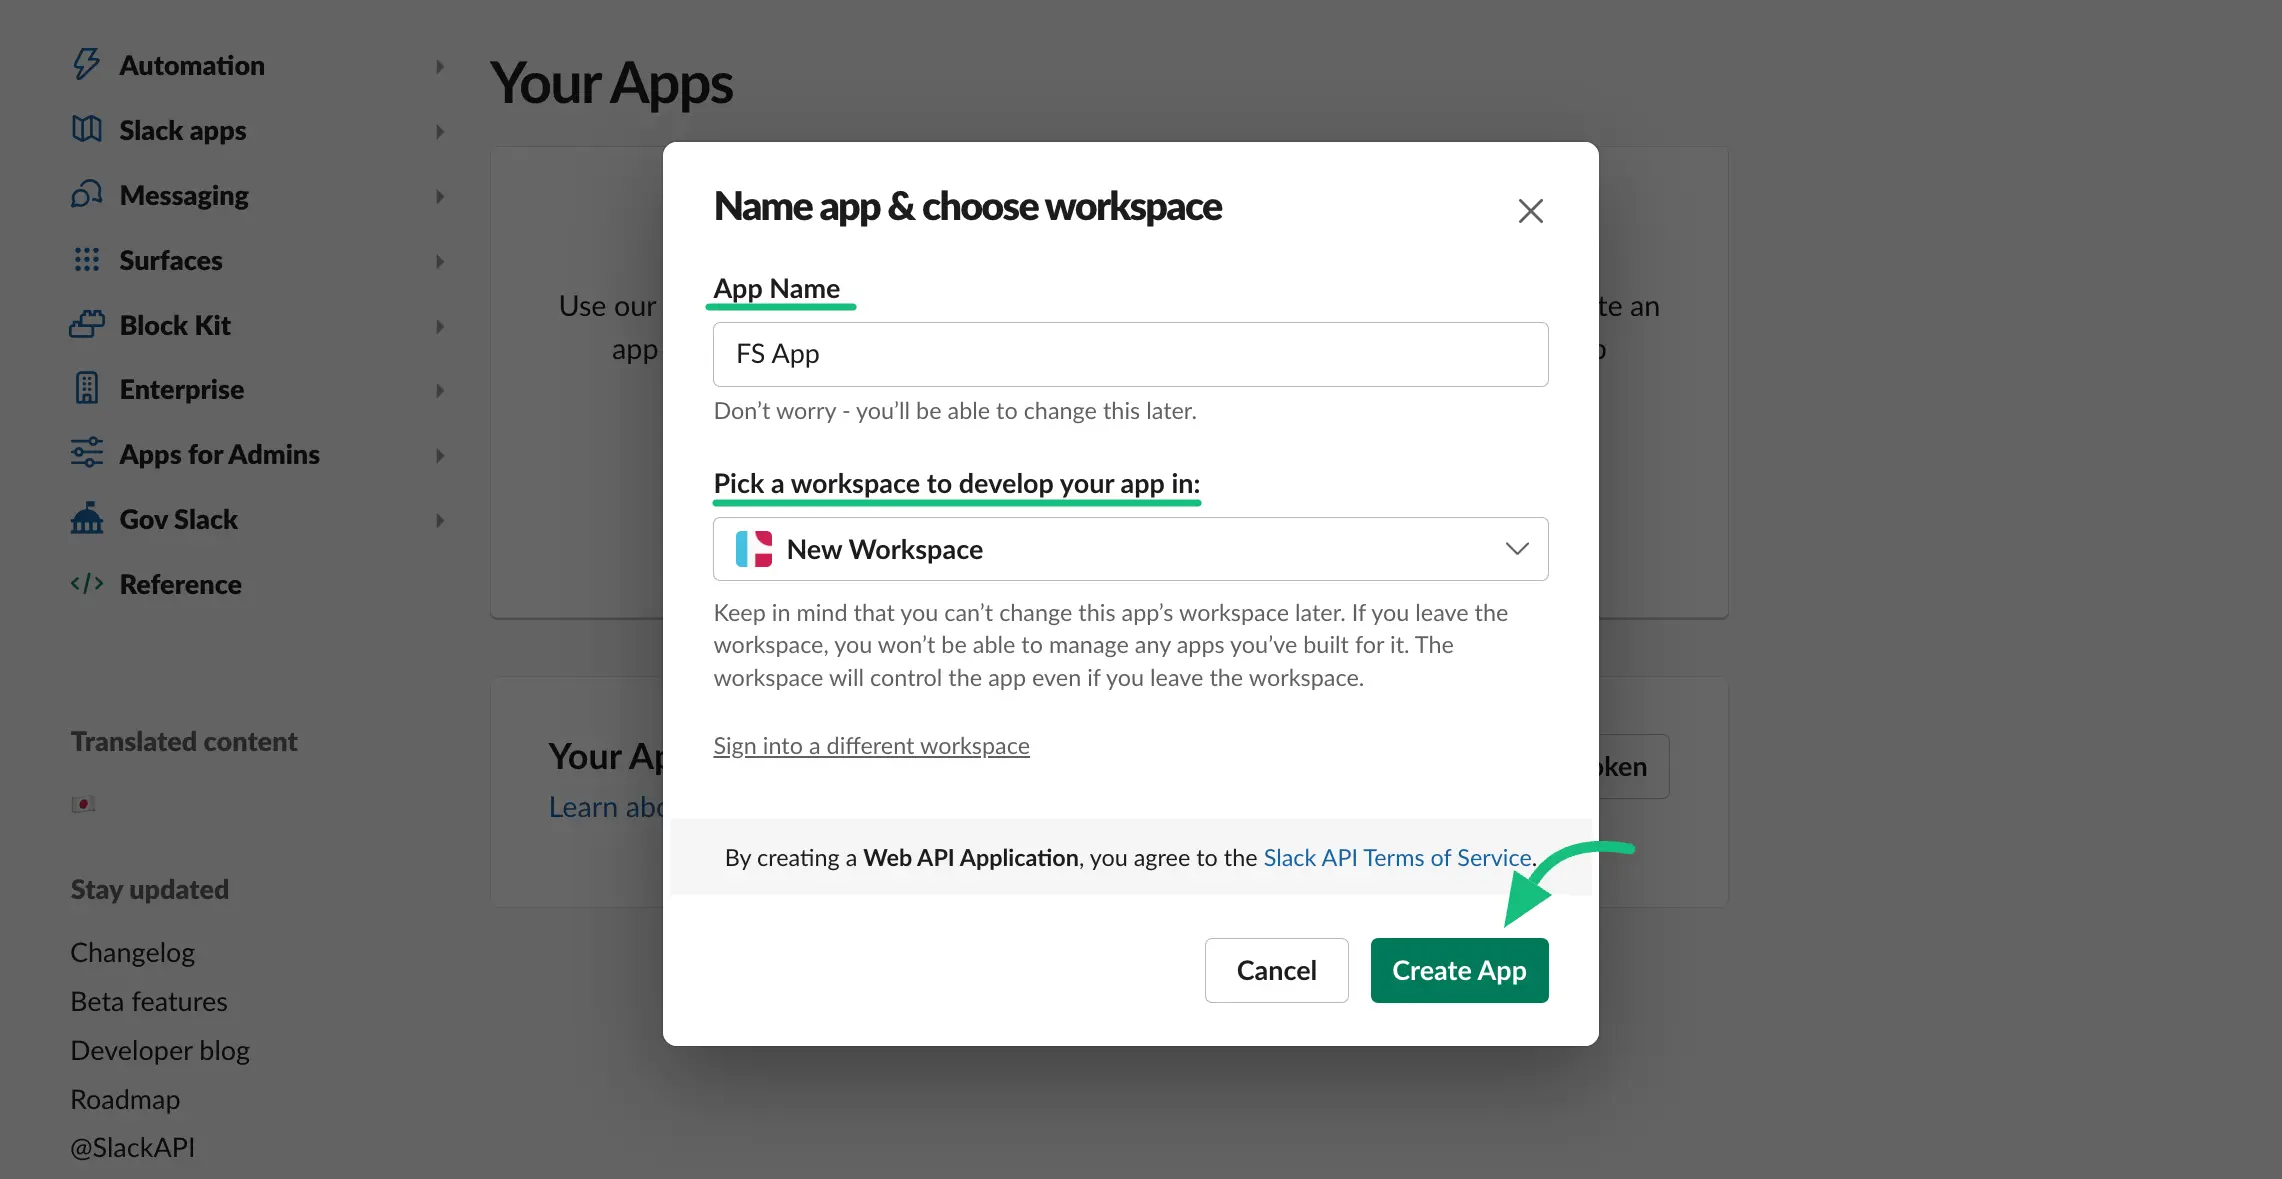
Give the App name, select Slack Workspace, and click the Create App button.
Configure the Slack App #
Now you need to configure your Slack App and create an API token.
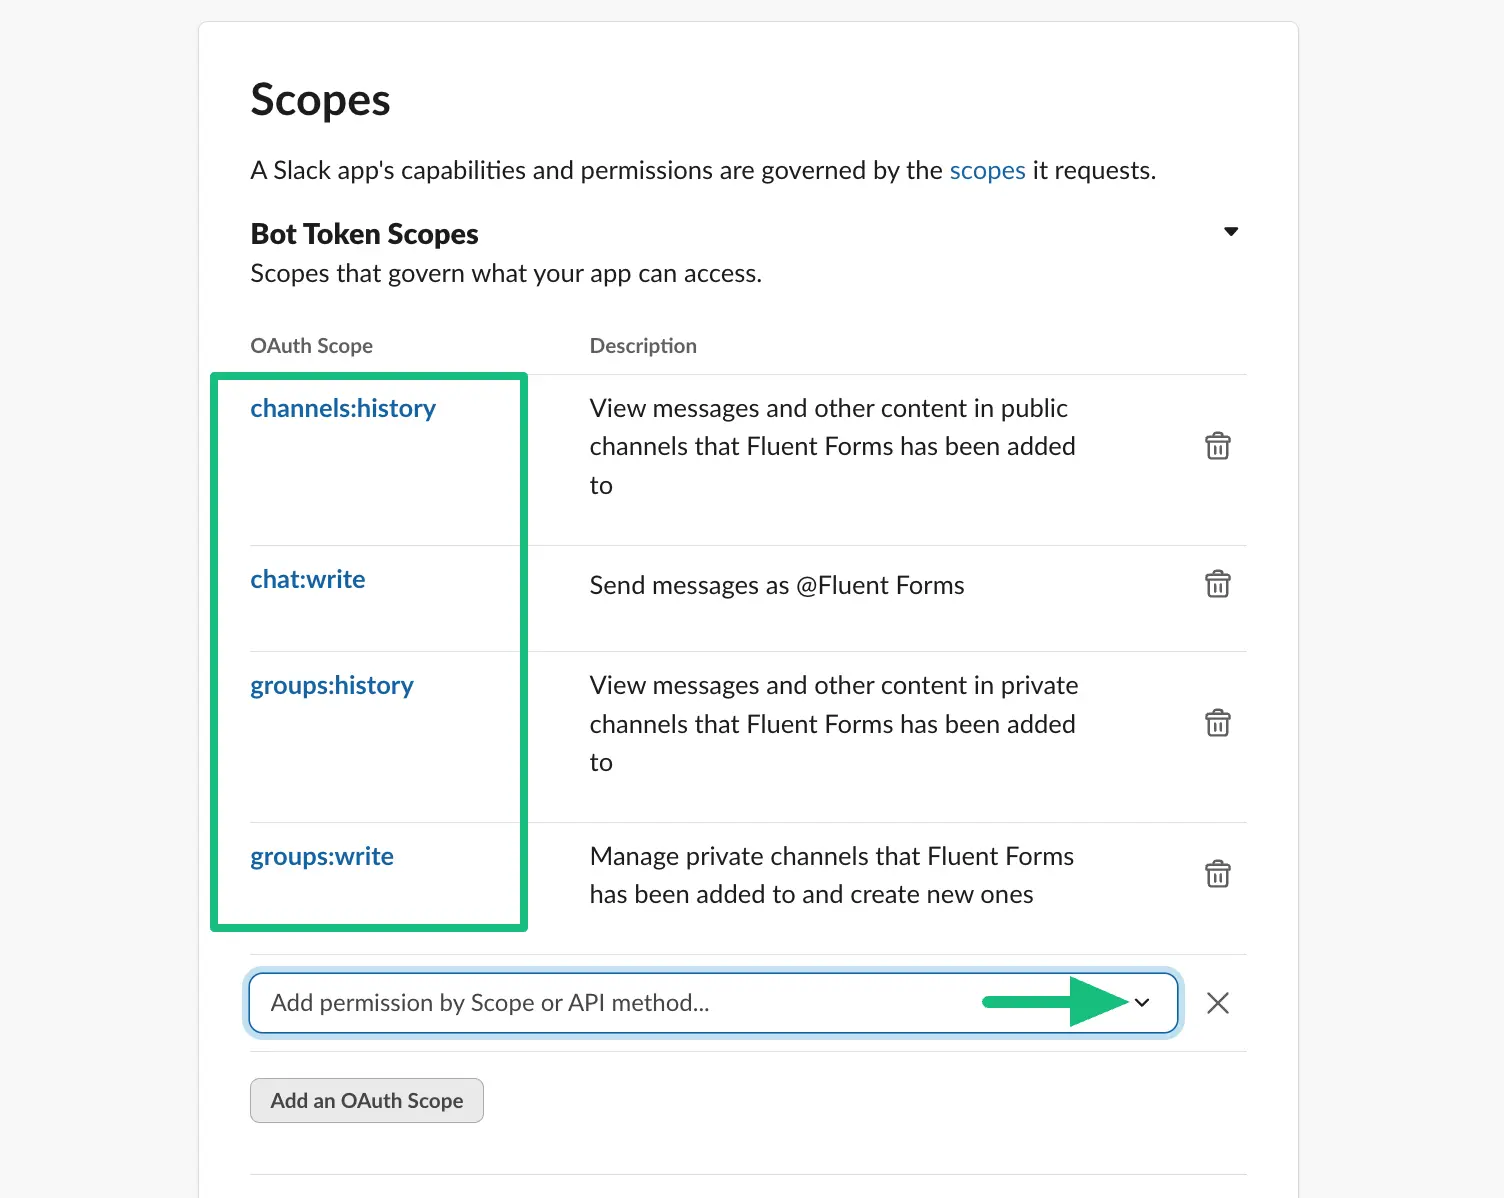
So first select the OAuth & Permission from the left sidebar.
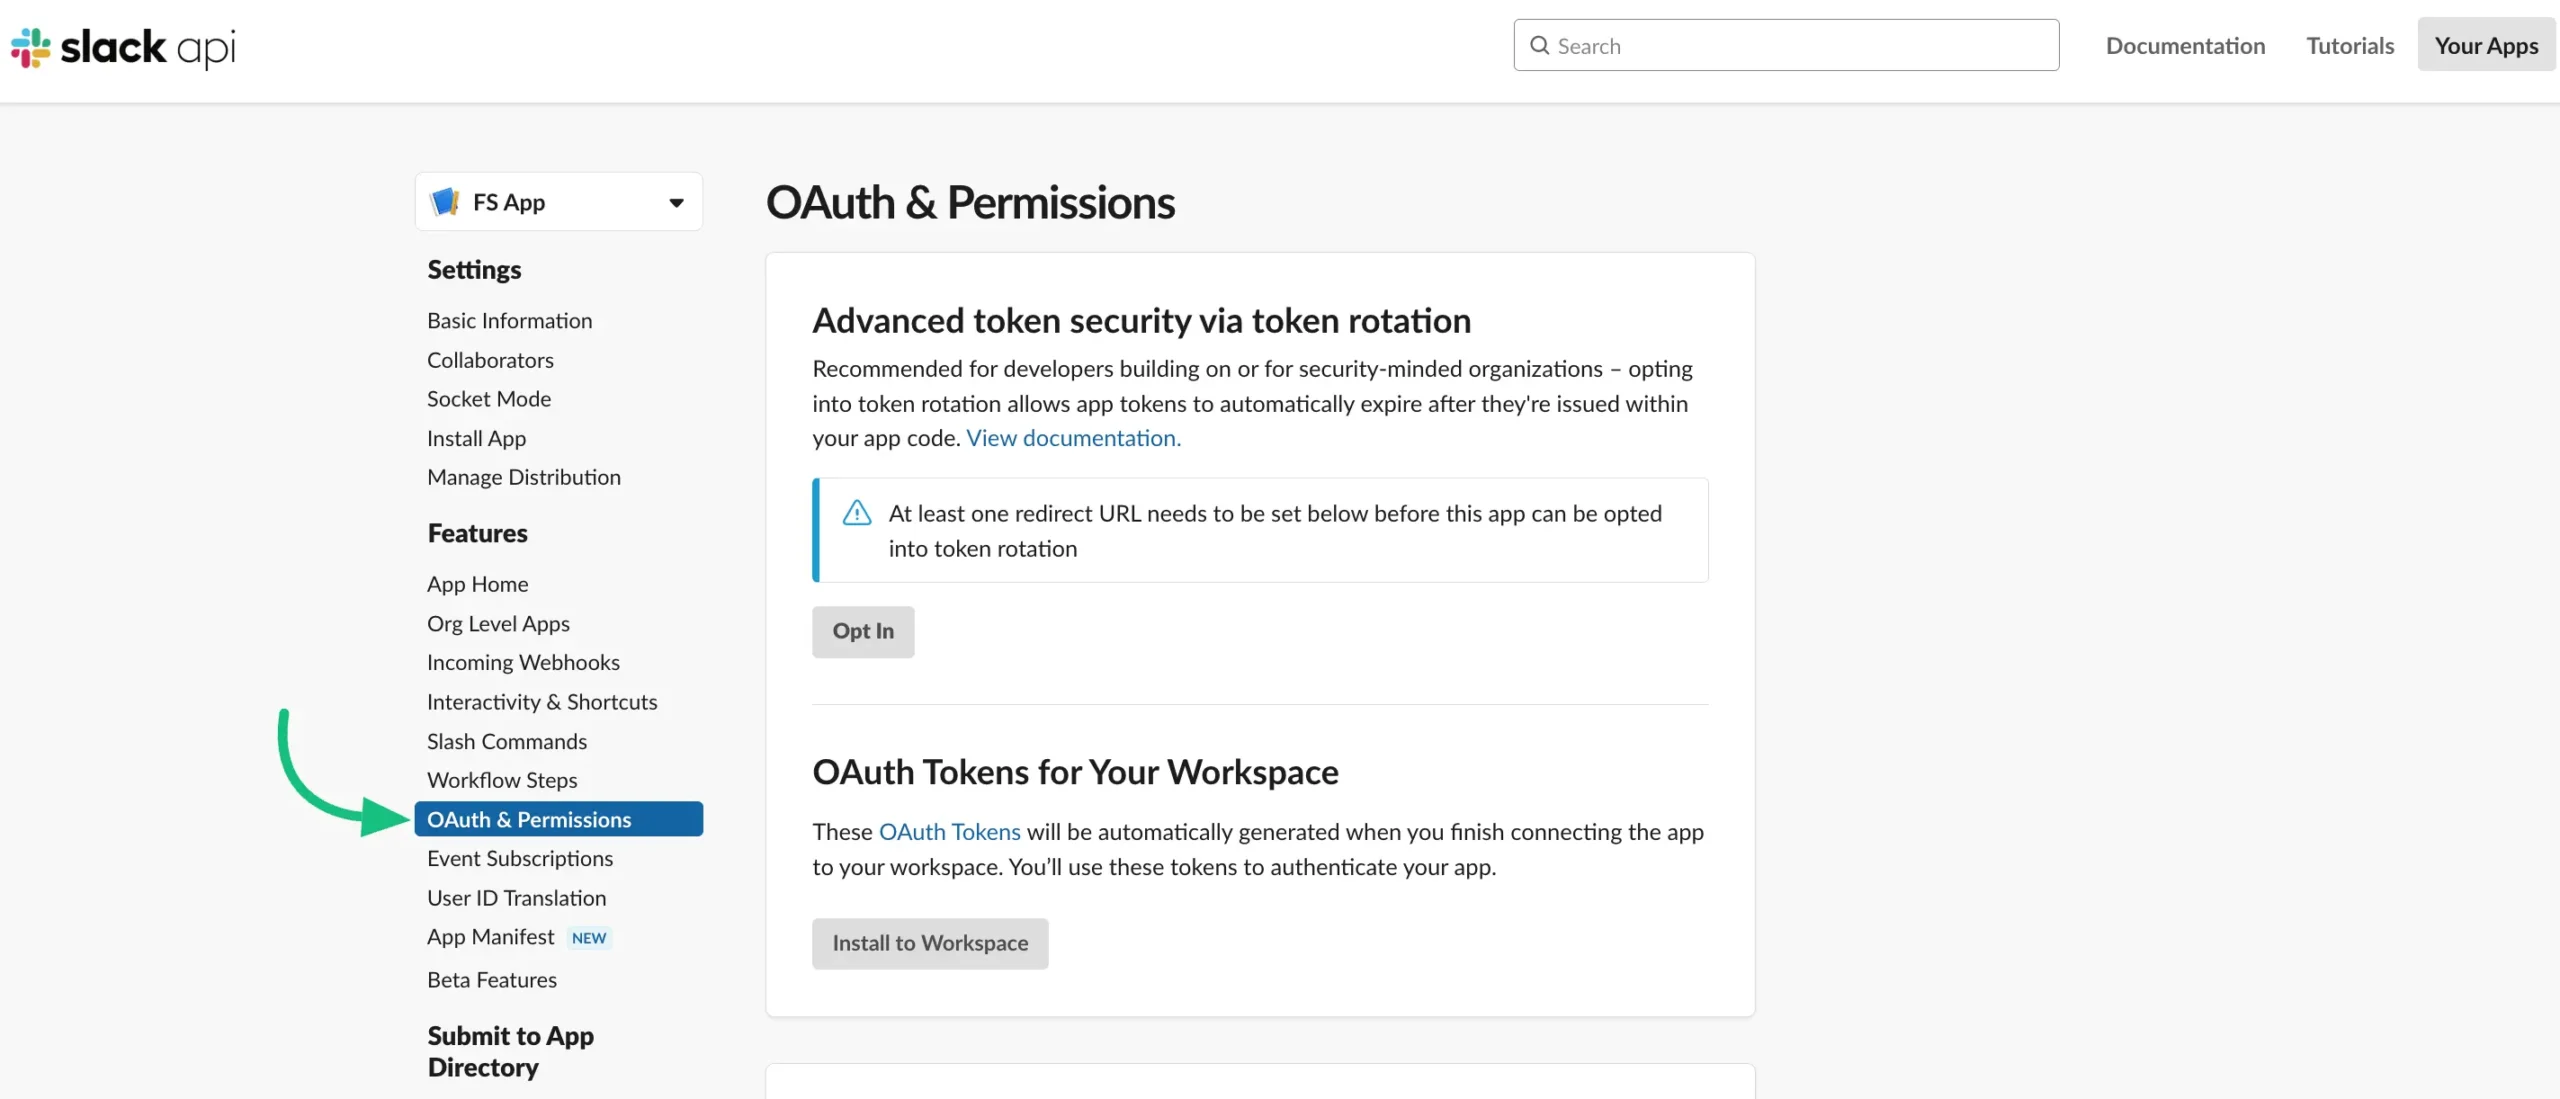
Scroll down, go to the Scopes, and add these four (channels:history, chat:write, groups:history, and groups:write) OAuth Scope from the dropdown menu.
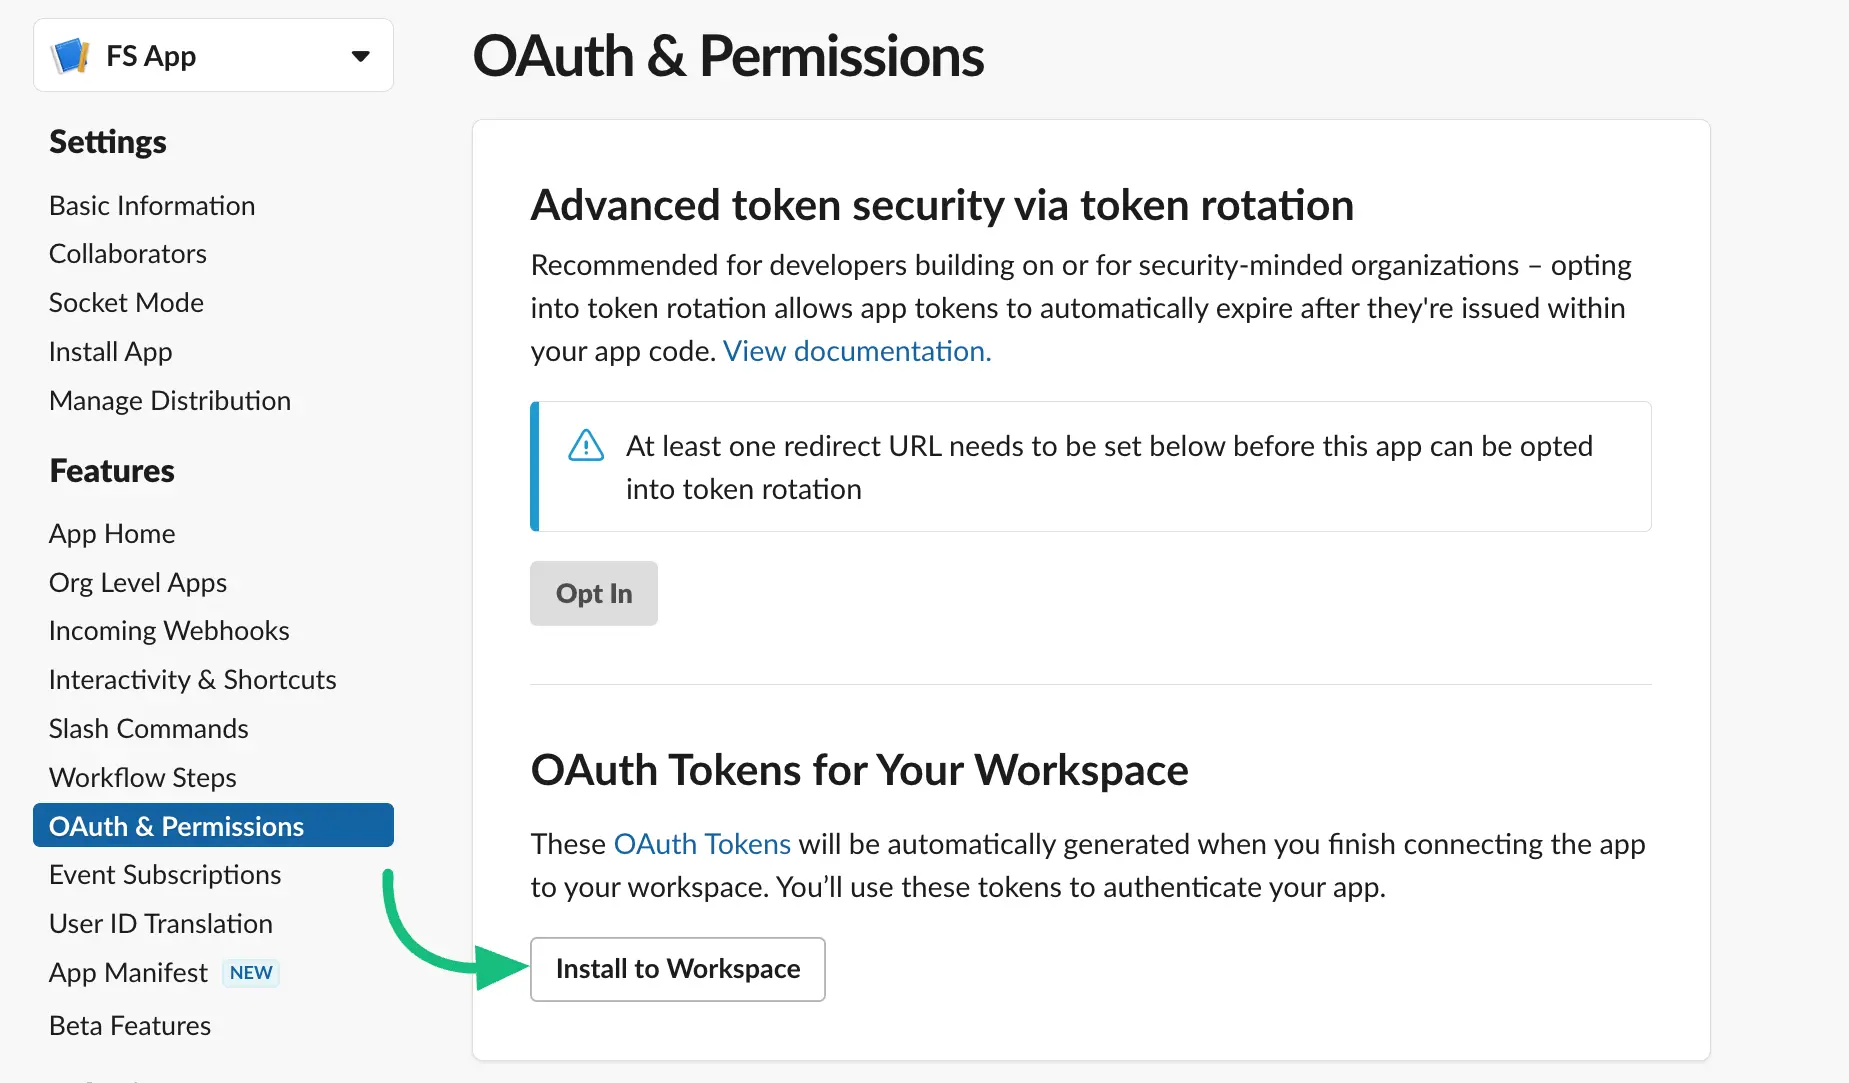
Go to the OAuth Tokens for Your Workspace and click the Install to Workspace button below.
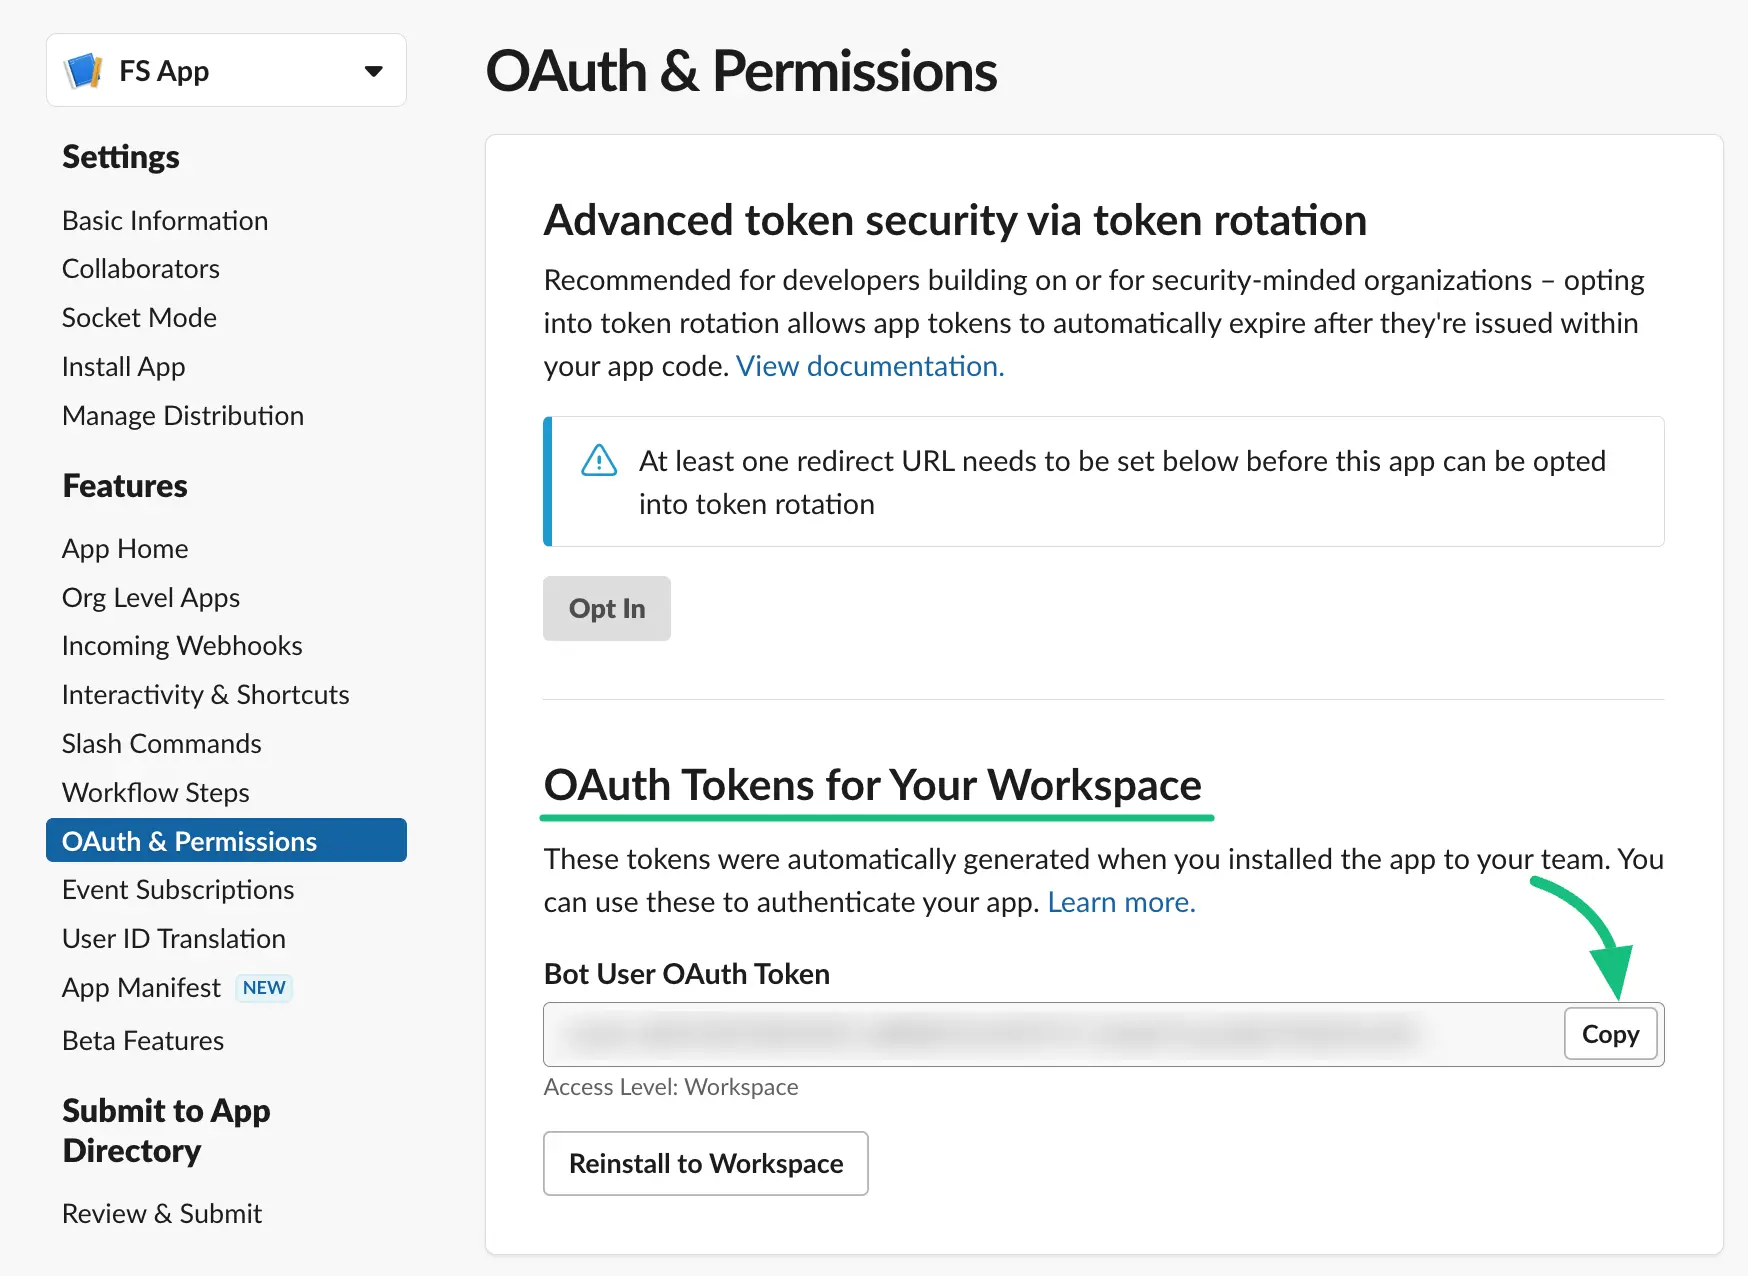
Now you will get a Bot User OAuth Token here. Copy the token for later use.
Add a Channel for Ticket Notifications #
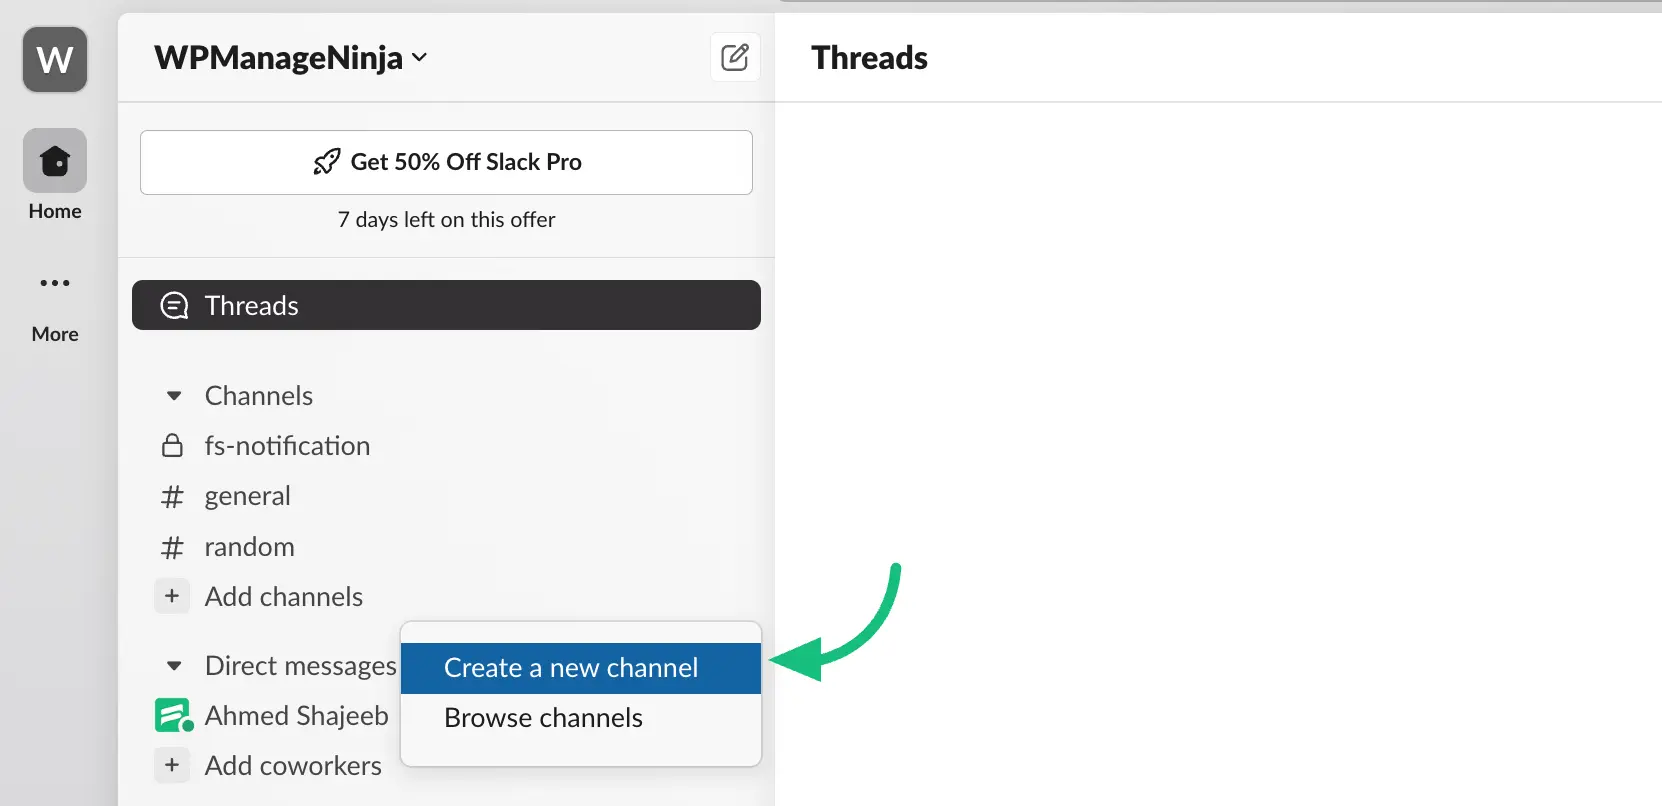
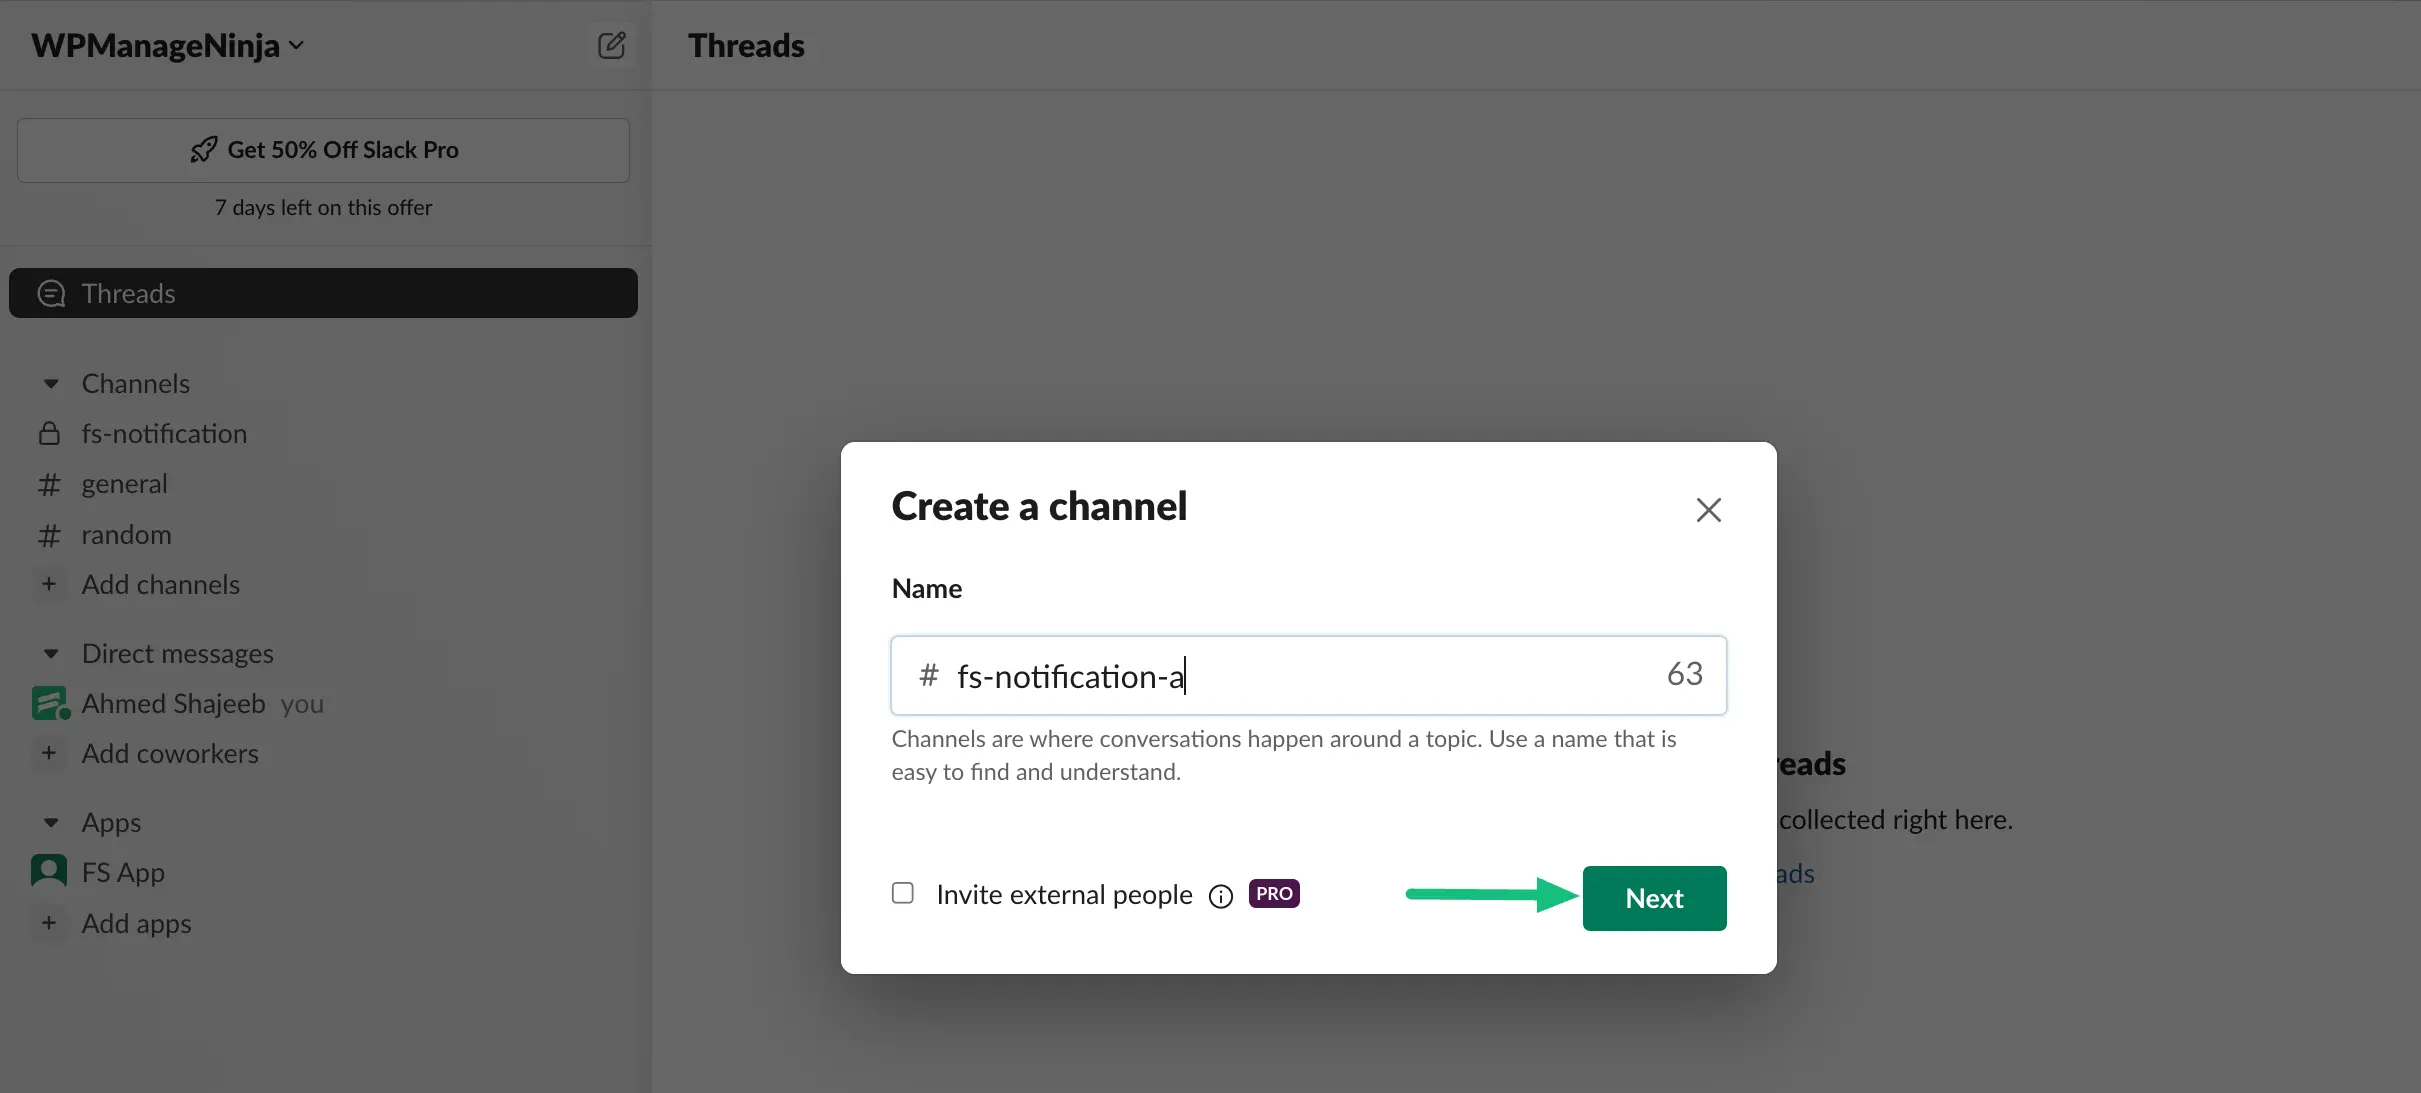
Go to your Slack Workspace, select Add Channels, and Create a new channel for Fluent Support Ticket notification.
A pop-up will come here, give a name, and click the Next button.
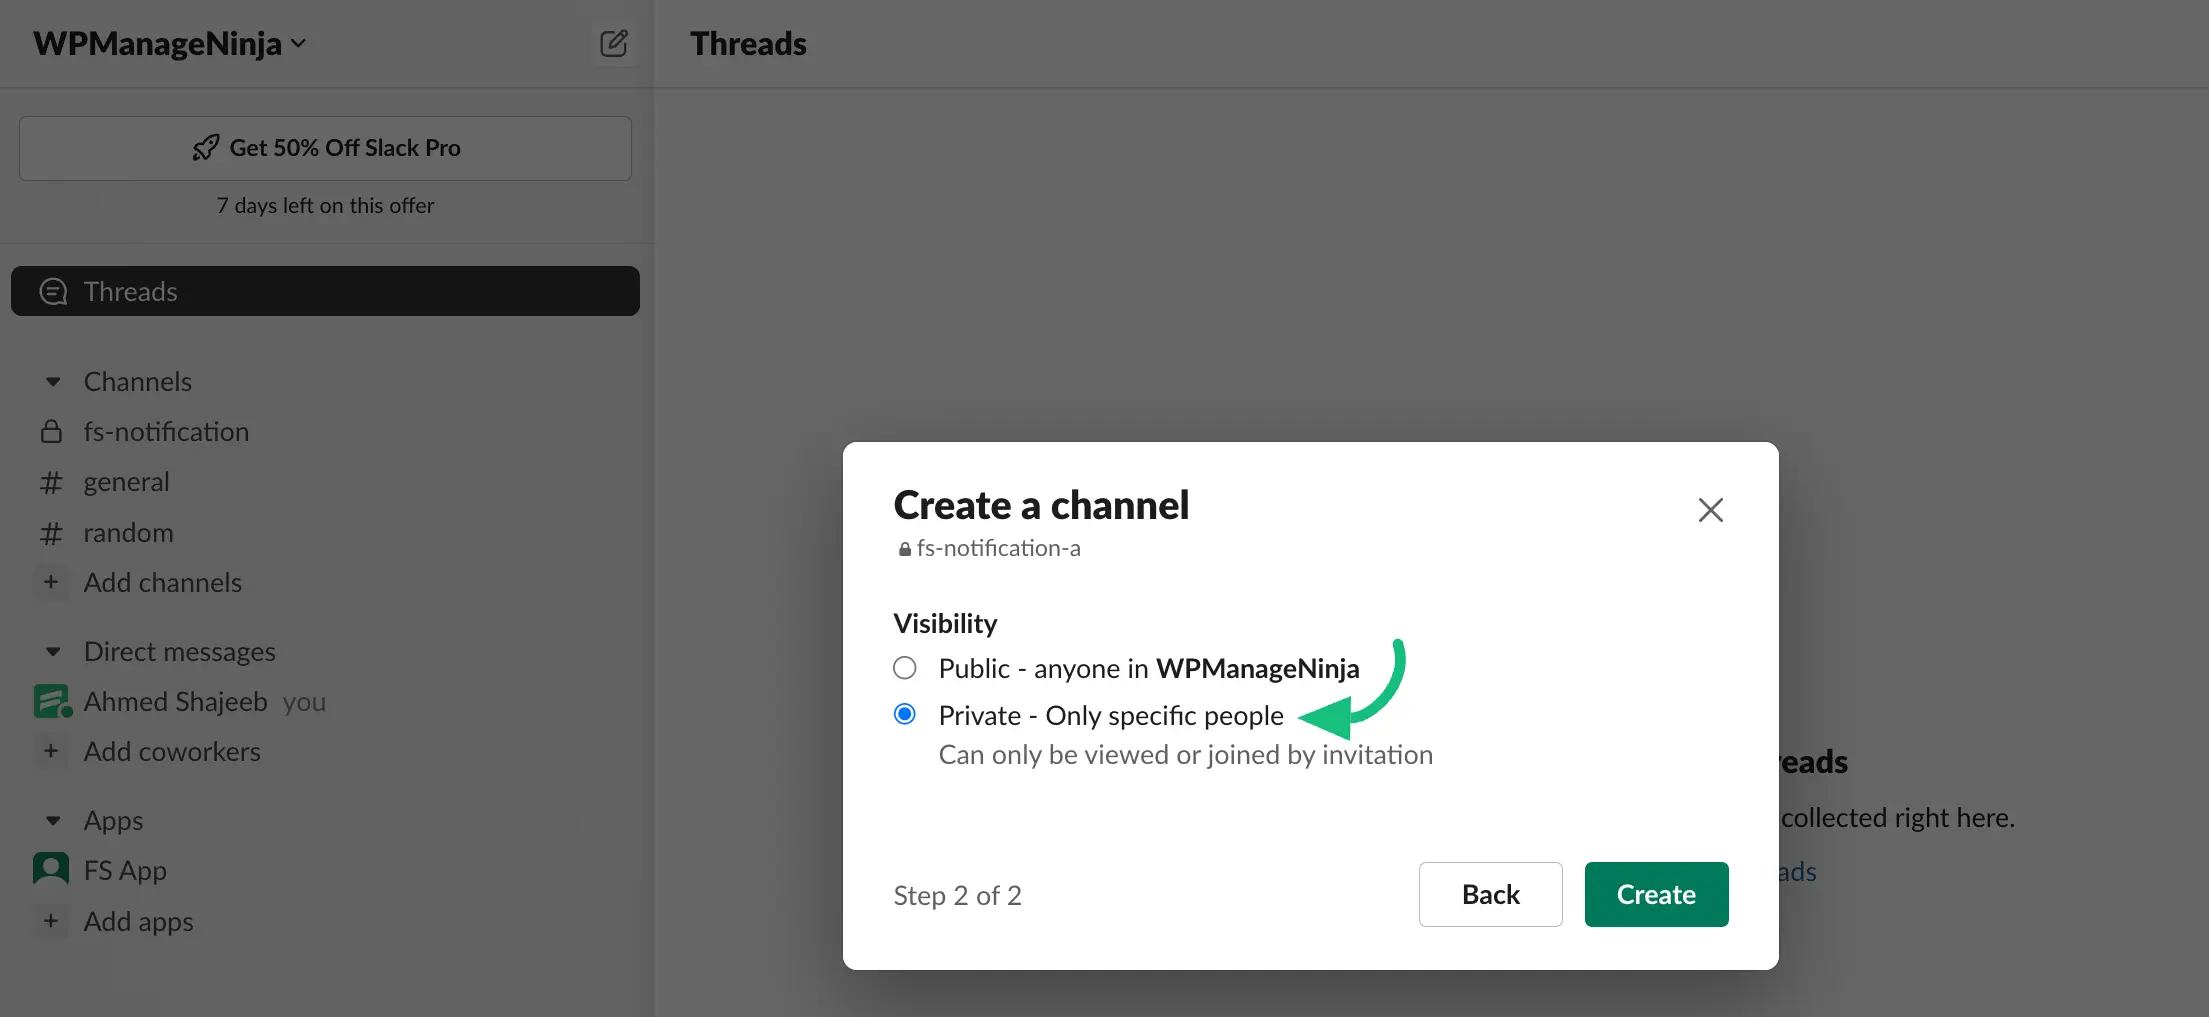
Then you will be asked for channel visibility keep the channel visibility Private.
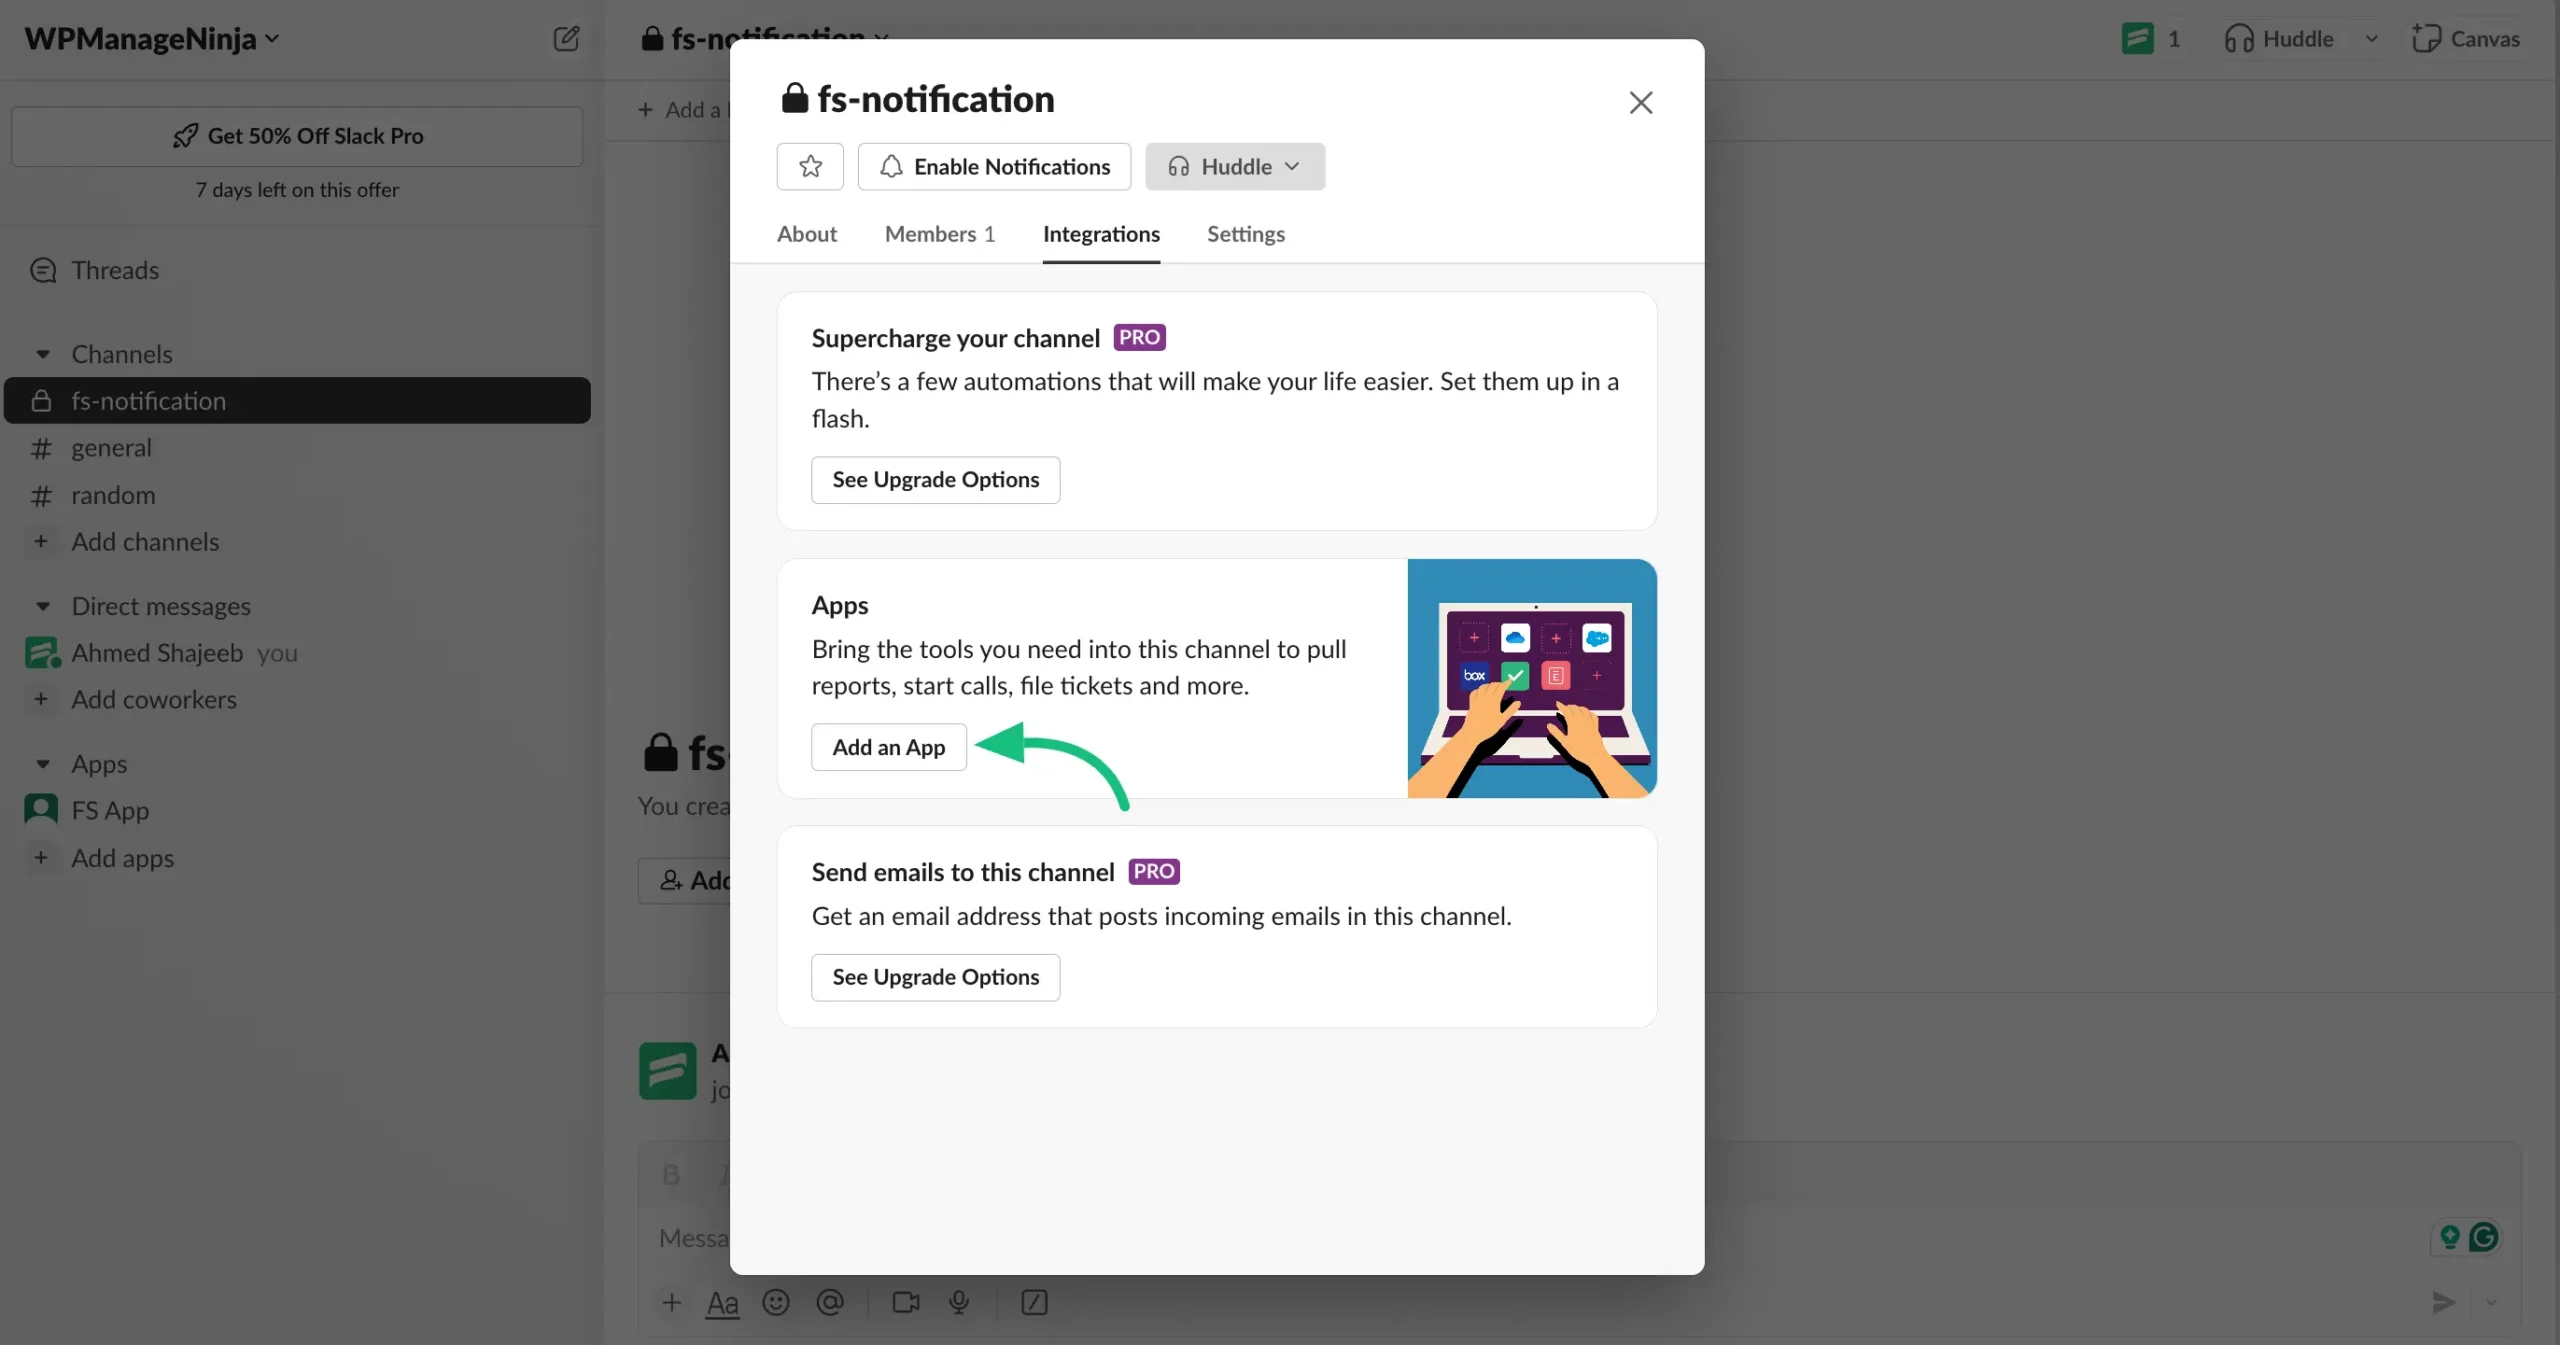
Now the channel settings will come. Select the Integrations from this settings option.

Here, you have to Add the Slack App you have created. So click on the Add an App button.
Now you will see here all of your Apps. Select the App you created and click on the Add button.
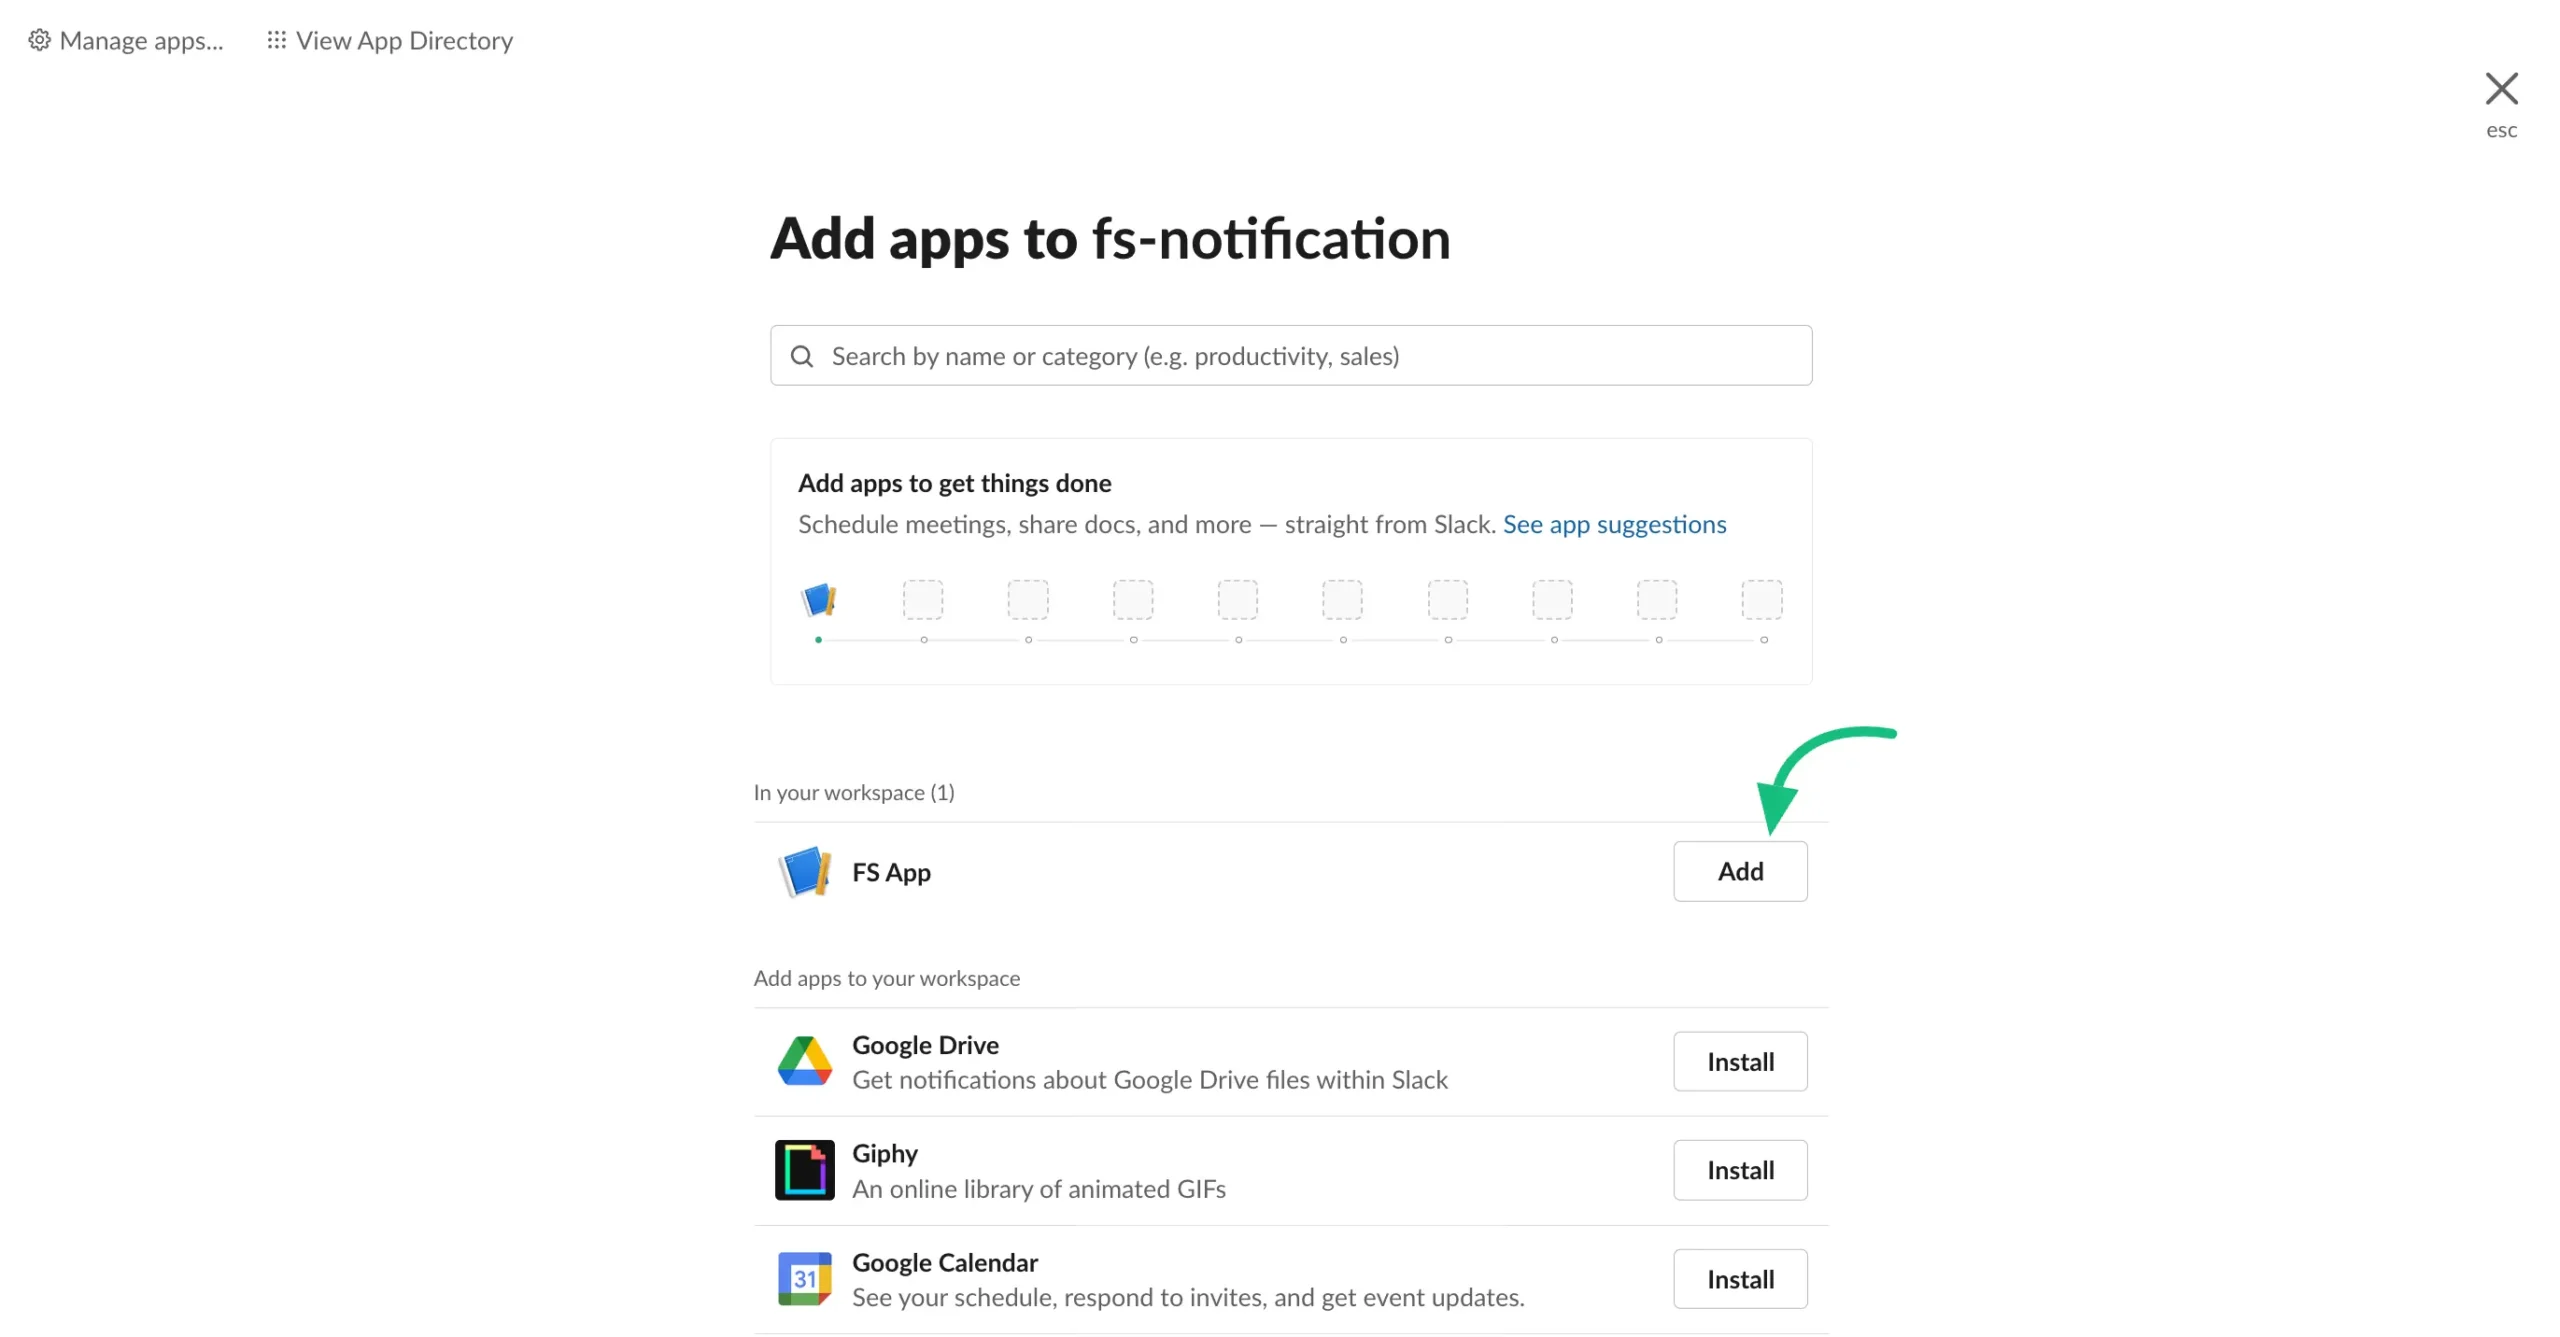
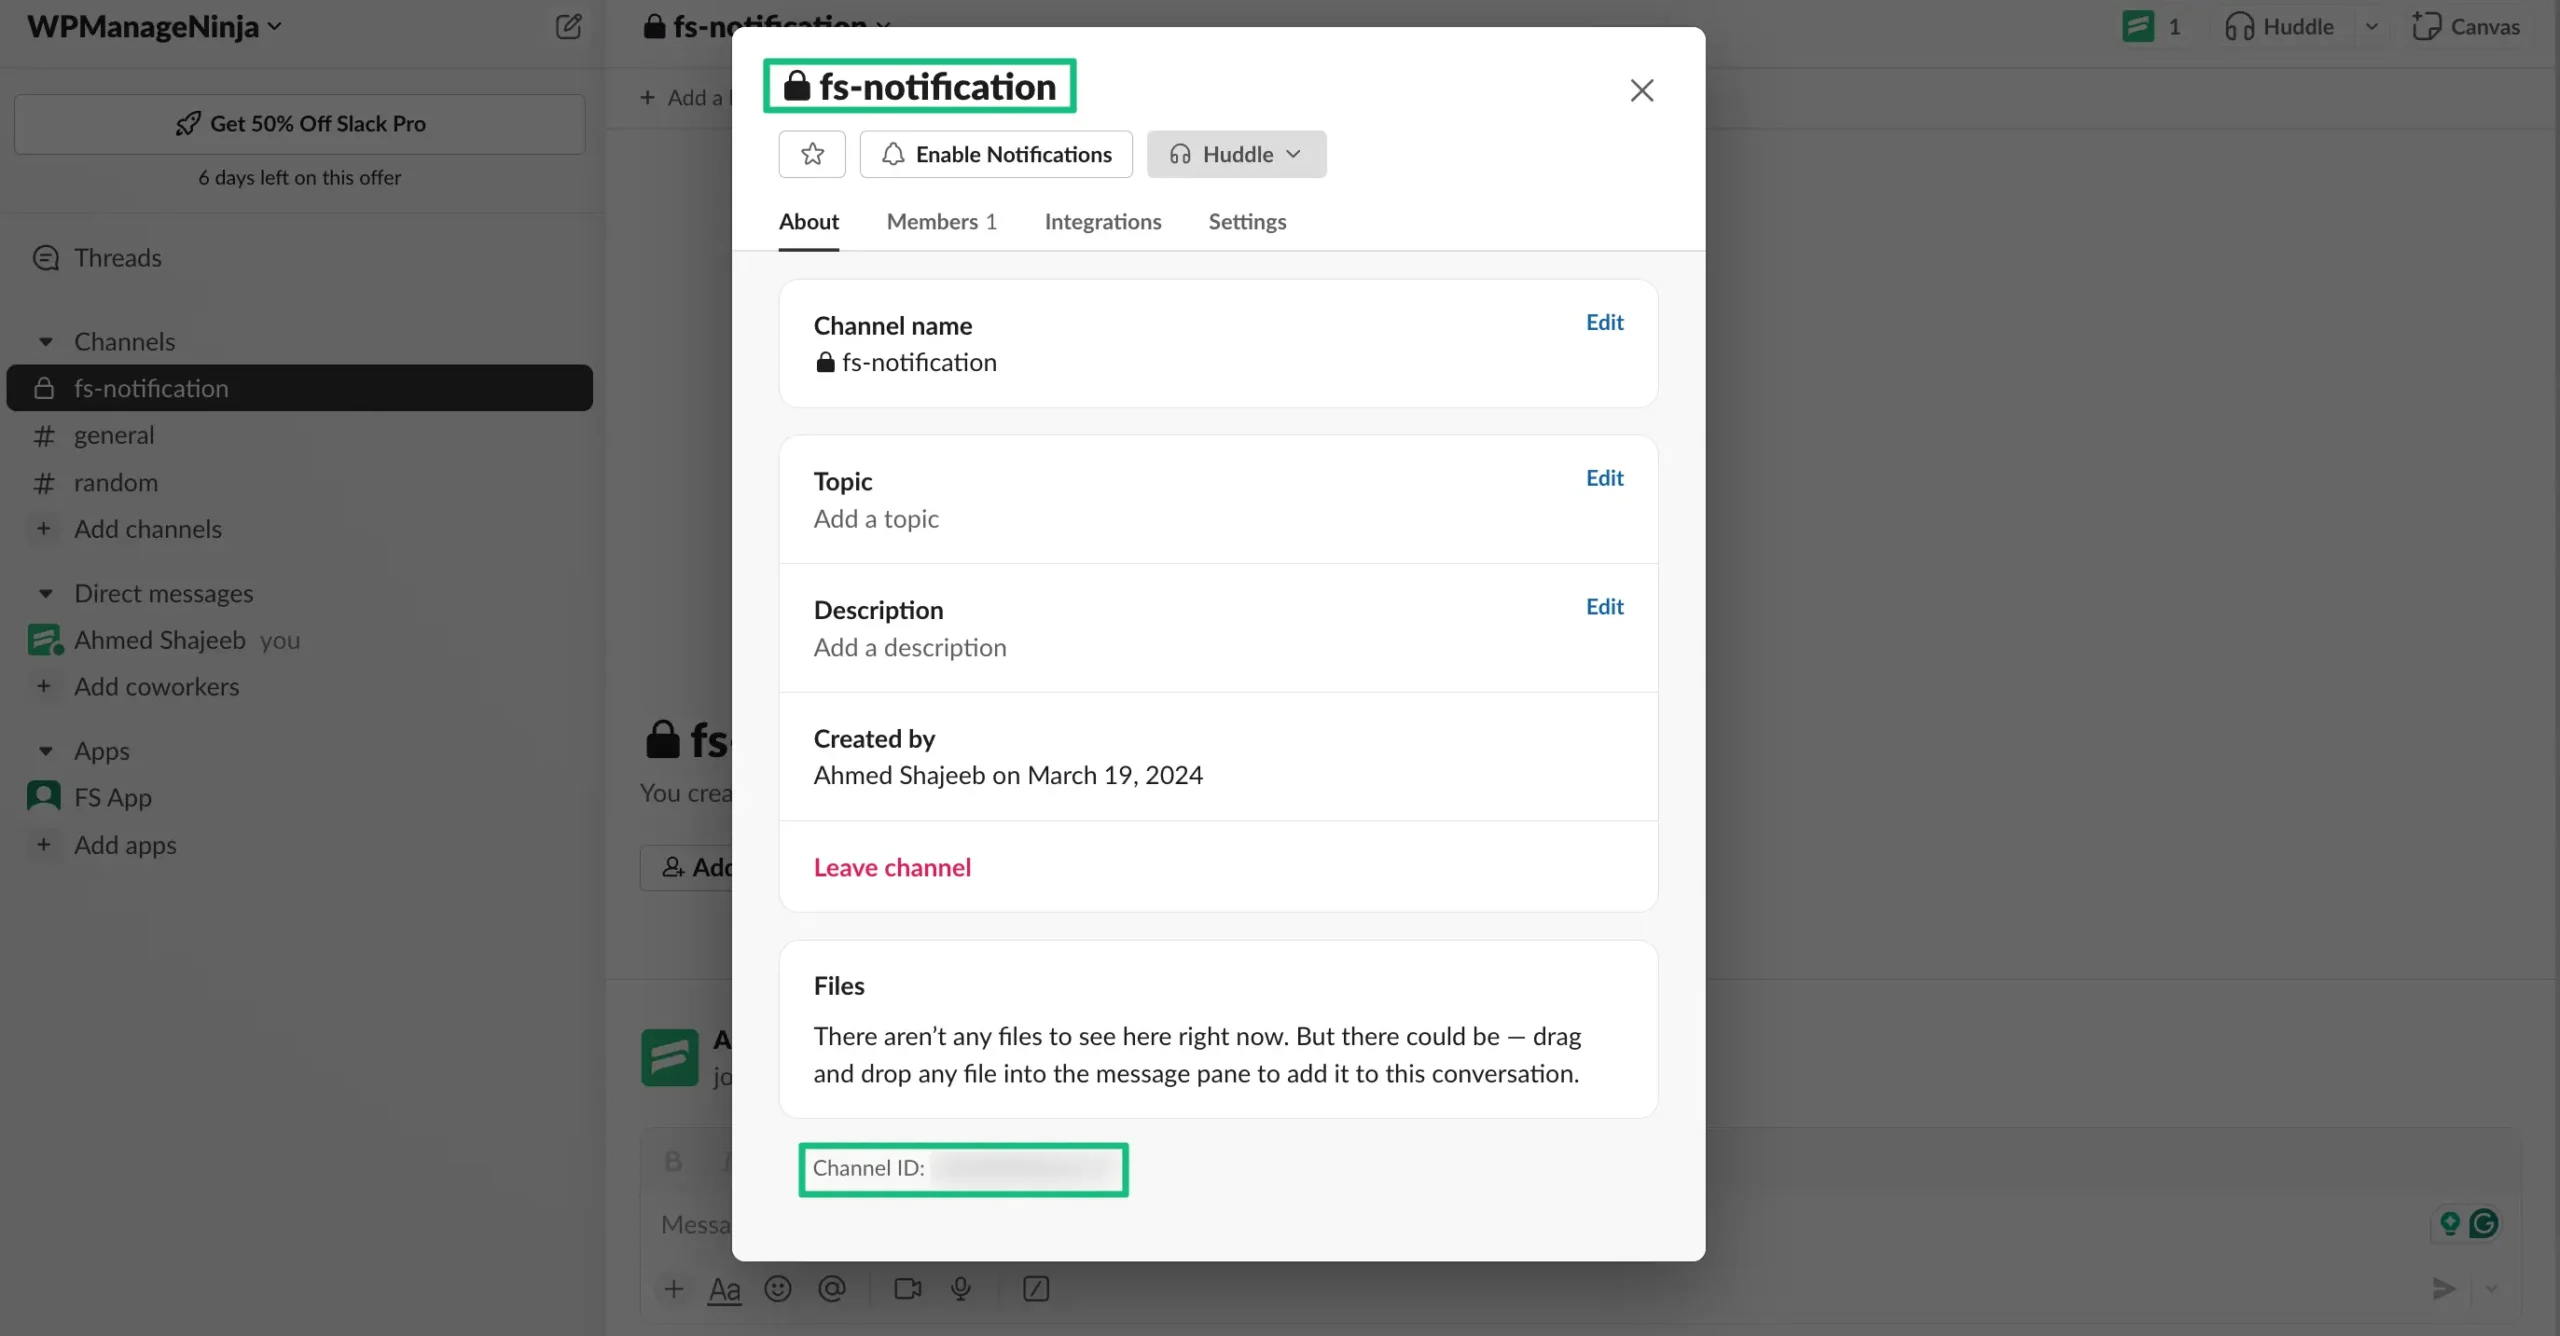
Now simply copy the Channel Name and Channel ID.
Configuring Slack in Fluent Support #
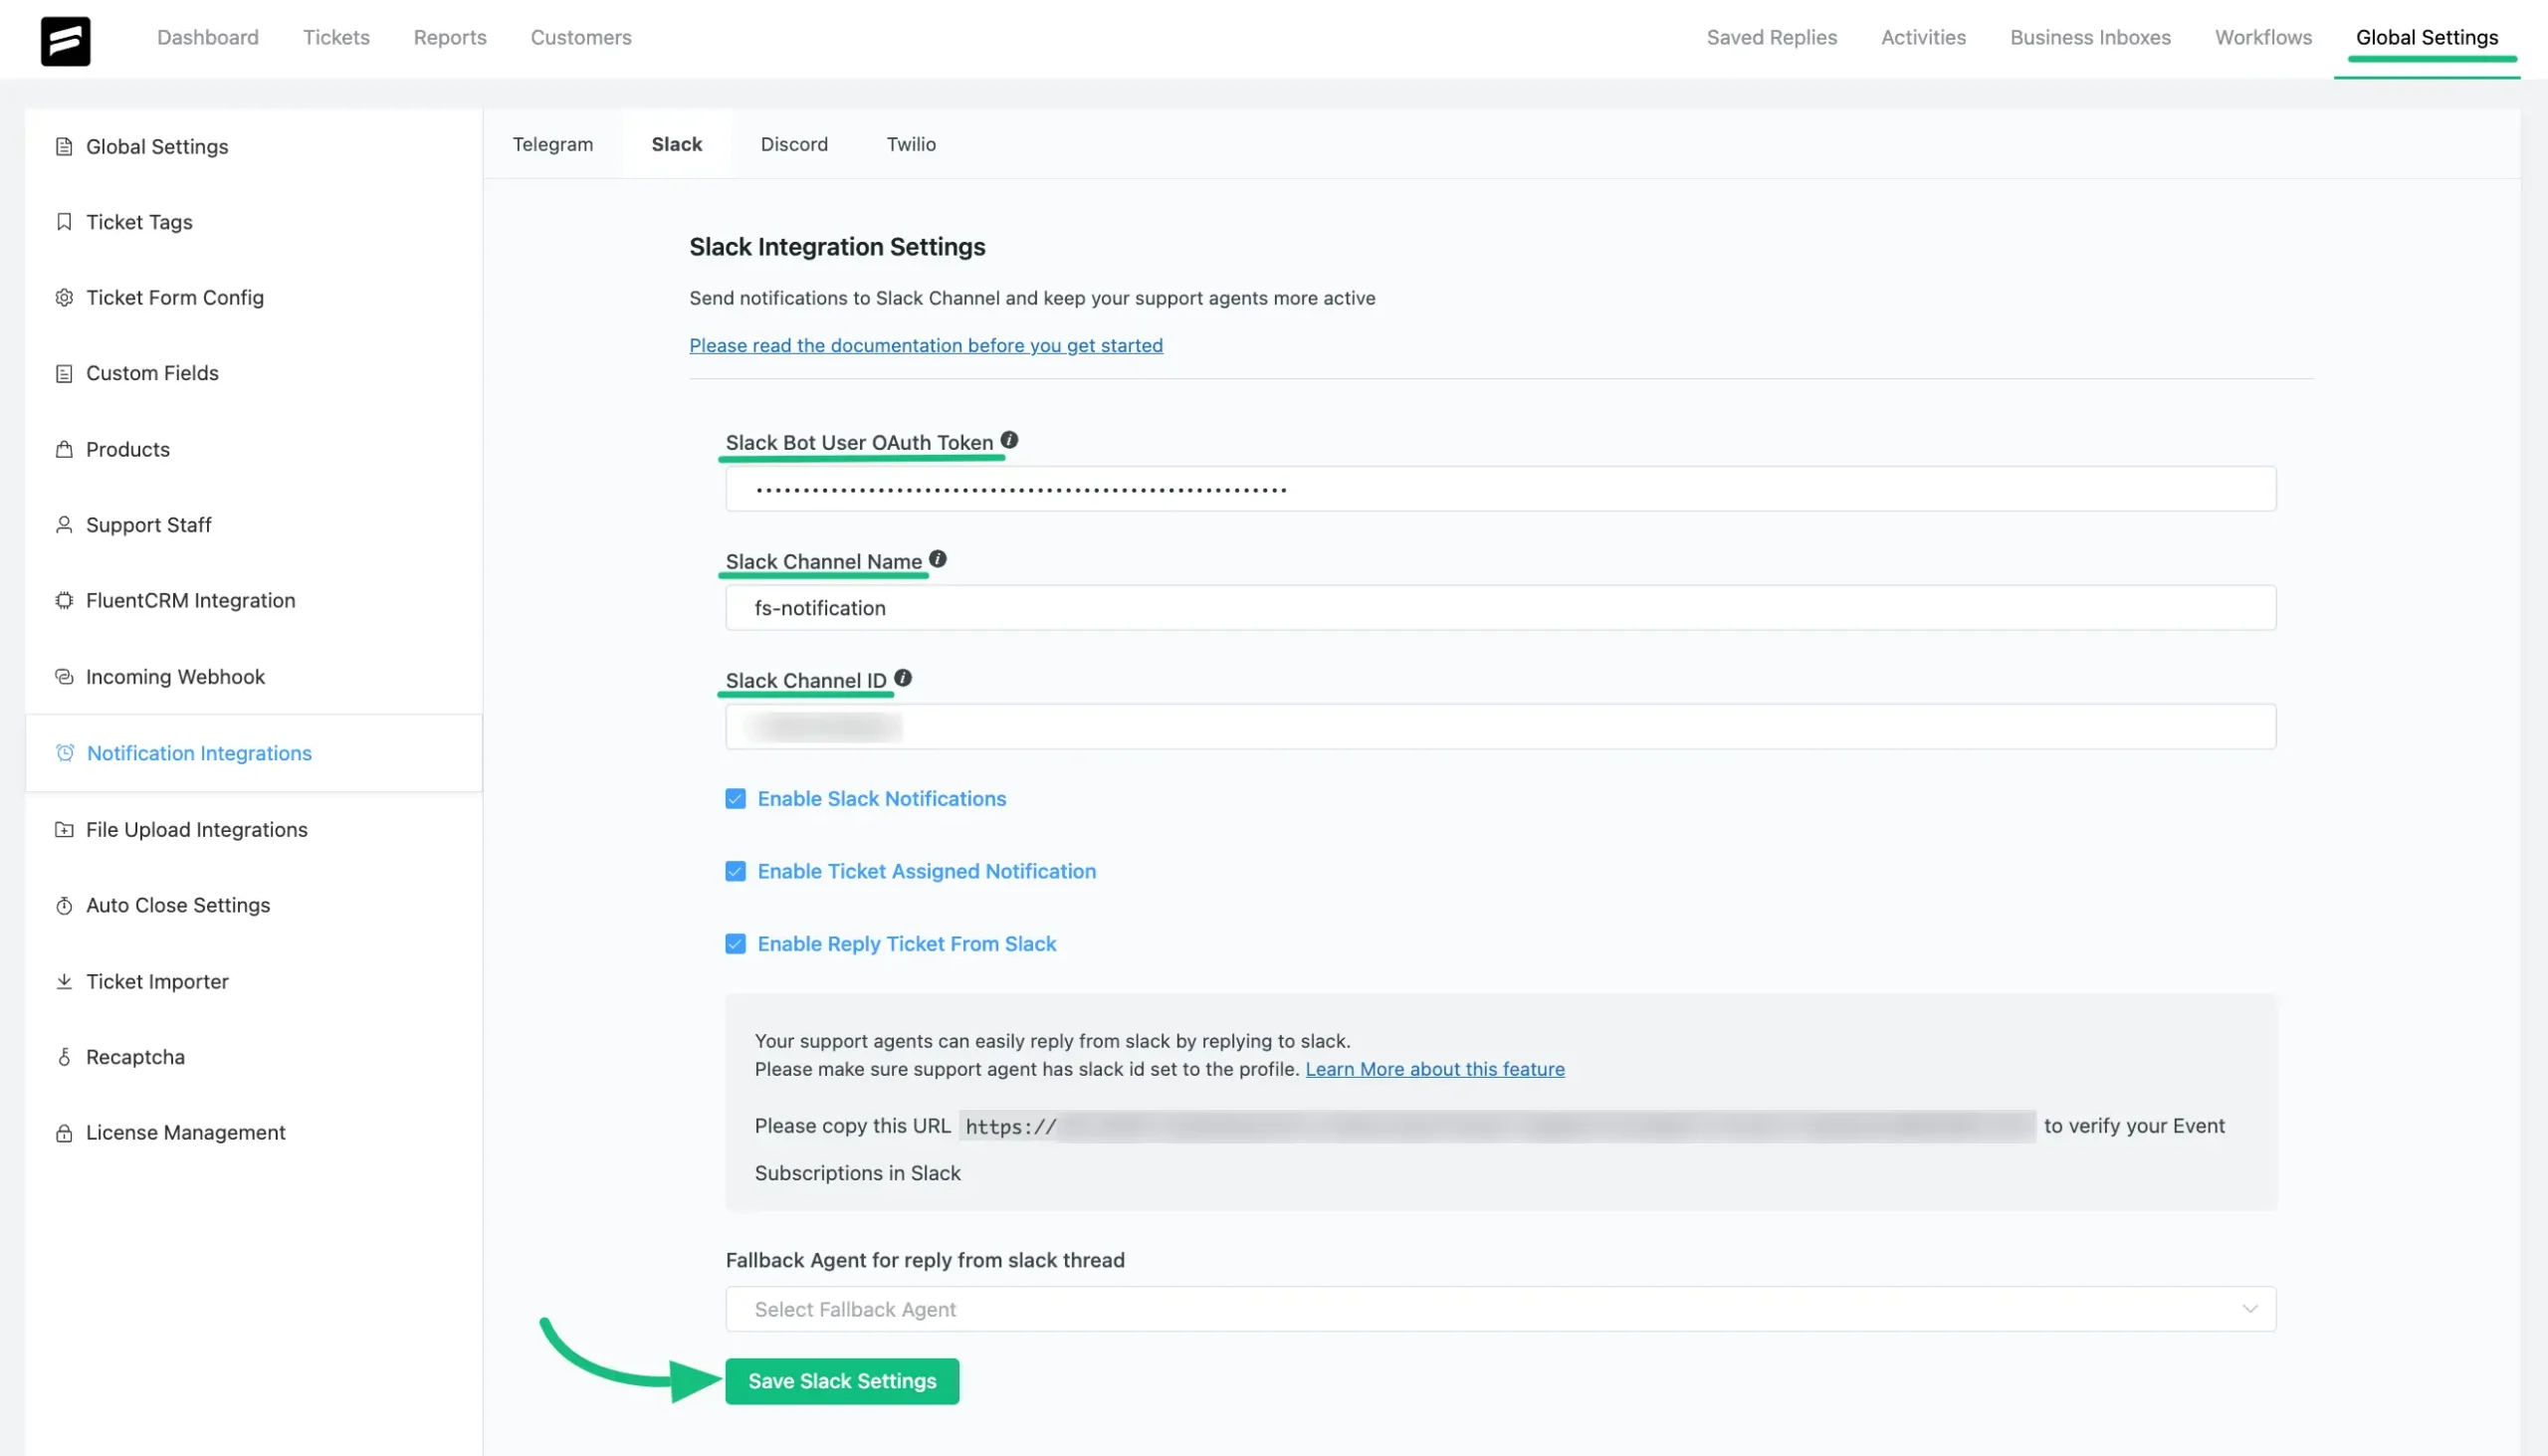
Go to the Global Settings from the Fluent Support Dashboard and select Notification Integrations from the left sidebar to find the Slack option. You will see the Slack Integration Settings page.
Now fill in all the fields with the necessary information that you have copied before. Also, you can enable the checkboxes if needed. Once you are done, do not forget to click on Save Slack Settings.
Slack Reply #
You can also send Reply for your business Tickets from your Slack channel. You need to follow some simple steps to complete the process.
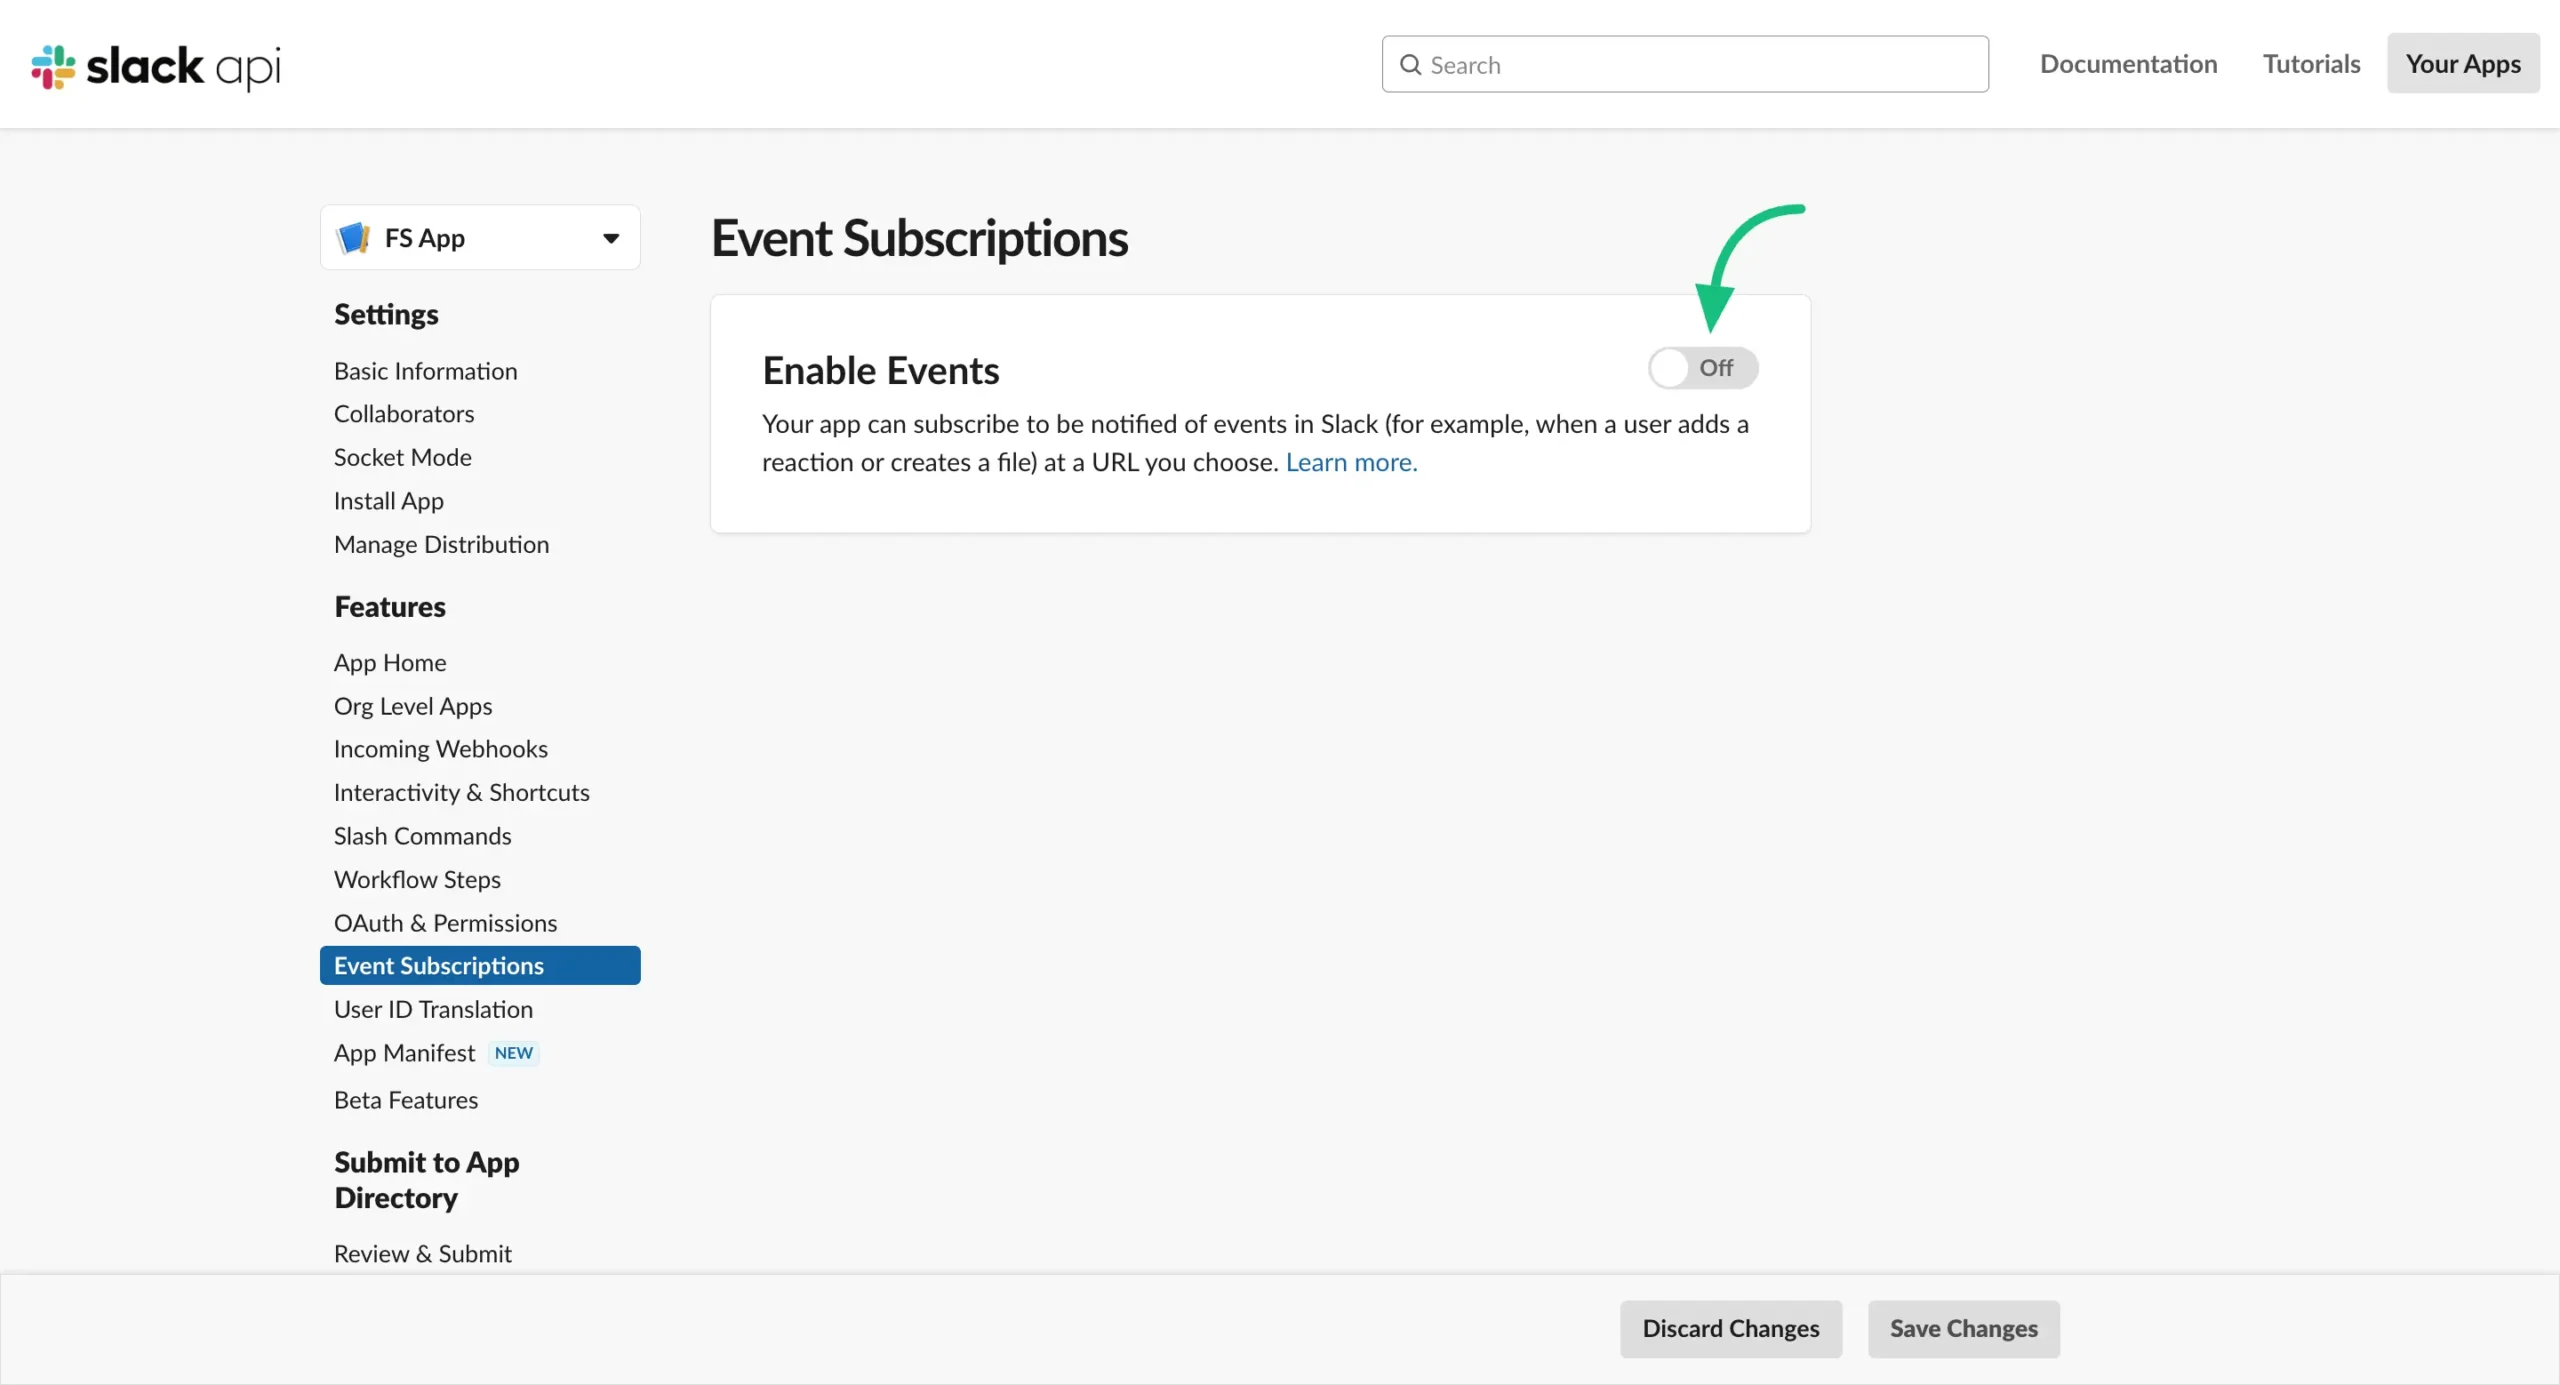
To send a reply from your Slack channel go to your Slack App settings. Now Search for the Event Subscriptions and enable the Event by clicking the Toggle button.
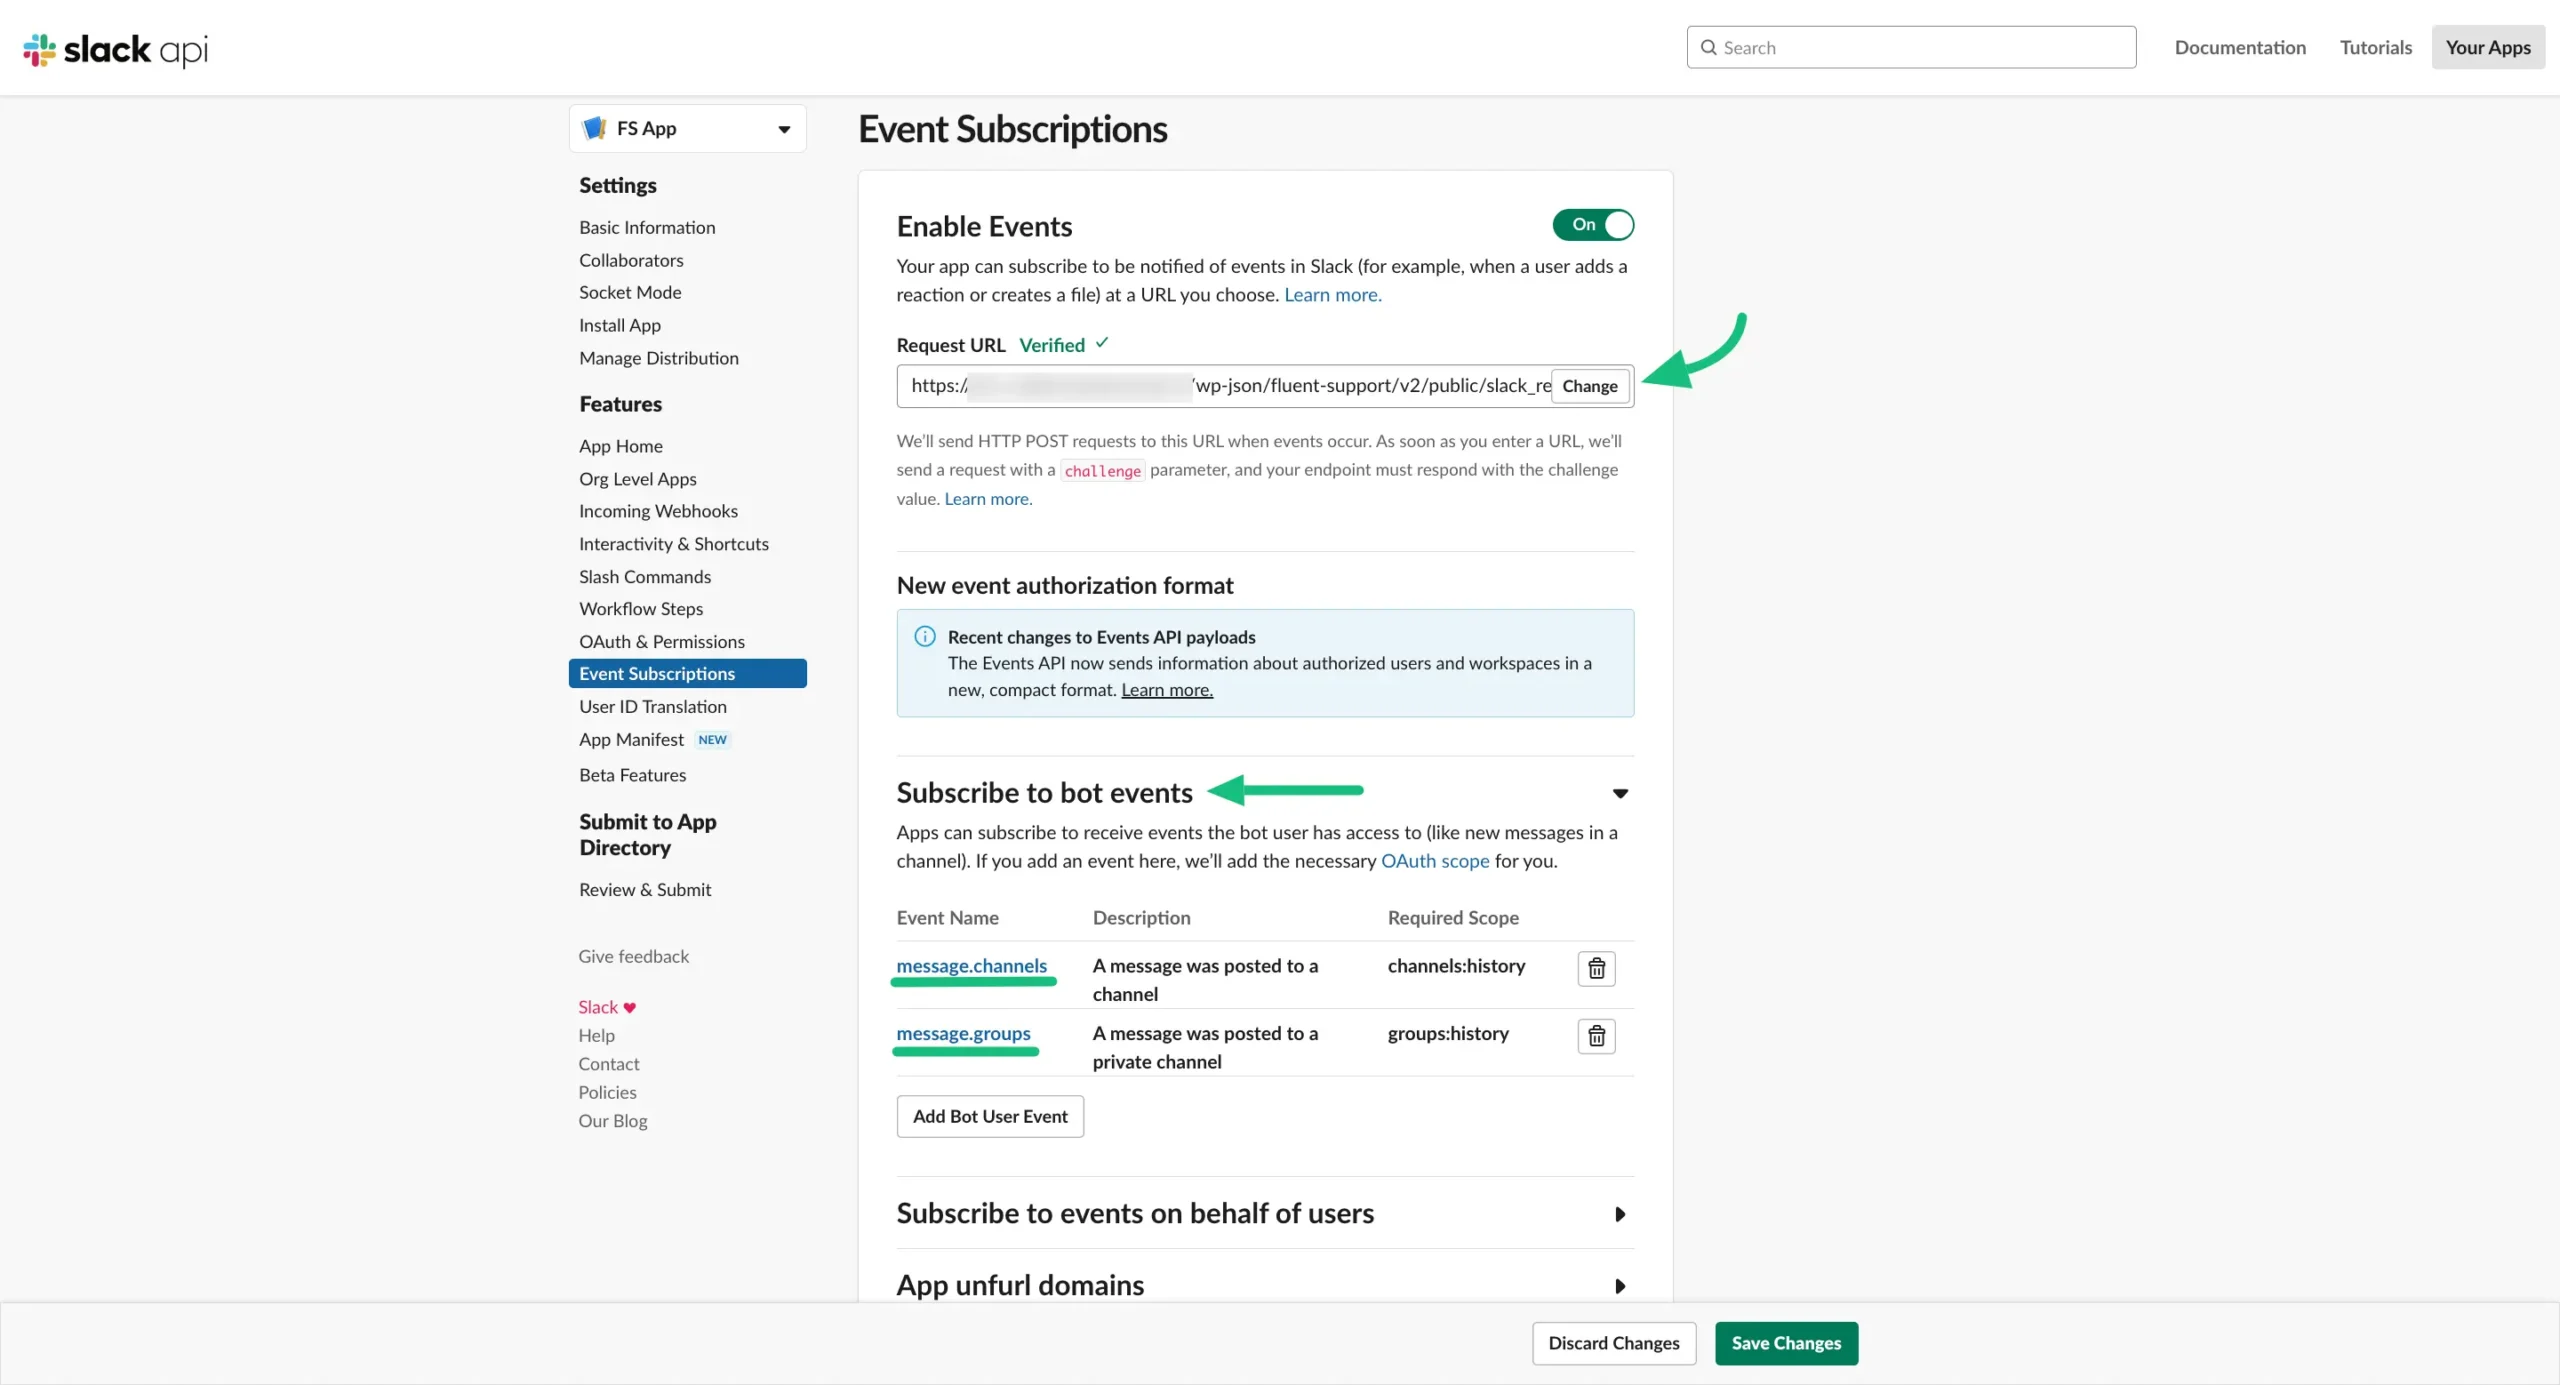
Now you will need to give a Redirected URL here. You will get this redirected URL in the Fluent Support Slack Configuration page. Get the URL from there and paste it here.
Also, here you need to add some Event bots. So click on the Add Bot User Event button.
Now add these two bot events message.channels & message.groups.
After all the changes you have been made, click on the Save Changes.
Now go to your channel and Copy the member ID.

Paste the member ID in your Fleunt Support Agents profile.
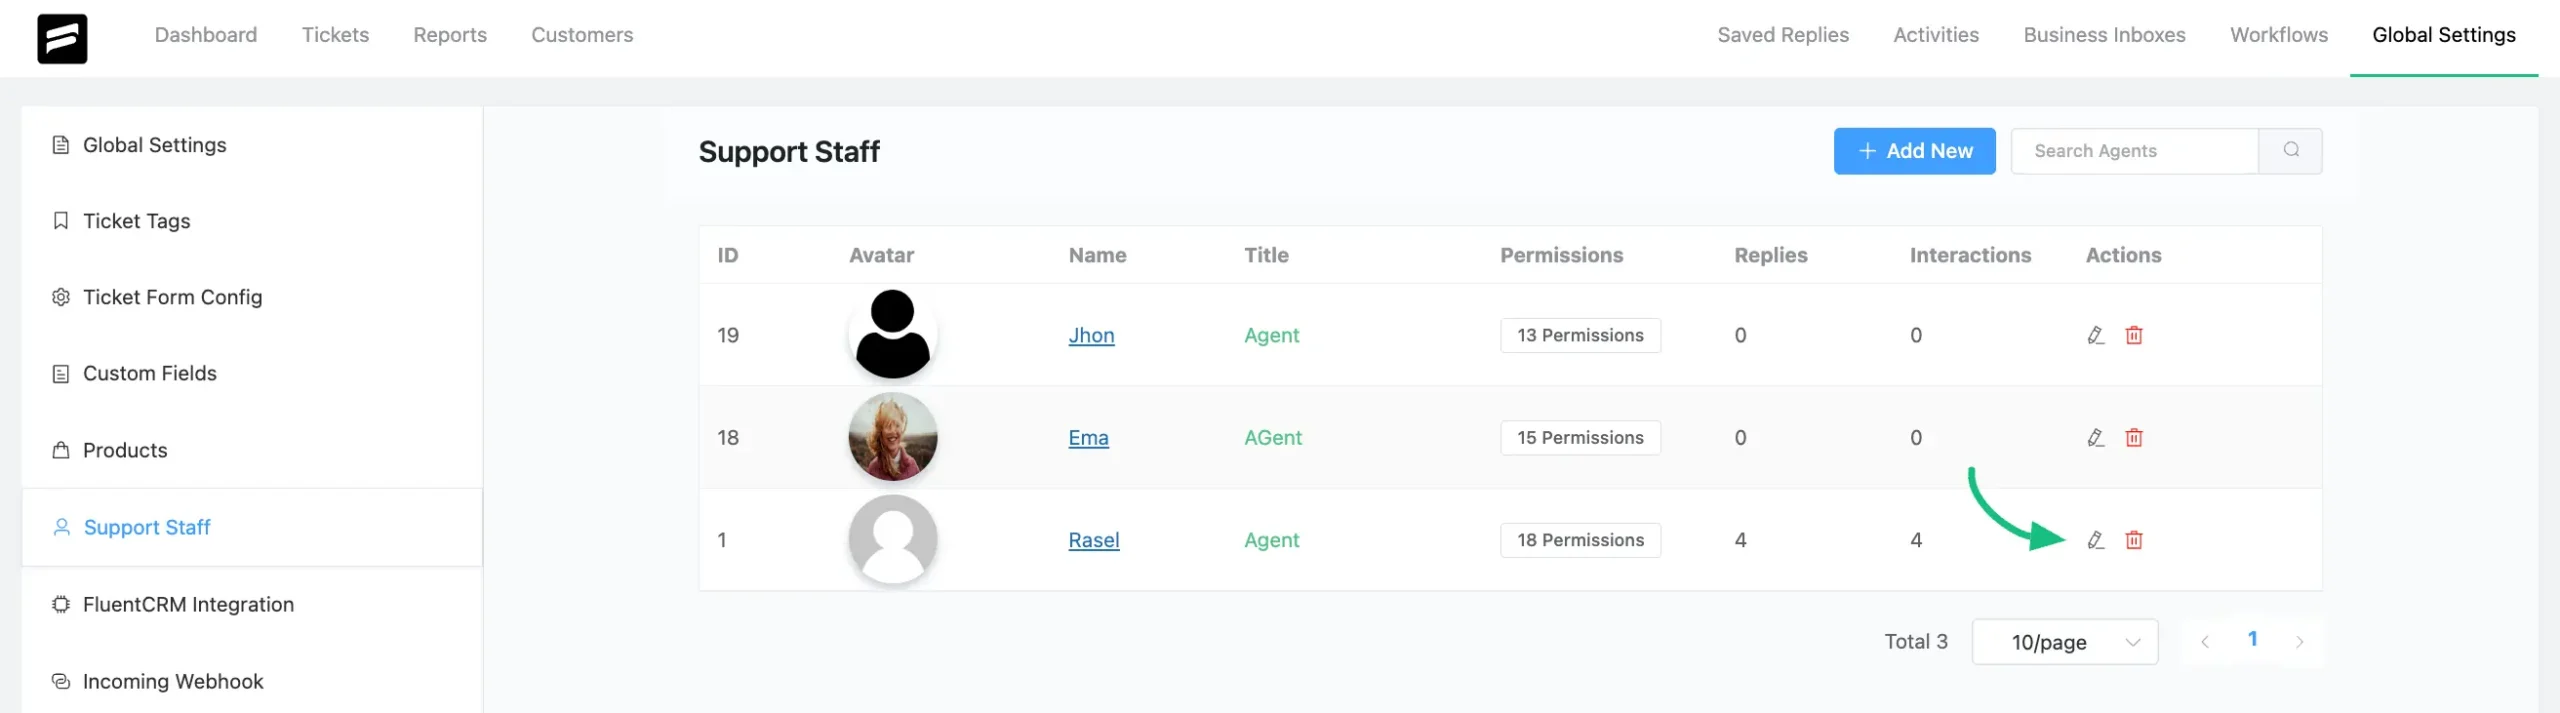
Click on the Edit button of the Agent profile you want to connect with Slack for the reply.
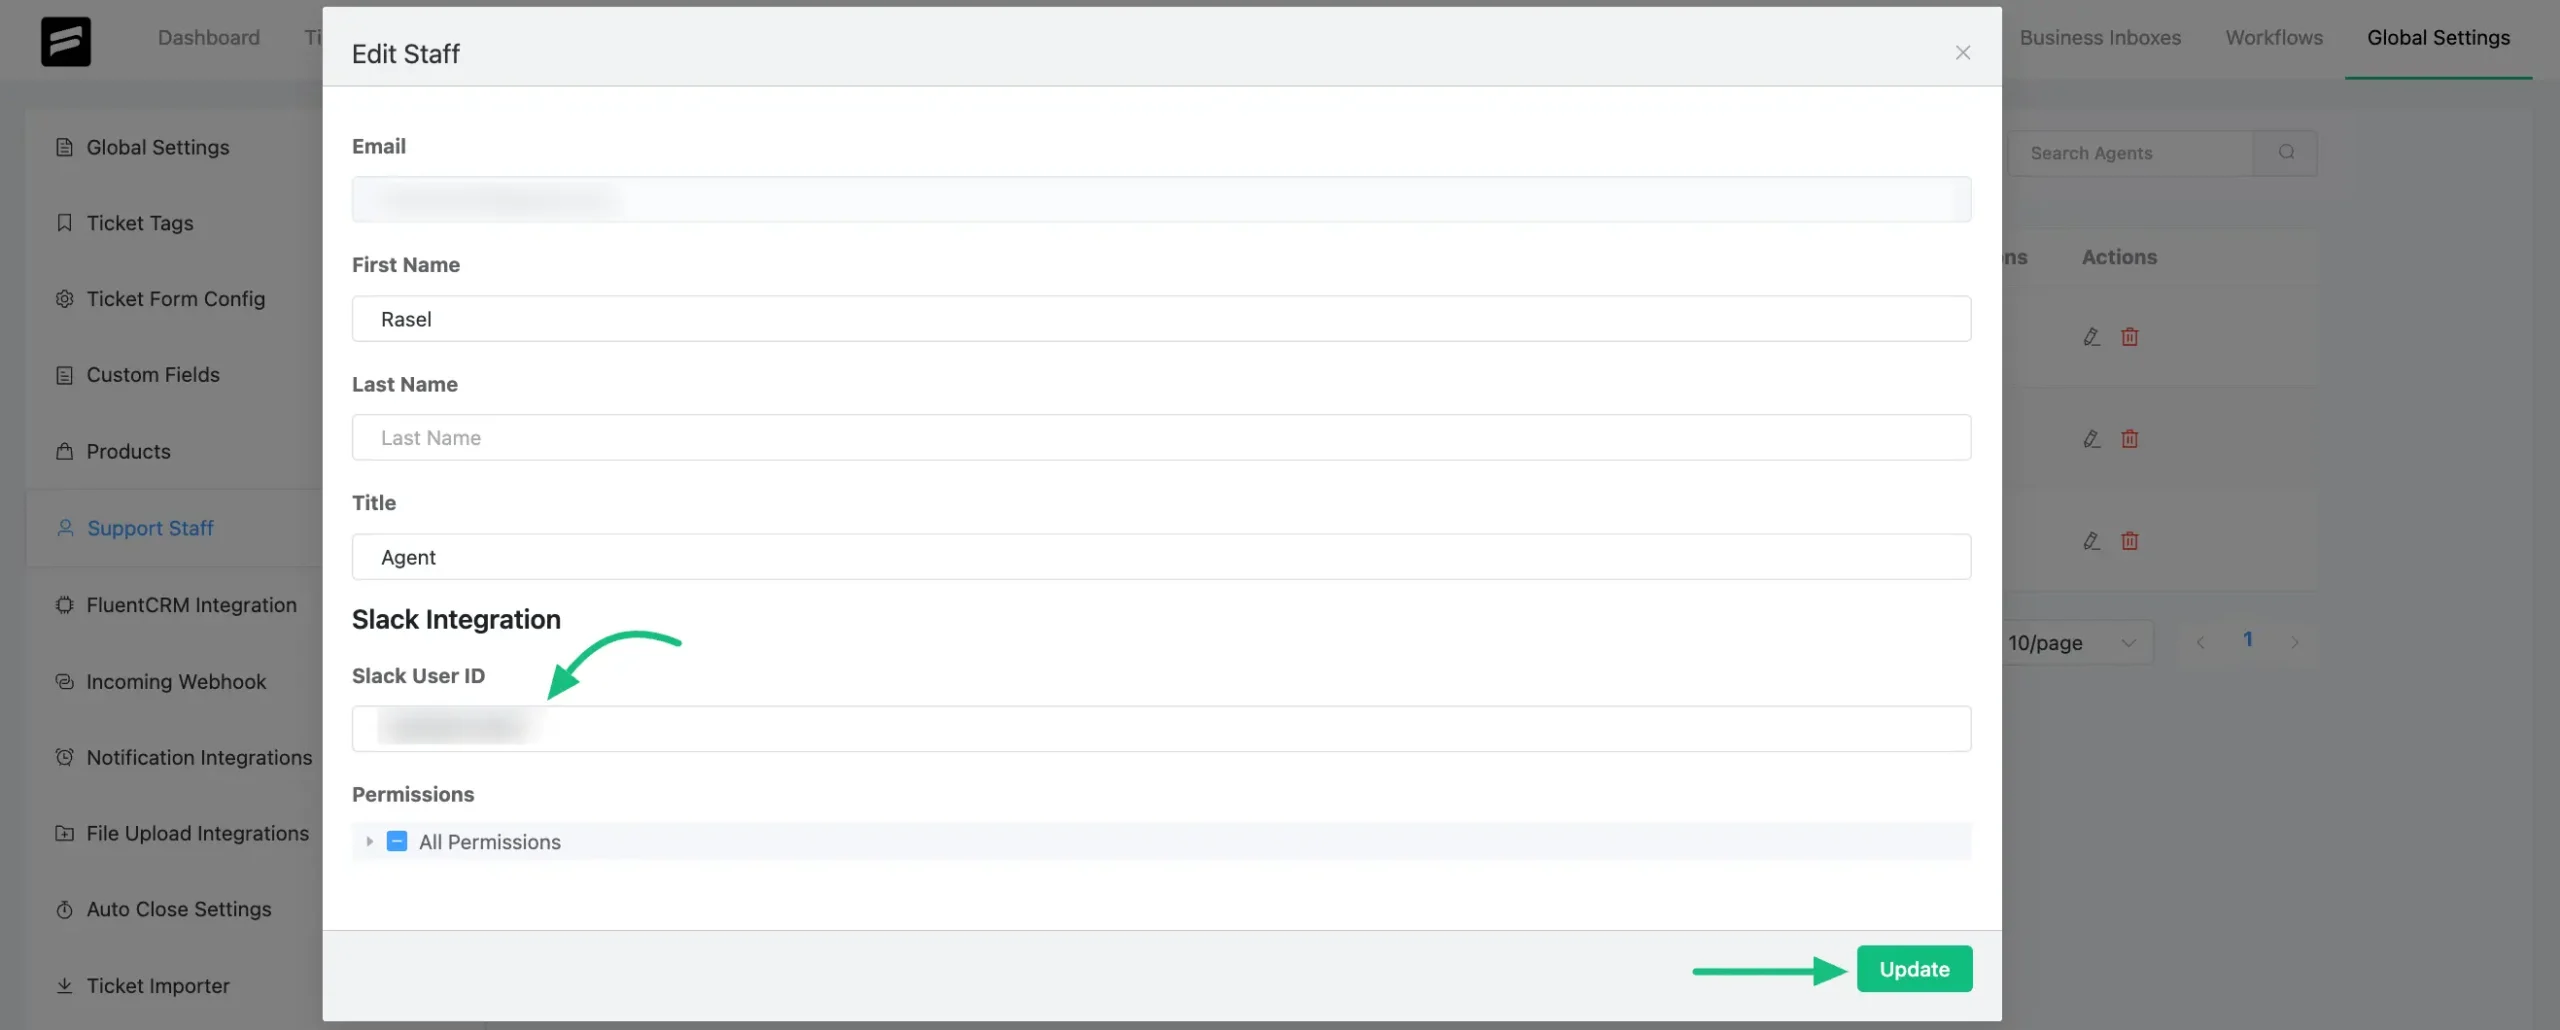
After going to the Edit option you will find a Slack User ID field, now paste your Slack member ID here and click on the Update button.
If you have any further questions, concerns, or suggestions, please do not hesitate to contact our @support team. Thank you.


