Fluent Support allows you to Merge multiple tickets into a single ticket from a single user with all responses included especially to remove the need for separate replies. This article will guide you through the whole process of doing it.
Merge Tickets #
To learn how you can Merge Tickets using Fluent Support, follow the steps with the screenshots & GIFs below —
Remember, only those with permission can merge tickets. Also, once you merge all tickets, you can’t Unmerge them.
First, go to your Fluent Support and click on Tickets.
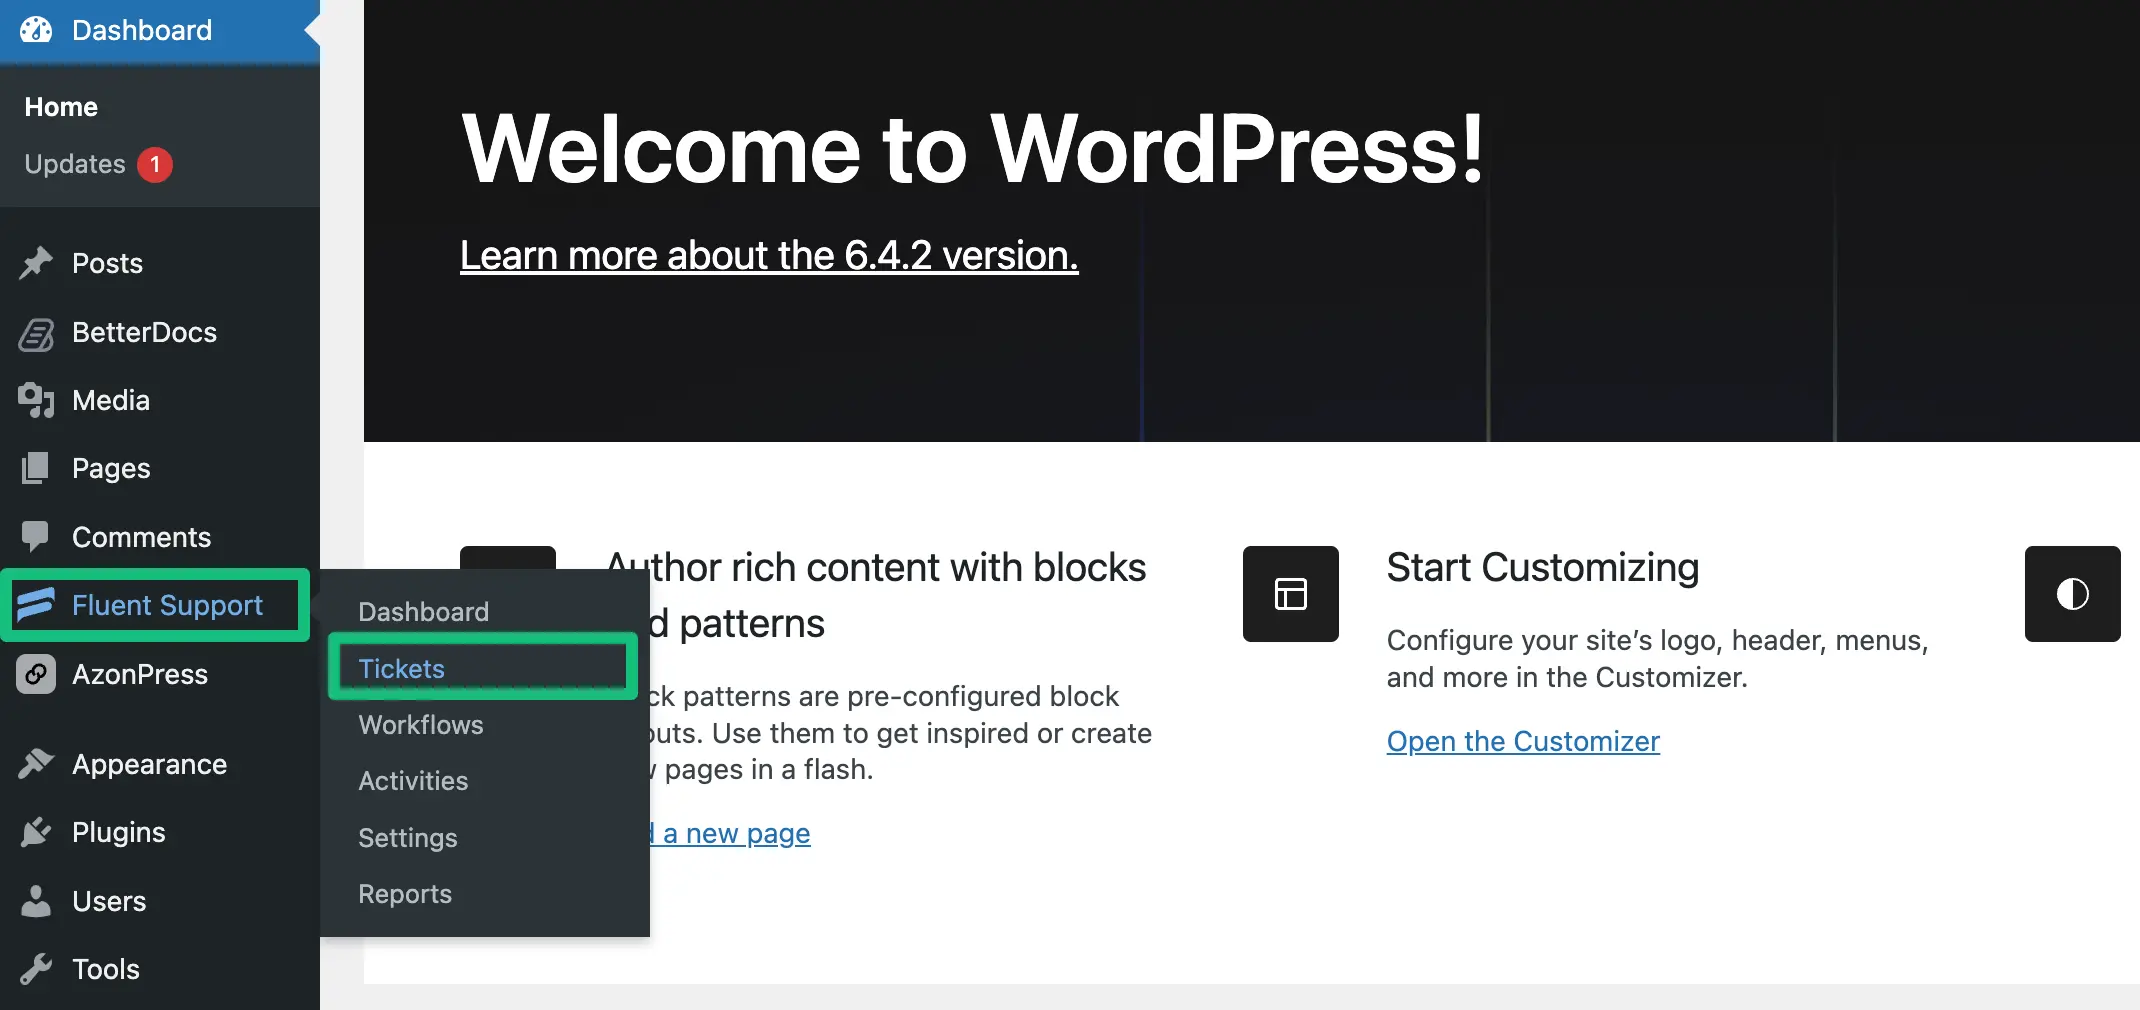
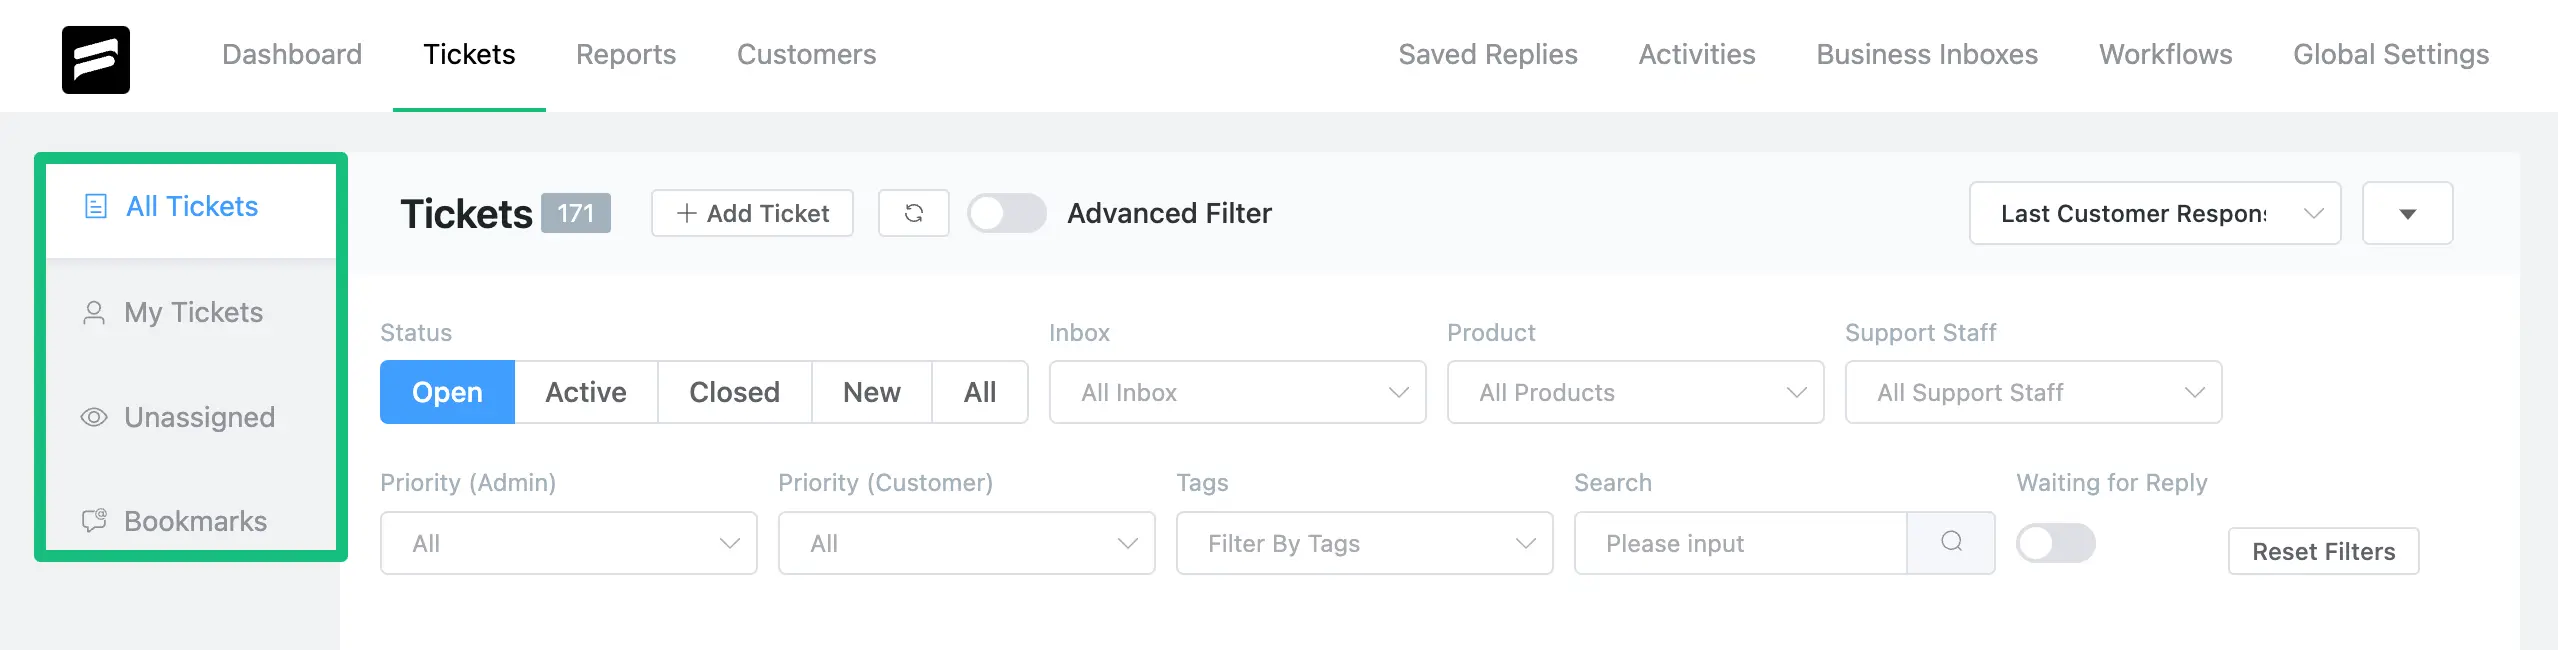
Now go to your desired ticket section from My Tickets, All Tickets, Unassigned, or Bookmarks.
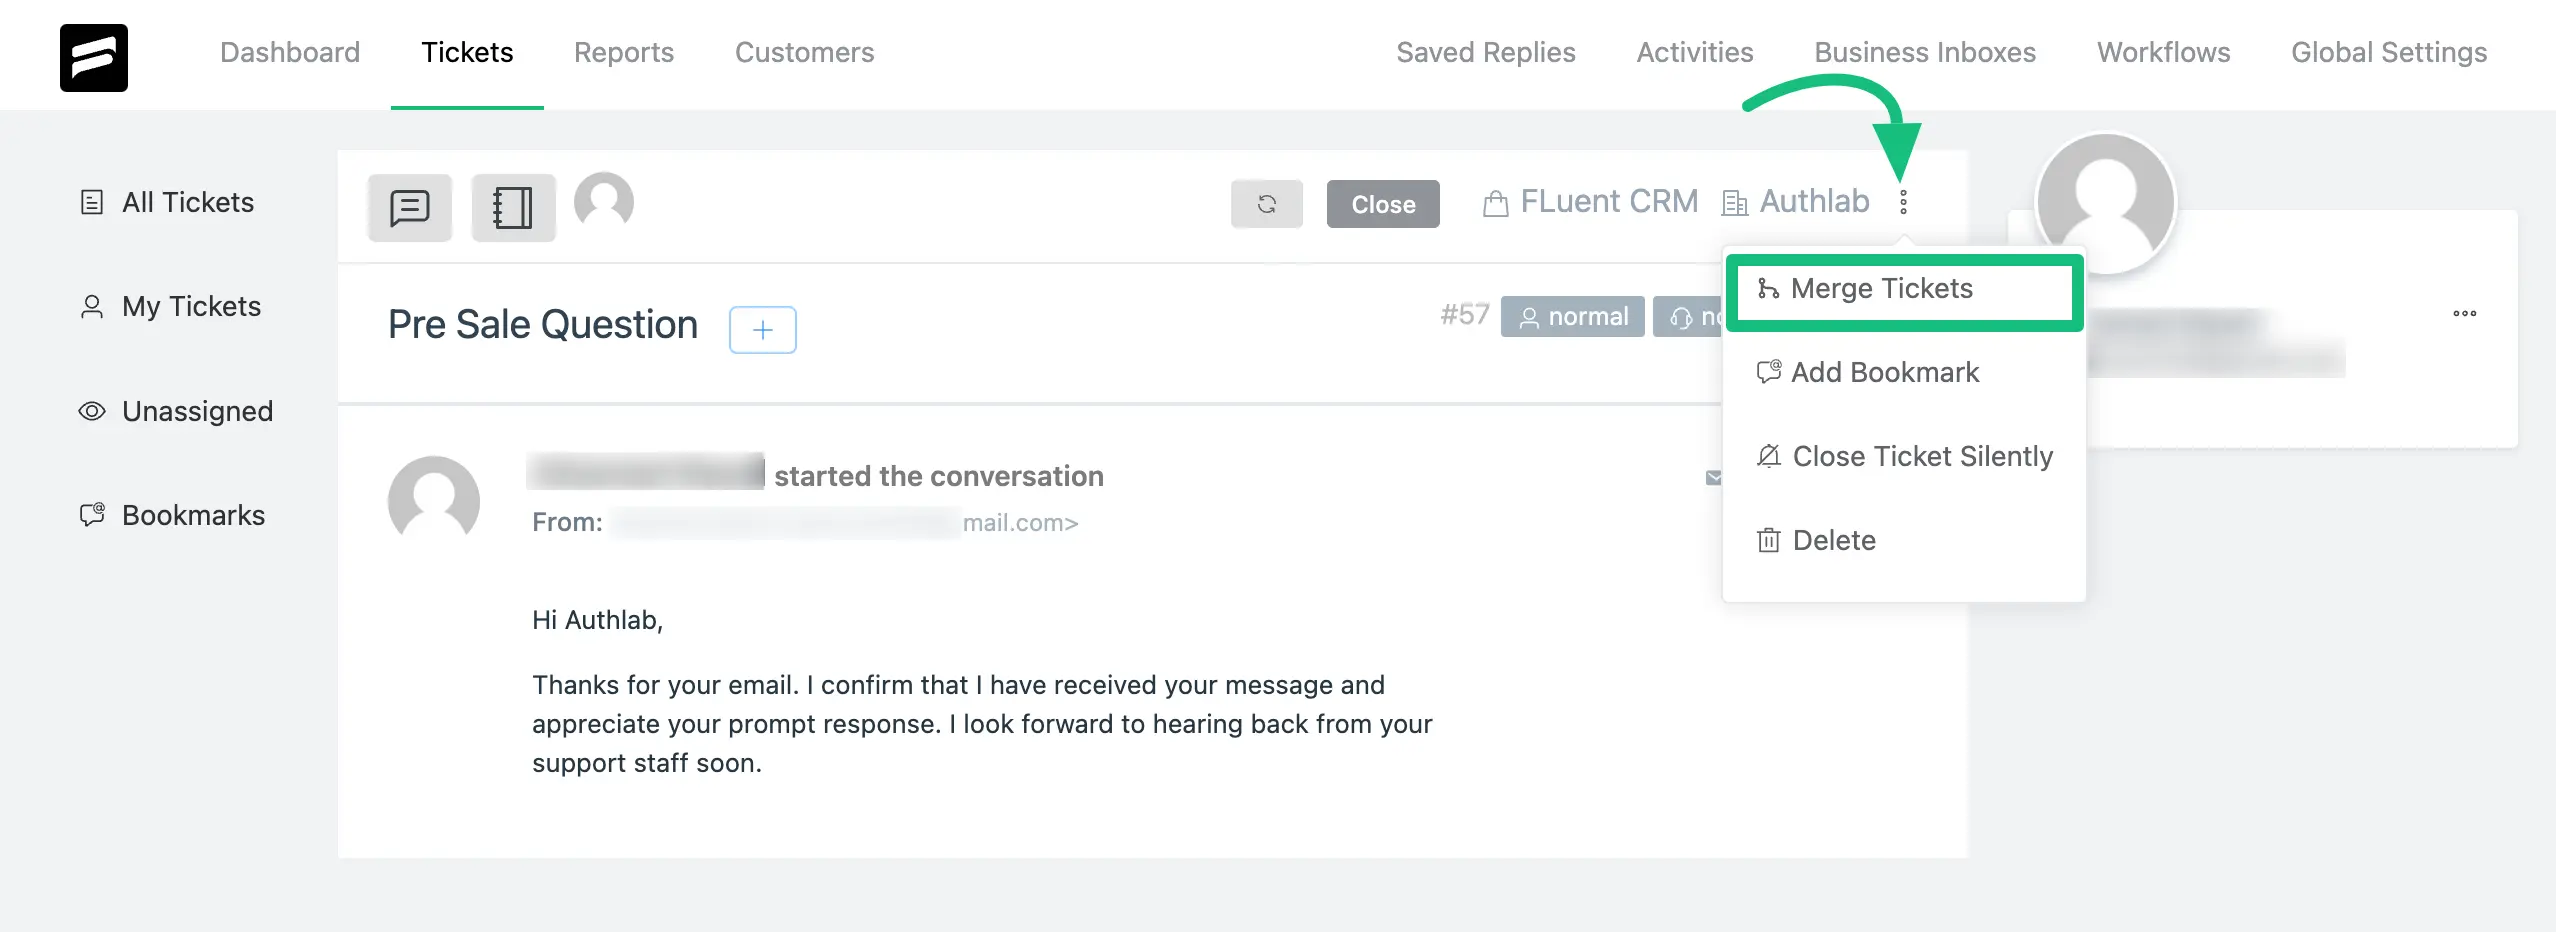
Open the specific ticket you want to merge, and click on the Three dot Icon next to the mailbox option. Now, select ”Merge Tickets” and a popup page will appear on the top.
The popup will display all the tickets opened by a single user under ID, Title, and Status options to merge.

You can select all the tickets in bulk at once or individually based on your needs.
Click on and the ticket will be combined with the previous one. Now you can respond to all merged tickets at once with a single response for all inquiries.
If you have any further questions, concerns, or suggestions, please do not hesitate to contact our @support team. Thank you.


