Fluent Support is a WordPress plugin offering an efficient support ticketing system for fast, reliable, and effective customer support. This article will guide you through installing and activating Fluent Support on your WordPress website. Please follow the instructions for a successful installation.
Add Fluent Support To Your WordPress Site #
In your WordPress site, you can add the Fluent Support plugin in two ways: by adding it directly from the WordPress Plugin directory or uploading it using a Zip file.
You can get started with the free version of Fluent Support,
or if you want to purchase the Fluent Support Pro, check here.
Instructions for both Methods of Fluent Support installation are shown below —
Install from the WordPress Plugin Directory #
To learn how to install and activate Fluent Support directly from the WordPress Plugin directory into your WordPress site, follow the steps with the screenshots below —
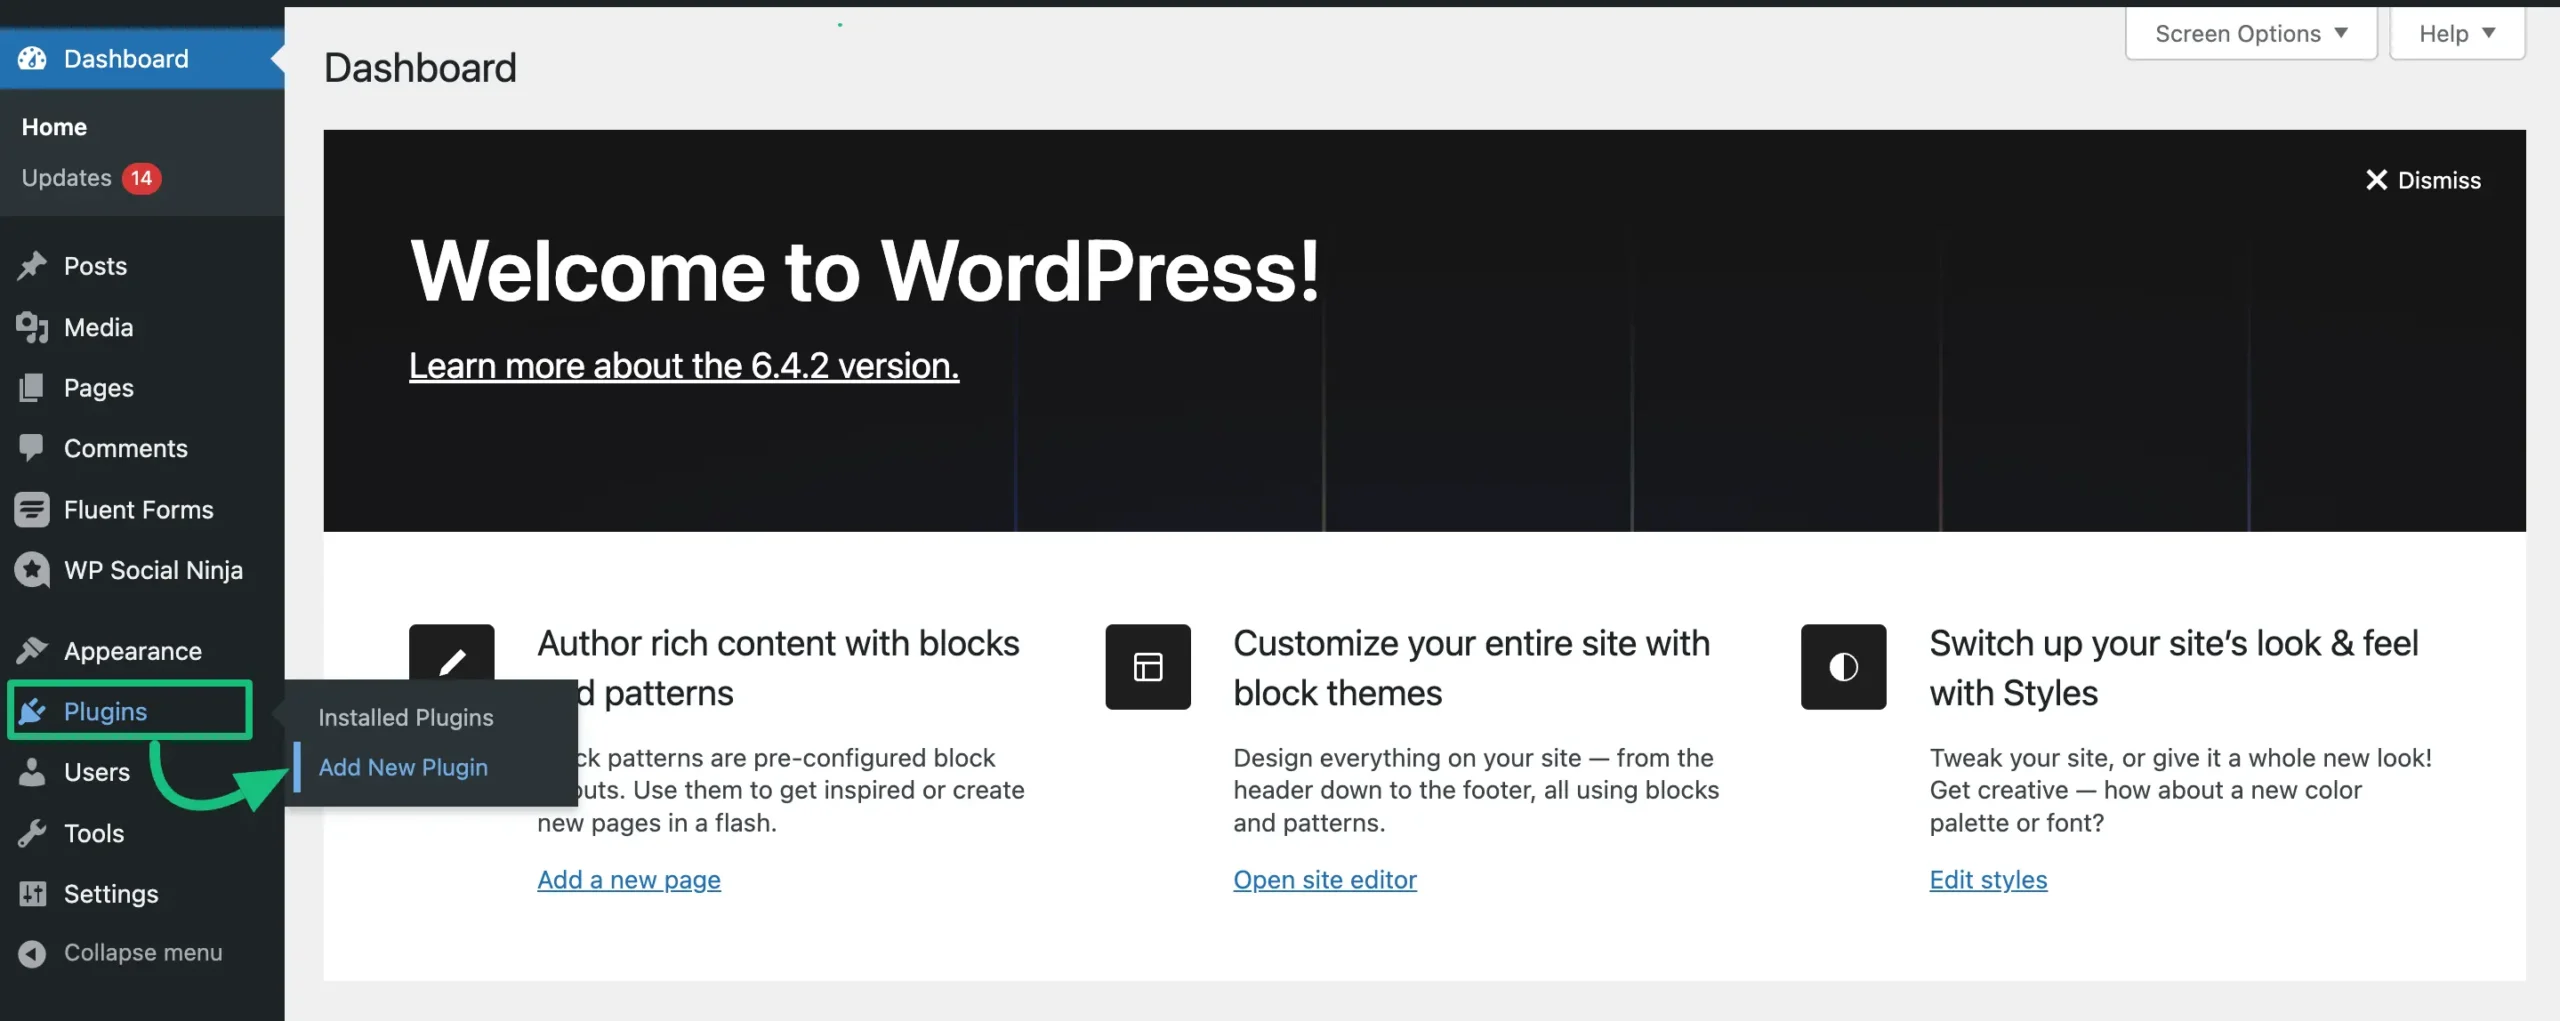
First, go to the Plugins from your WordPress dashboard & click on the Add New Plugin.
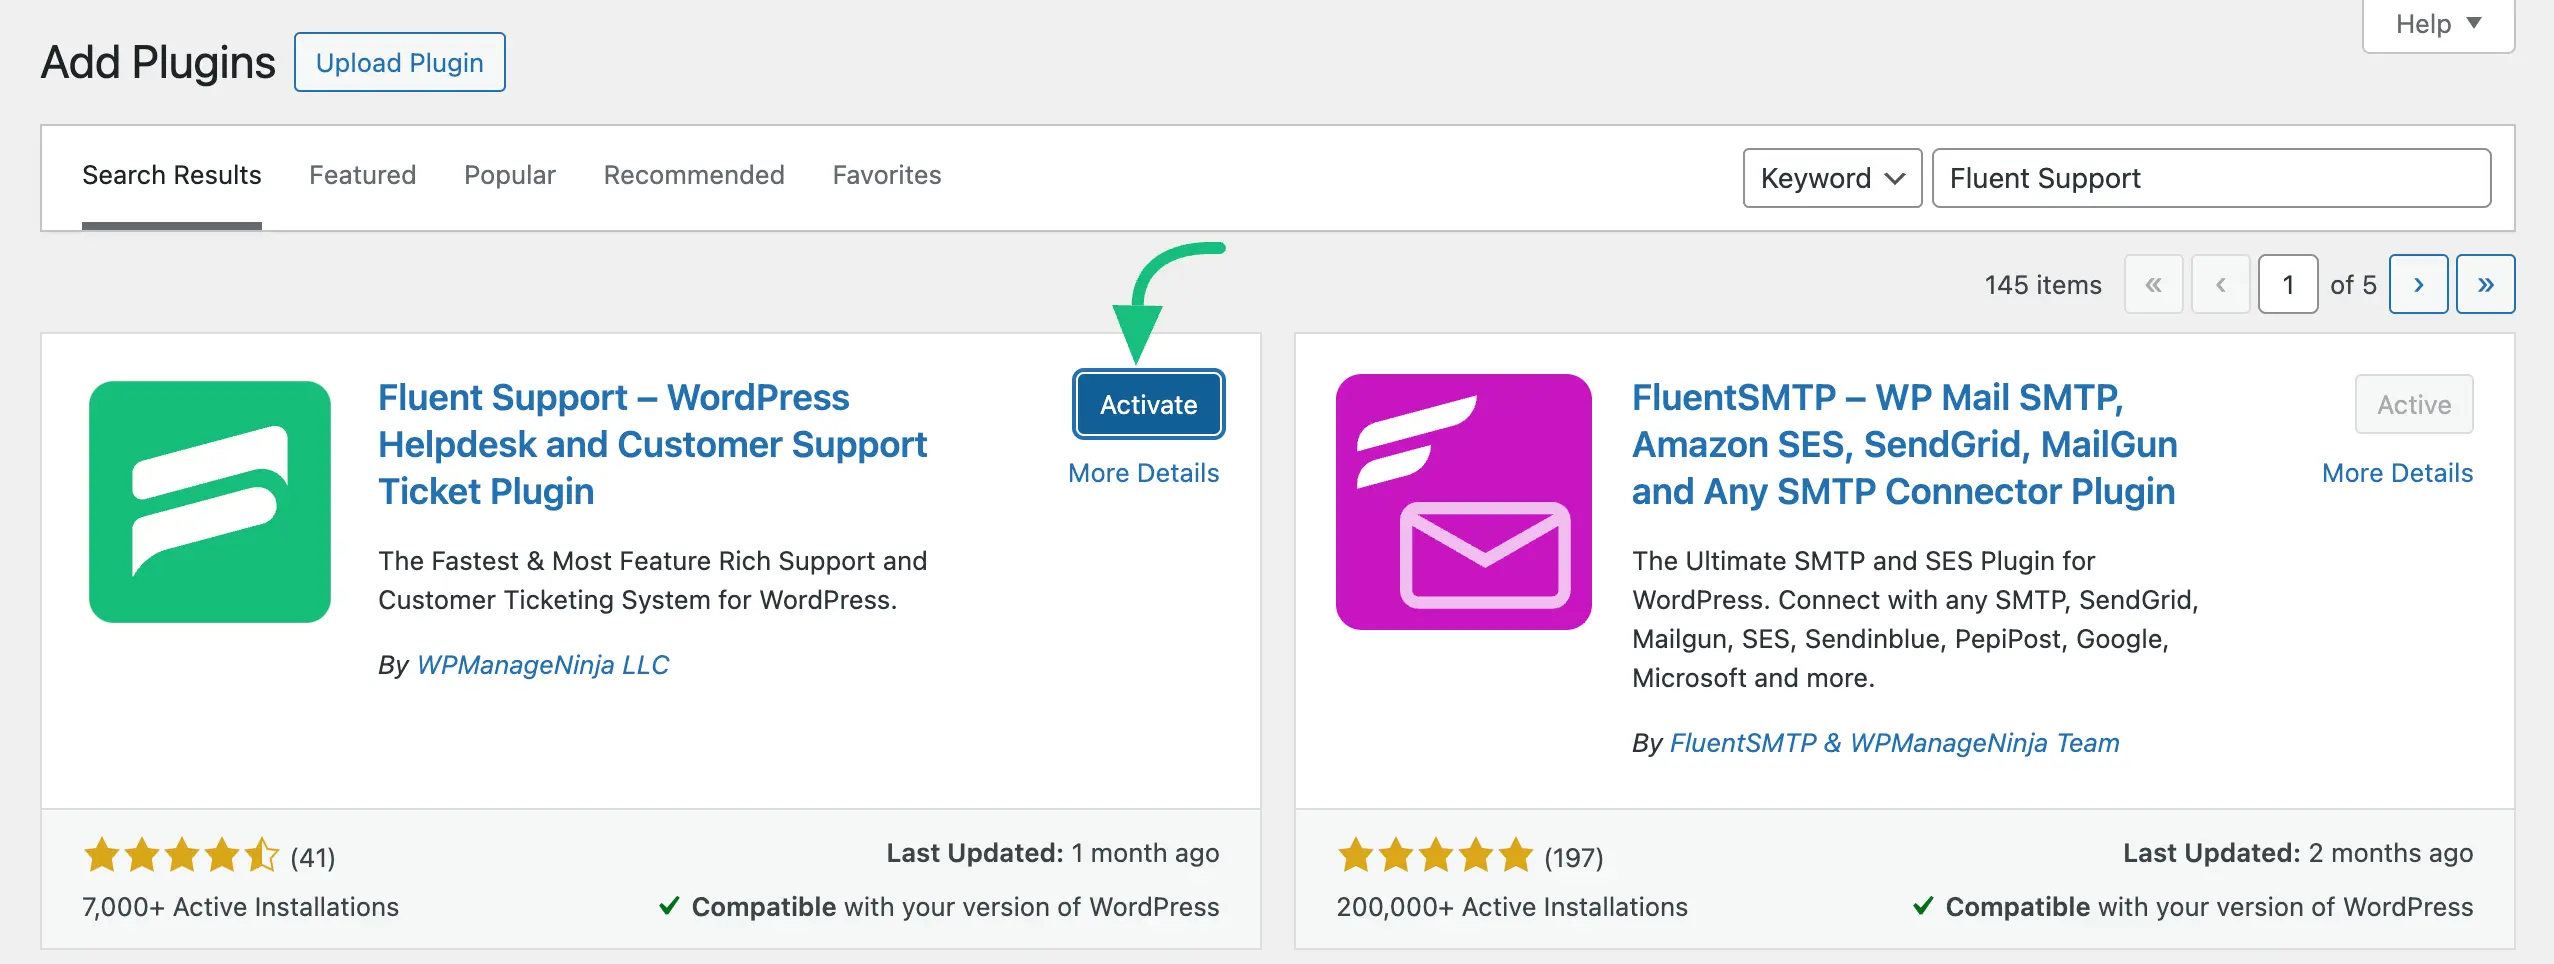
Then, type Fluent Support in the search box and it will appear on the plugins page. Now, click on the Install Now button.

After installing, click on the Activate button. Done! Your Fluent Support plugin is installed and activated smoothly.
Install by Uploading the Zip File #
To install and activate the Fluent Support PRO version, you must upload the Zip file manually. Otherwise, you can add the free version simply from the WordPress Plugin directory as shown above.
To learn how to install and activate Fluent Support (PRO) on a WordPress Site using the Zip file,
check this Documentation.
Update Fluent Support #
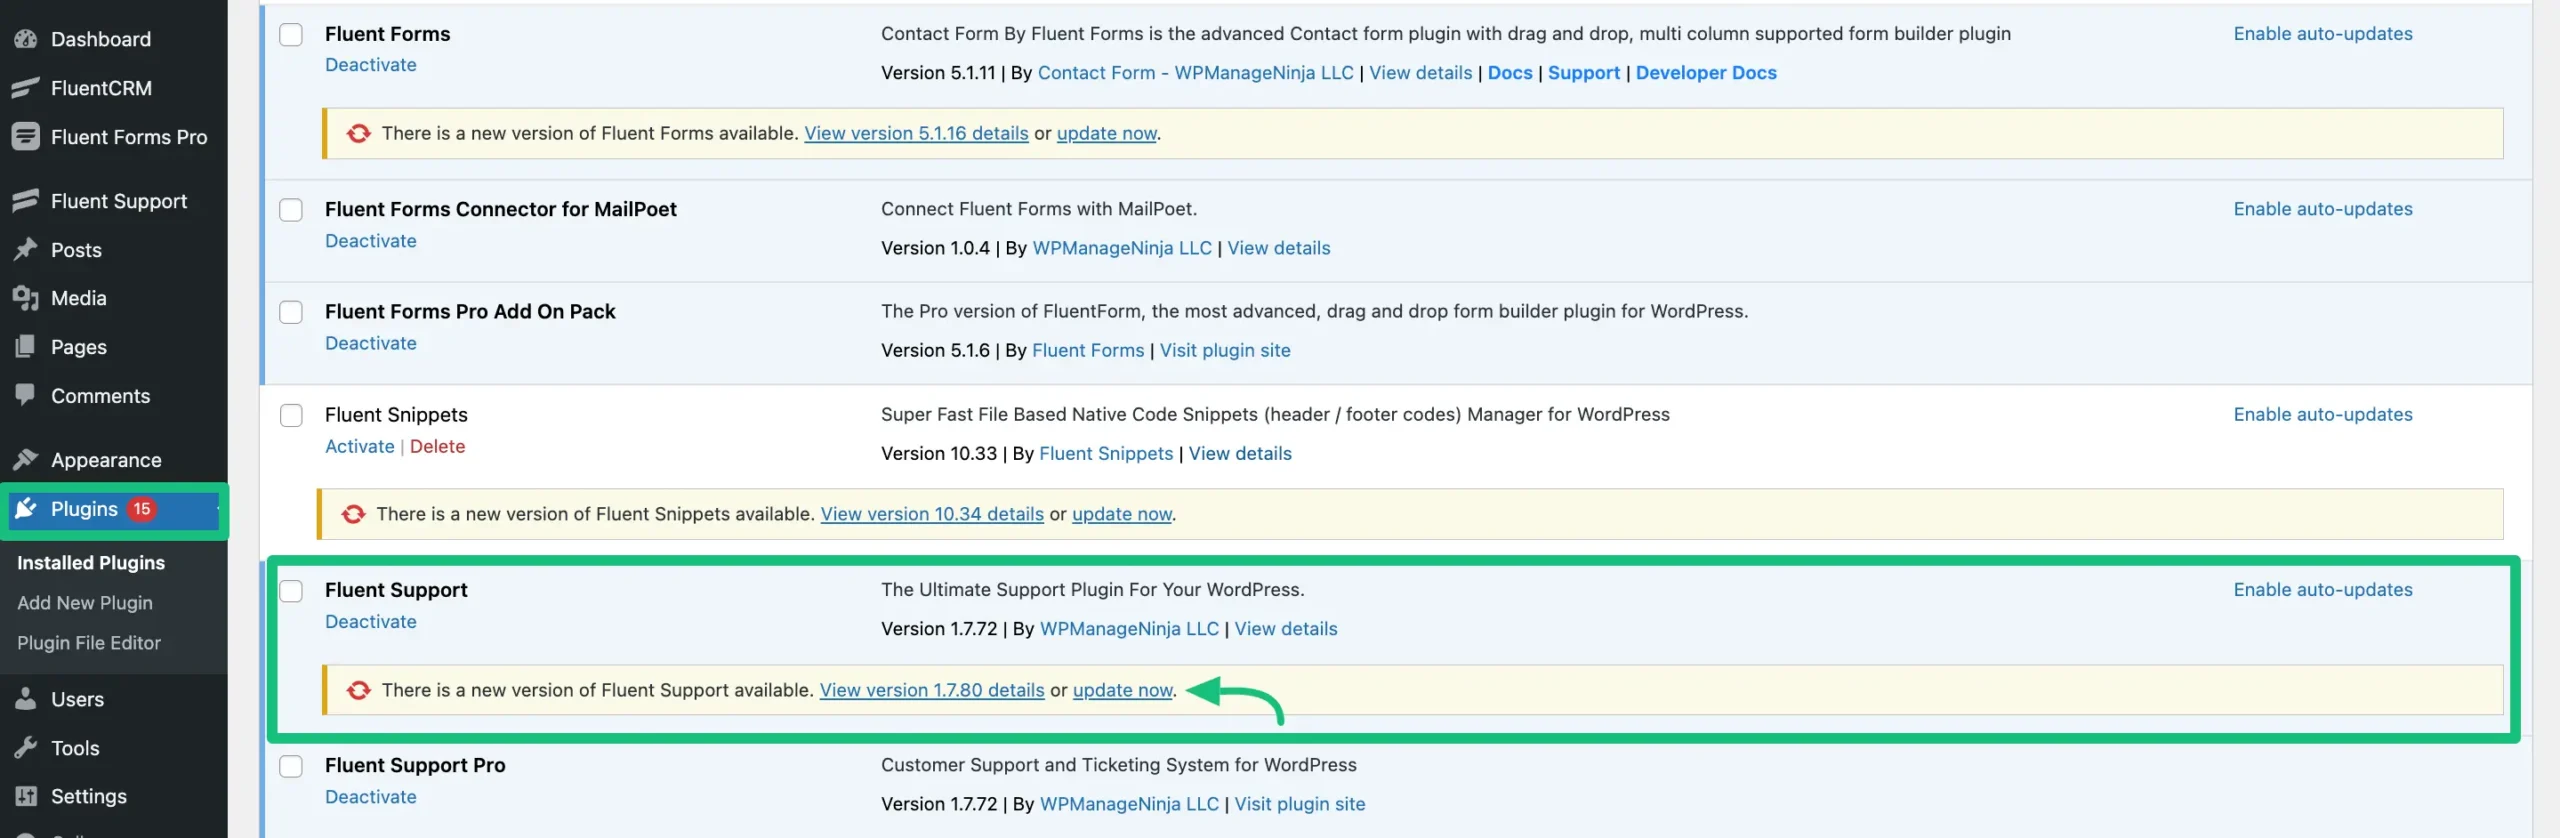
You can easily update your Fluent Support Free or Pro versions anytime.
To do this, go to the Plugins page of your WordPress Dashboard and check whether any update is available. If any update is available click on the update now button.
Make sure that the pro version is activated with a valid license key. If you don’t have a license key or the license key is expired, you can purchase a new one or renew the existing one from here.

Congratulations now you can Experience the features of the Fluent Support plugin and take your productivity to the next level! We hope this article helps you have an amazing experience.
If you have any further questions, concerns, or suggestions, please do not hesitate to contact our @support team. Thank you.


