You must set up Email Piping first to use the Business Inboxes for Email-based support channels in Fluent Support. This article will guide you through the steps required for Email Piping.
Email Piping Settings #
To set up Email Piping, you must create a Business Inbox with an Email-Based support channel. And, to learn how to create this, read this Documentation.
To learn how to set up Email Piping for an Email-based business inbox, follow the steps with the screenshots below —
Go to View Settings from your desired email-based business inbox and click Email Piping.
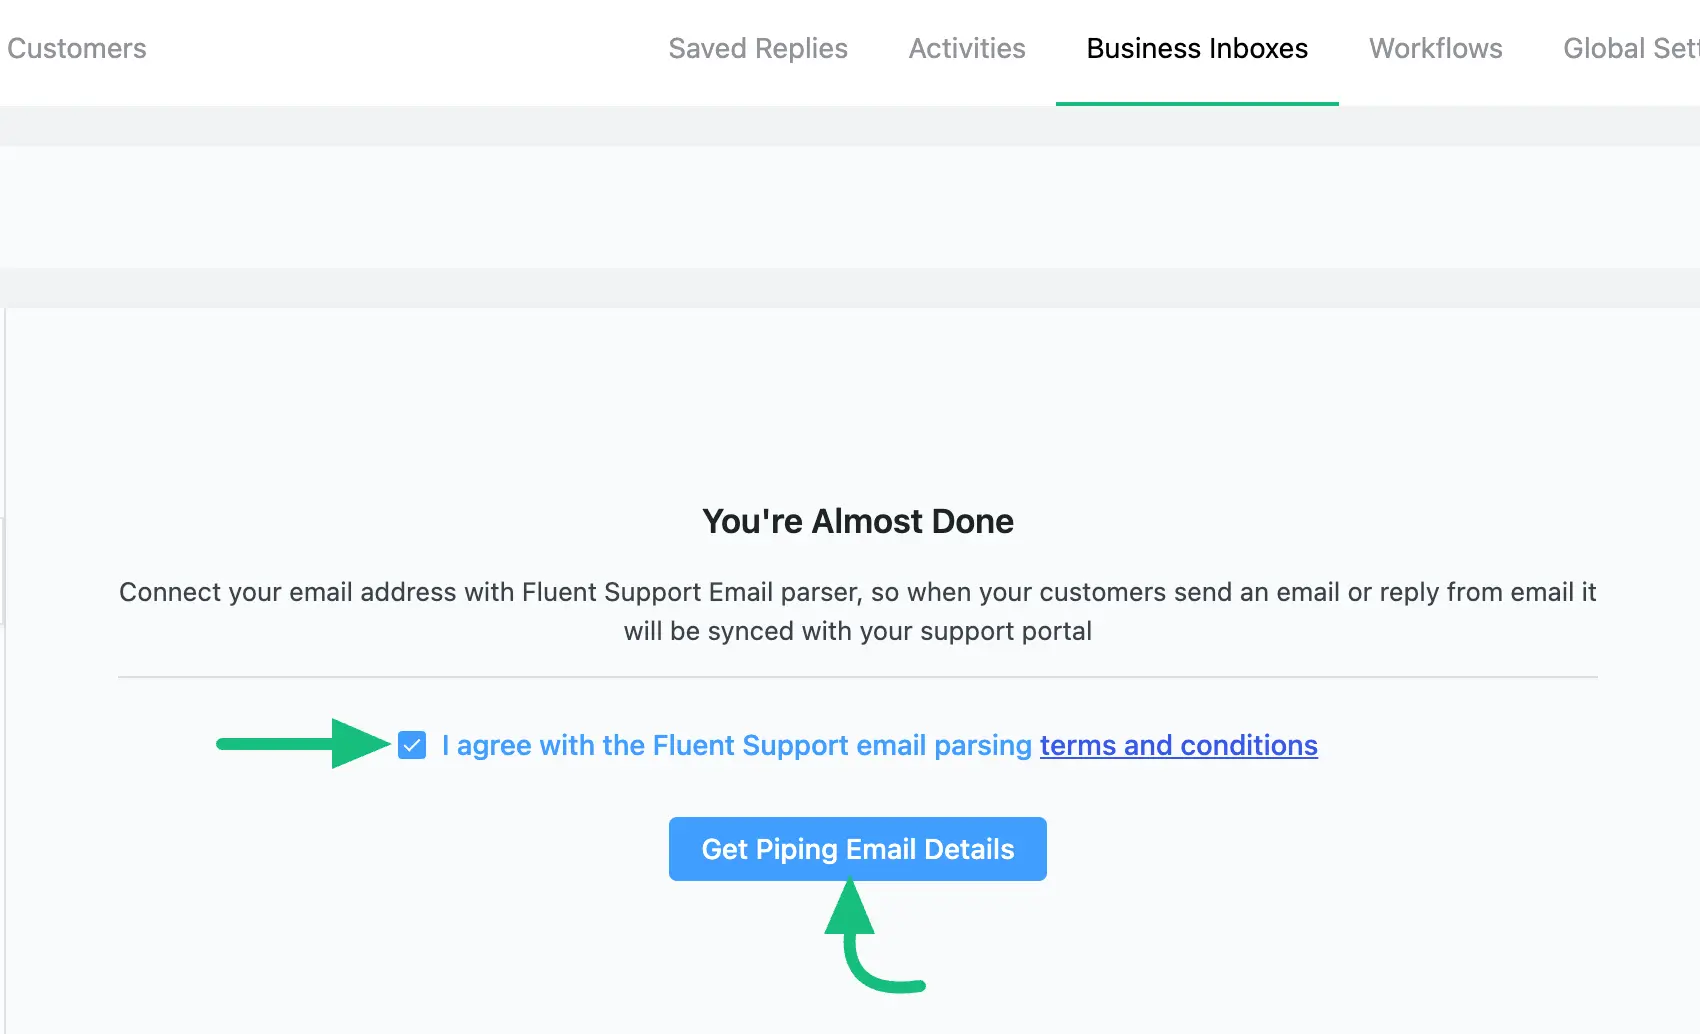
Read the terms and conditions before you agree to it and click the Get Piping Email Details.
To get the email piping details, ensure your fluent support license key is active as Email Piping is a Pro Feature of Fluent Support. To learn how to get the license key and activate it, read this Documentation.
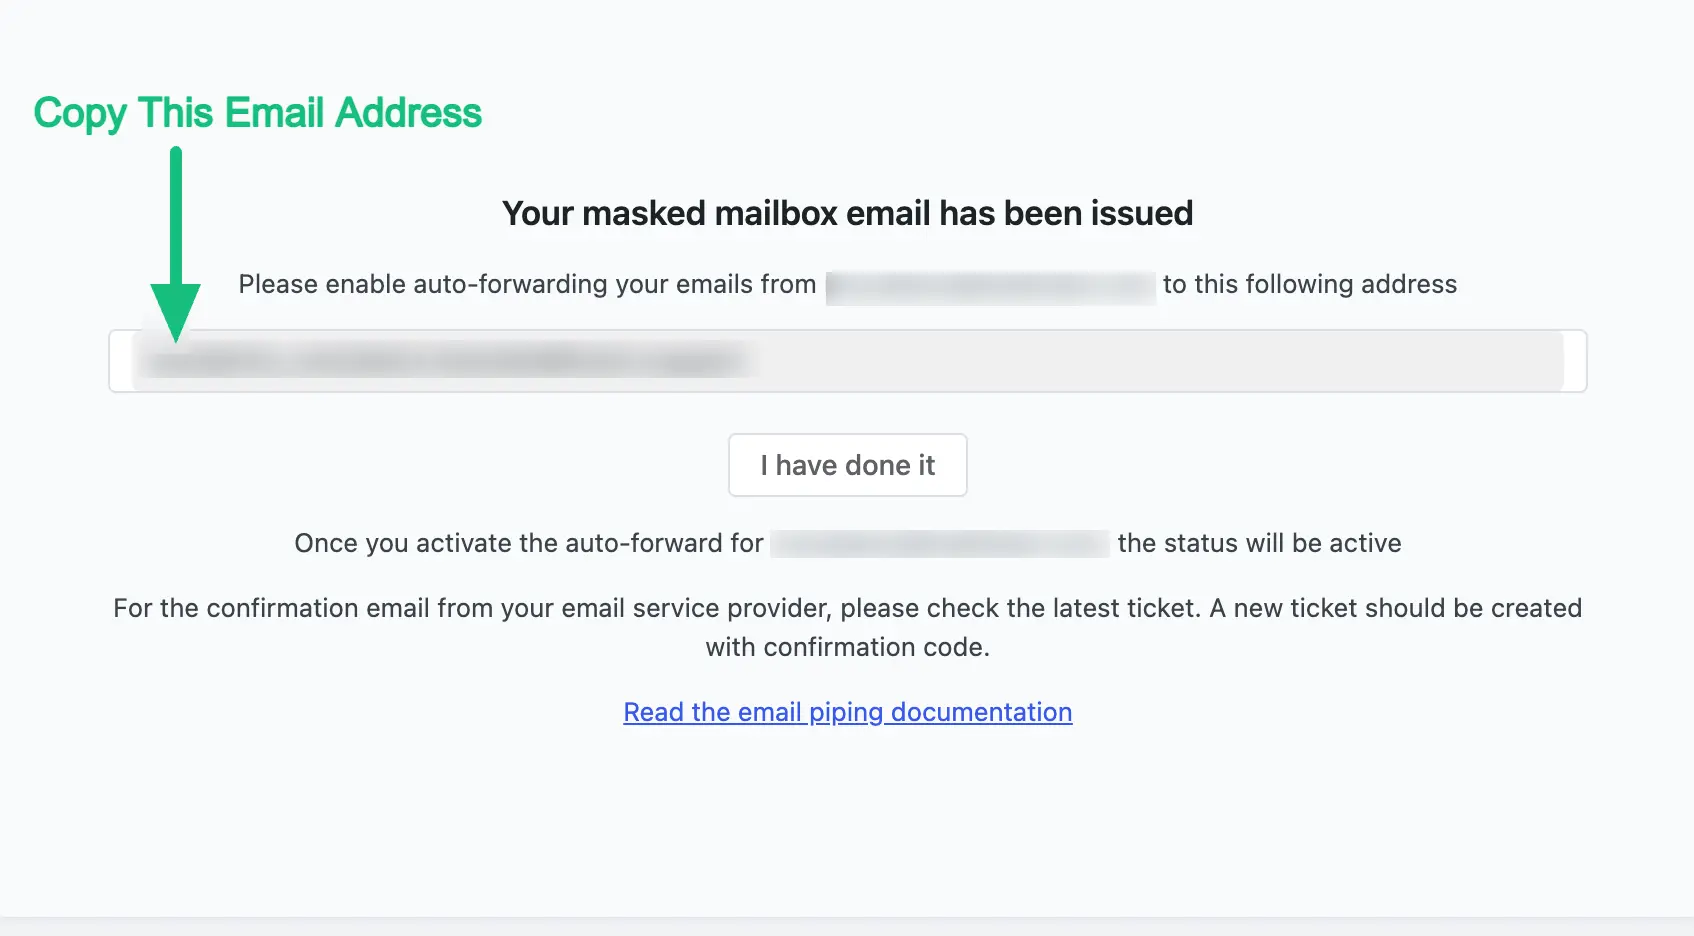
Now, copy the Mailbox Email address provided by Fluent Support to set up auto-forwarding of your emails from other email addresses.
How to Forward/Redirect From an Email Provider #
In this step, you need to set up an email forwarding or redirection from your email provider or host. Depending on your email provider, you can easily set up email forwarding following the instructions provided.
Remember, after setting up Email forwarding, a verification email will be sent. So, check recent tickets for the verification code.
To show you the process, we have listed a few examples below –
Forward or redirect from an Email Provider #
- Google Workspace (formerly known as G Suite)
- Office 365 Outlook Web Access (OWA)
- Amazon WorkMail
- Zoho Mail
- Yahoo Mail
Forward or redirect from a Host #
After you have set an auto-forward, your mailbox will be active. Now, when anyone sends an email to your email address, a new ticket will be created in Fluent Support.
Collaboration with CC in Fluent Support Tickets #
CC is an email feature that allows you to include additional recipients in a message, with CC recipients visible to all.
The Screenshots below show the whole process being demonstrated visually:
When a user sends an email to your business inbox and includes additional CC users in subsequent reply emails, Fluent Support automatically designates CC users as sub-customers for that specific ticket. You will see the added CC emails also in your ticket.
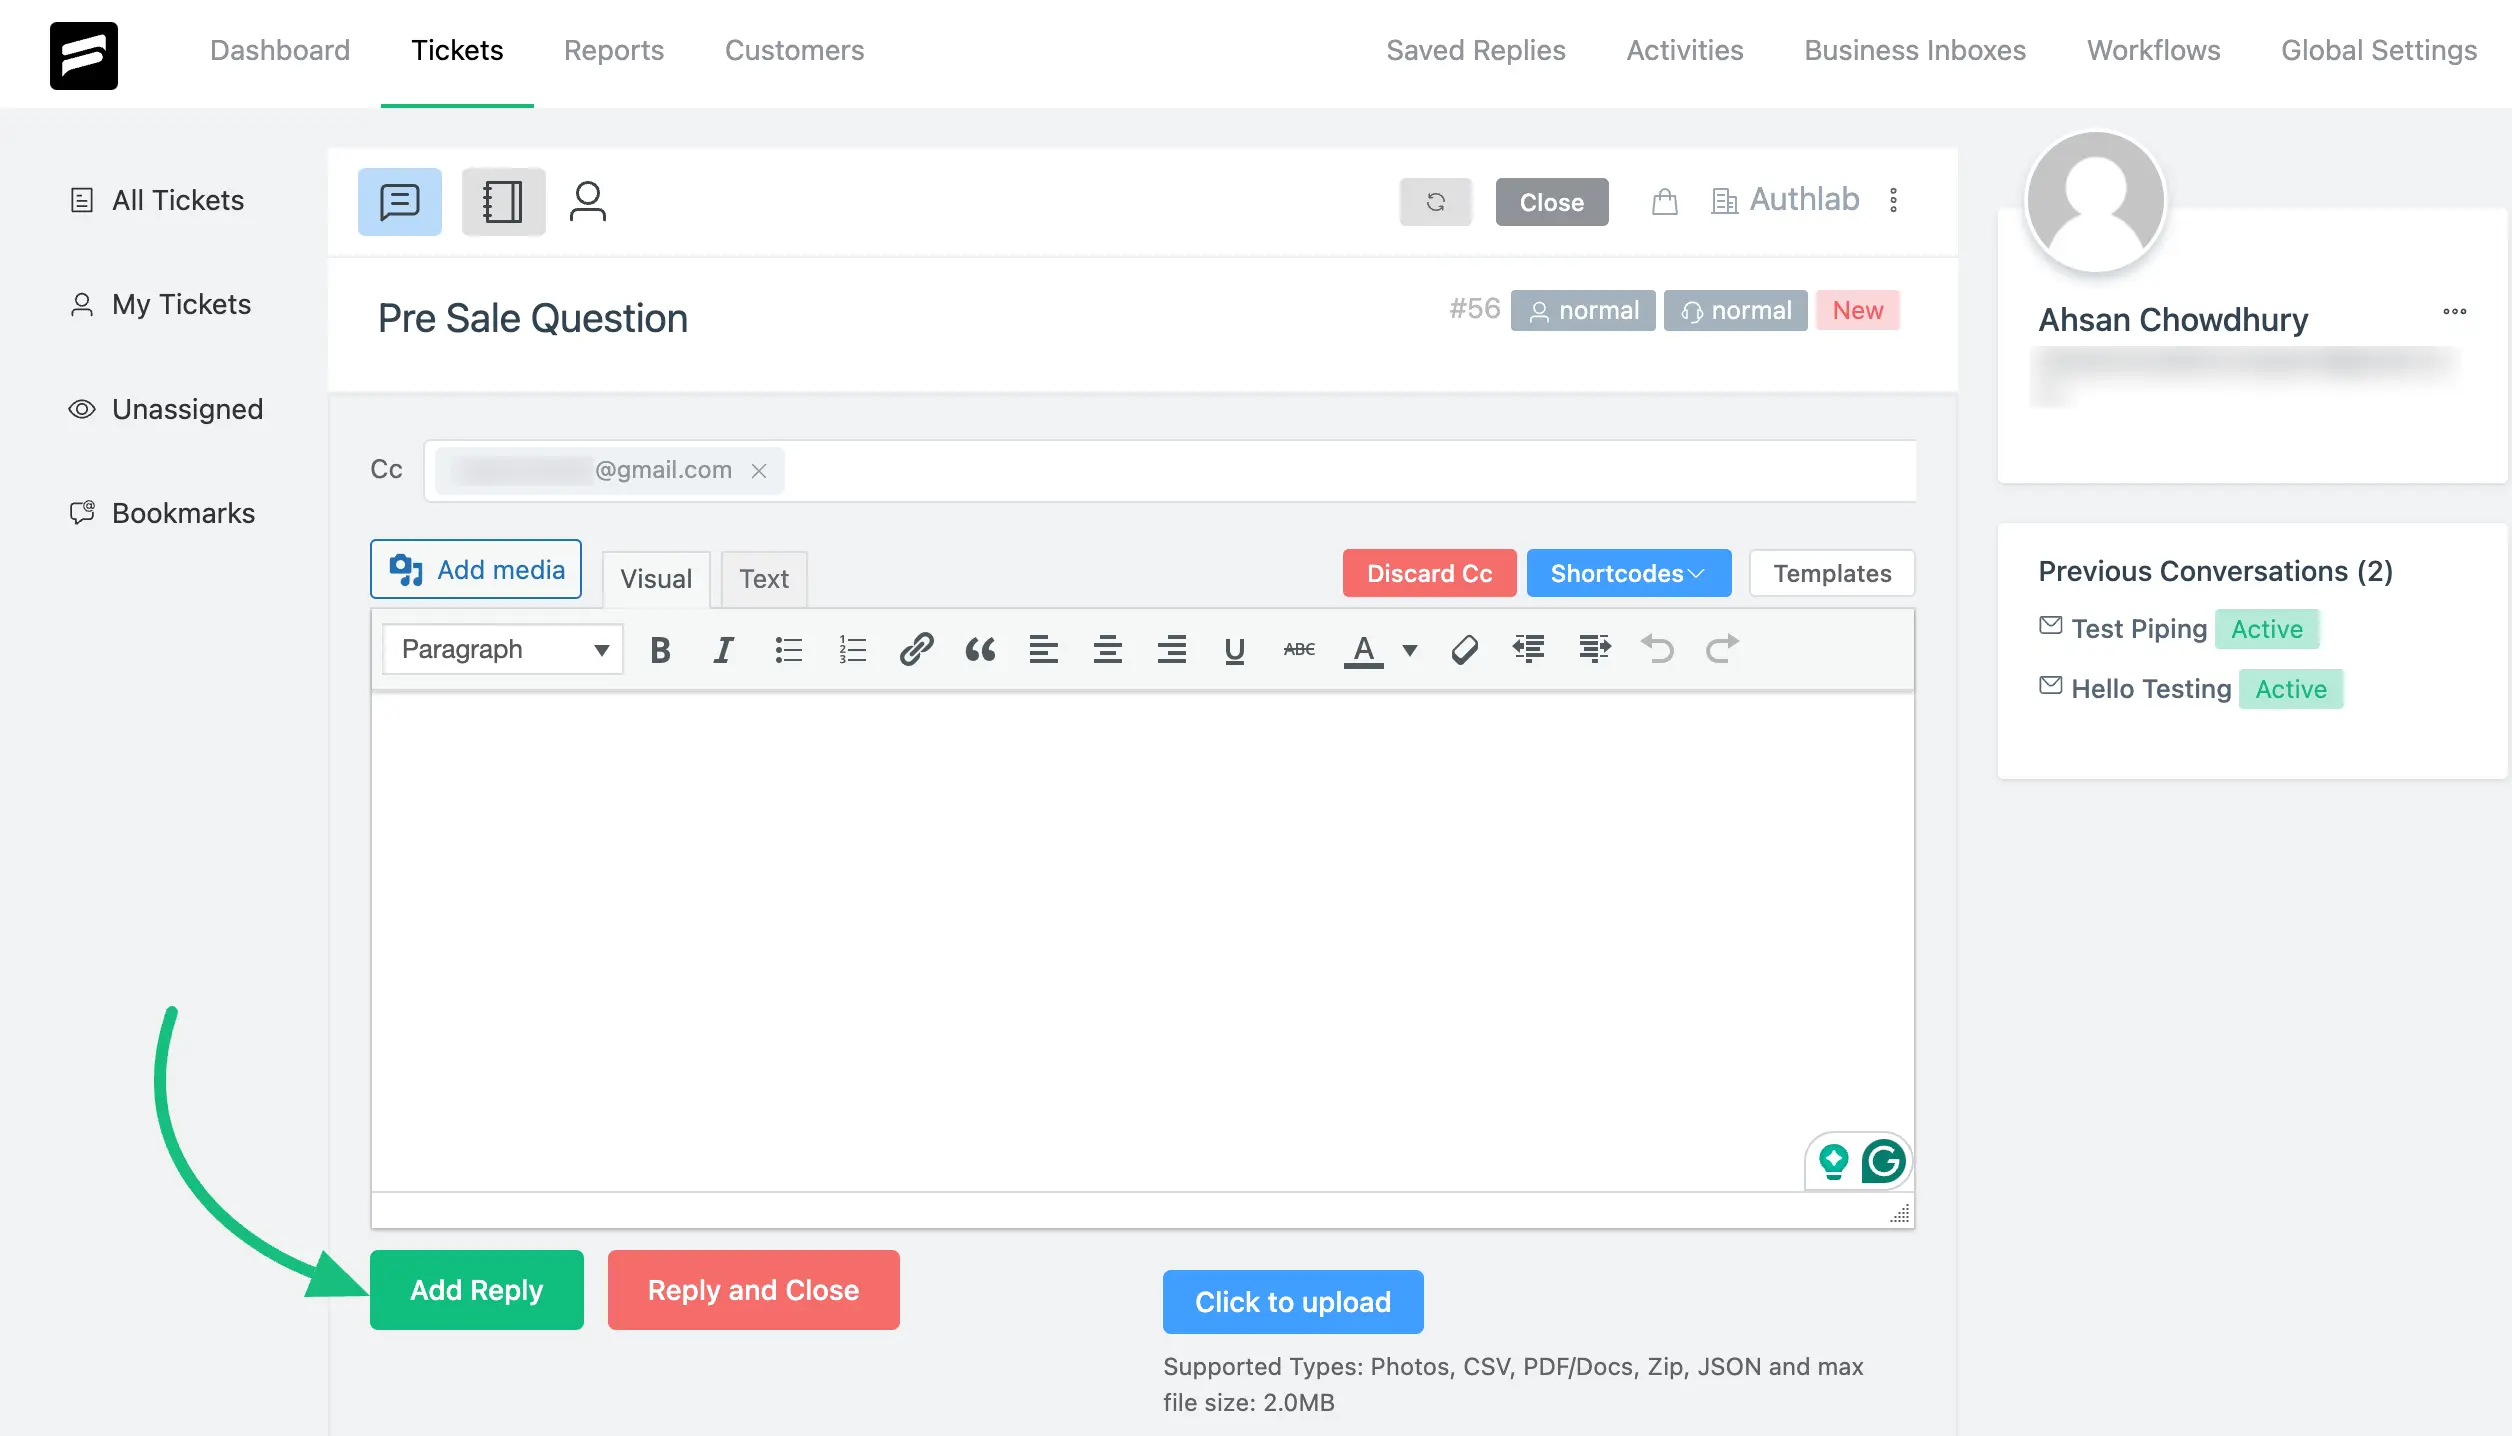
Here, you can see the customer-added CC email which you can remove by pressing the Discard CC button before replying to it if you want.
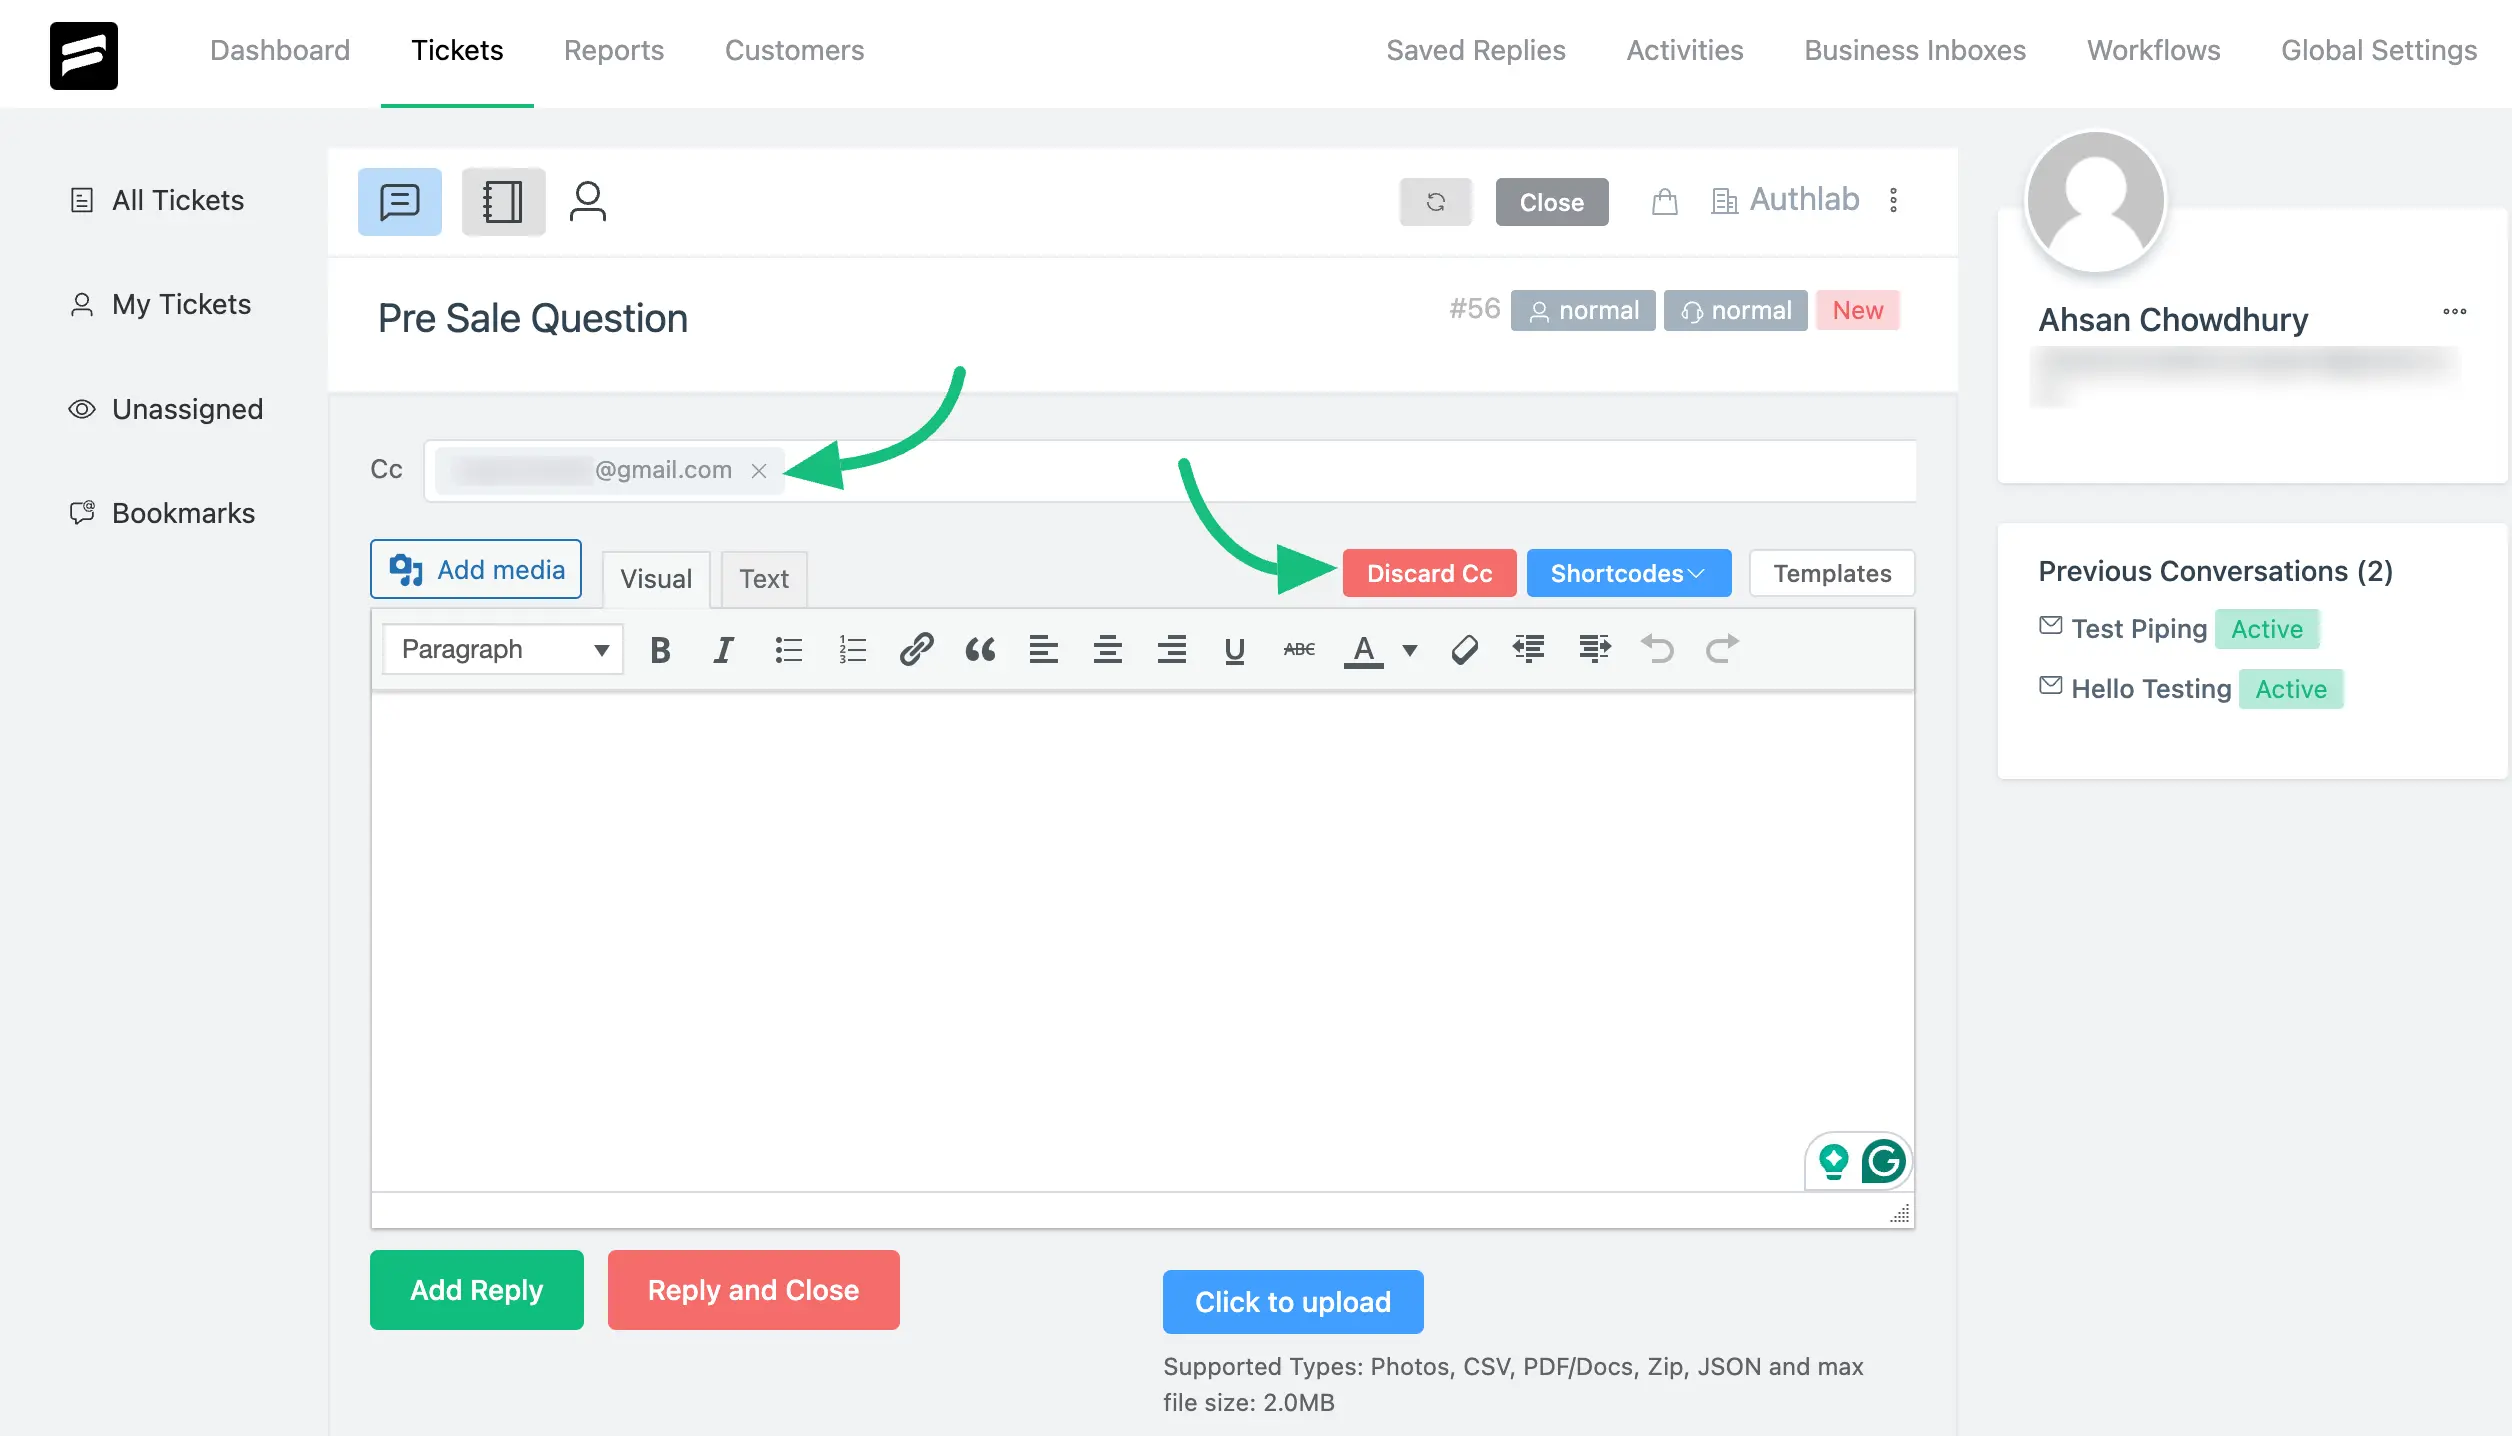
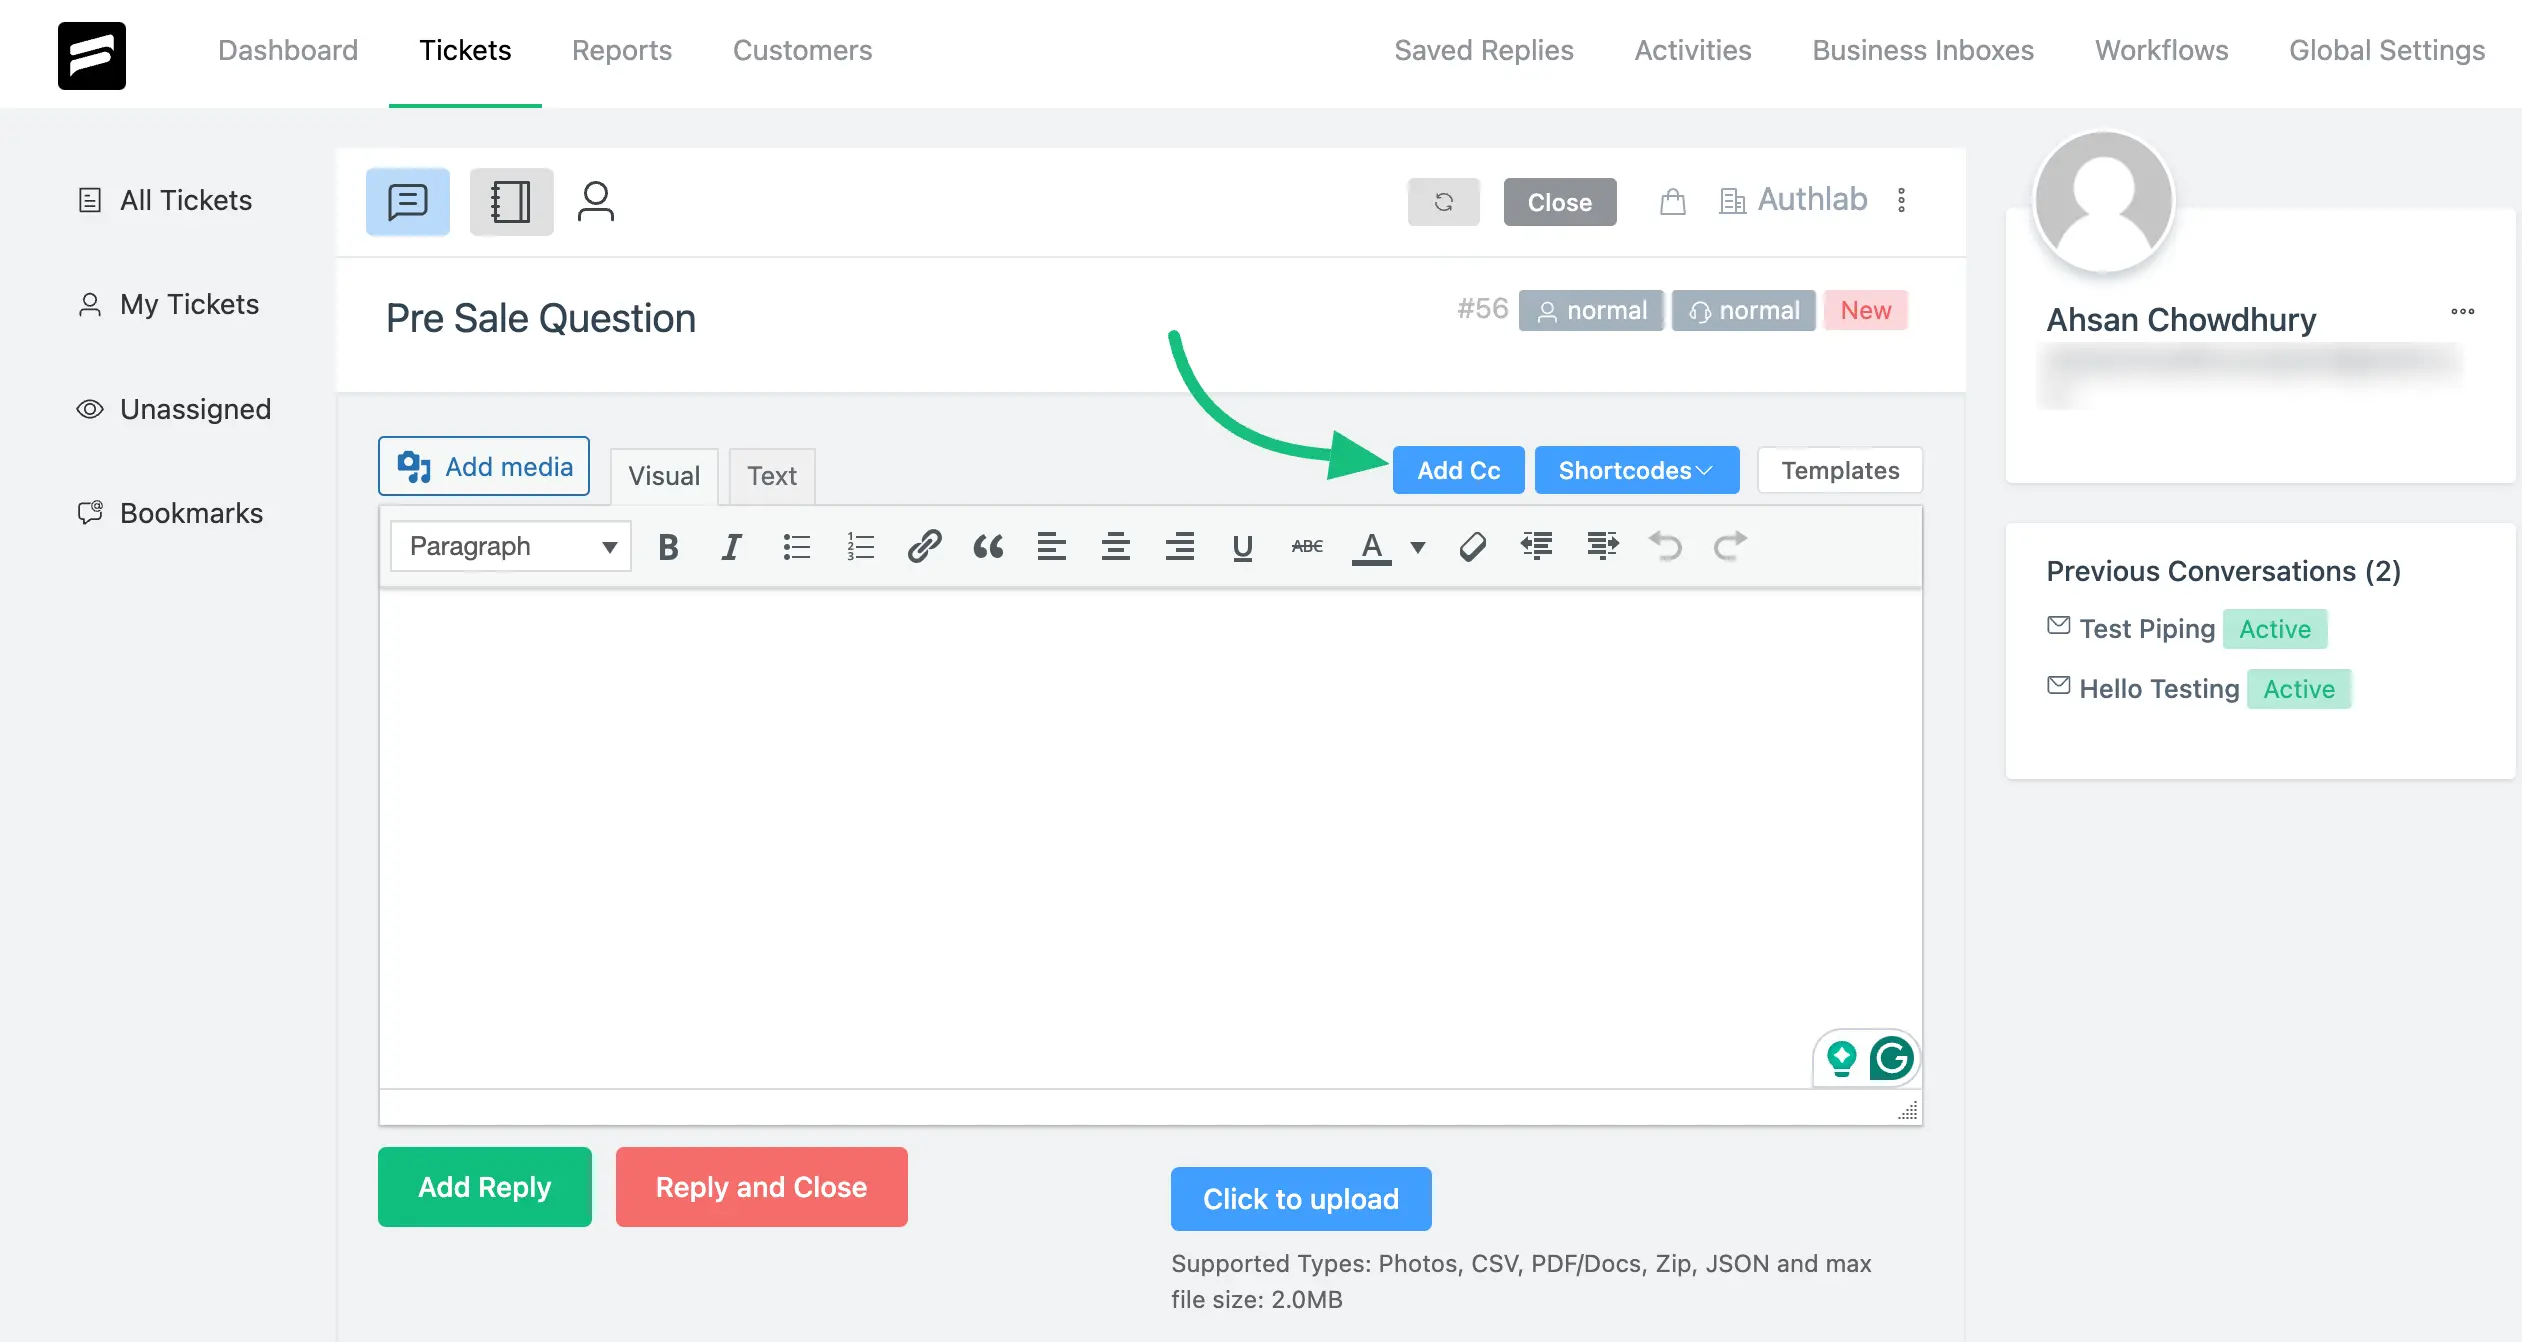
You can also add one or more CC emails to send your reply to them. To add CC, click on the Add CC button.
To reply to the ticket, click on the Add Reply button. Your ticket reply will be sent to the primary customer and all the CC recipients.
Replies from CC users are treated as coming from the primary customer i.e., CC users can reply to the agent directly from their mailbox.
If you want to know more details about Email Piping, you can also read this What is Email Piping and Why?
If you have any further questions, concerns, or suggestions, please do not hesitate to contact our @support team. Thank you.


