This article will guide you through the steps required to forward email from Outlook Web Access on Microsoft 365 (formerly known as Office 365), also known as OWA, to your Mailbox of Fluent Support.
Forward from Microsoft 365 Outlook Web Access (OWA) #
Before starting the procedure, ensure you have followed the first steps; setting up a new Business Inbox in Fluent Support and your Fluent Support Mailbox Address is ready.
To know the details of setting up a Business Inbox, check this Documentation.
Now to learn how to set up auto-forwarding from Google Workspace to Fluent Support, follow the steps with the screenshots below —
Log in to your Microsoft 365 Outlook Web Access by clicking here.
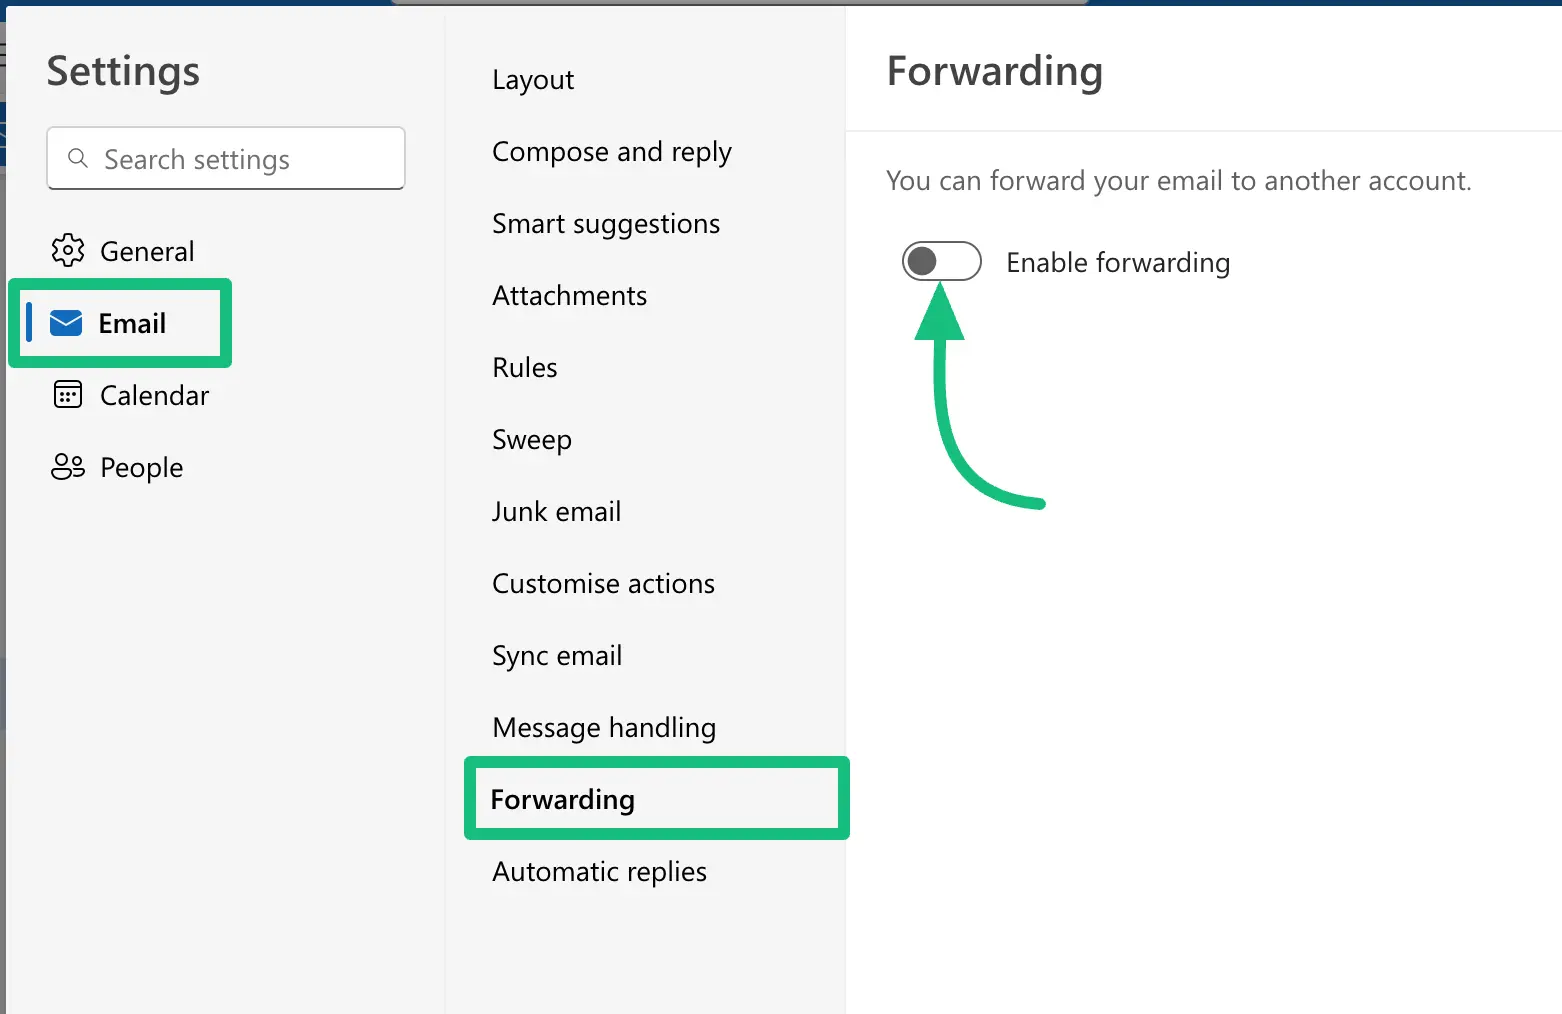
Then, click on the Gear Icon located in the top right corner, and a Settings pop-up will appear.
From the Mailbox Settings of your Outlook mailbox, select Email, then Forwarding, and click on the Enable forwarding toggle.
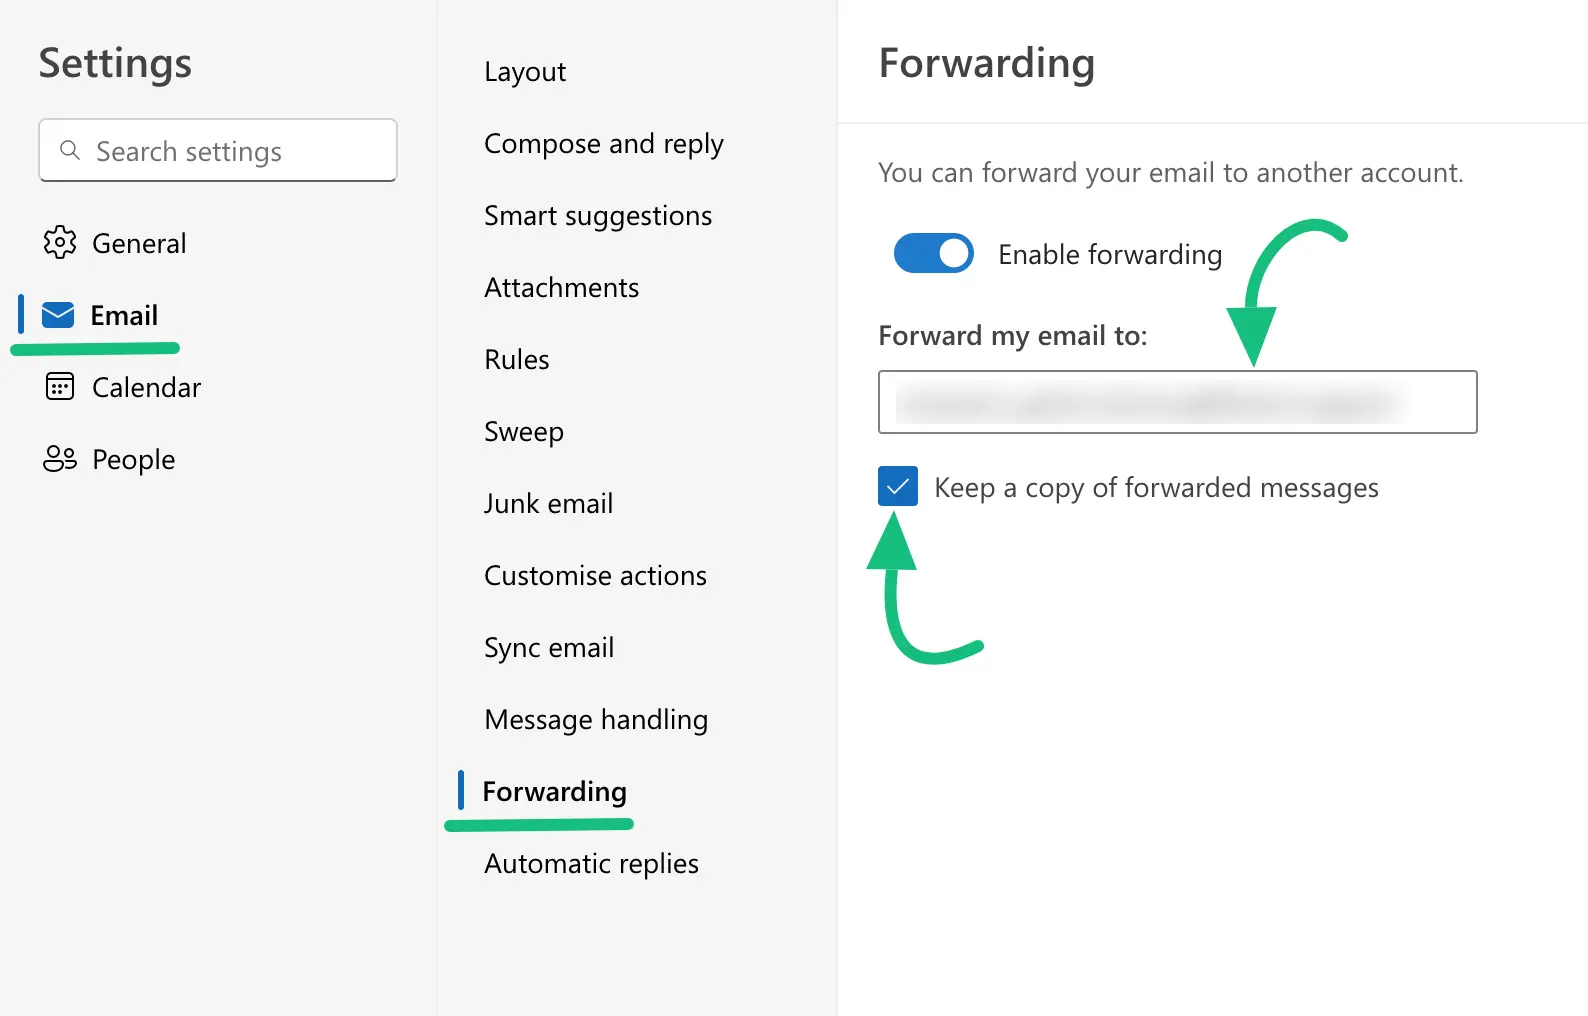
Now, paste the Mailbox Email Address you got from the Email Piping settings of Fluent Support into the ‘Forward my email to’ field.
Also, we recommend enabling the Keep a copy of forwarded messages option.
Don’t forget to press the Save button once you’re done.
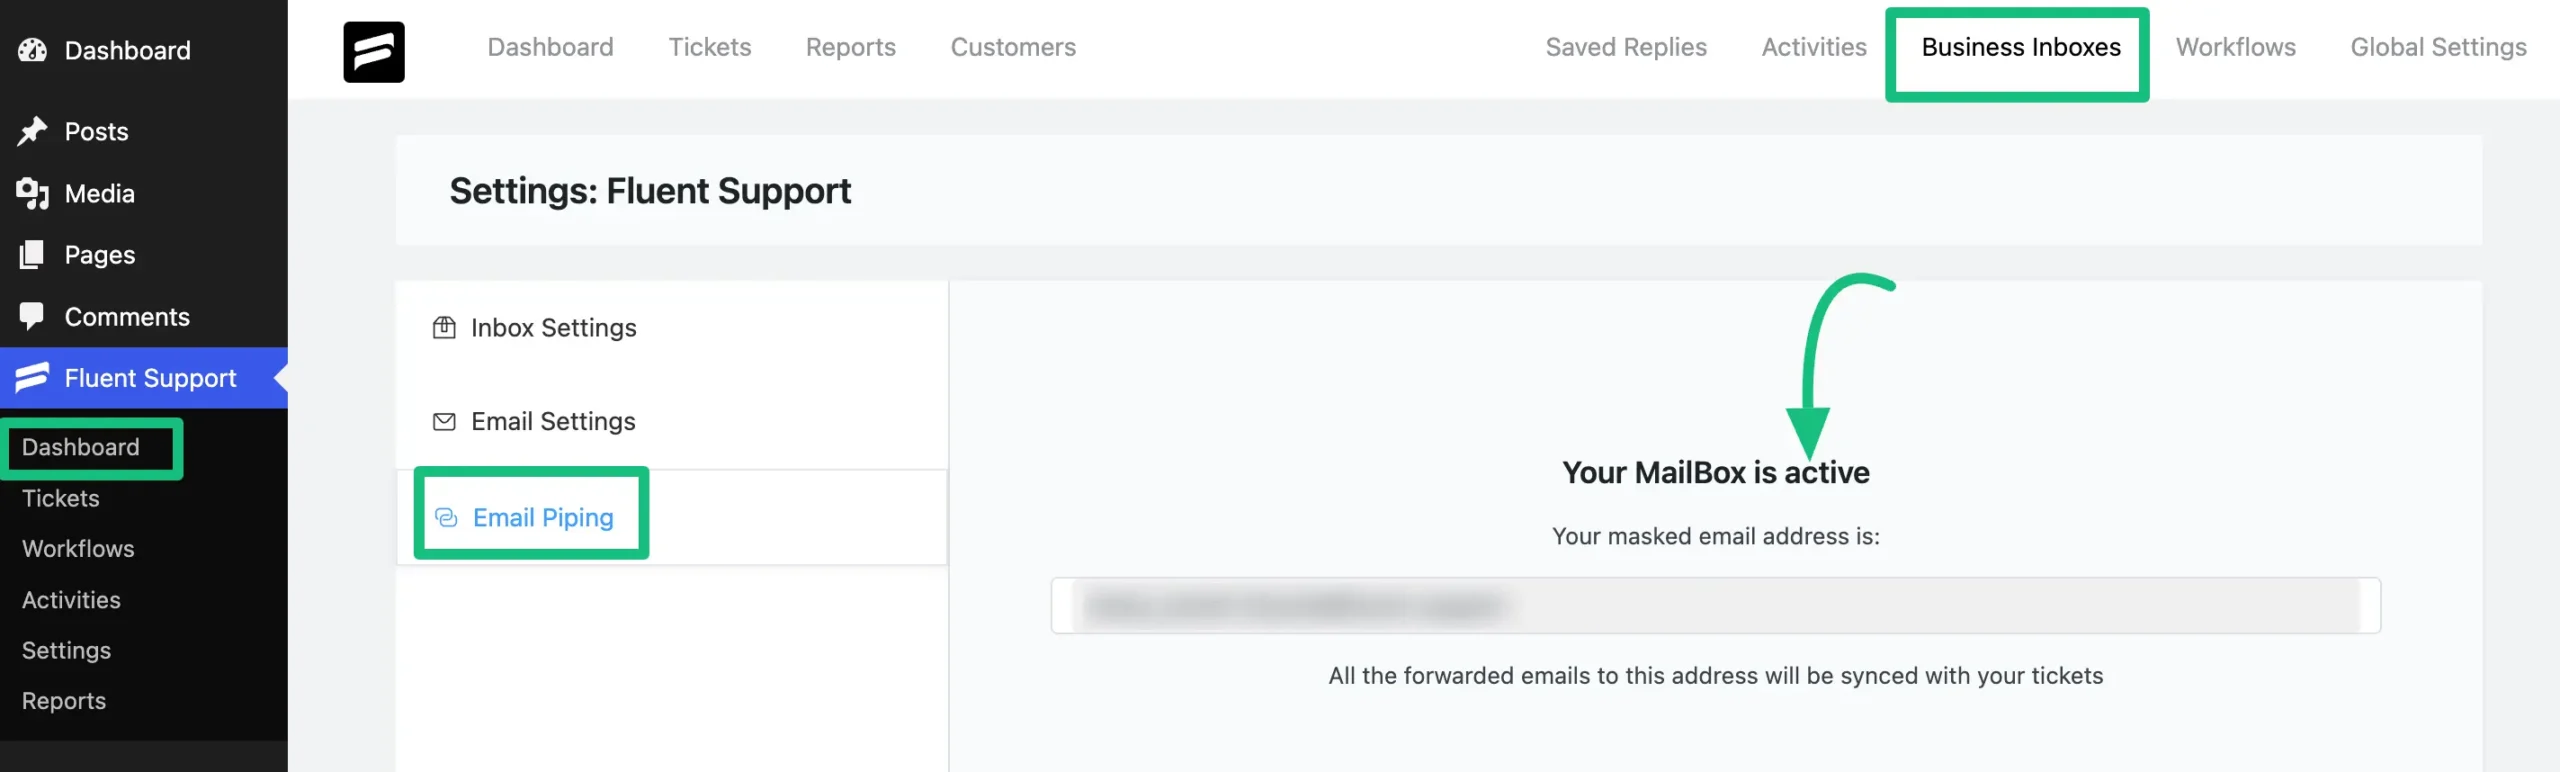
That’s it! Your email forwarding is set and the mailbox is activated!
Now, when anyone sends an email to your email address, a new ticket will be created in Fluent Support.
If You Face Any Issues Regarding Mailbox activation #
If you face any issues regarding the Activation of your Fluent Support Mailbox, follow the steps with the screenshots and GIFs below —
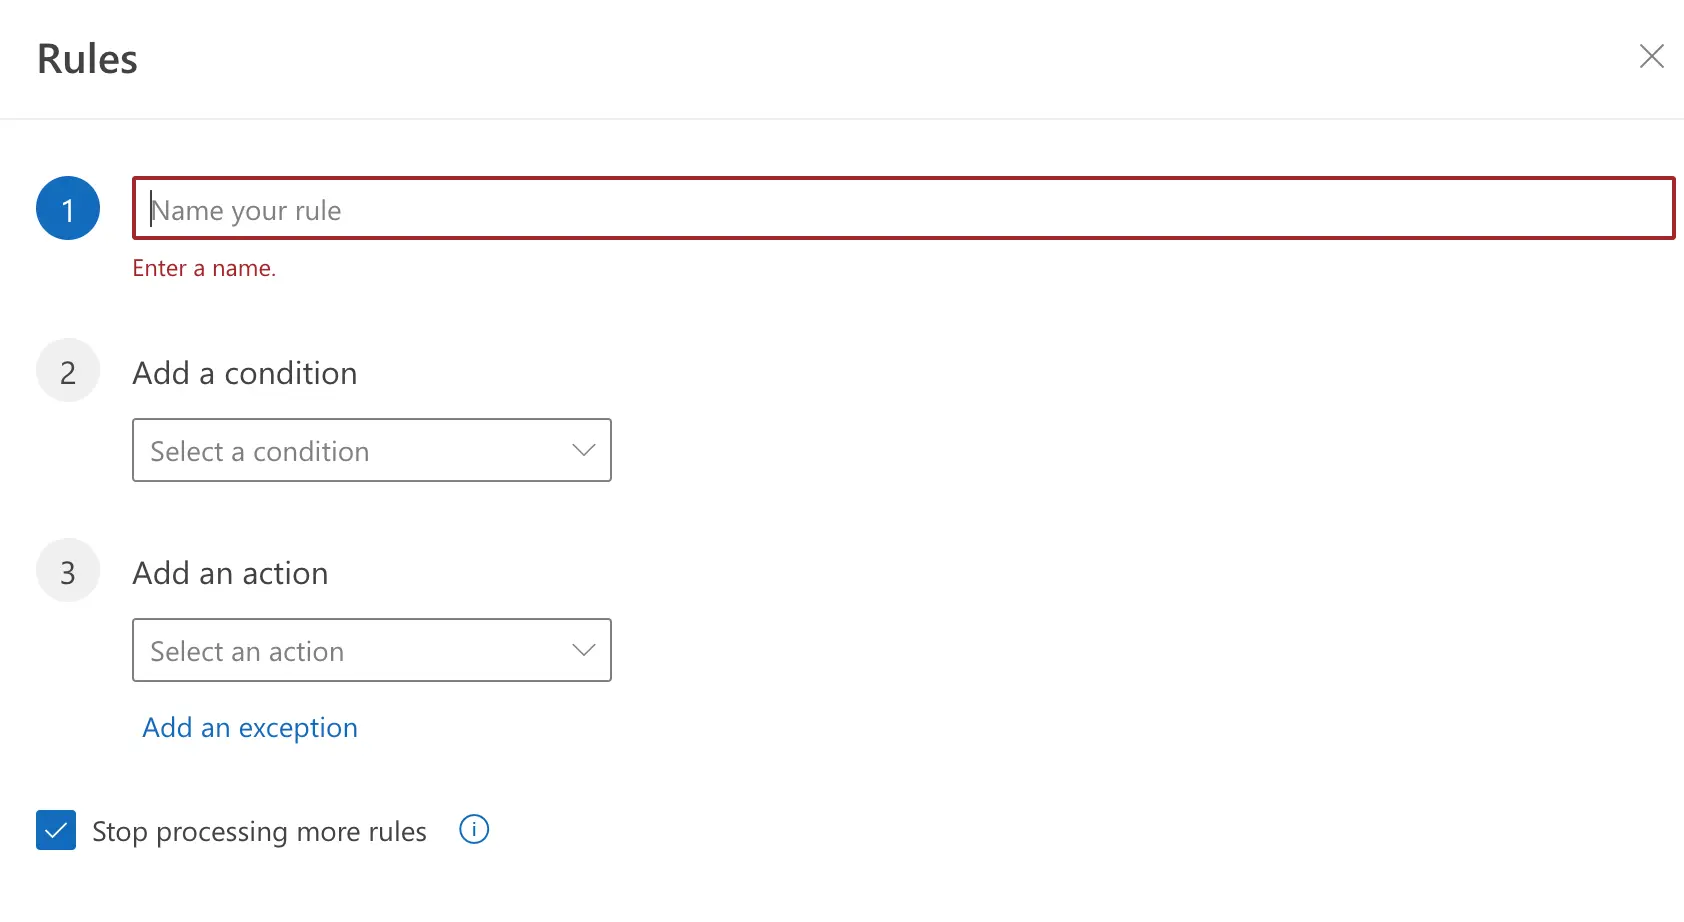
Go to the Mailbox Settings from your Outlook mailbox dashboard, select Email, then Rules, and click the + Add new rule.
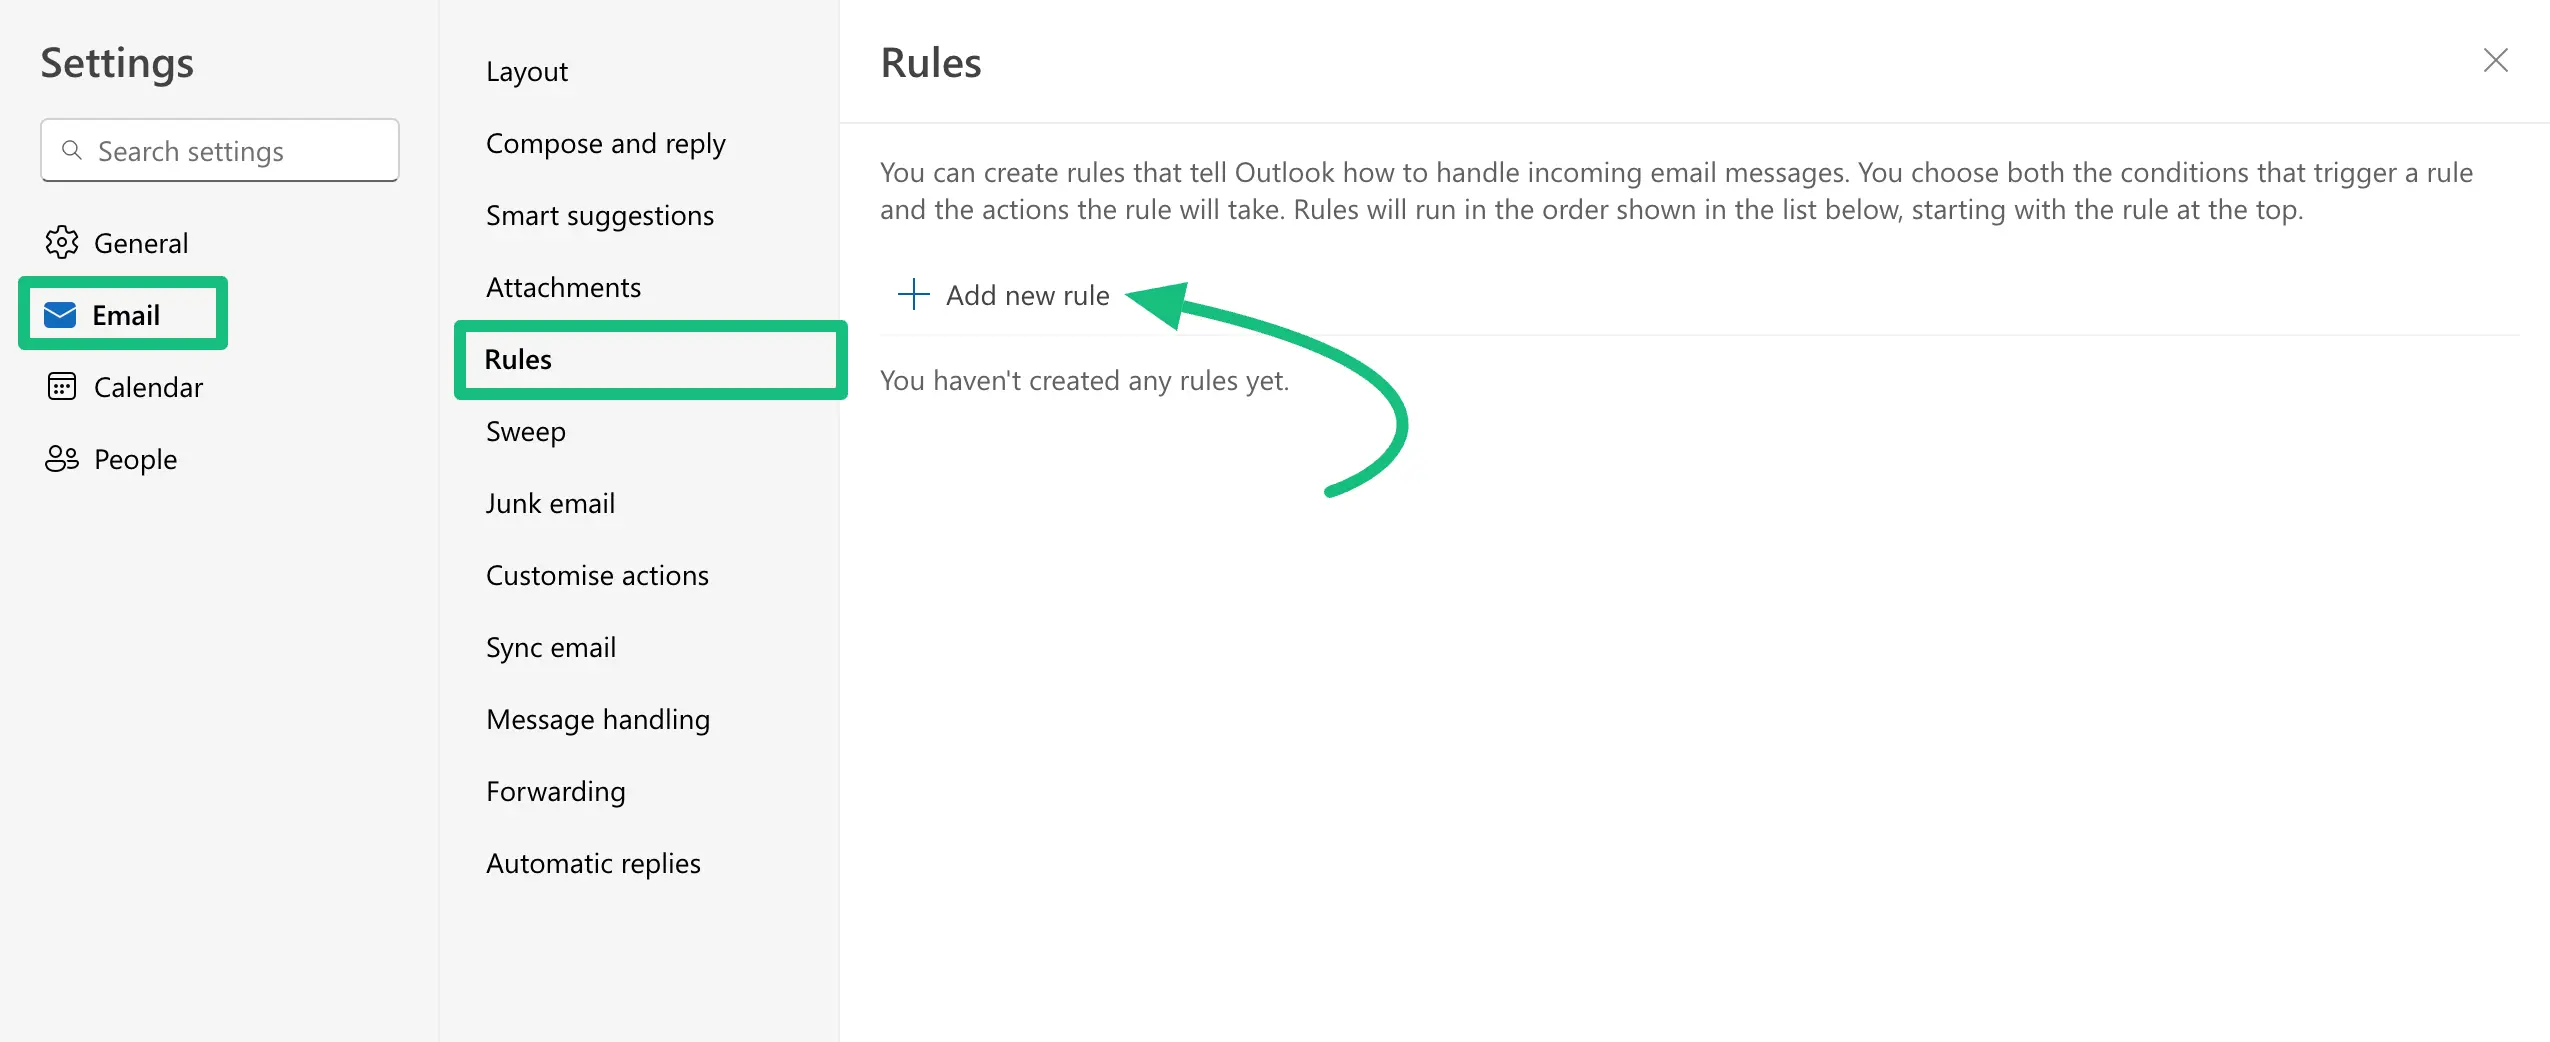
These are the fields under Rules that you need to fill in to add the rule.
Refer to the GIF, to see the whole process of adding new rules at a glance.
You can also test it to confirm that your mailbox is successfully activated for your users.

If you have any further questions, concerns, or suggestions, please do not hesitate to contact our @support team. Thank you.


