Fluent Support, allows you to create multiple products for organizing your tickets and allows customers to select the relevant product when submitting their tickets. This article will help you through the process of creating products to categorize tickets.
Creating Products #
To learn how to create Products in your Fluent Support Dashboard, follow the steps with the screenshots & GIF below —
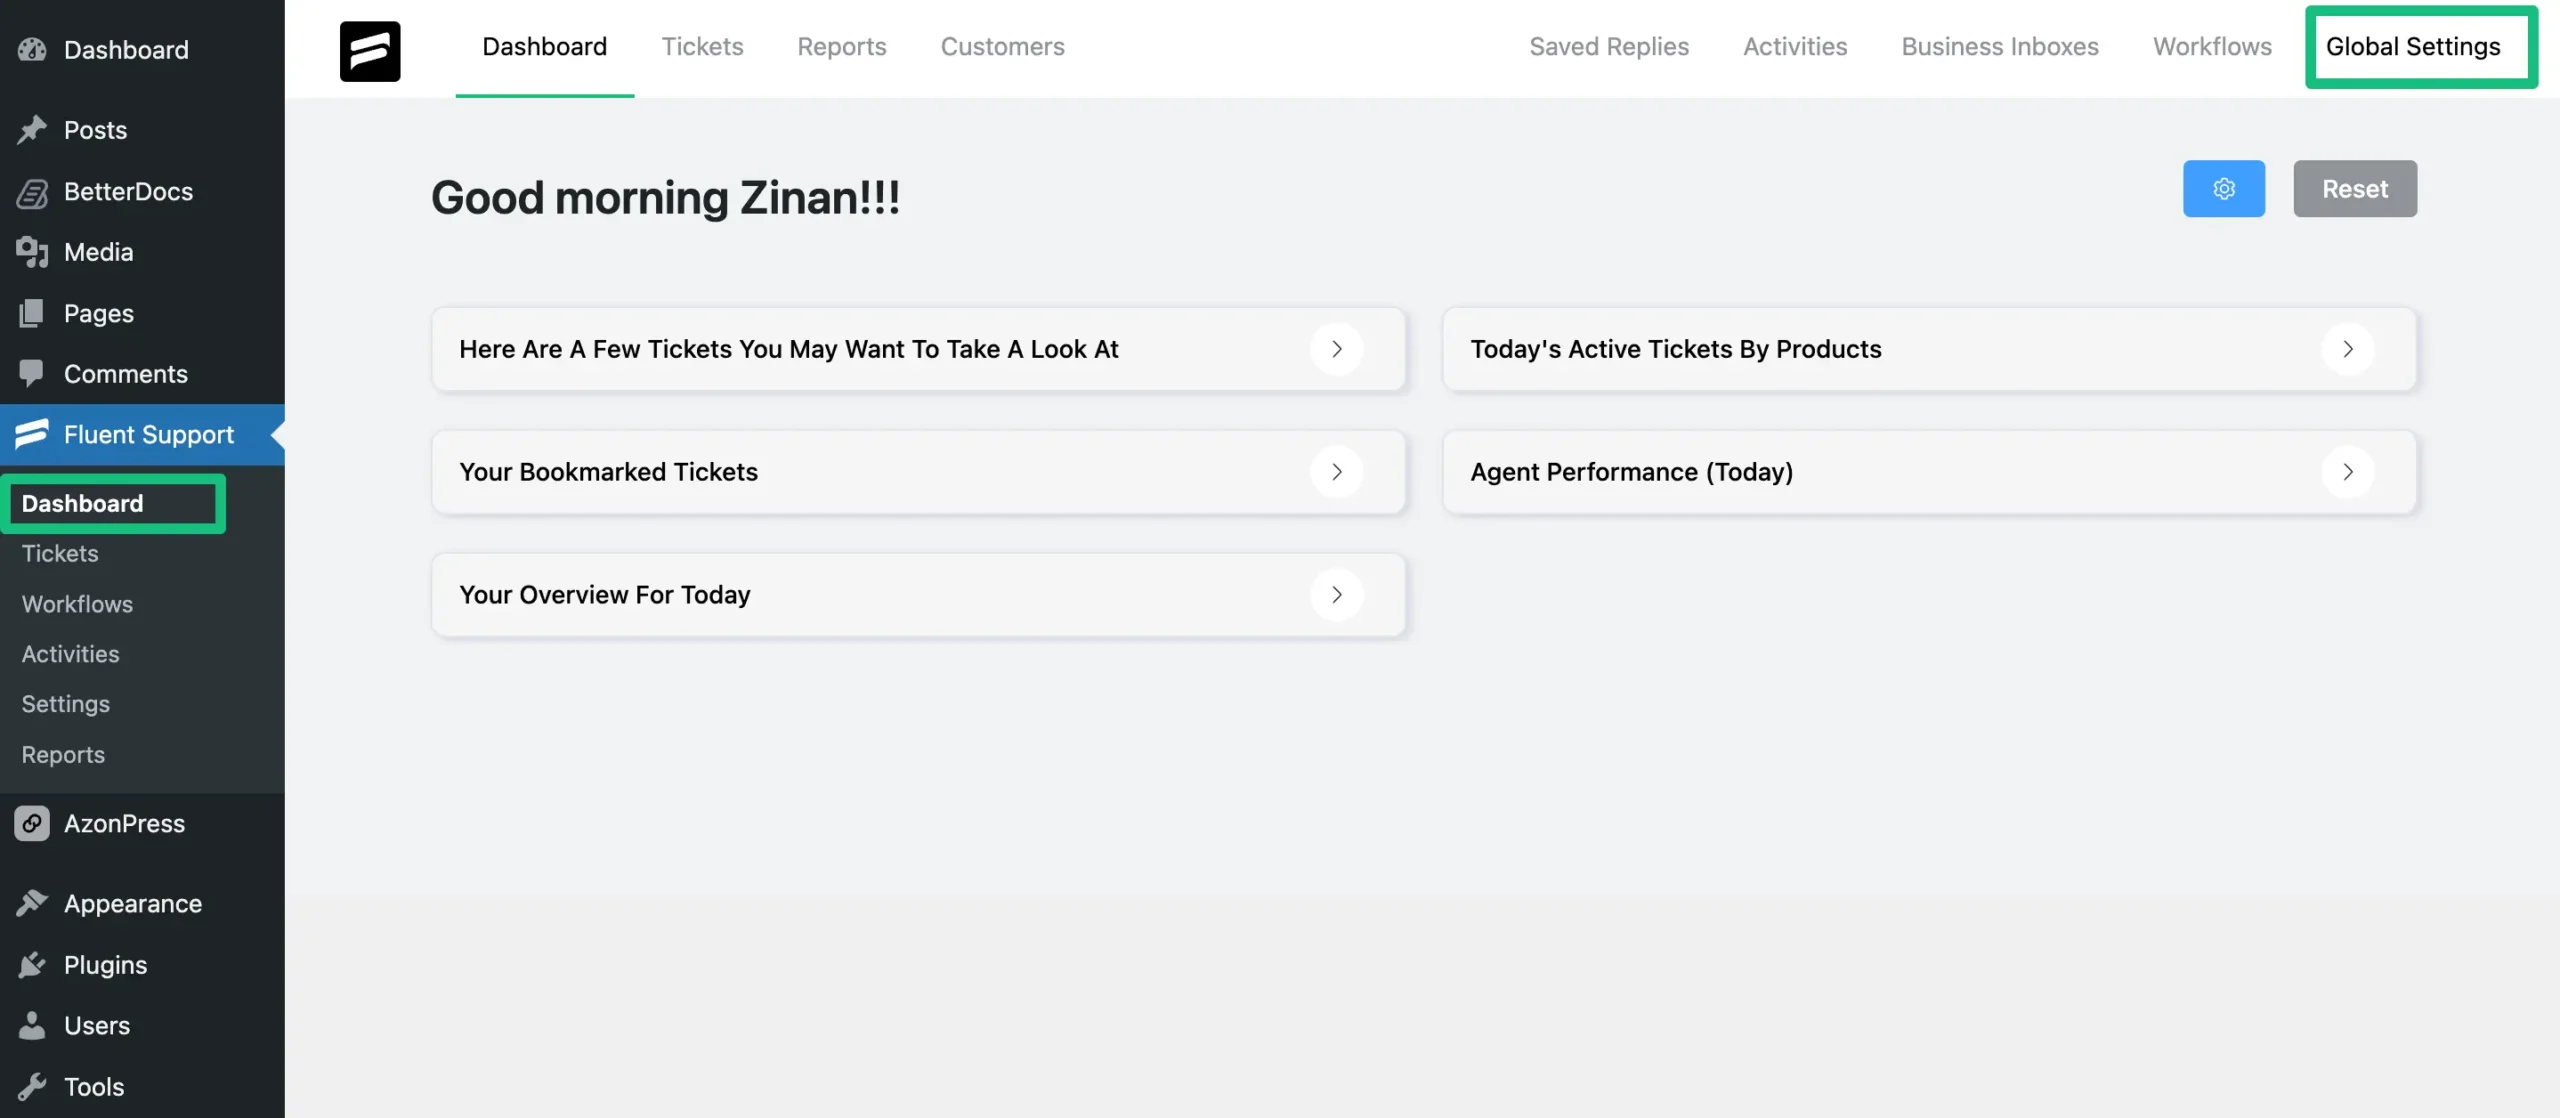
Go to your Fluent Support Dashboard & click on Global Settings.
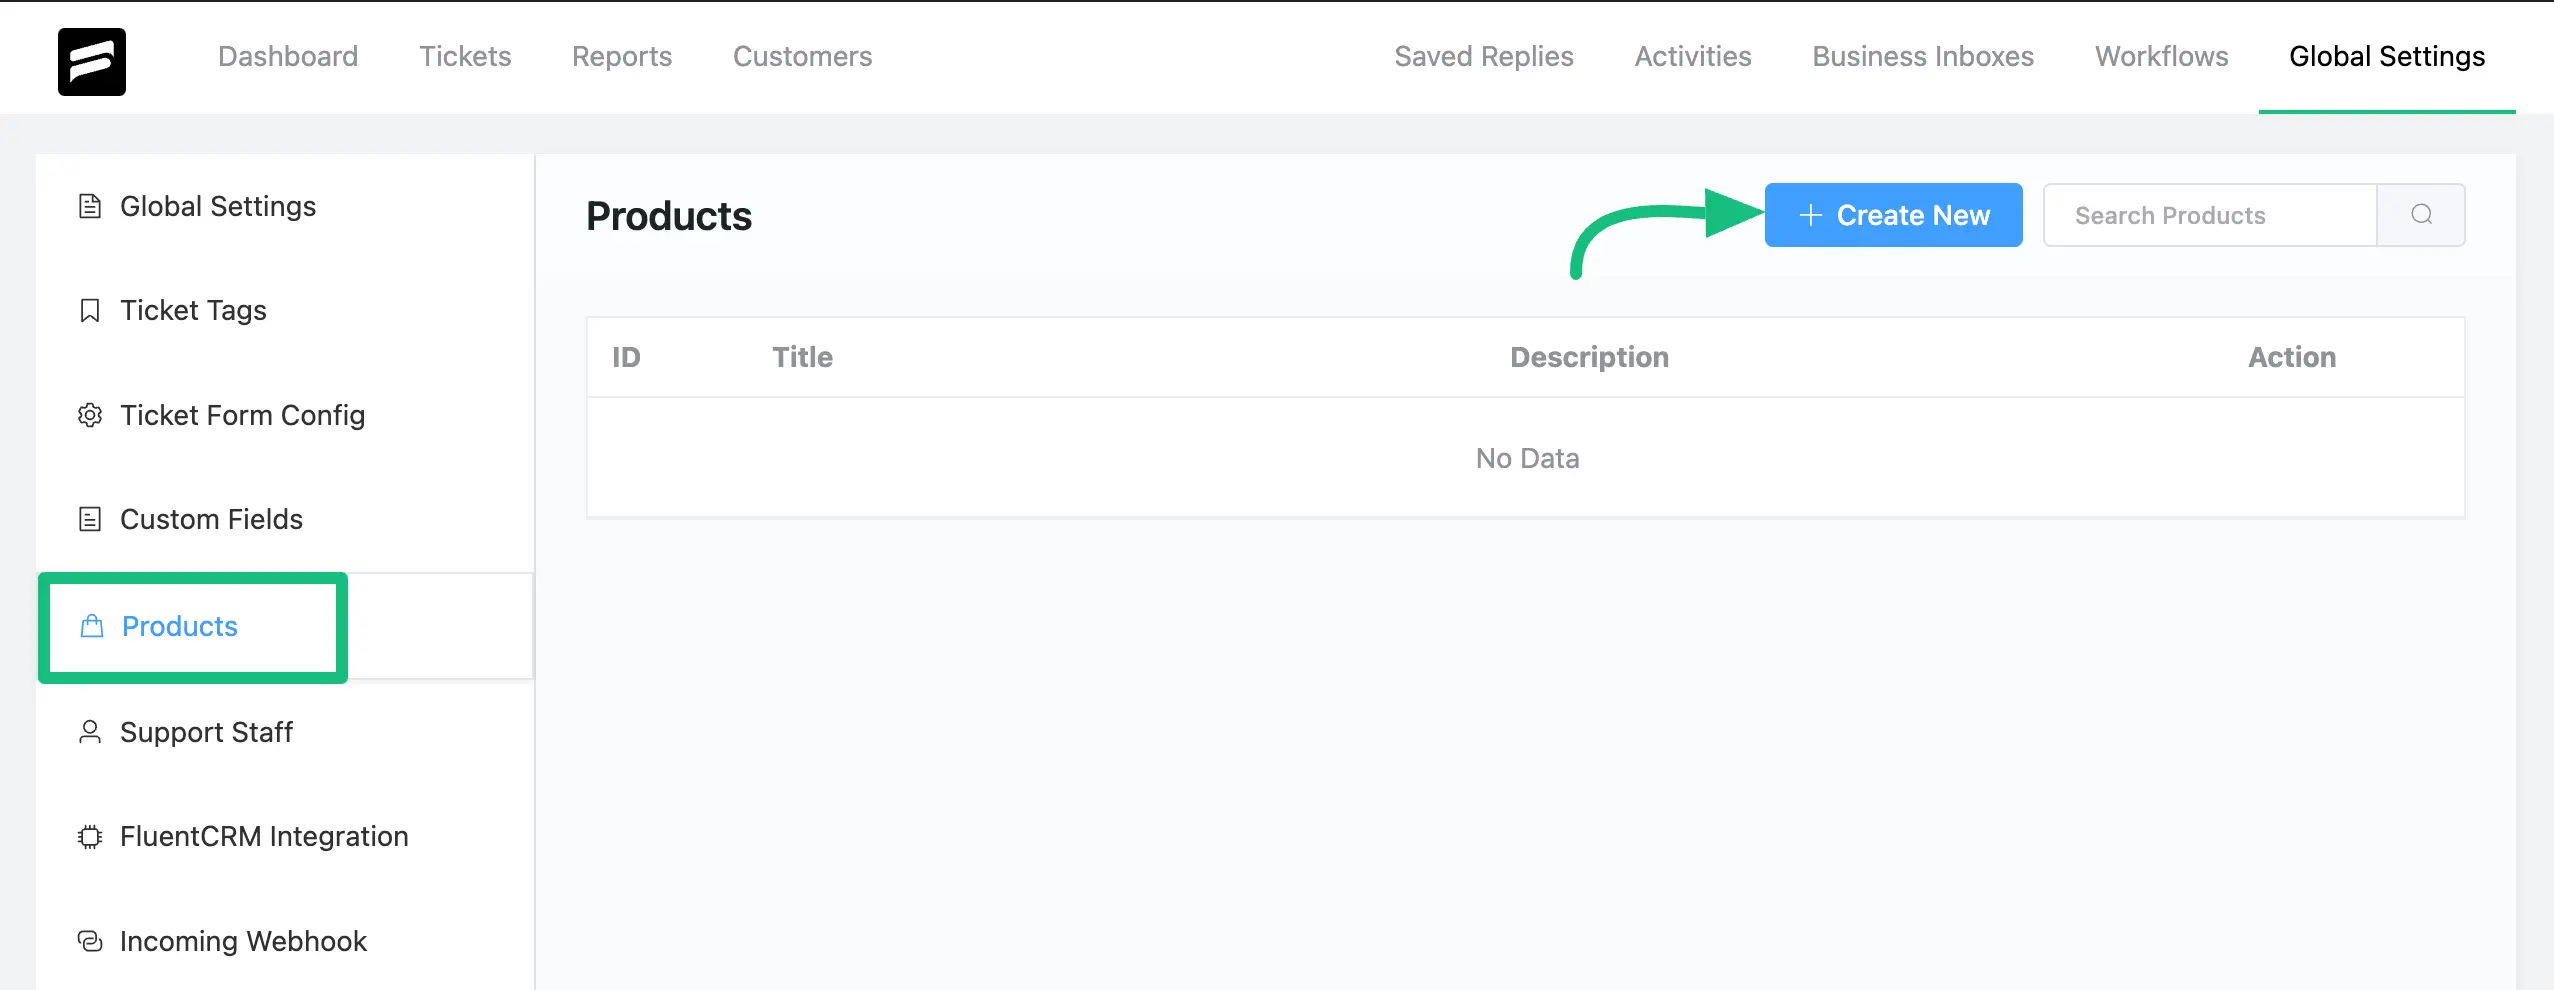
Select Products from the left sidebar and click on + Create New to create a new product.
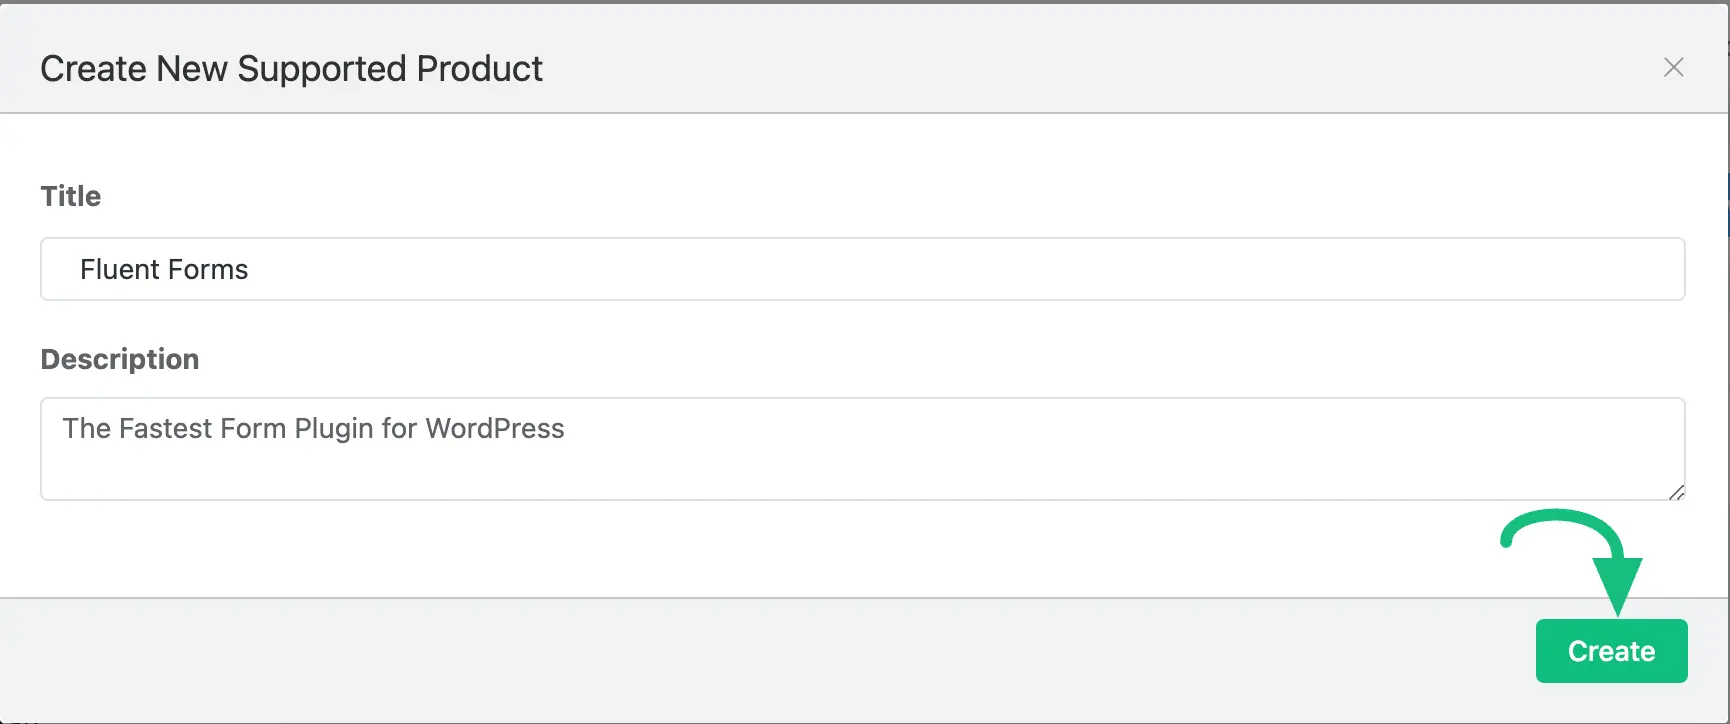
Add a relevant Title & Description for the product, then click the Create button.
Also, you can Edit/Delete the products by clicking the Pencil/Trash icons placed on the right-hand side under the Actions column.
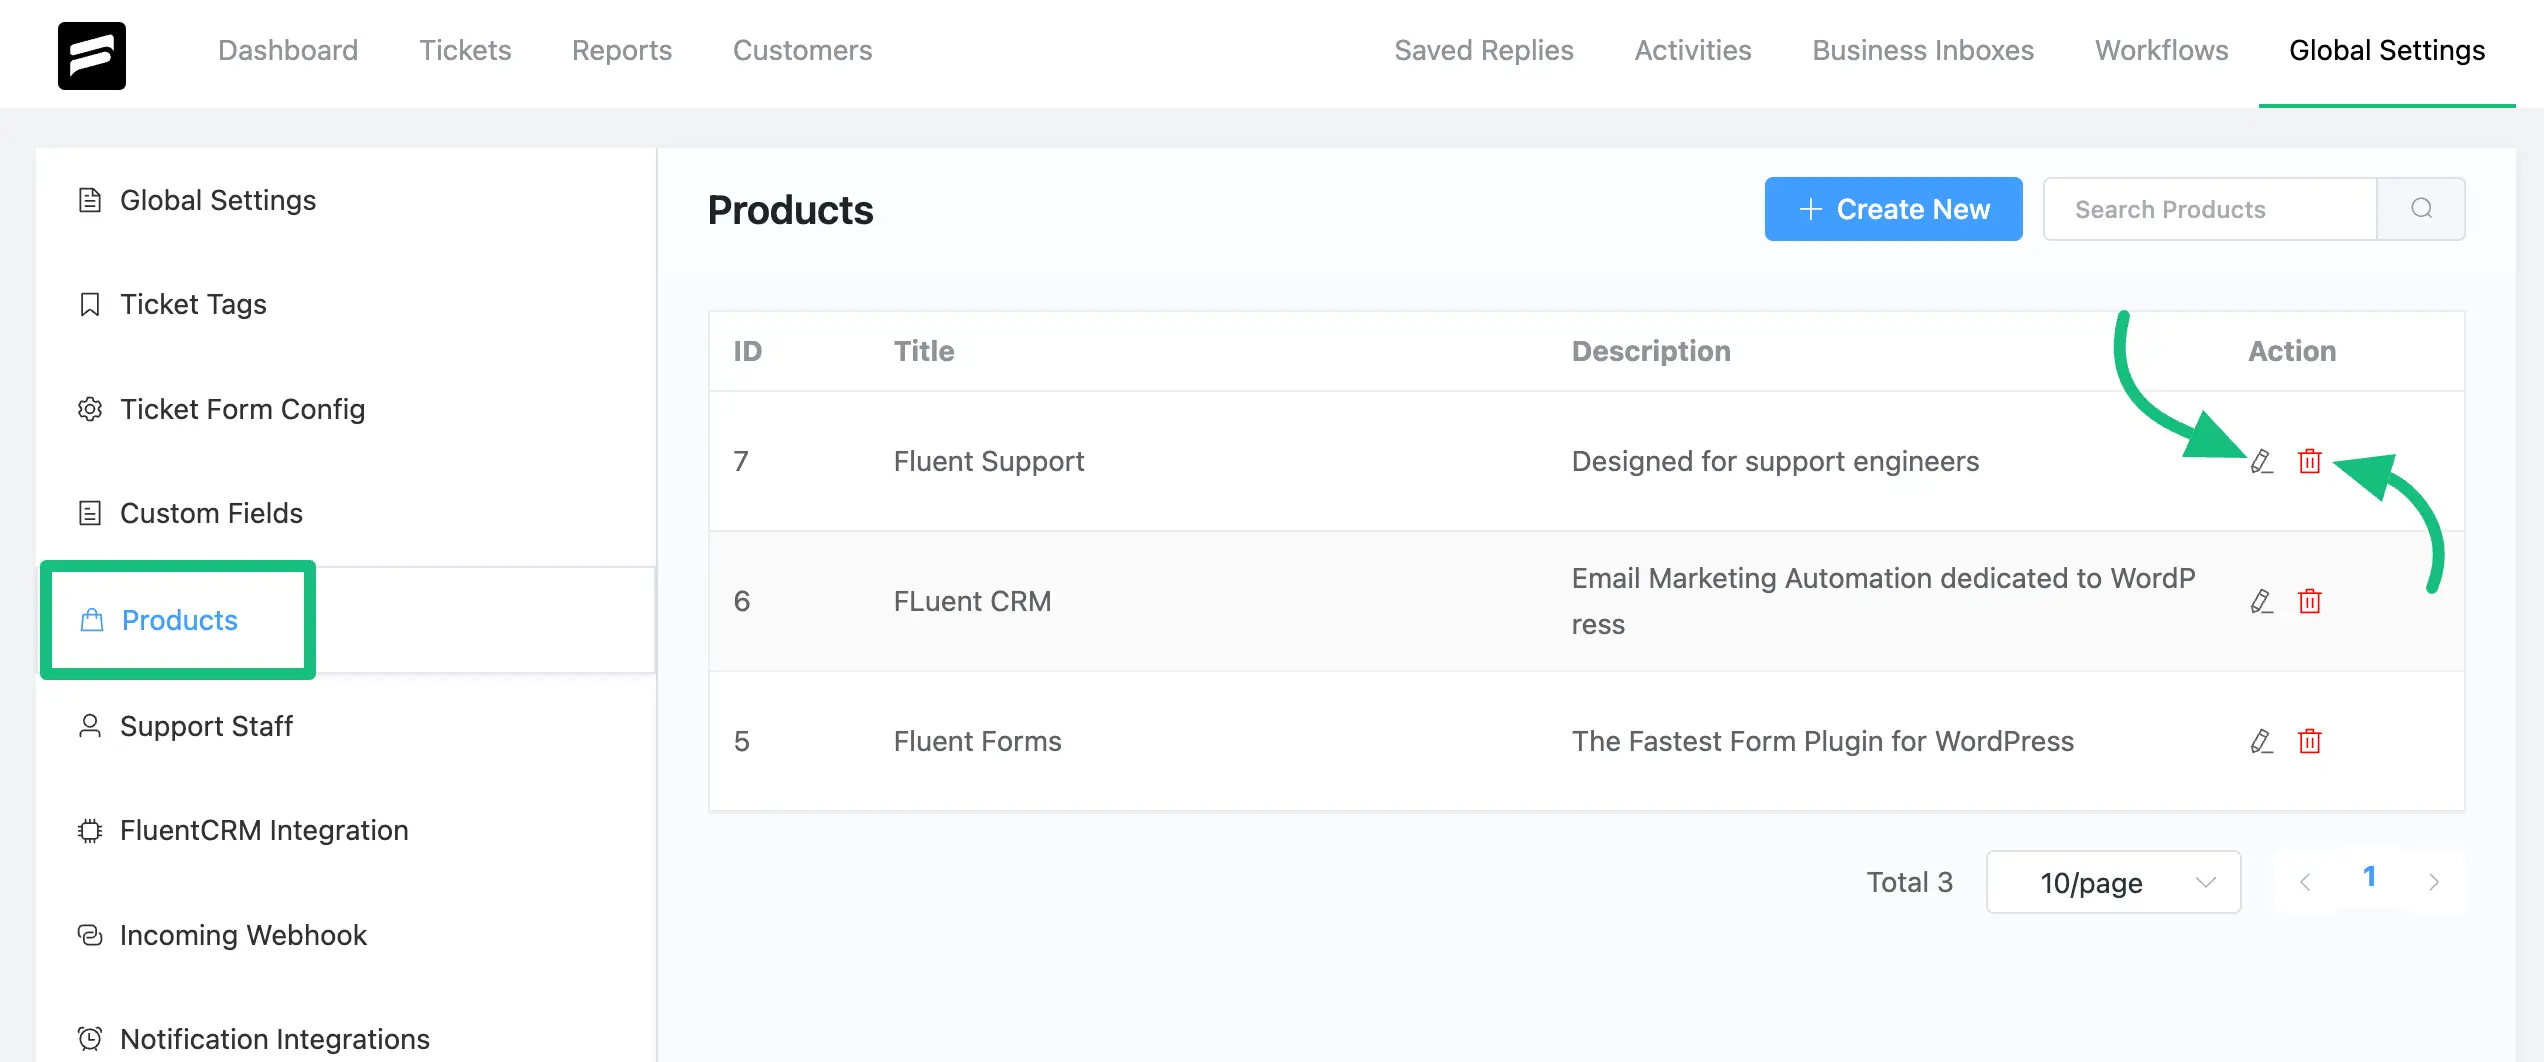
For instance, I edited the Product Title from ‘Fluent Support’ to ‘Fluent Support PRO’. Similarly, you can Edit/Delete any of your existing products according to your needs.

This way, you can create as many Products as you want to categorize or organize your tickets!
If you have any further questions, concerns, or suggestions, please do not hesitate to contact our @support team. Thank you.


