FluentSupport allows you to manage your tickets using Telegram. You can see your New Tickets Notification in your Telegram groups or a person’s Inbox and can also reply from your Telegram inbox. This article will guide you through how to connect your Fluent Support with Telegram to manage your tickets in Telegram.
Fluent Support Telegram Settings #
To make your Telegram Integration running, you need to get the Bot Token and Group Chat ID from Telegram. To learn how to Manage your Tickets using Telegram, follow the guidelines accordingly –
Get Bot Token #
Simply follow the steps to get the Bot Token from Telegram.
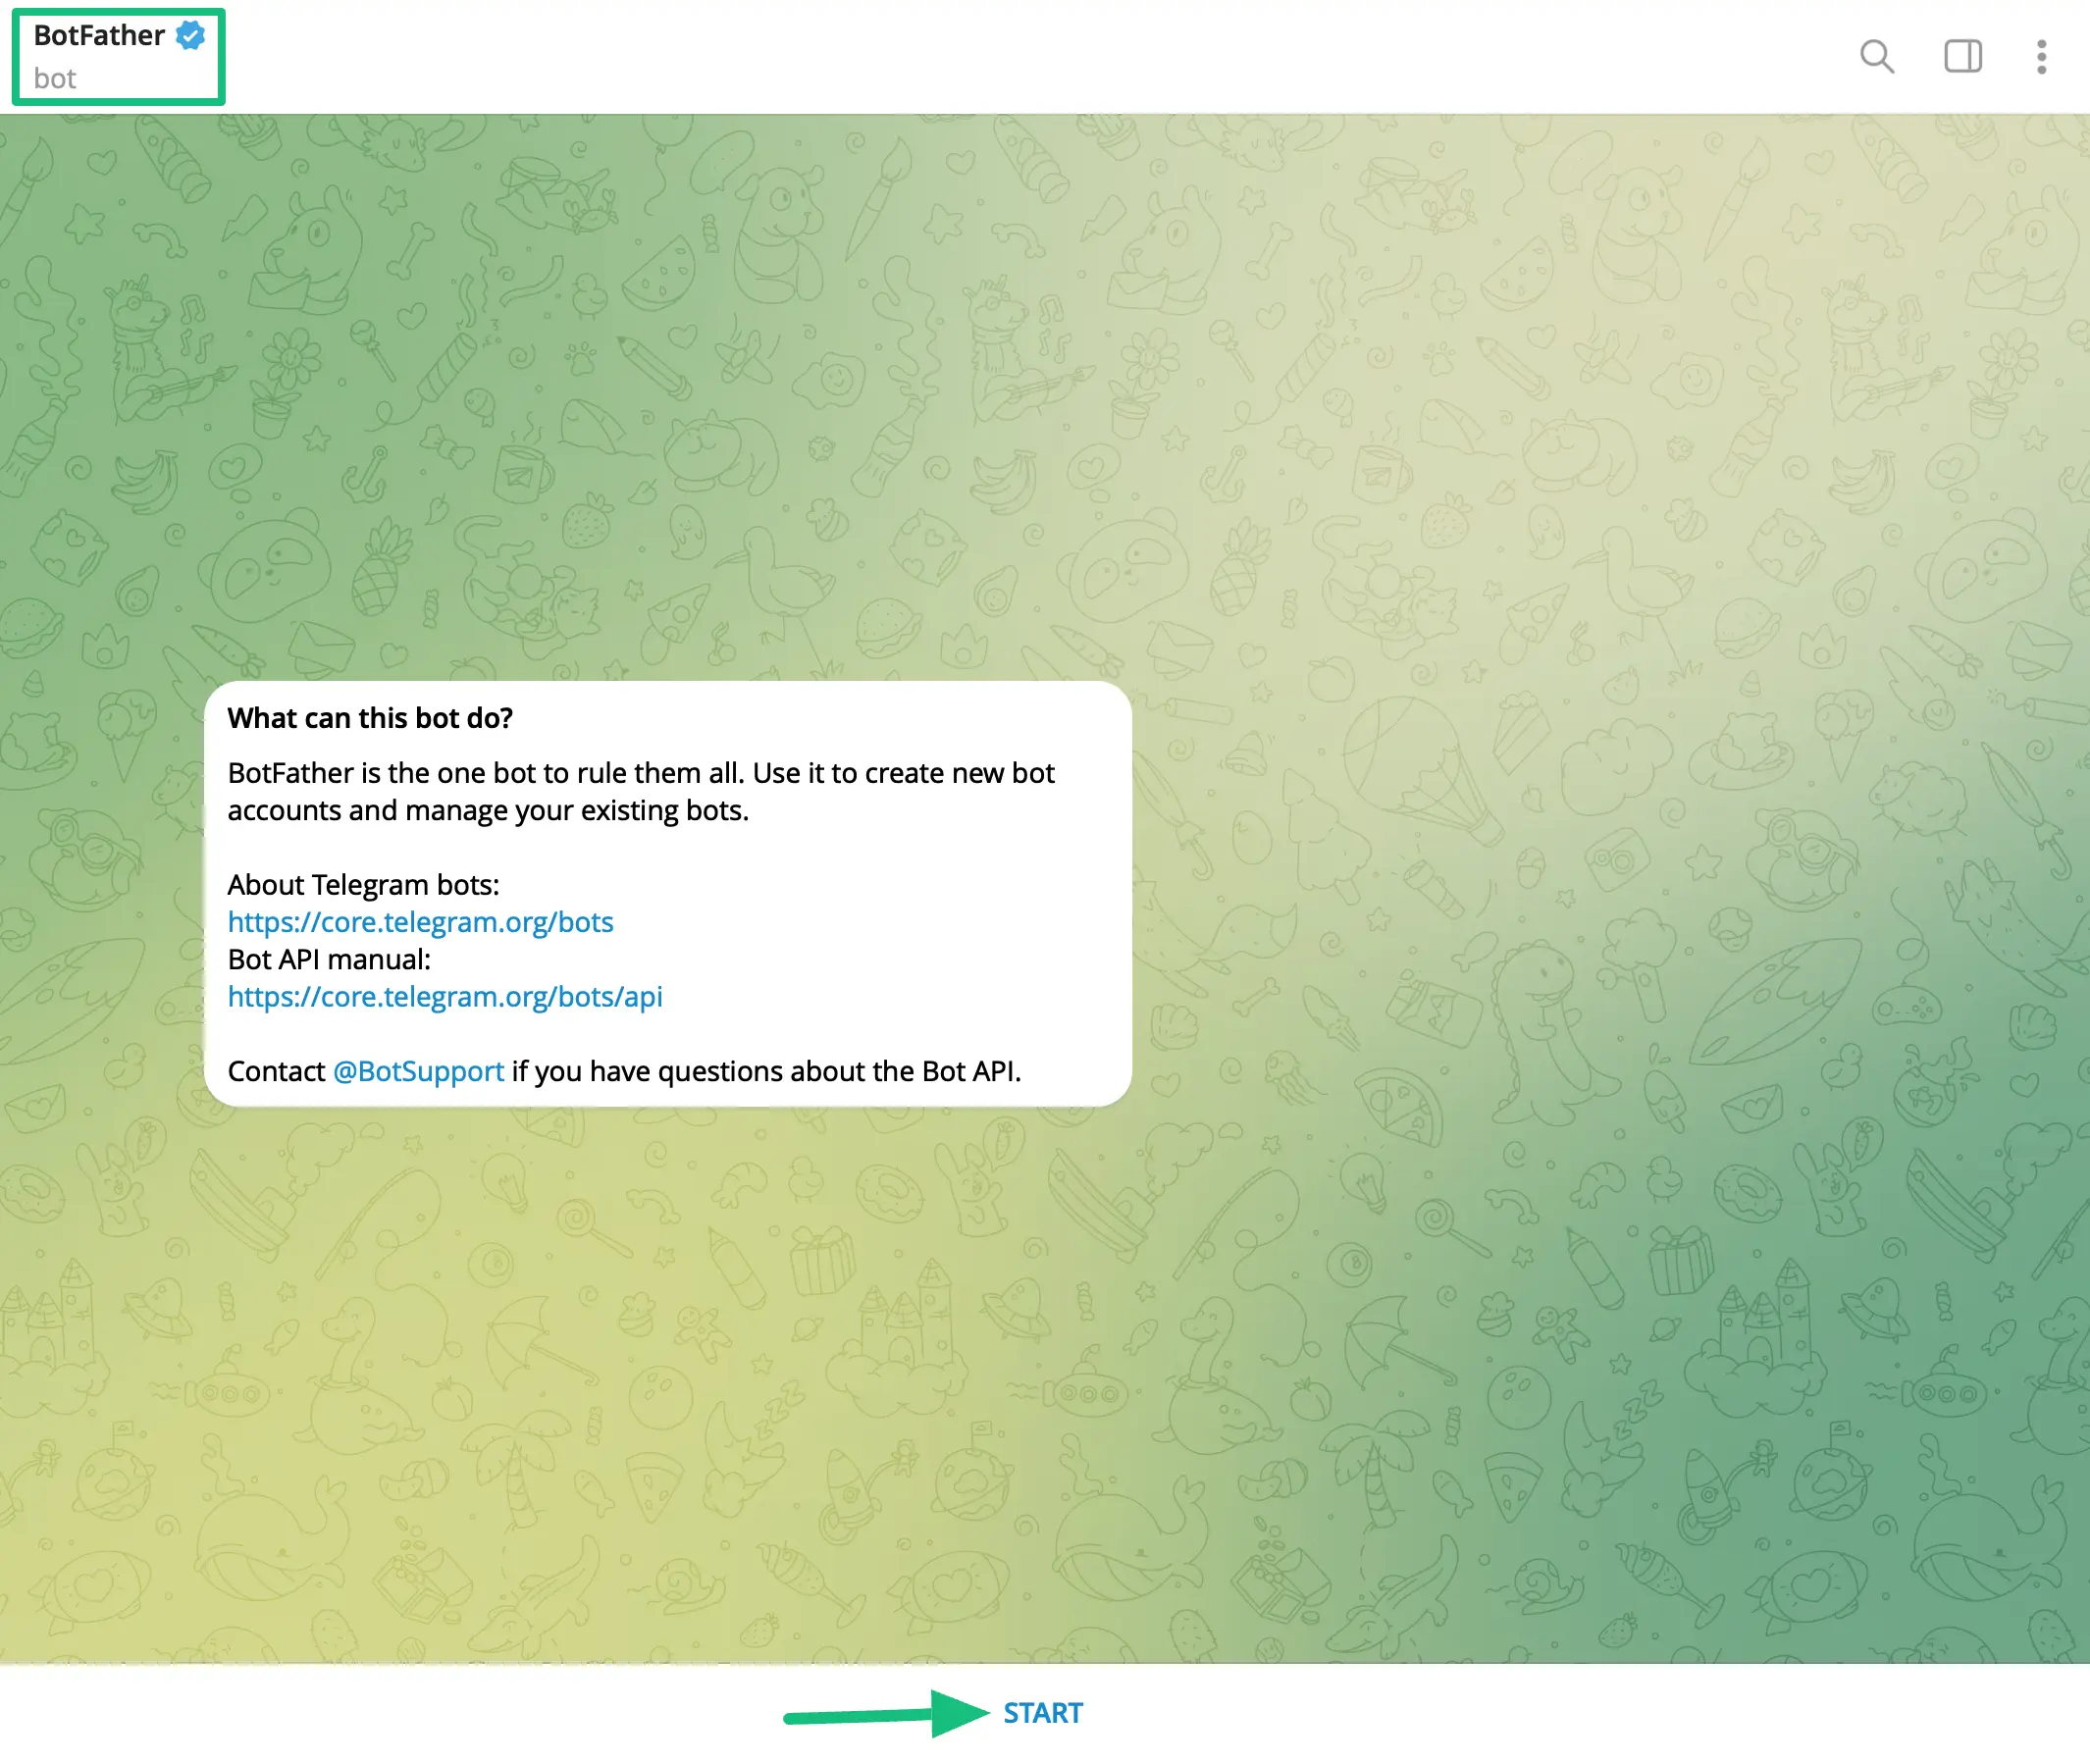
First, send a text to @BotFather or click the start button to start the bot in your Telegram application.
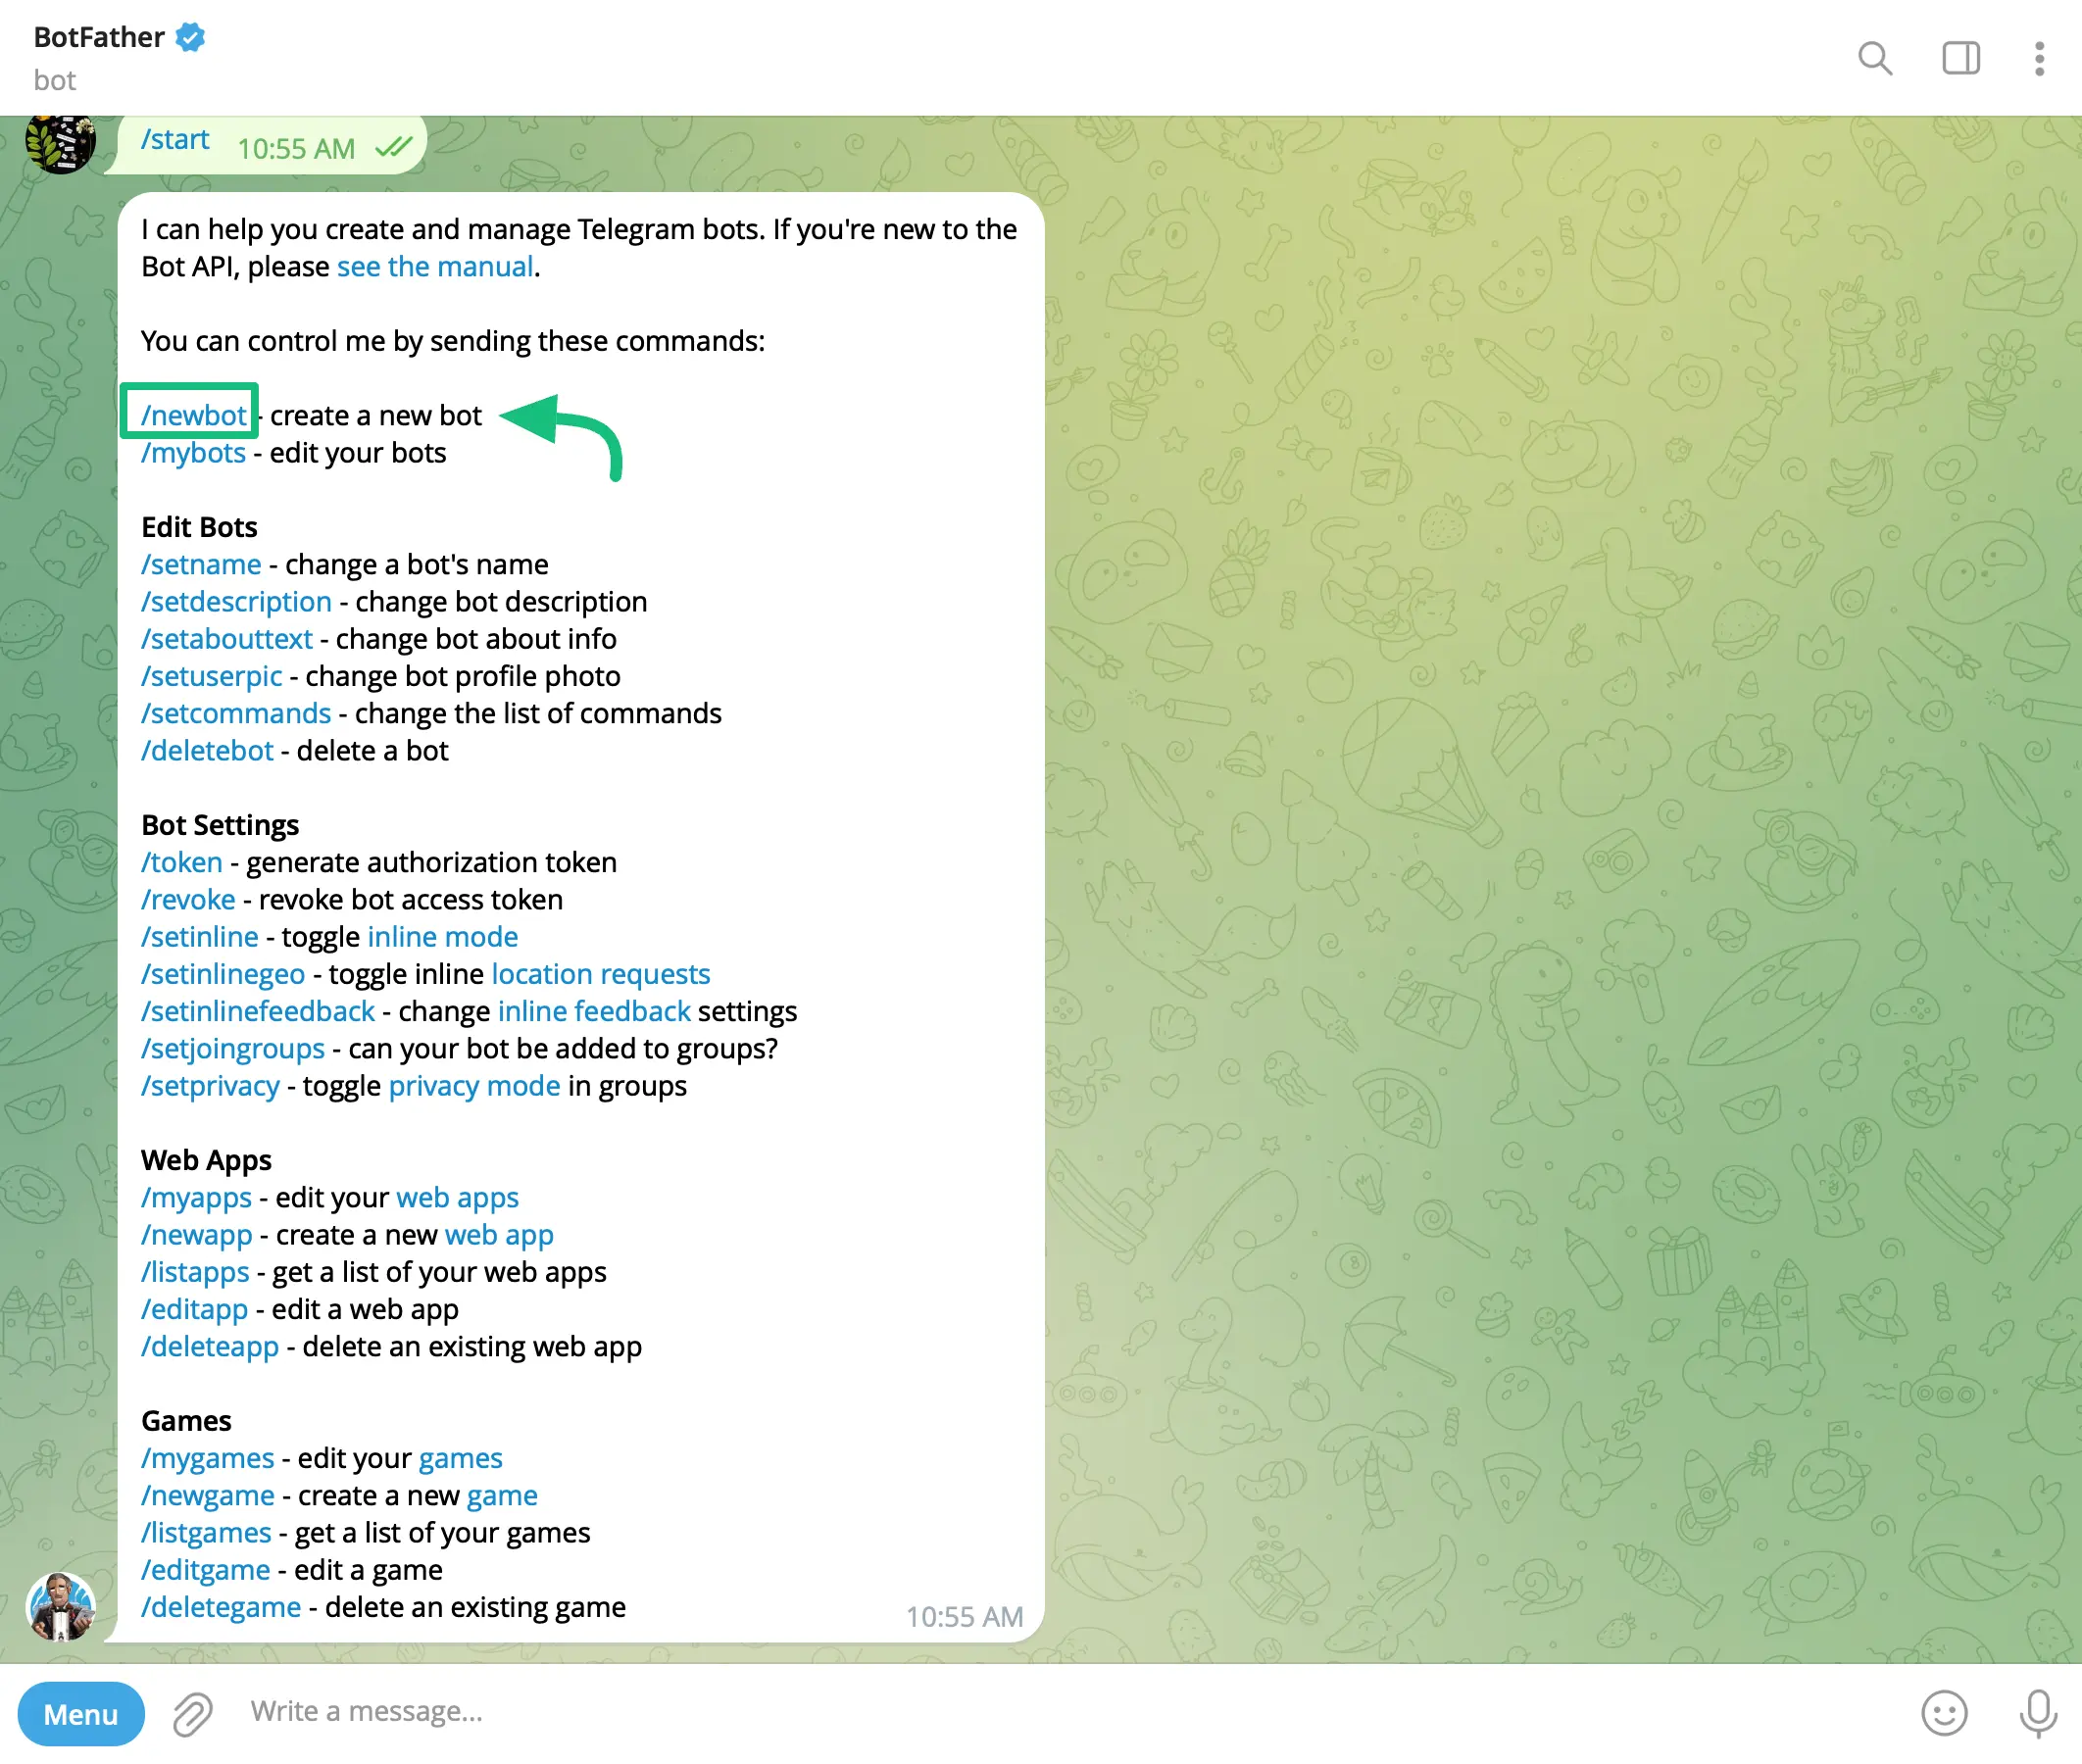
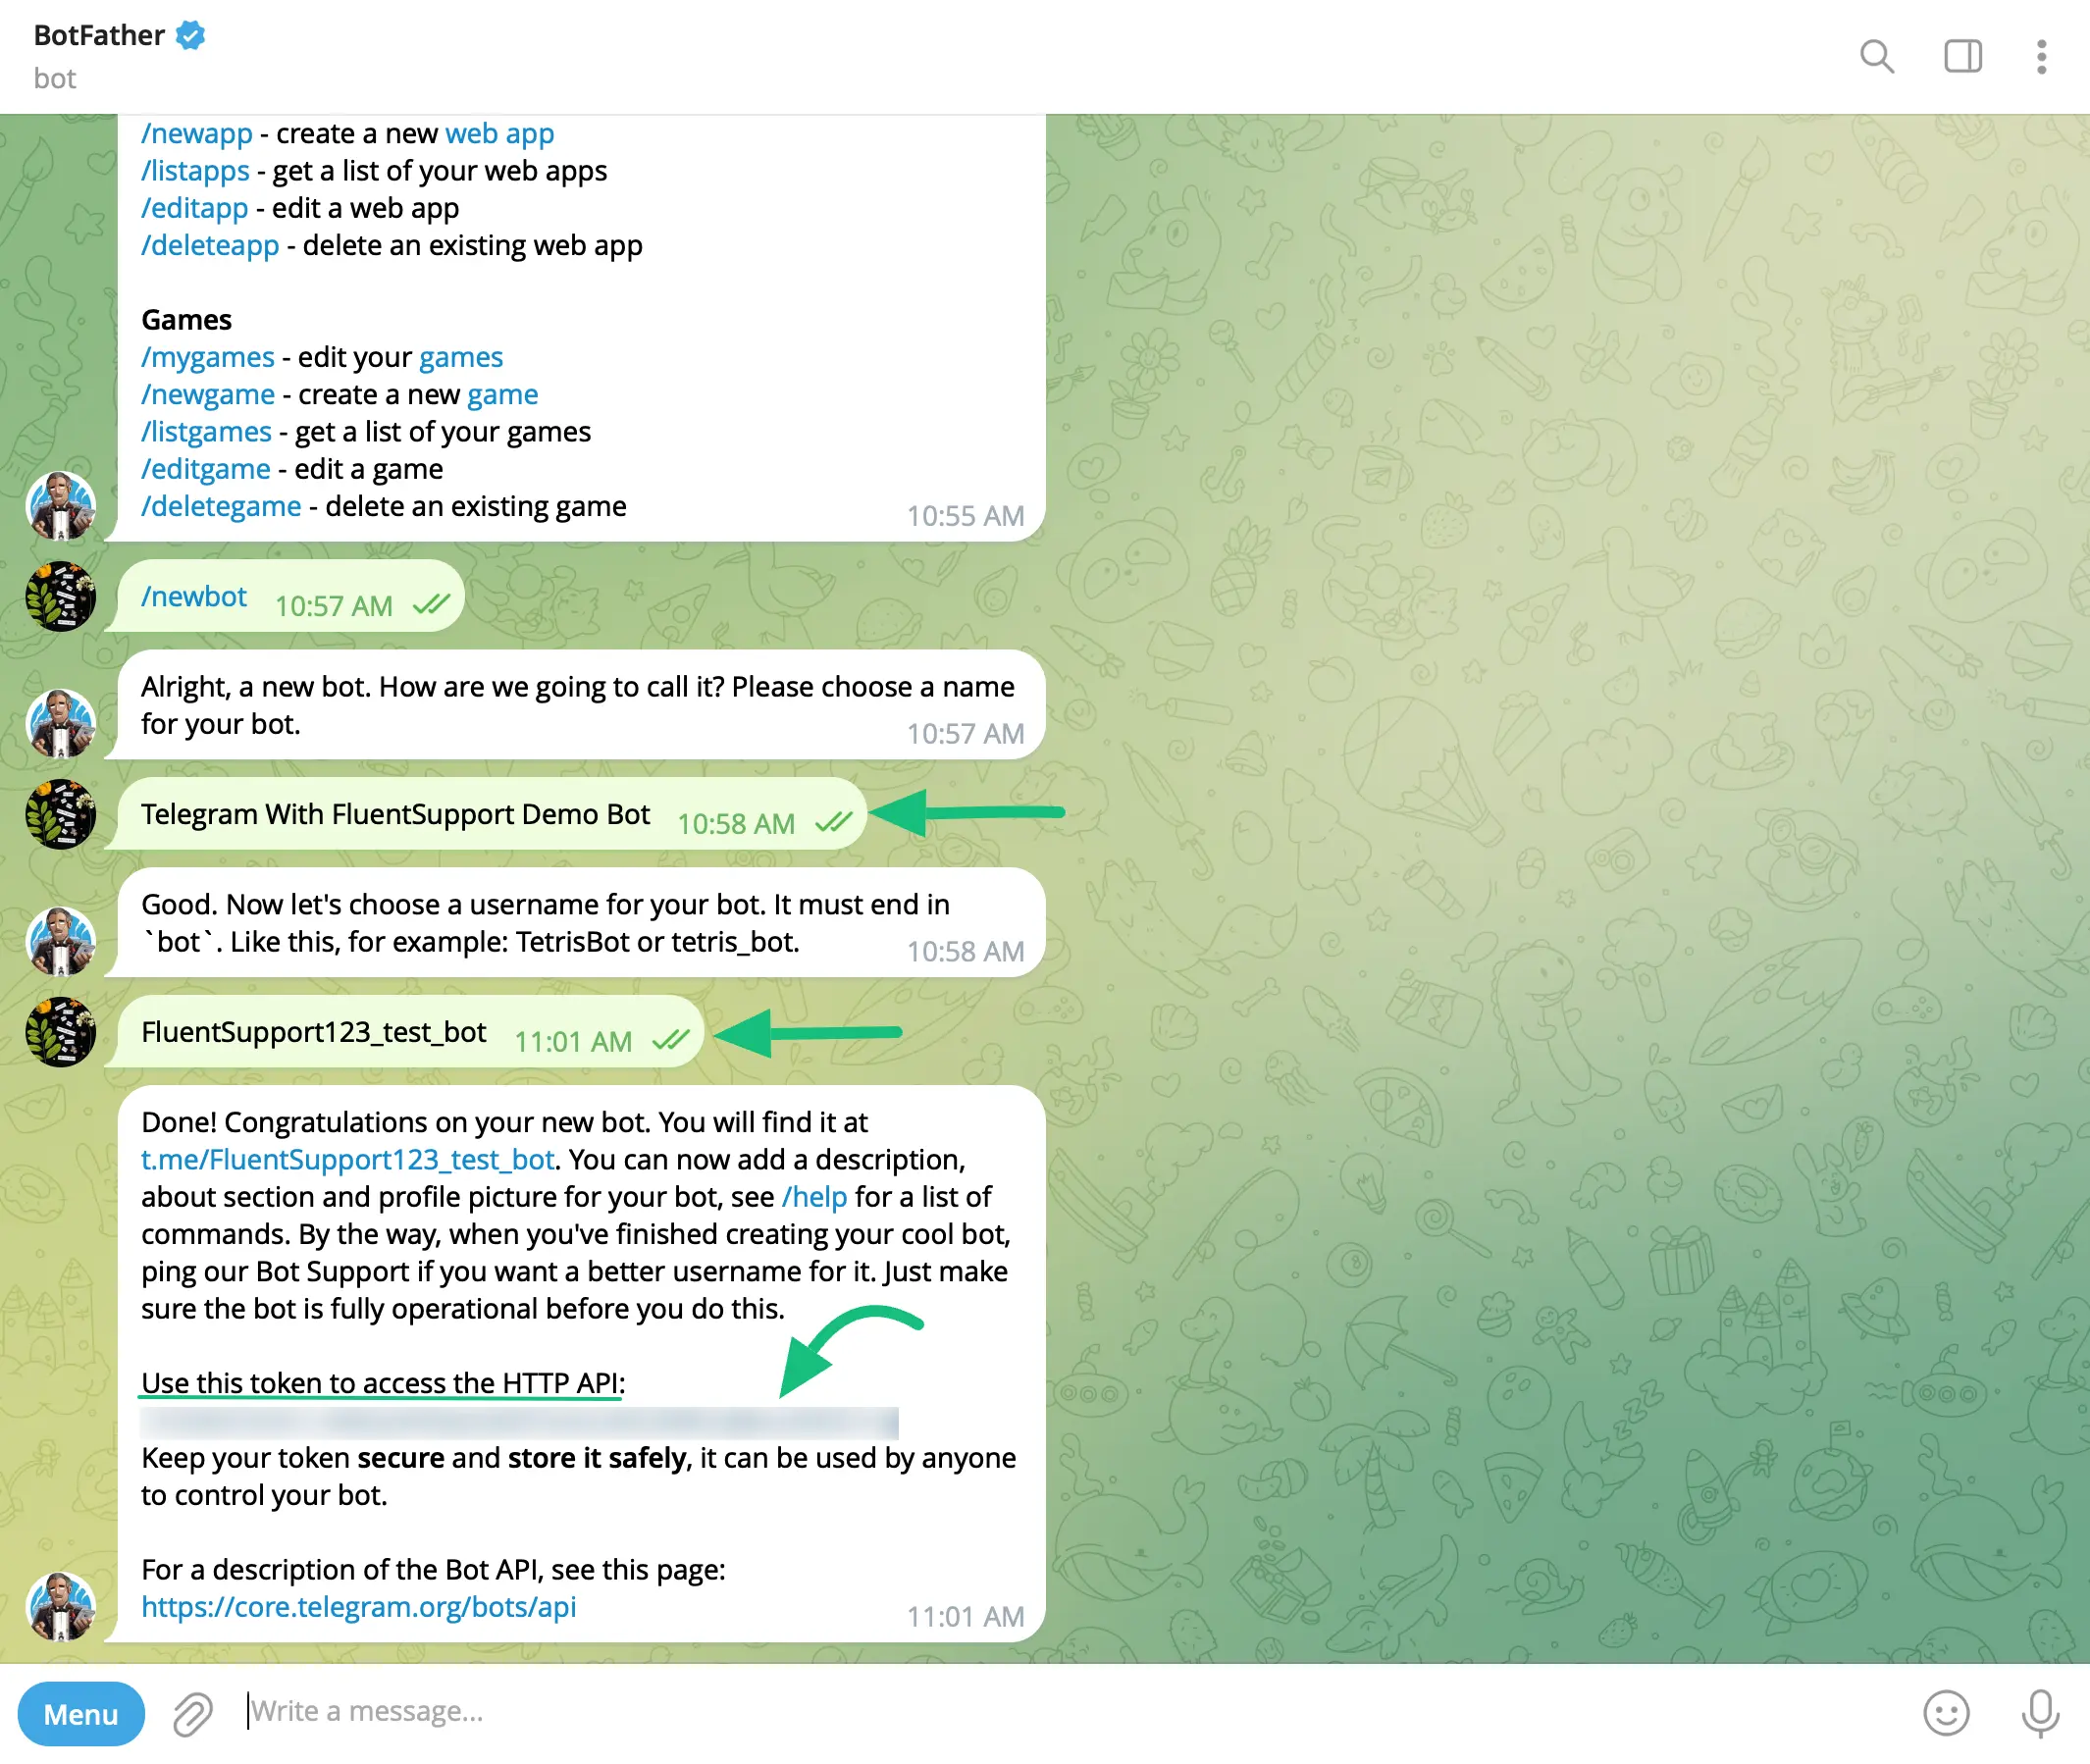
Then create a Bot by sending the ‘/newbot’ command using the help message.
Provide a relevant name for your bot. Next, choose a username for your bot that must end with the text ‘bot’.
After finishing these steps, @BotFather will provide you with the Bot Token that you need to complete the next step.
Get Group Chat ID #
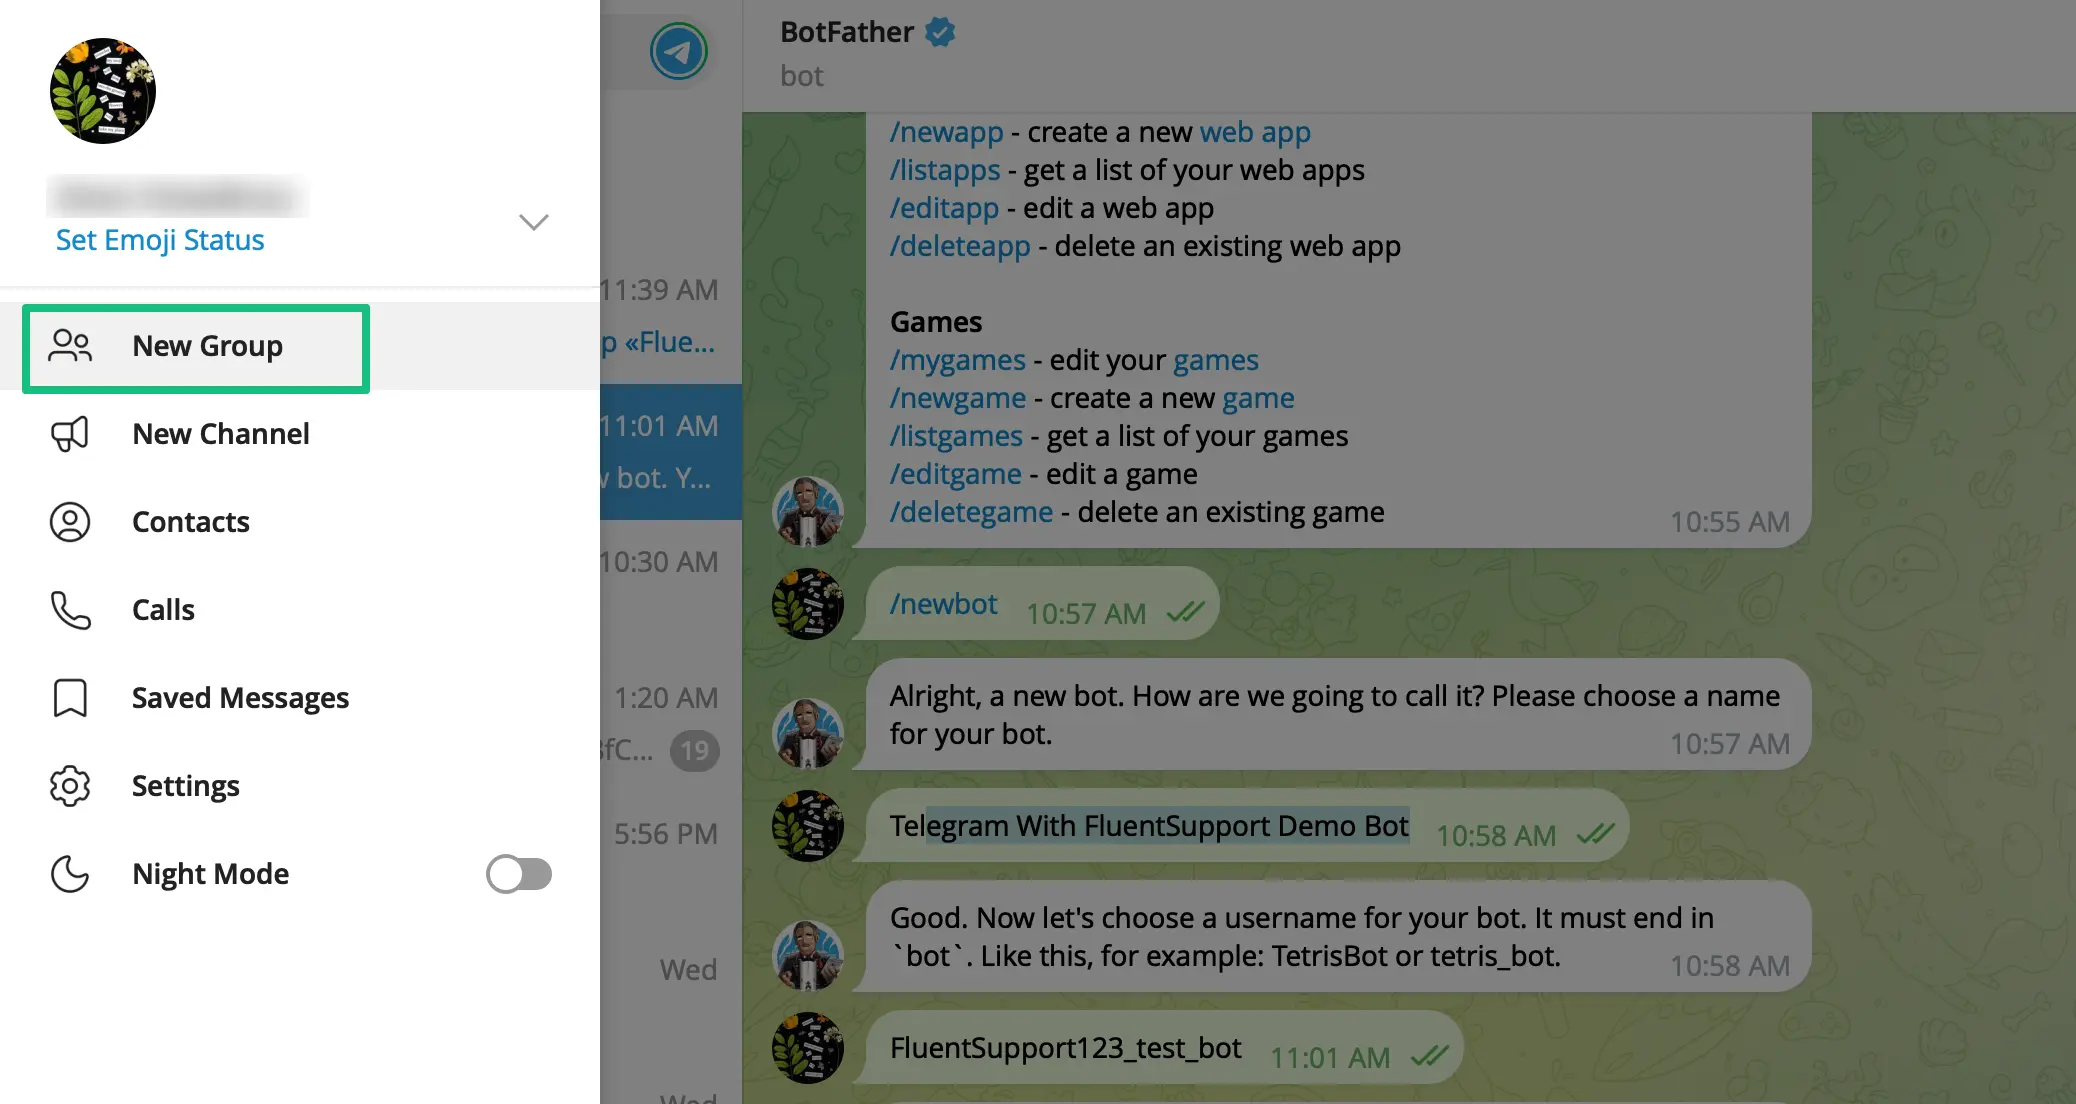
Now you will need a Group Chat ID to send your notification. To do this, first, you need to Create a Group in Telegram.
Creating A New Group On Telegram #
To create a new group in Telegram, follow the Screenshots & GIF below –
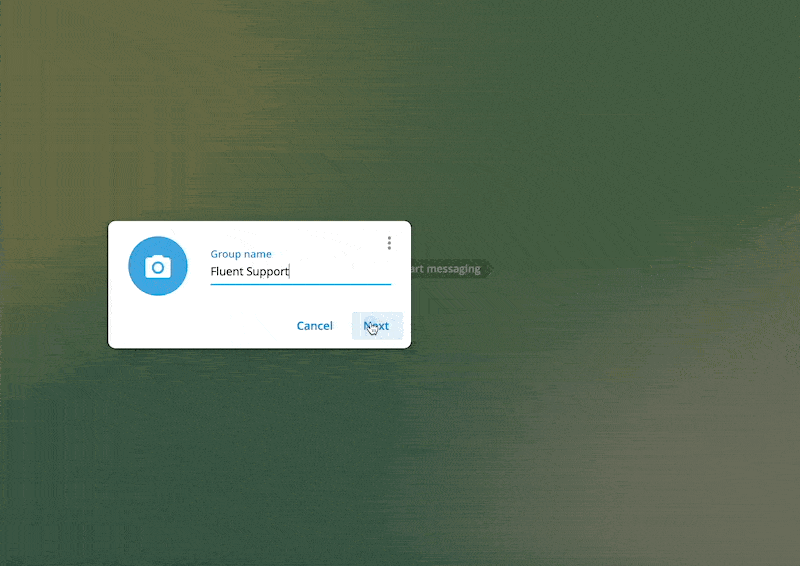
First, click the New Group button from the left-side Editor.
Now, give a name to your group and Add the Bot that you created in the previous step as a member of the group. Press the Create button and your group will be created.
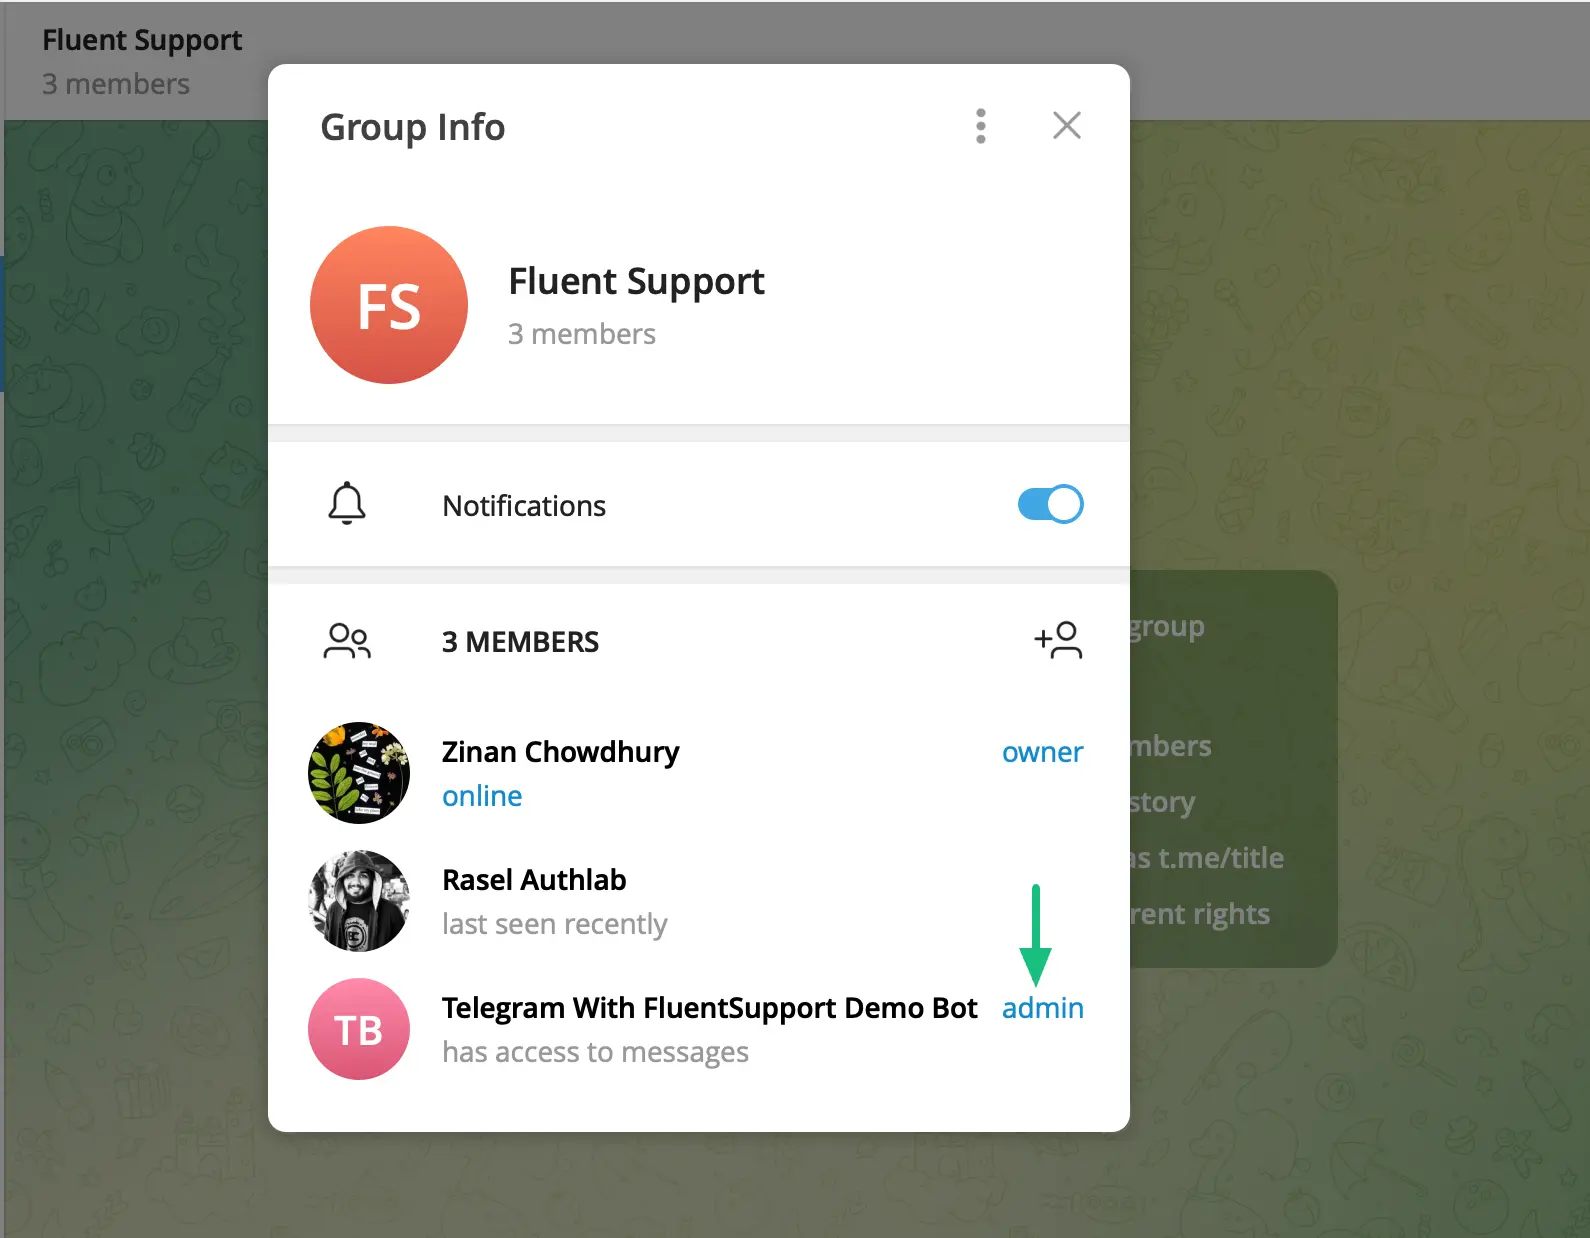
Now, give your bot “Admin Acces” i.e., simply make the bot admin of your group chat.
Follow the GIF below, to learn how you can make your Bot Admin of your group.
%20Give%20Admin%20Access%20to%20Your%20created%20Bot.gif?raw=true)
After giving your Bot the “Admin Access” you can see the preview from View group info by clicking the three-dot from the right-side corner
Get Group Chat ID #
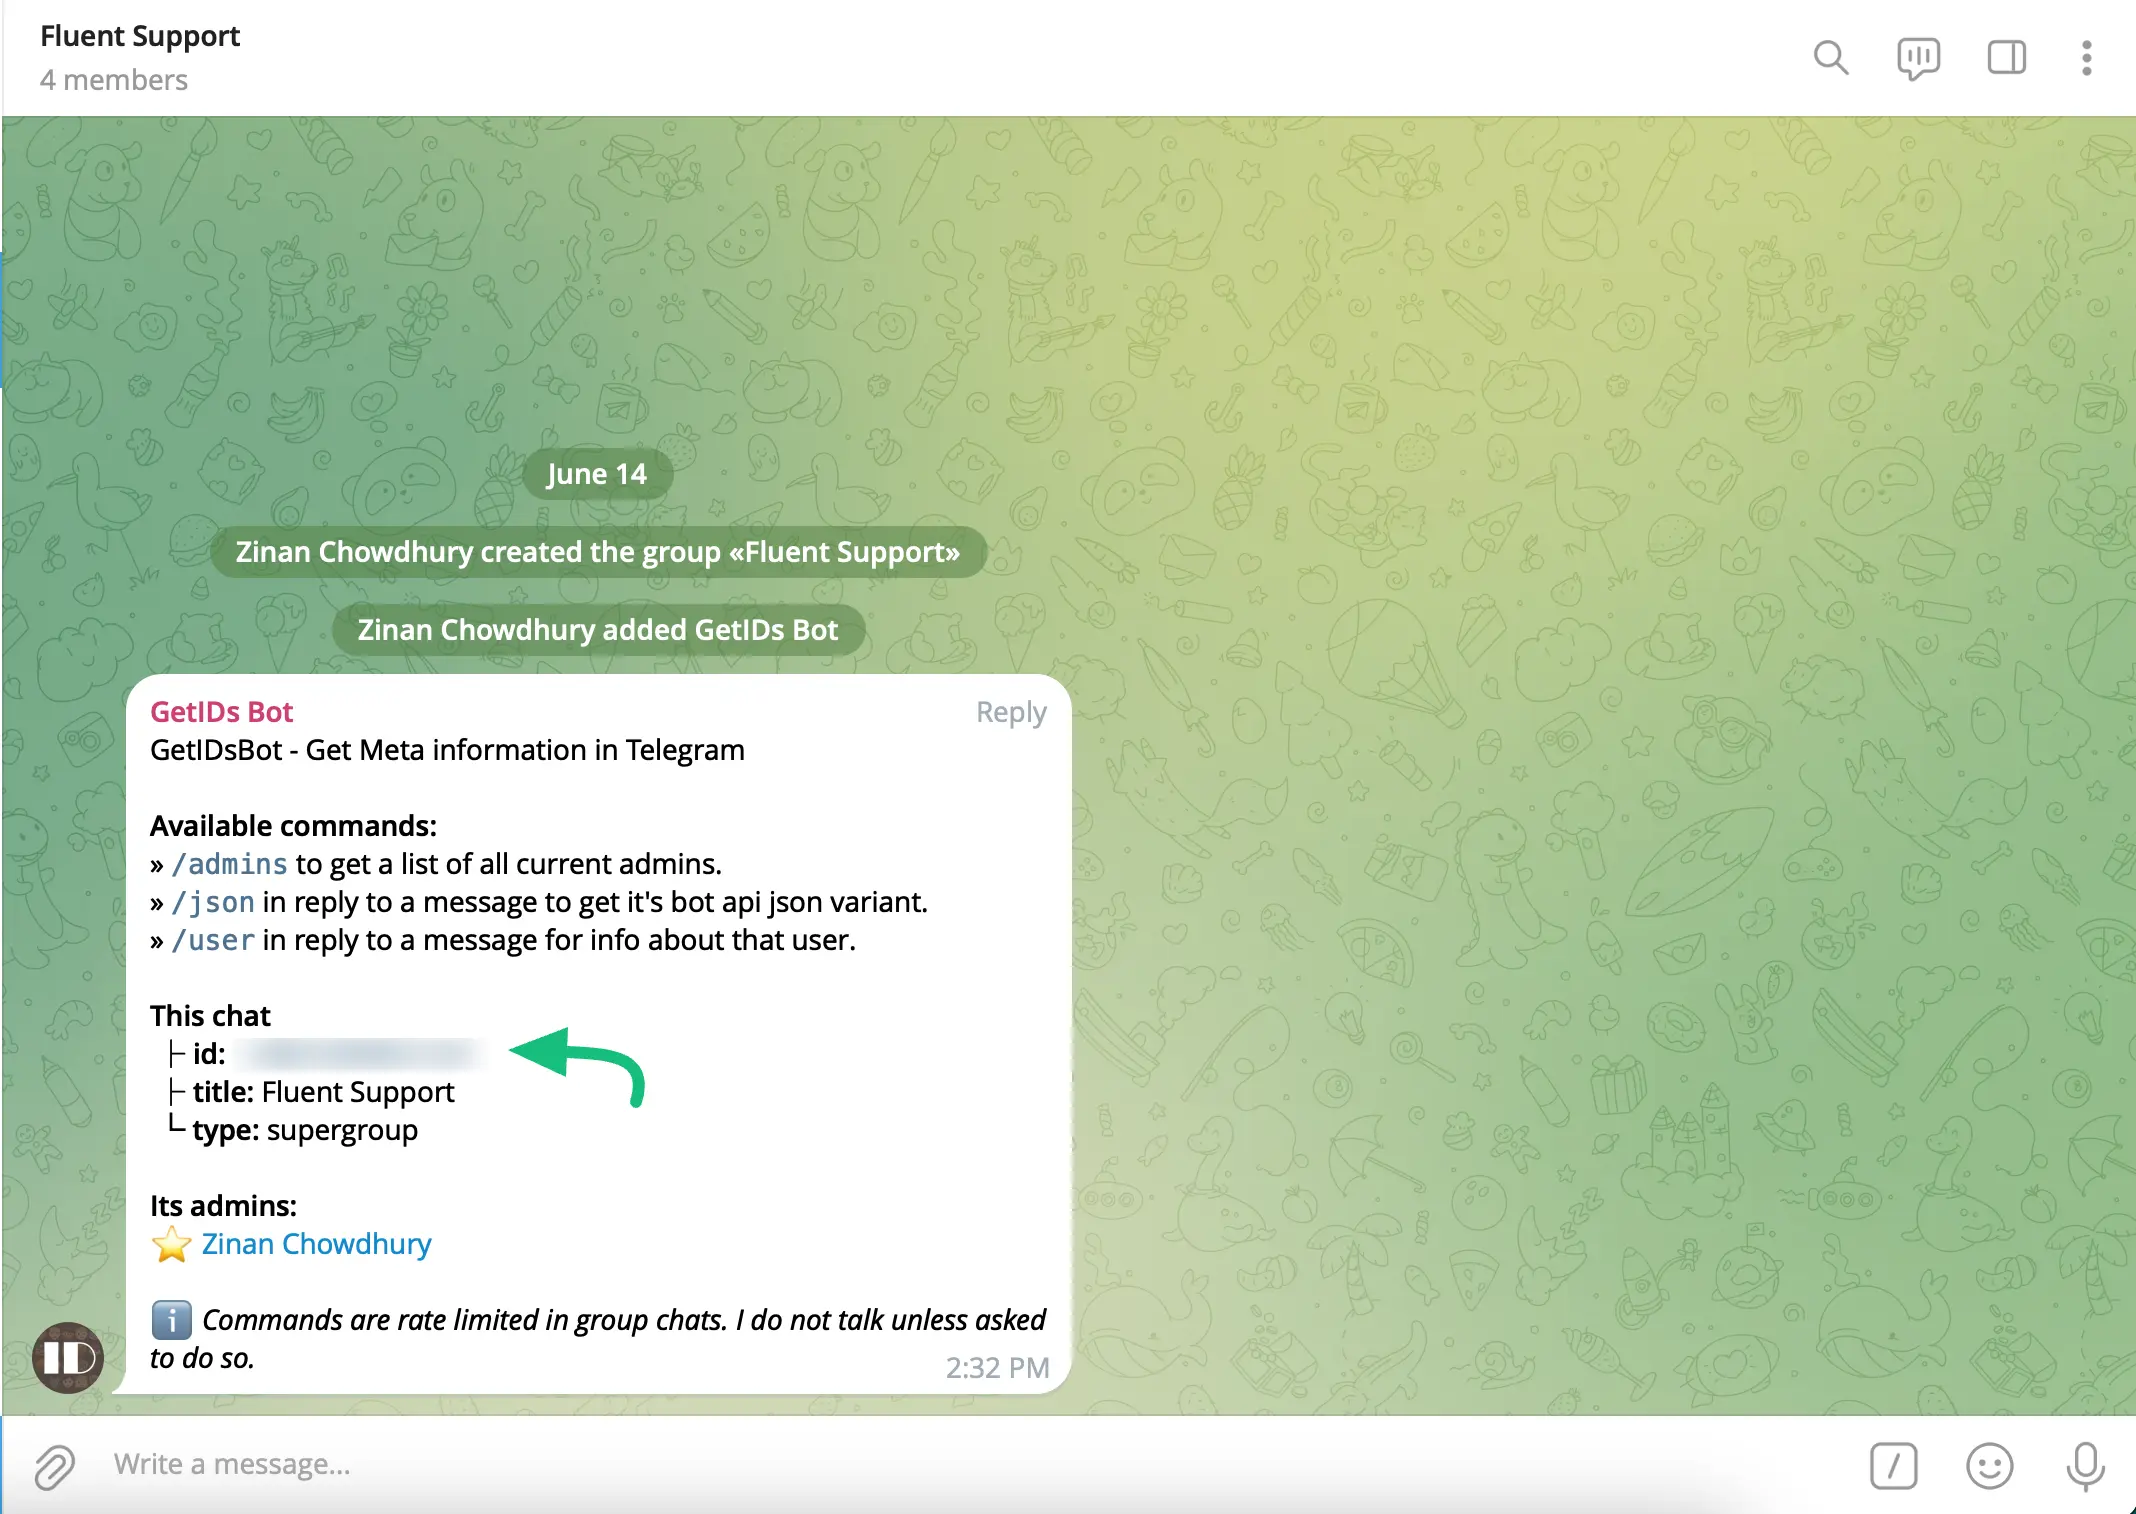
Finally, to get the Chat ID of your group, add @GetIdsBot as a member of this same newly created group.
To do this follow the Screenshots & GIF below step-by-step –
%20Add%20GetIDs%20Bot%20as%20a%20Member.gif?raw=true)
After adding the GetIDs Bot as a member, it will send a message to the group with the Group Chat ID.
Remember, the Chat ID starts with a minus sign (-), and you would have to copy the code exactly provided by the GetIDs bot.
Configure Telegram in Fluent Support #
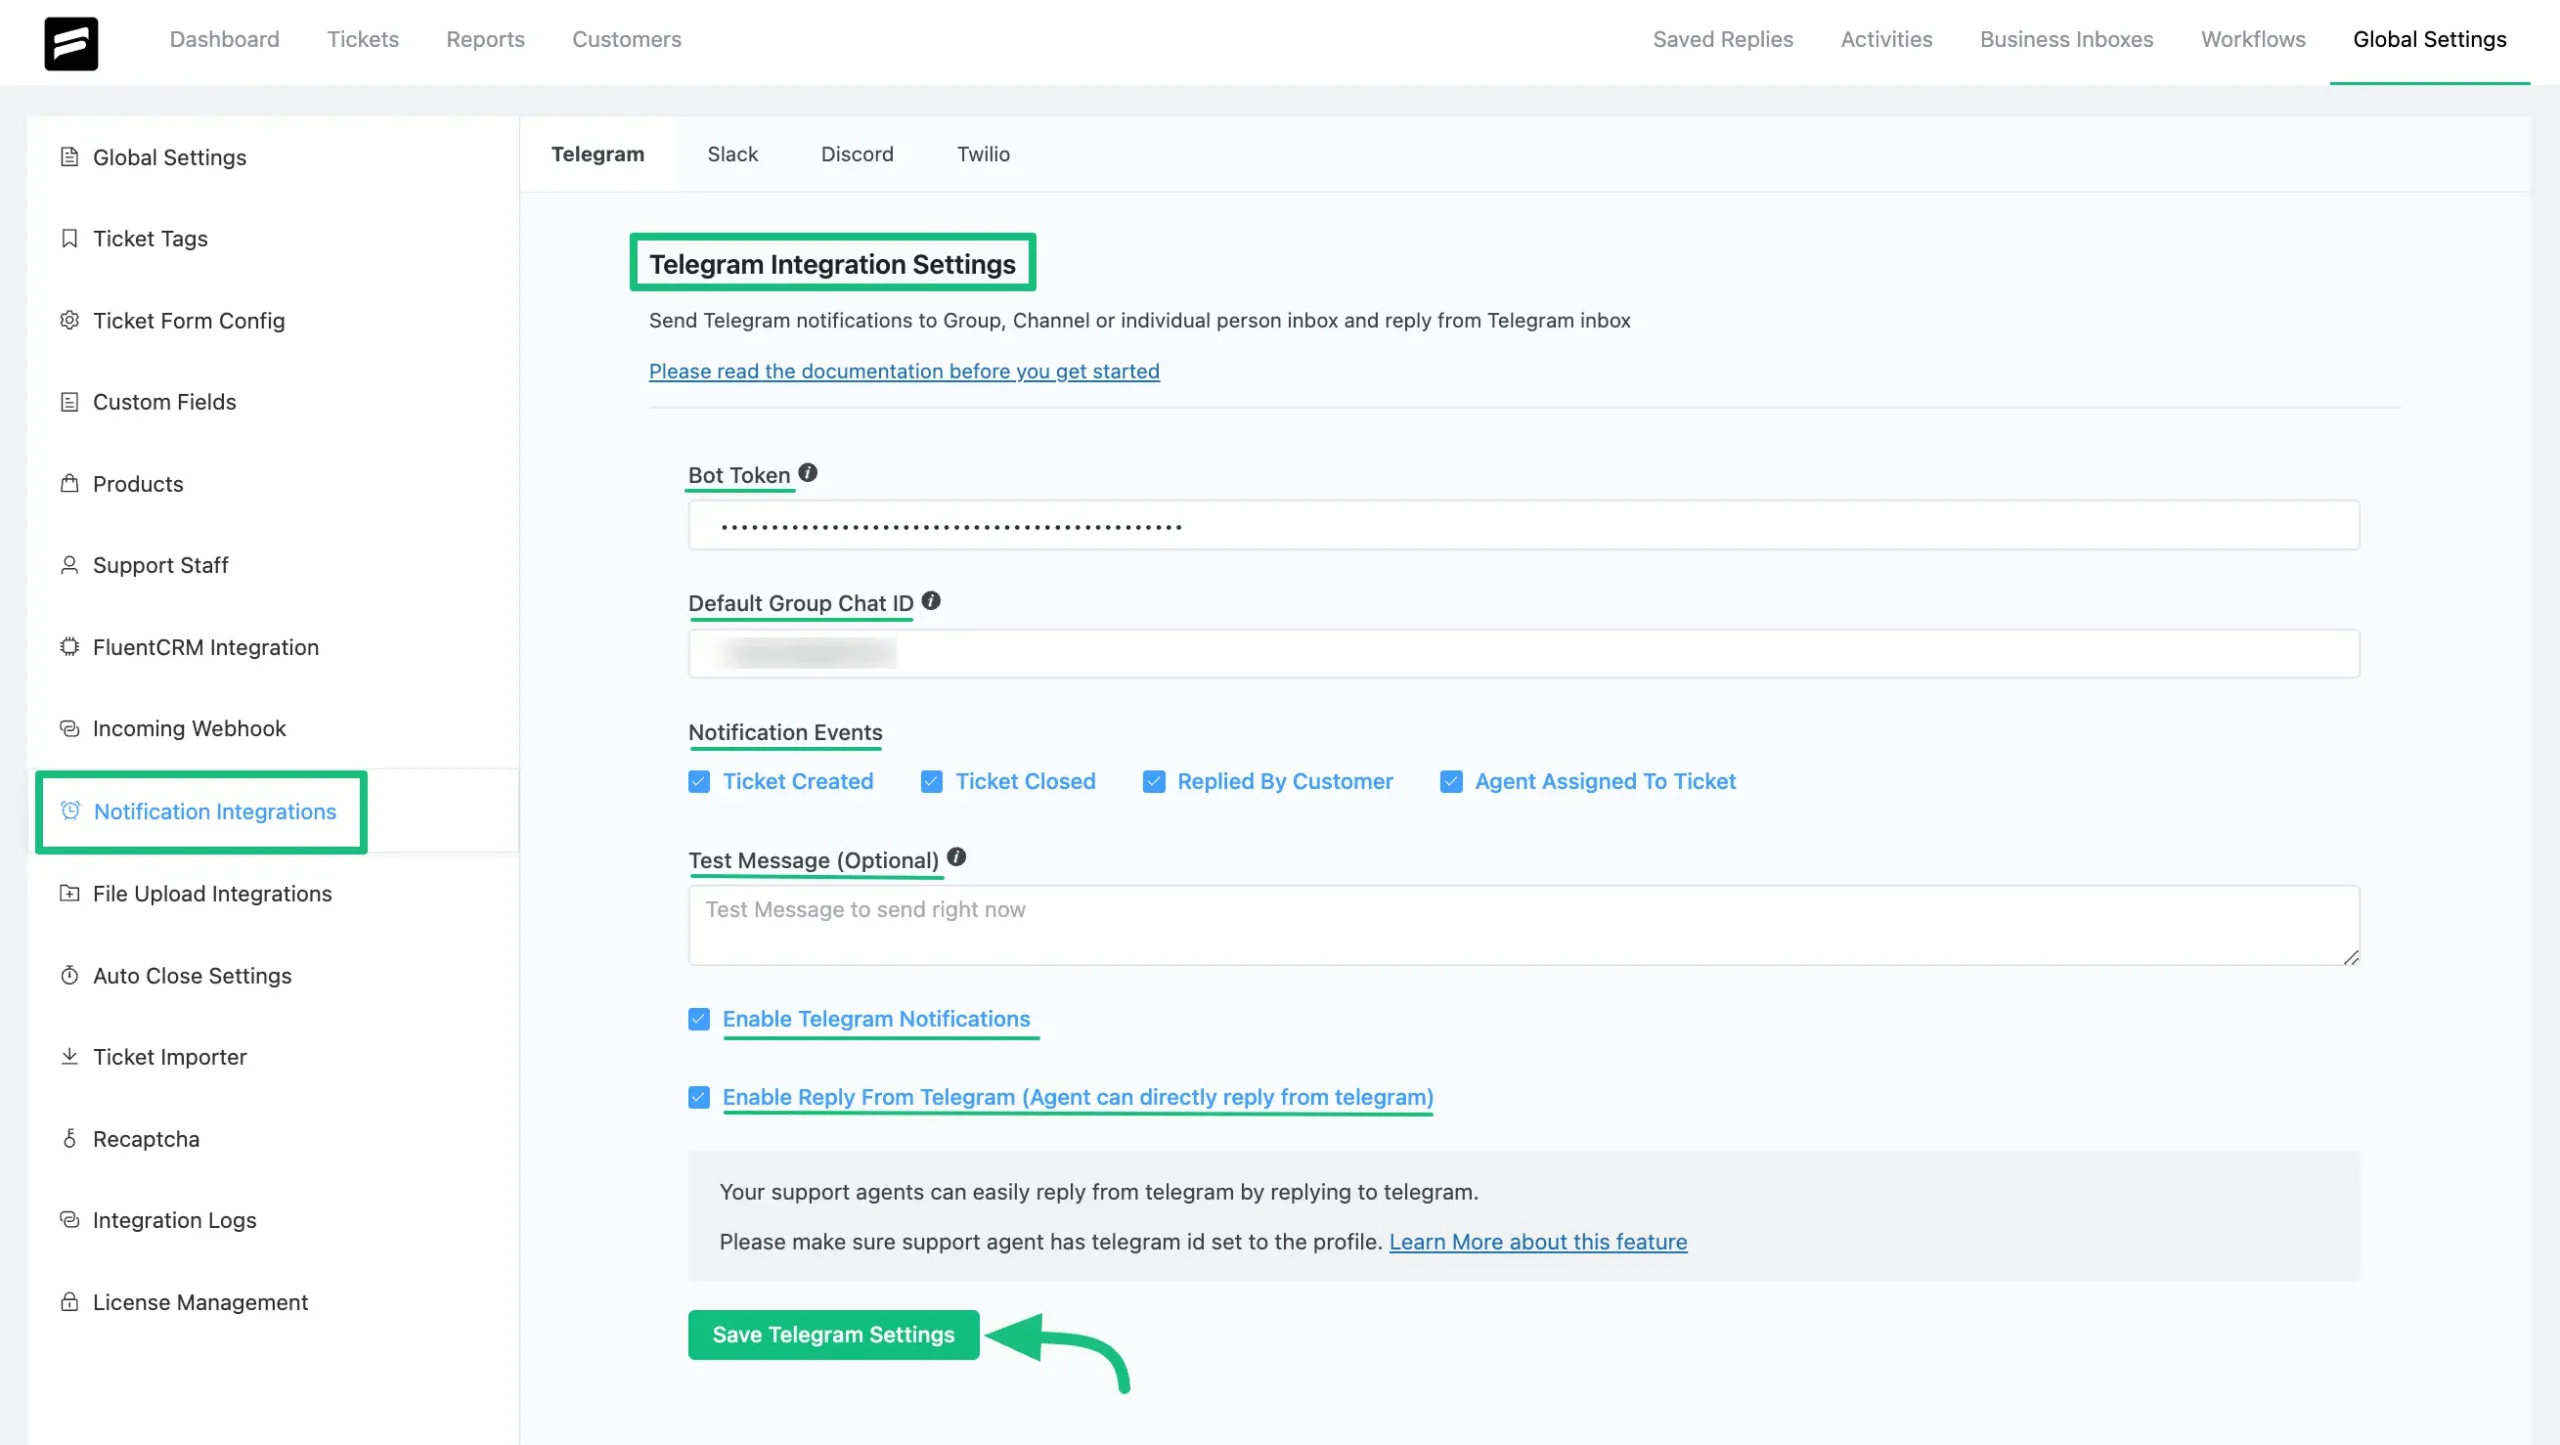
From your Fluent Support Dashboard, go to Global Settings, and click the Notification Integrations from the left sidebar. This will open the Telegram Integration Settings tab.
Then, paste the Bot Token & Group Chat ID that you have copied before into the Bot Token & Default Channel/Group Chat ID field. Finally press the Save Telegram Settings.
Remember, the Chat ID starts with a minus sign (-), and you would have to copy the code exactly provided by the GetIDs bot.
A brief explanation of other options mentioned above –
- Notification Events: Using this option, choose for which instances you want to be notified through Telegram. The available notification events are – Ticket Created, Ticket Closed, Replied by Customer, and Agent Assigned To Ticket.
- Test Message: You can also insert any text message to test whether you connected your telegram successfully or not. After you click the Save Telegram Settings if the settings are correct, you will see a message in your Telegram, and the settings will be saved.
- Enable Telegram Notifications: Enable this option, to make sure you get the telegram notifications.
- Enable Reply From Telegram (Agent can directly reply from telegram): You can also enable this option, so that your support agents can directly reply from Telegram.
Reply Tickets From Telegram #
To reply to any tickets directly from Telegram, follow the steps with screenshots below –
Note: If you or your agents want to get notifications in your/their individual inbox, you or any agents must send a test message (e.g., Hi) to the Bot that you have created and added to the group. This will enable the bot to forward telegram replies to the original tickets in the support portal.
First, you need to add your support agent’s Telegram Chat ID to their profile.
To get the Telegram user chat ID, send a message to @GetIdsBot and it will return the message with the ID. Copy the Chat id.
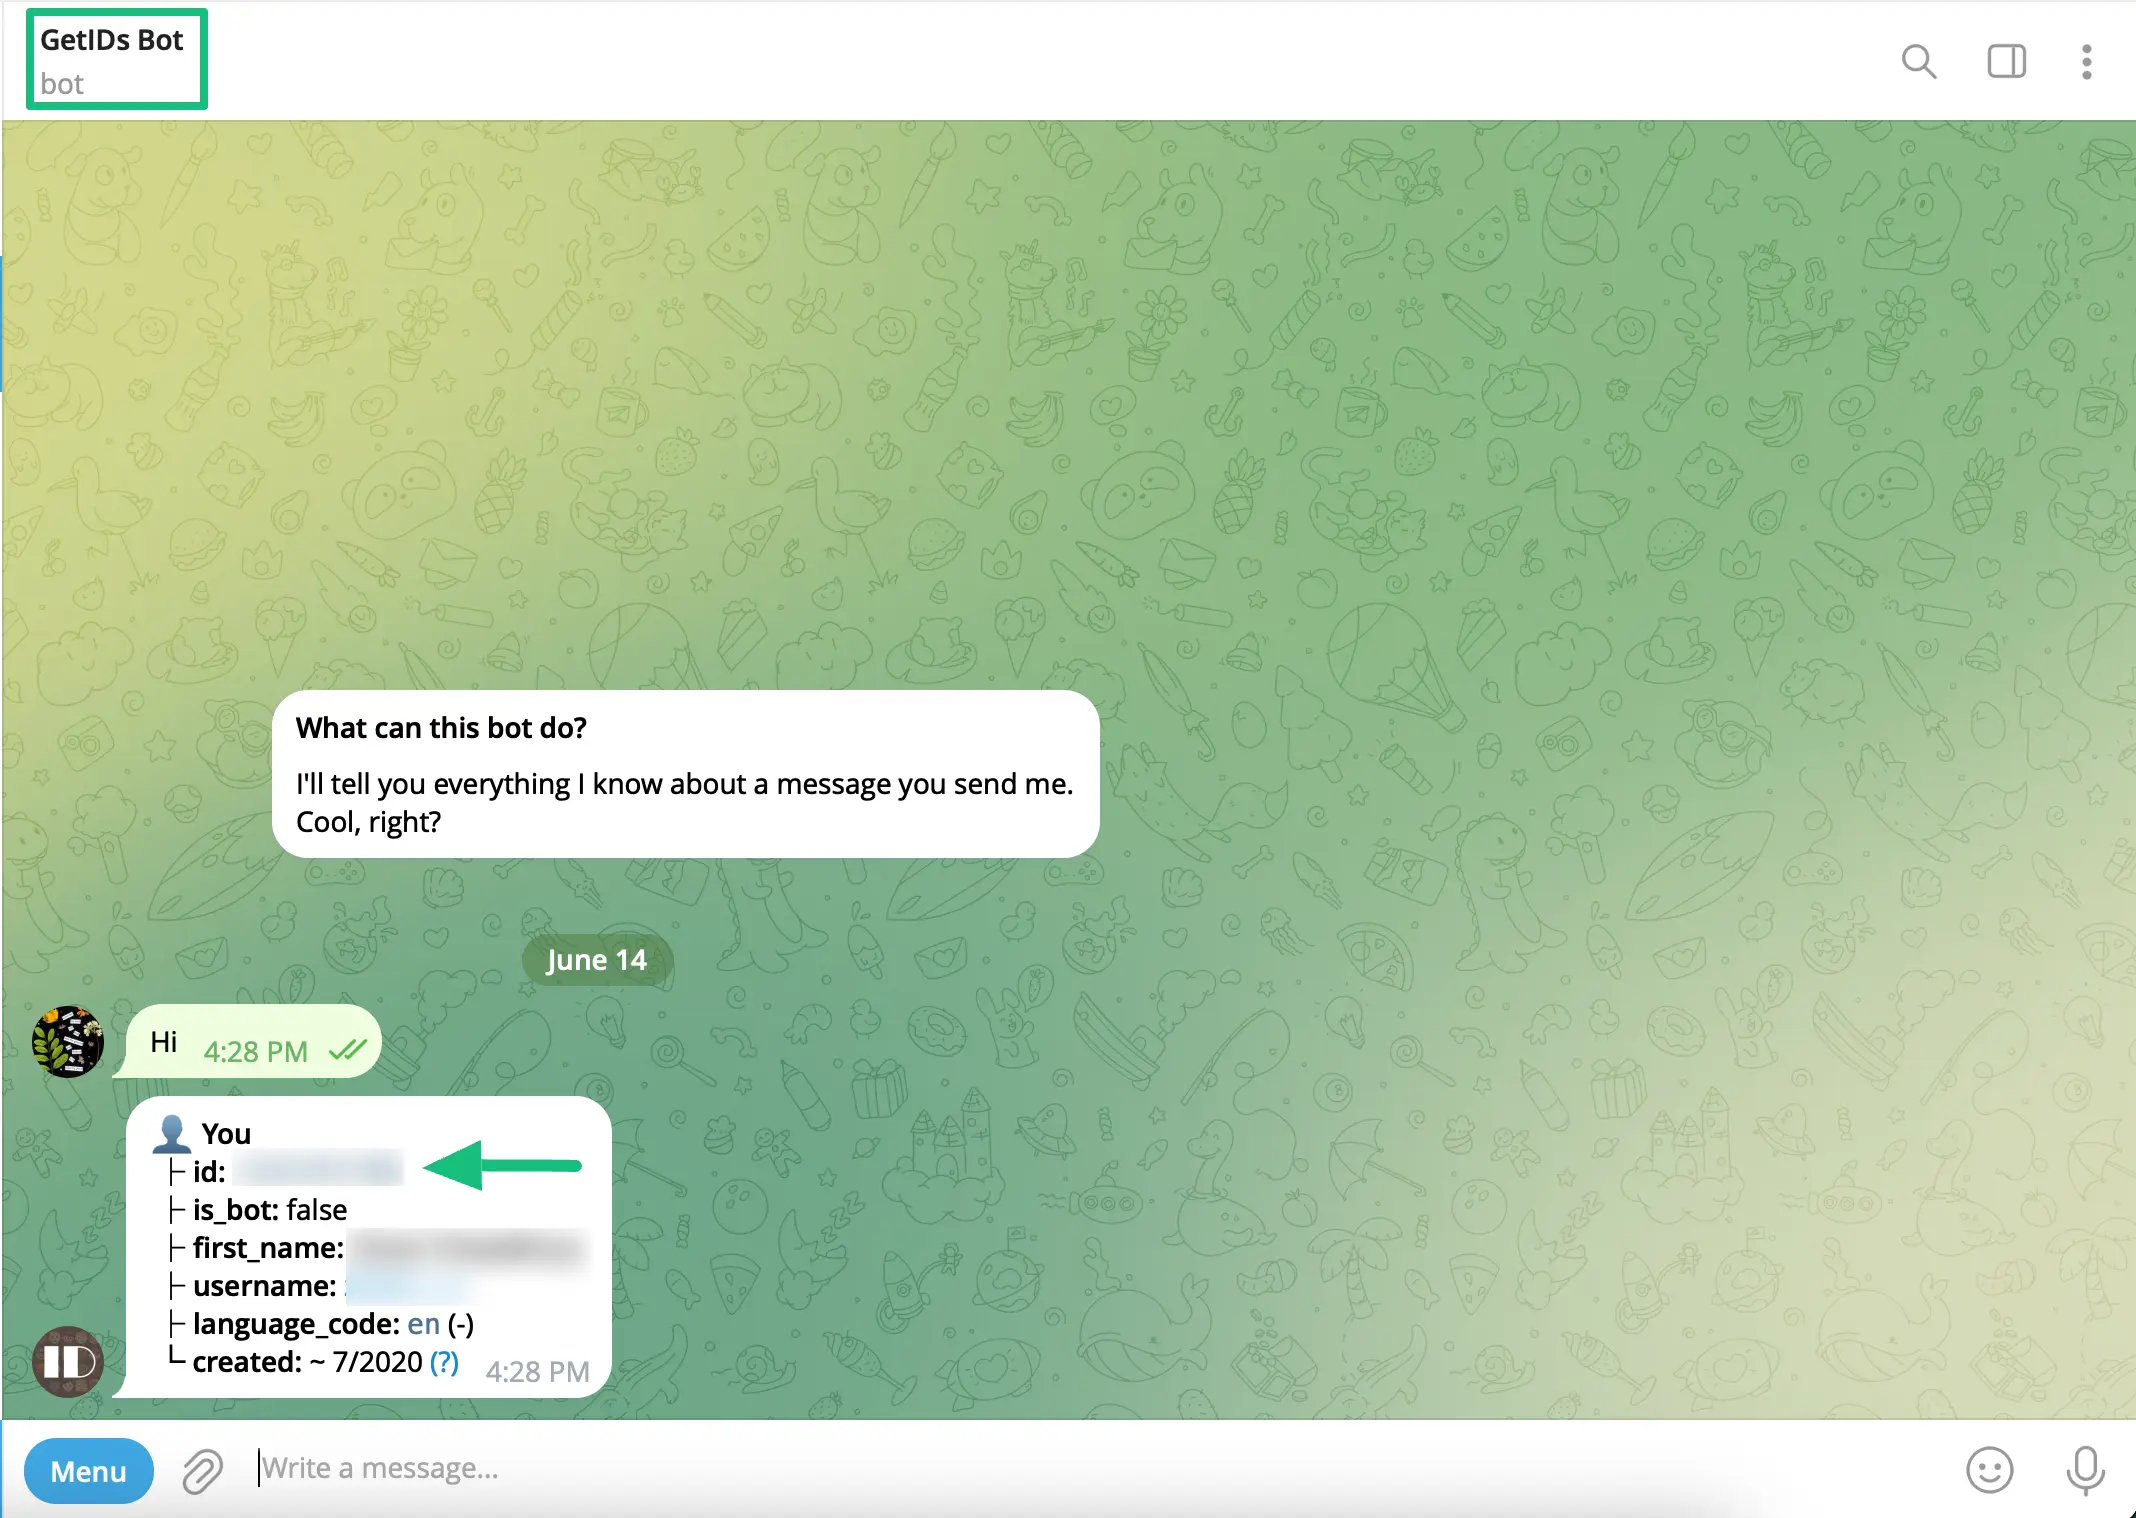
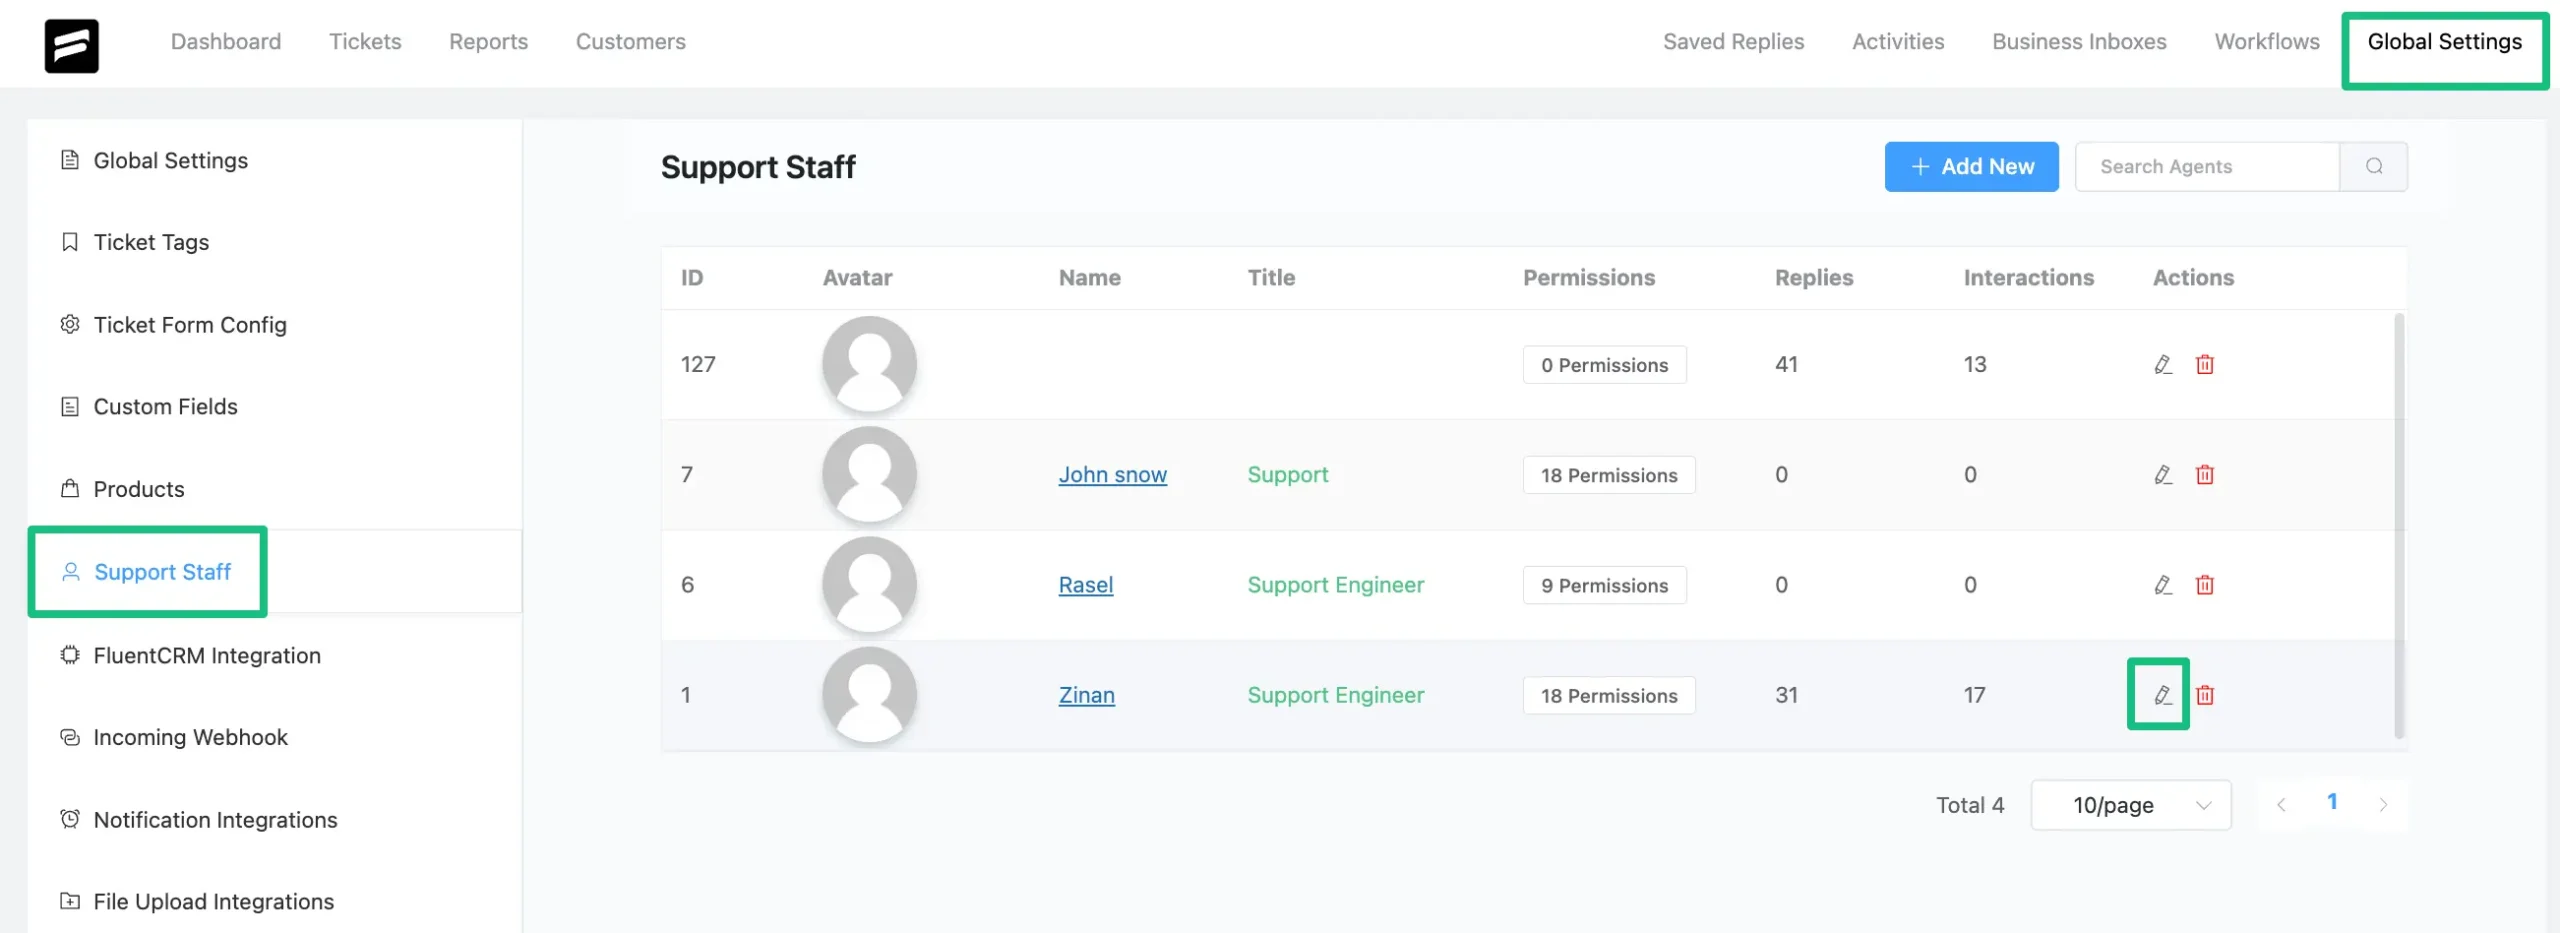
Now, go to Support Staff under the Global Settings from your Fluent Support Dashboard, and click on the Pencil Icon of your desired agent/s whom you want to give access to reply tickets directly from telegram.
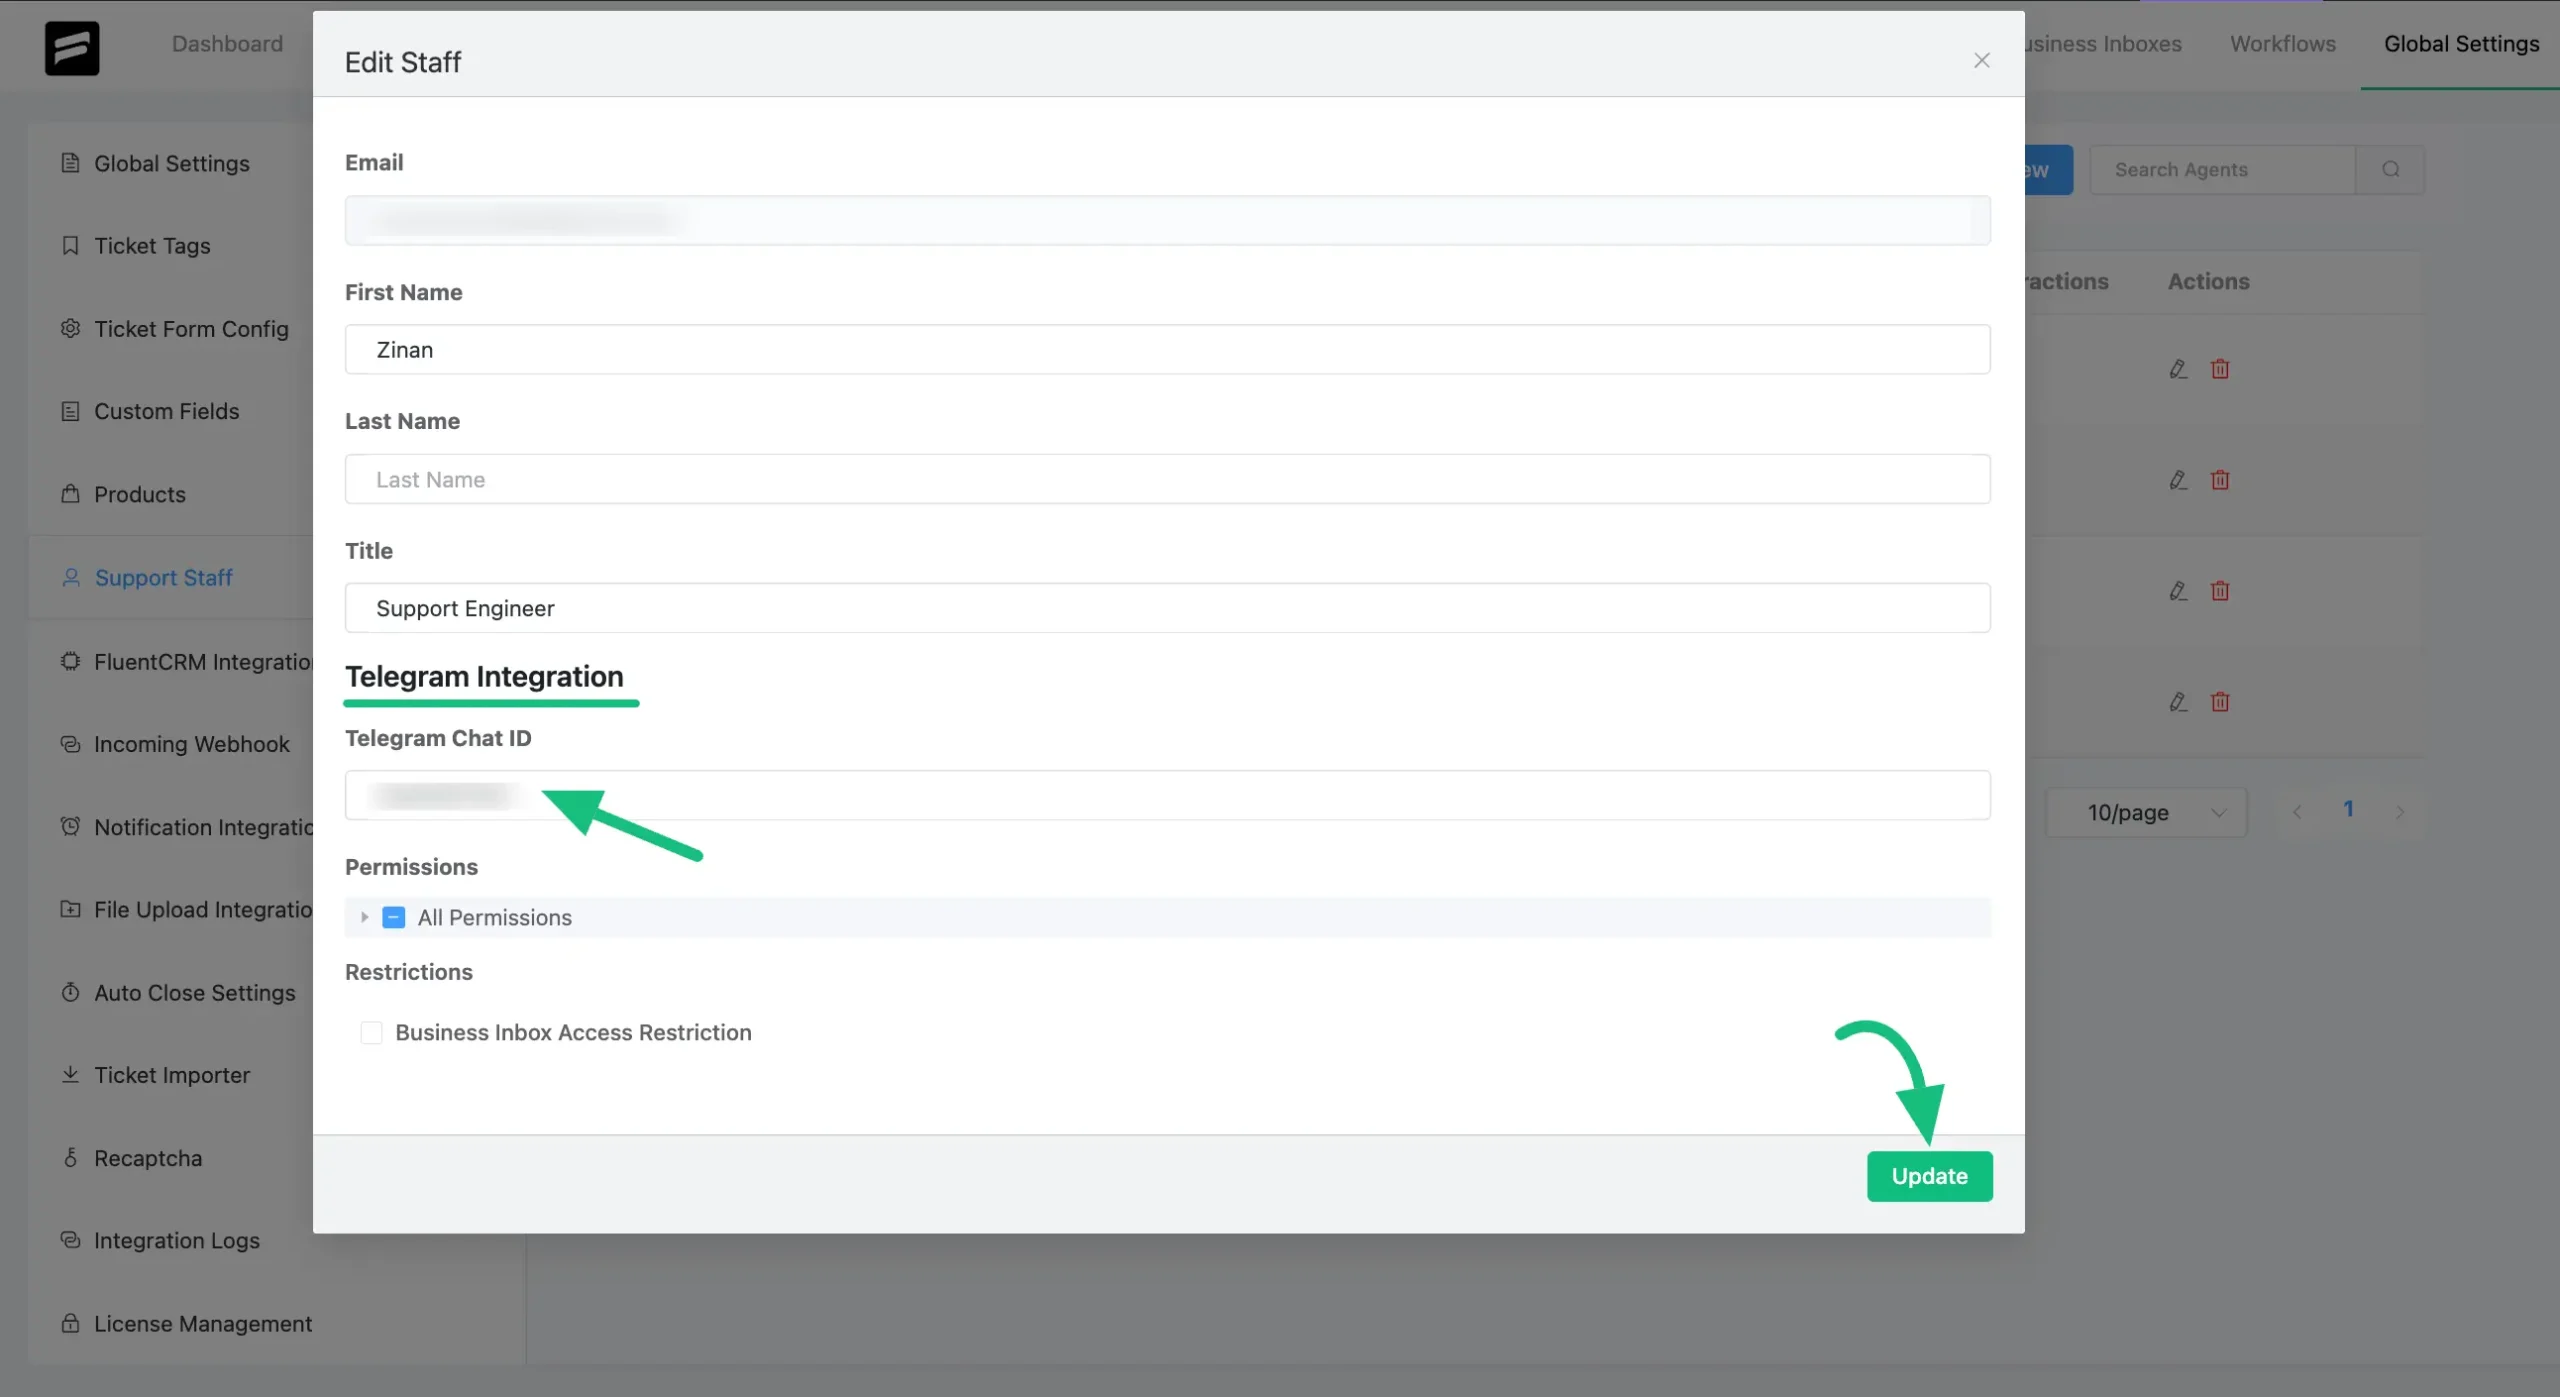
Scroll down to the Telegram Integration option, paste the Chat Id you have copied before into the Telegram Chat ID field, and click the Update button. Now your chosen agent/agents can reply to tickets from Telegram.
If you have any further questions, concerns, or suggestions, please do not hesitate to contact our @support team. Thank you.


