Custom fields are an advanced WordPress feature in Fluent Support that allows support agents to add extra information/fields to their ticket submission forms or other submission fields to organize the tickets more sophisticatedly.
Custom Fields in Fluent Support #
To learn how to use Custom Fields on your customer Support Portal in FluentSupport, follow the steps with screenshots below —
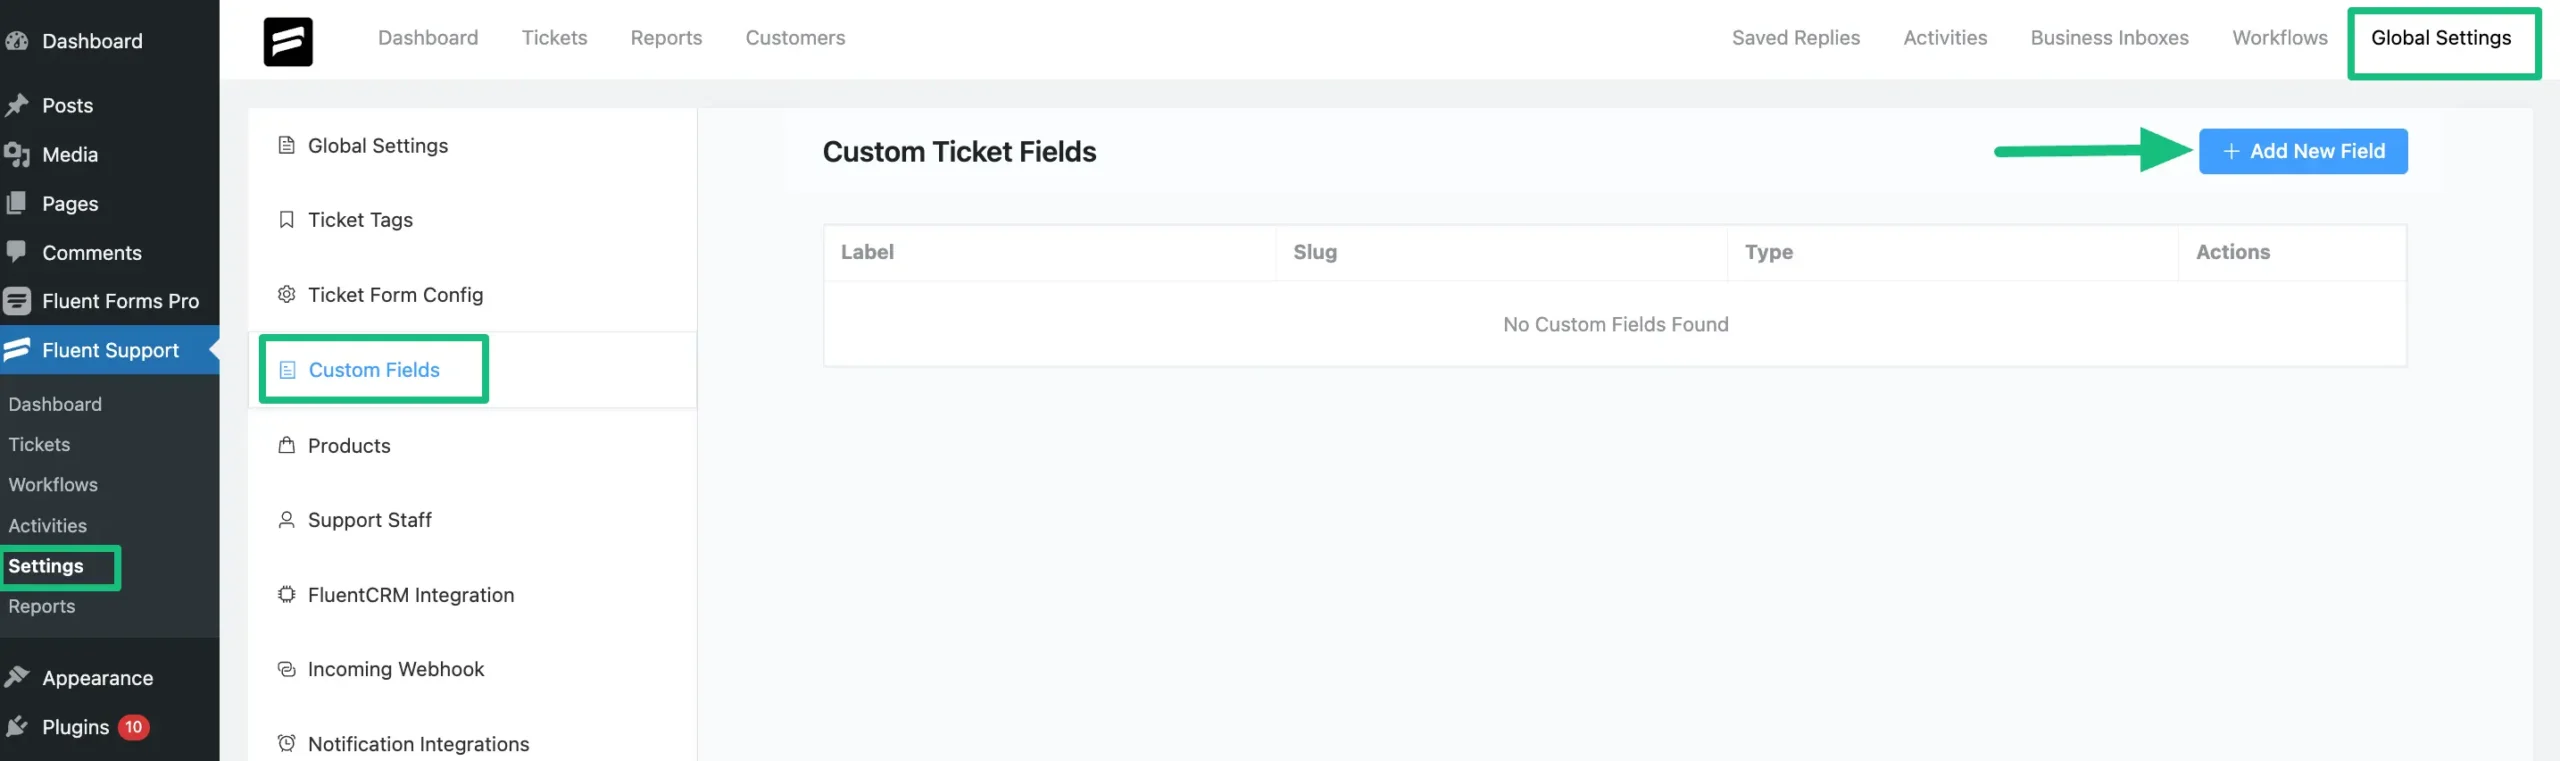
Go to Global Settings or Settings from the Fluent Support Dashboard, select Custom Fields, and click + Add New Filed.
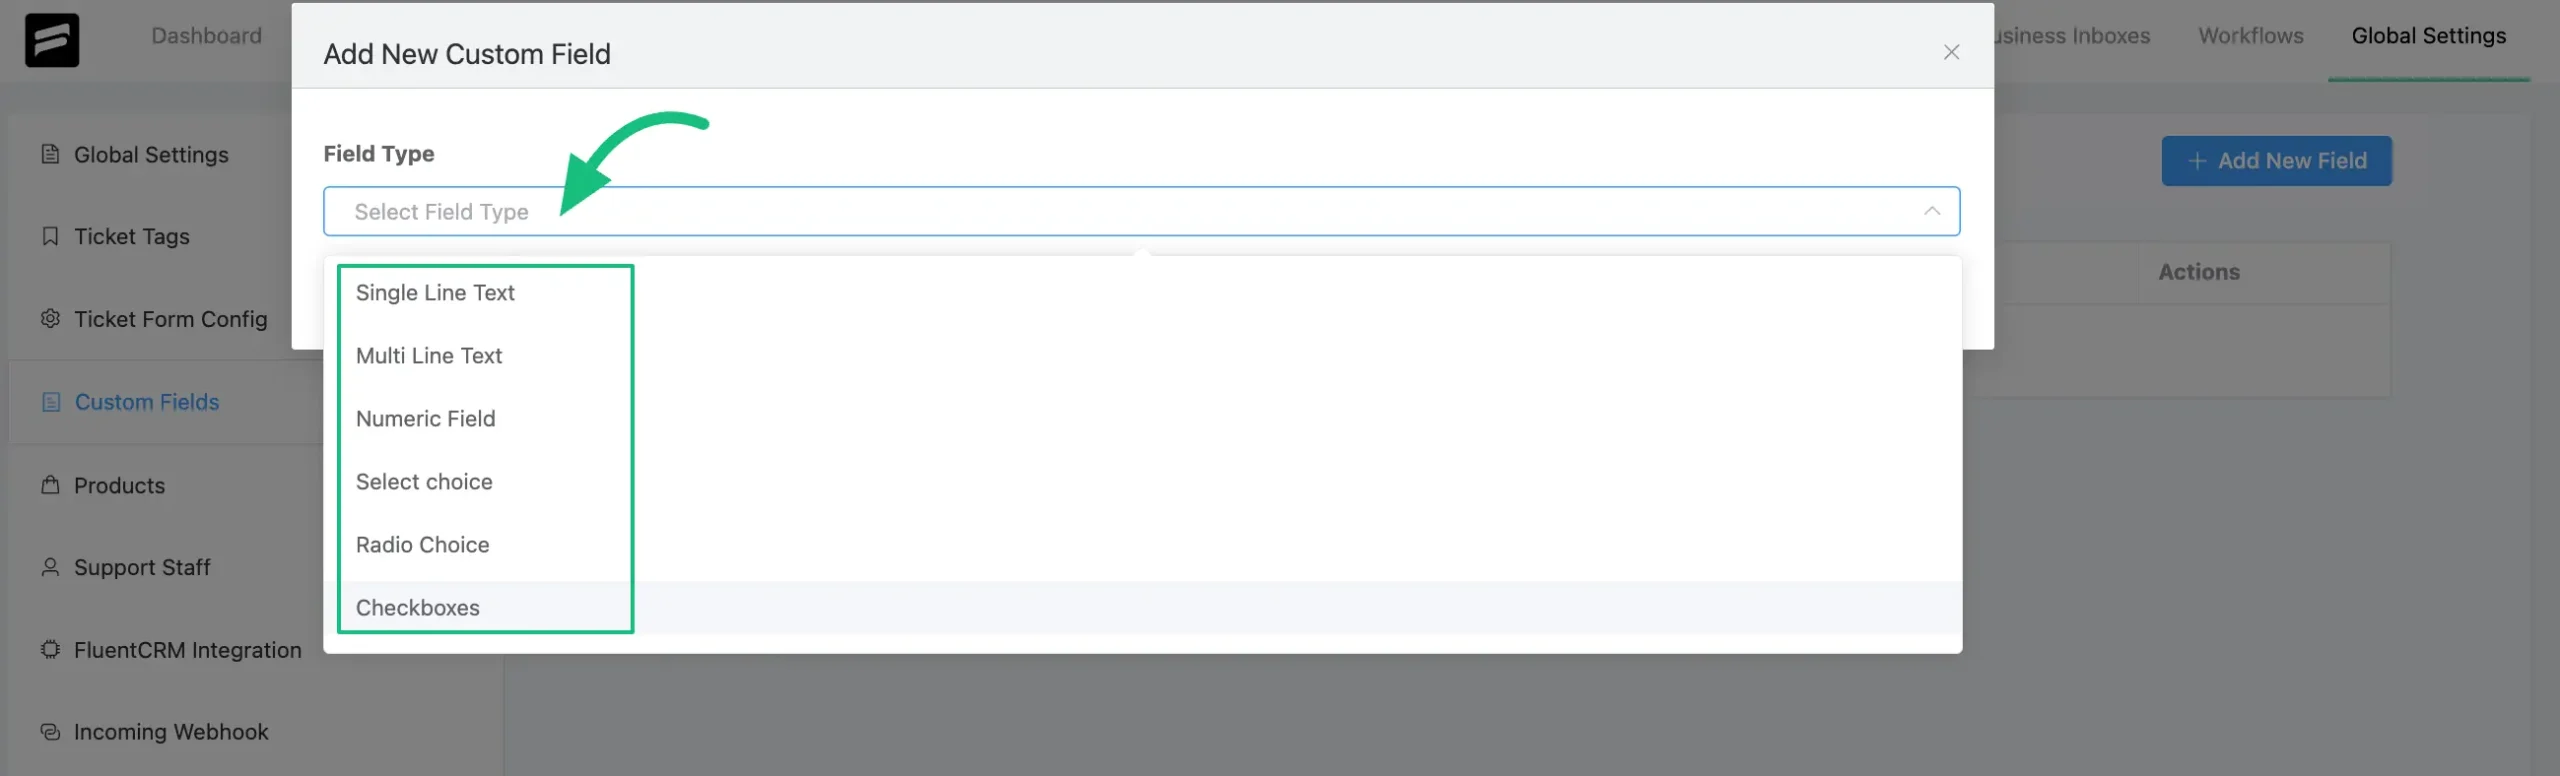
Choose the Field Type from the dropdown menu that suits your needs and click the Add button and a popup page will appear.
You will get the following Field Types from the Dropdown List –
- Single Line Text: Used for one-liner entries
- Multi-Line Text: Used for descriptive information
- Numeric Fields: Used for numerical inputs
- Select Choice: Used for multiple fixed inputs as choices
- Radio Choice: Used for radio button choices
- Checkboxes; Used for multiple/single tick inputs
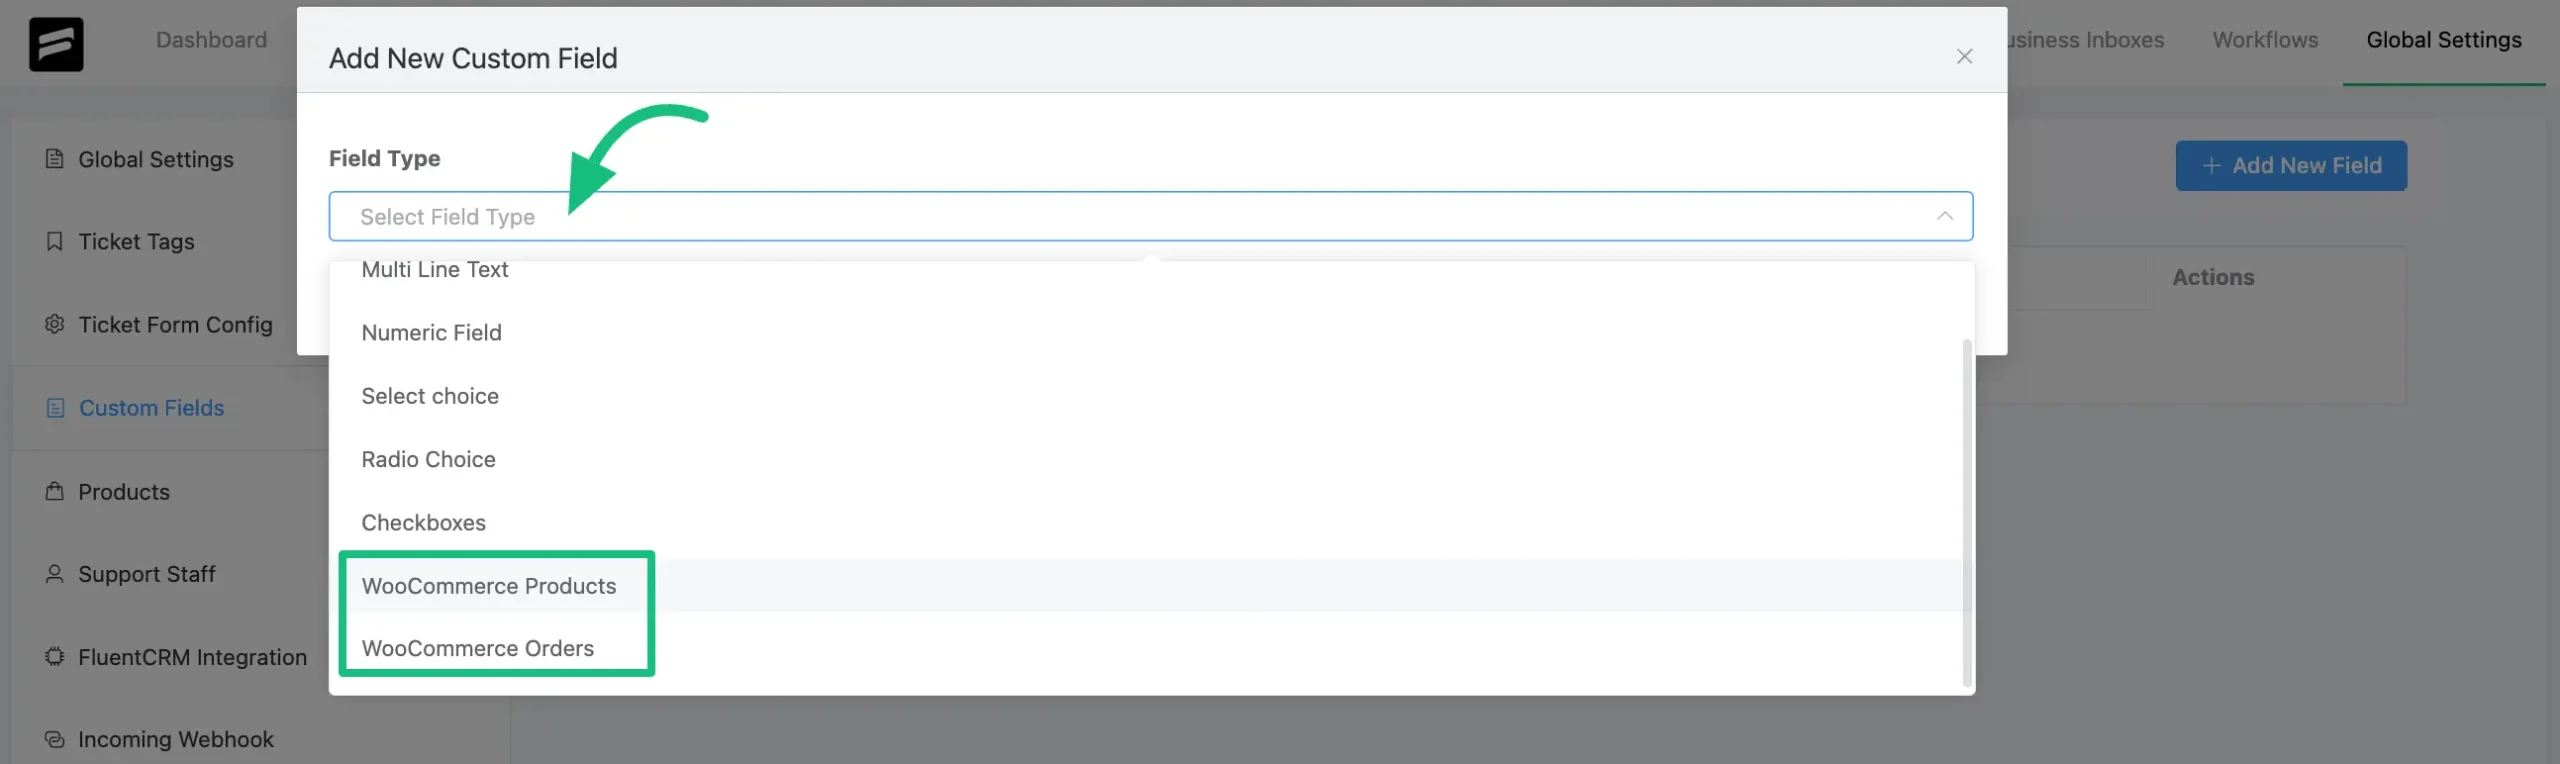
You will also get all your Integration related Field Types from the Dropdown List –
For example, as I’ve integrated WooCommerce with Fluent Support in this site, it is showing WooCommerce related two Field Type from where I can choose anyone according to the needs.
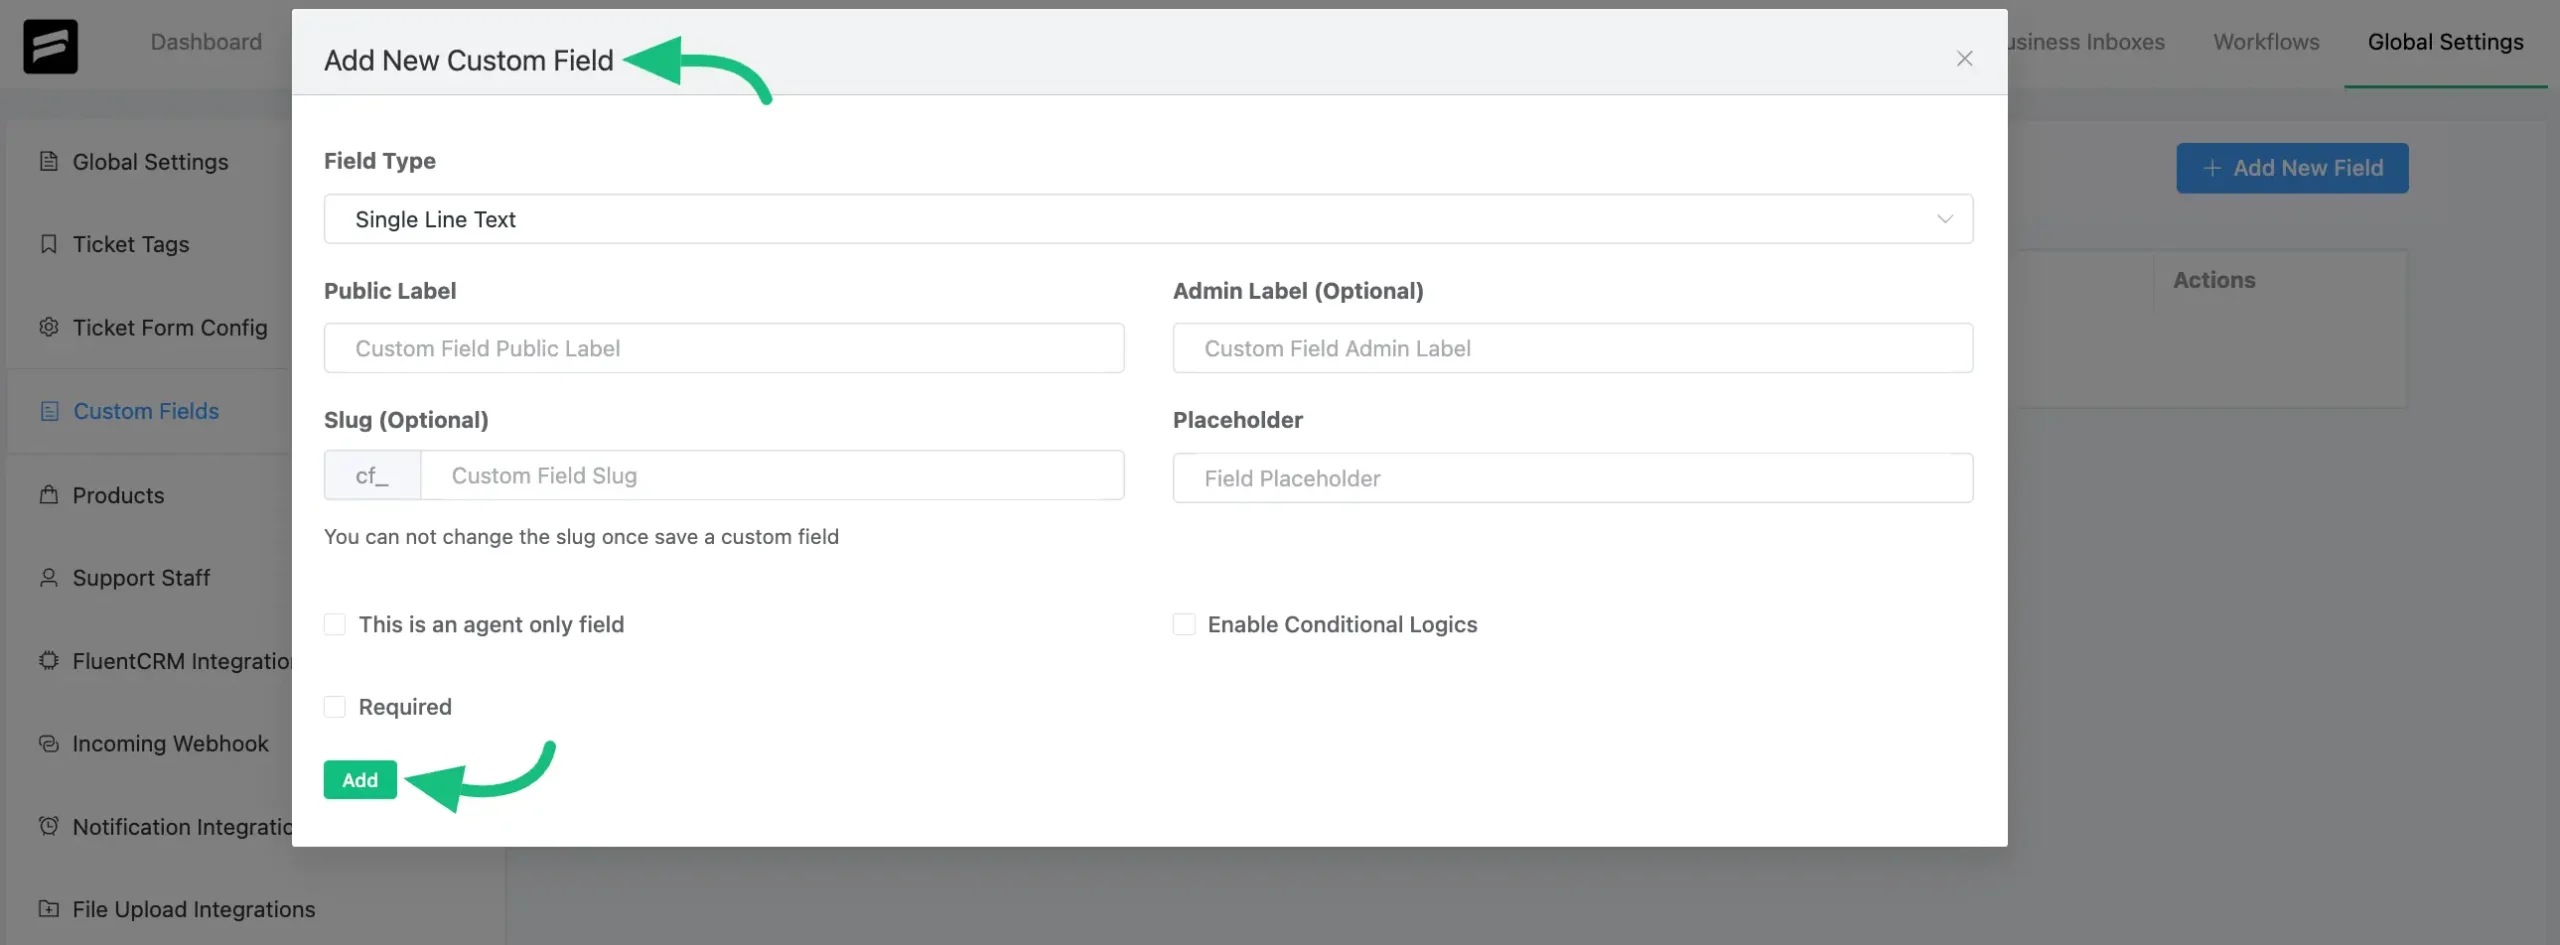
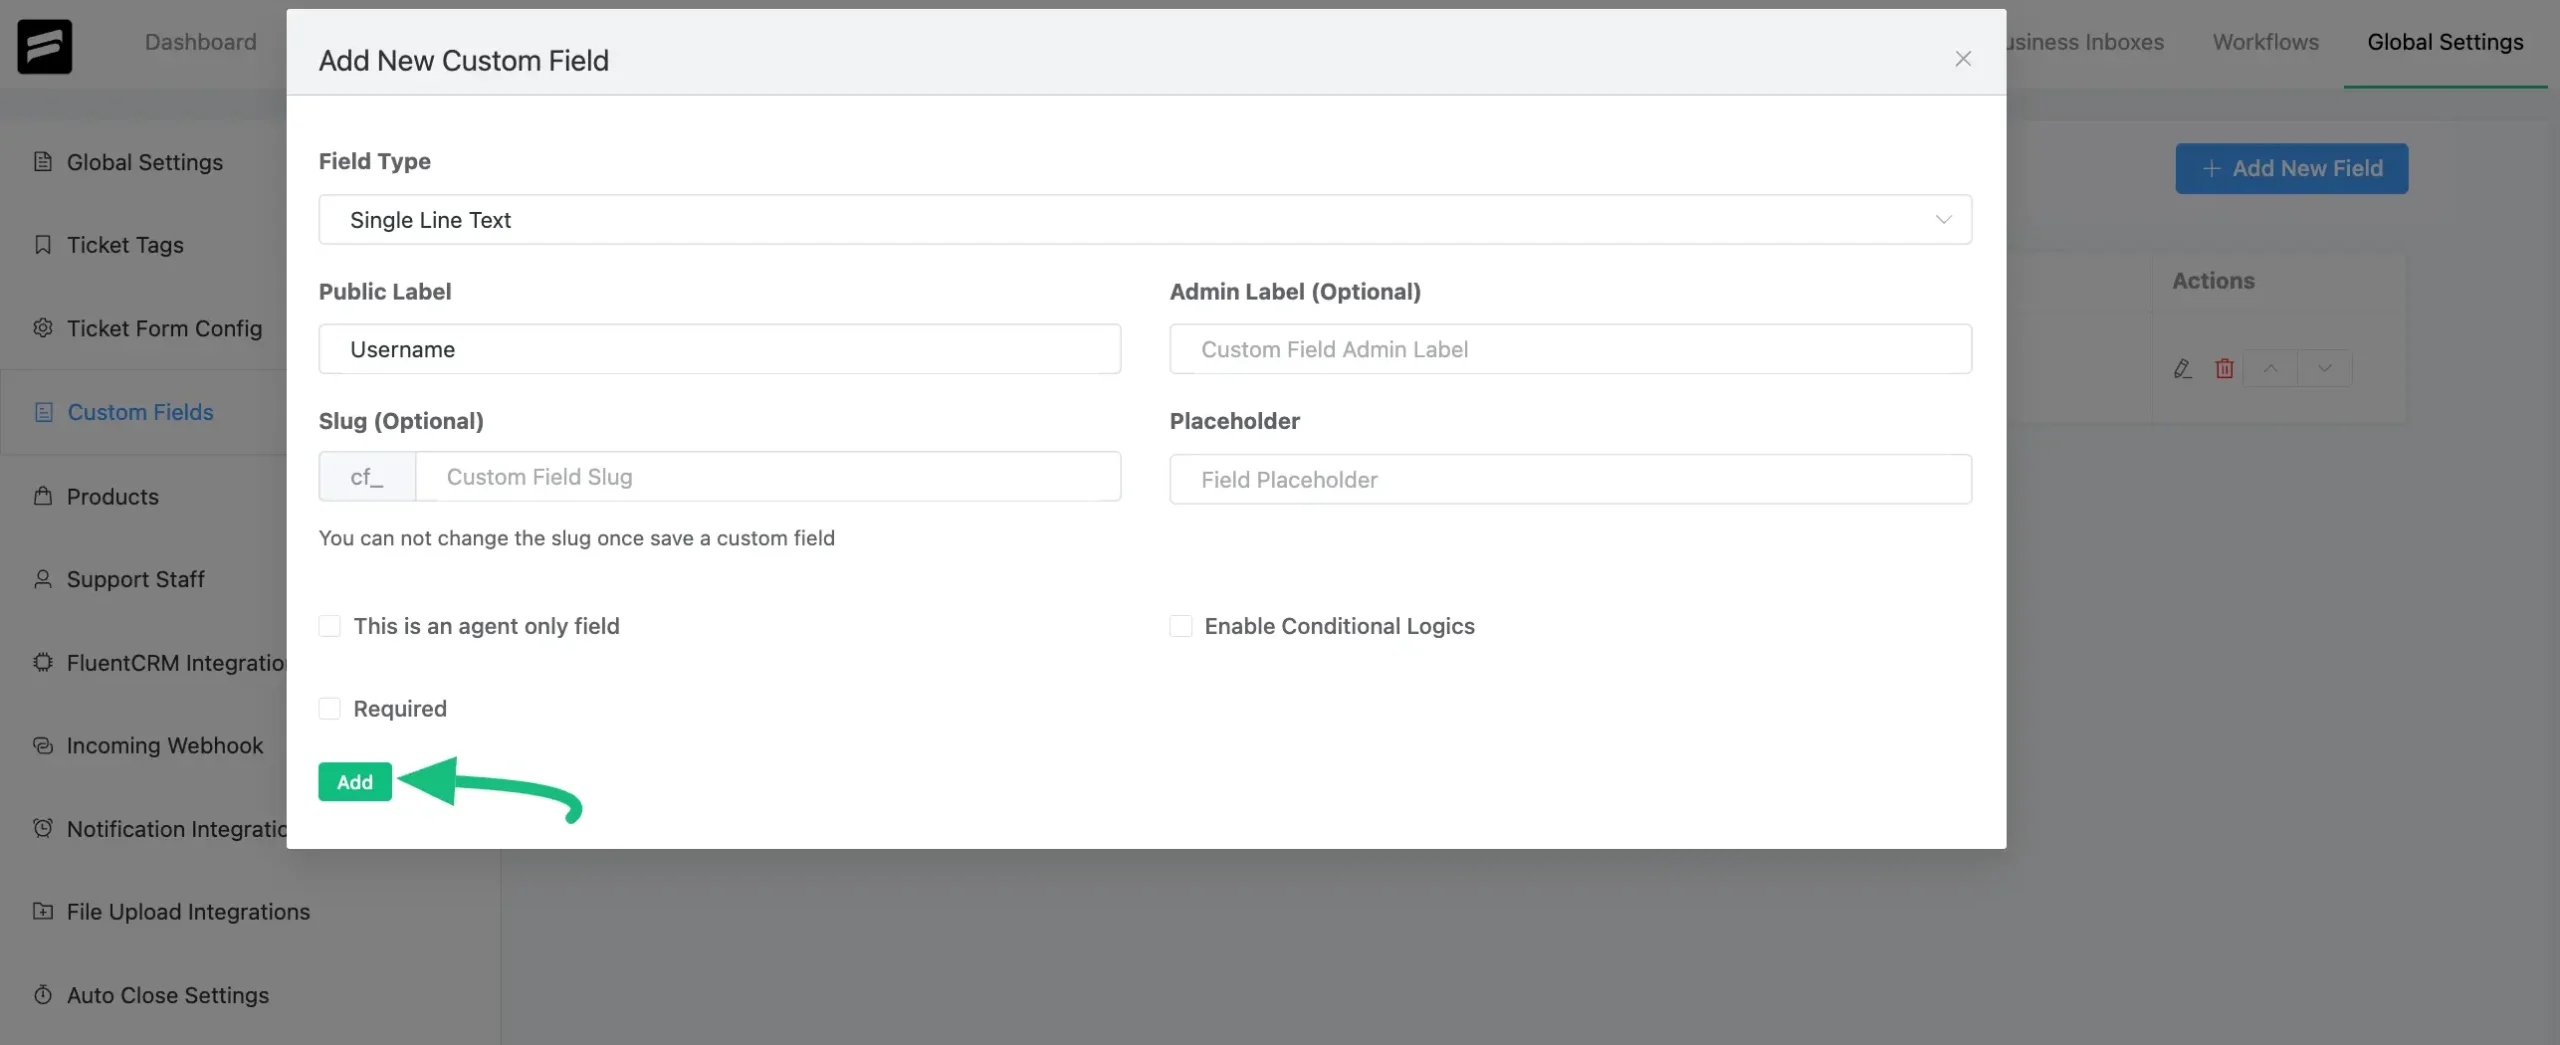
Now, configure all the additional fields according to your necessity and click the Add button.
You will get the following Fields on the Add New Custom Field popup page–
- Public Label: Used to name the field for general users in the Fluent Support interface.
- Admin Label (Optional): These are similar to Public labels but are only visible to Administrators.
- Slug (Optional): Slugs can be used to call up custom fields in code.
- Placeholder: This is the default text that will appear as instruction until any input is entered in the field.
- This is an agent only field: Use this to visible the Custom Field only to support agents.
- Enable Conditional Logic: Use this if you want any field to show only in specific situations based on specific conditions that you will set.
- Required: Use this to make the Custom Field mandatory for users to submit their tickets.
Here, you will get the following Options to set Conditions.
- Ticket Title: Content entered in the ticket title field
- Ticket Content: Content entered in the ticket body
- Ticket Client Priority: Priority status set by Client, i.e., Customer.
- Selected Product or Service: Product or Service as declared by the customer.
- Existing Custom Fields: Any custom fields that you’ve created before.
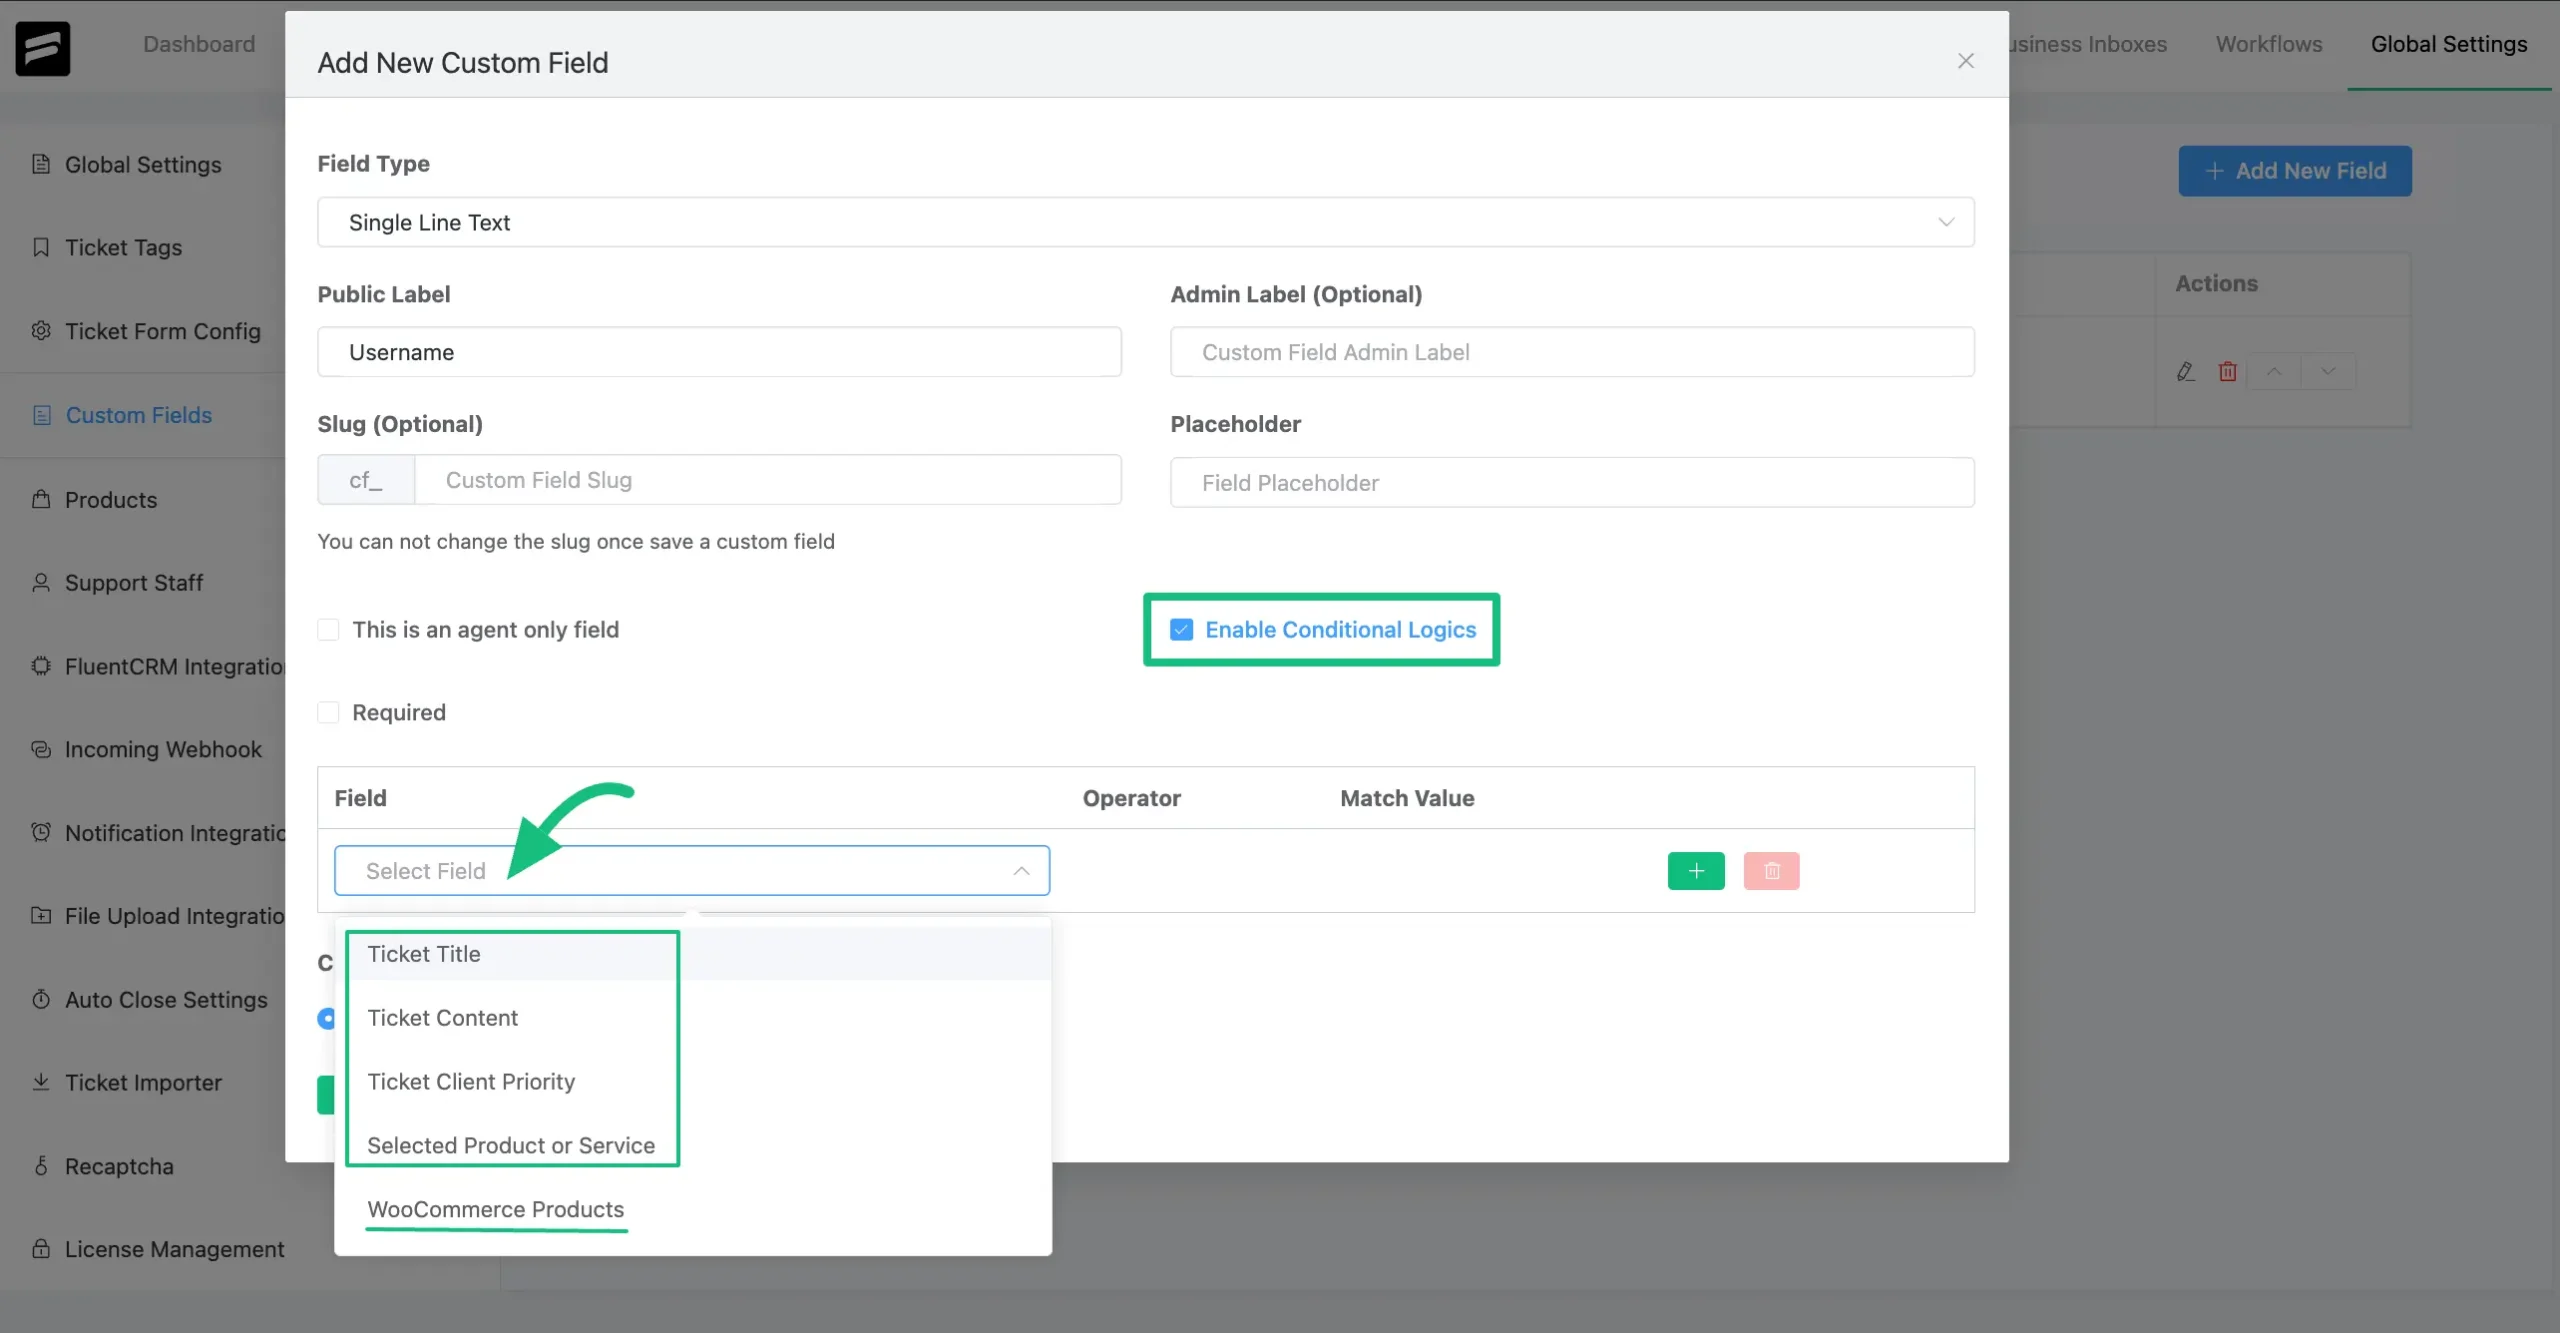
For example, I set the condition as “Ticket Title that contains Forms word”. Now, when the users will open a Ticket that contains Forms word, only they will see this Username custom field in their Ticket Submission Form.
- You can set Multiple Conditions by clicking the Green Plus Icon or Delete any existing Conditions by clicking the Trash Icon.
- Also, you can customize the logical outcome by selecting whether to function if Match all conditions or Match any conditions.
Once you’re done with all the configuration, click Add.
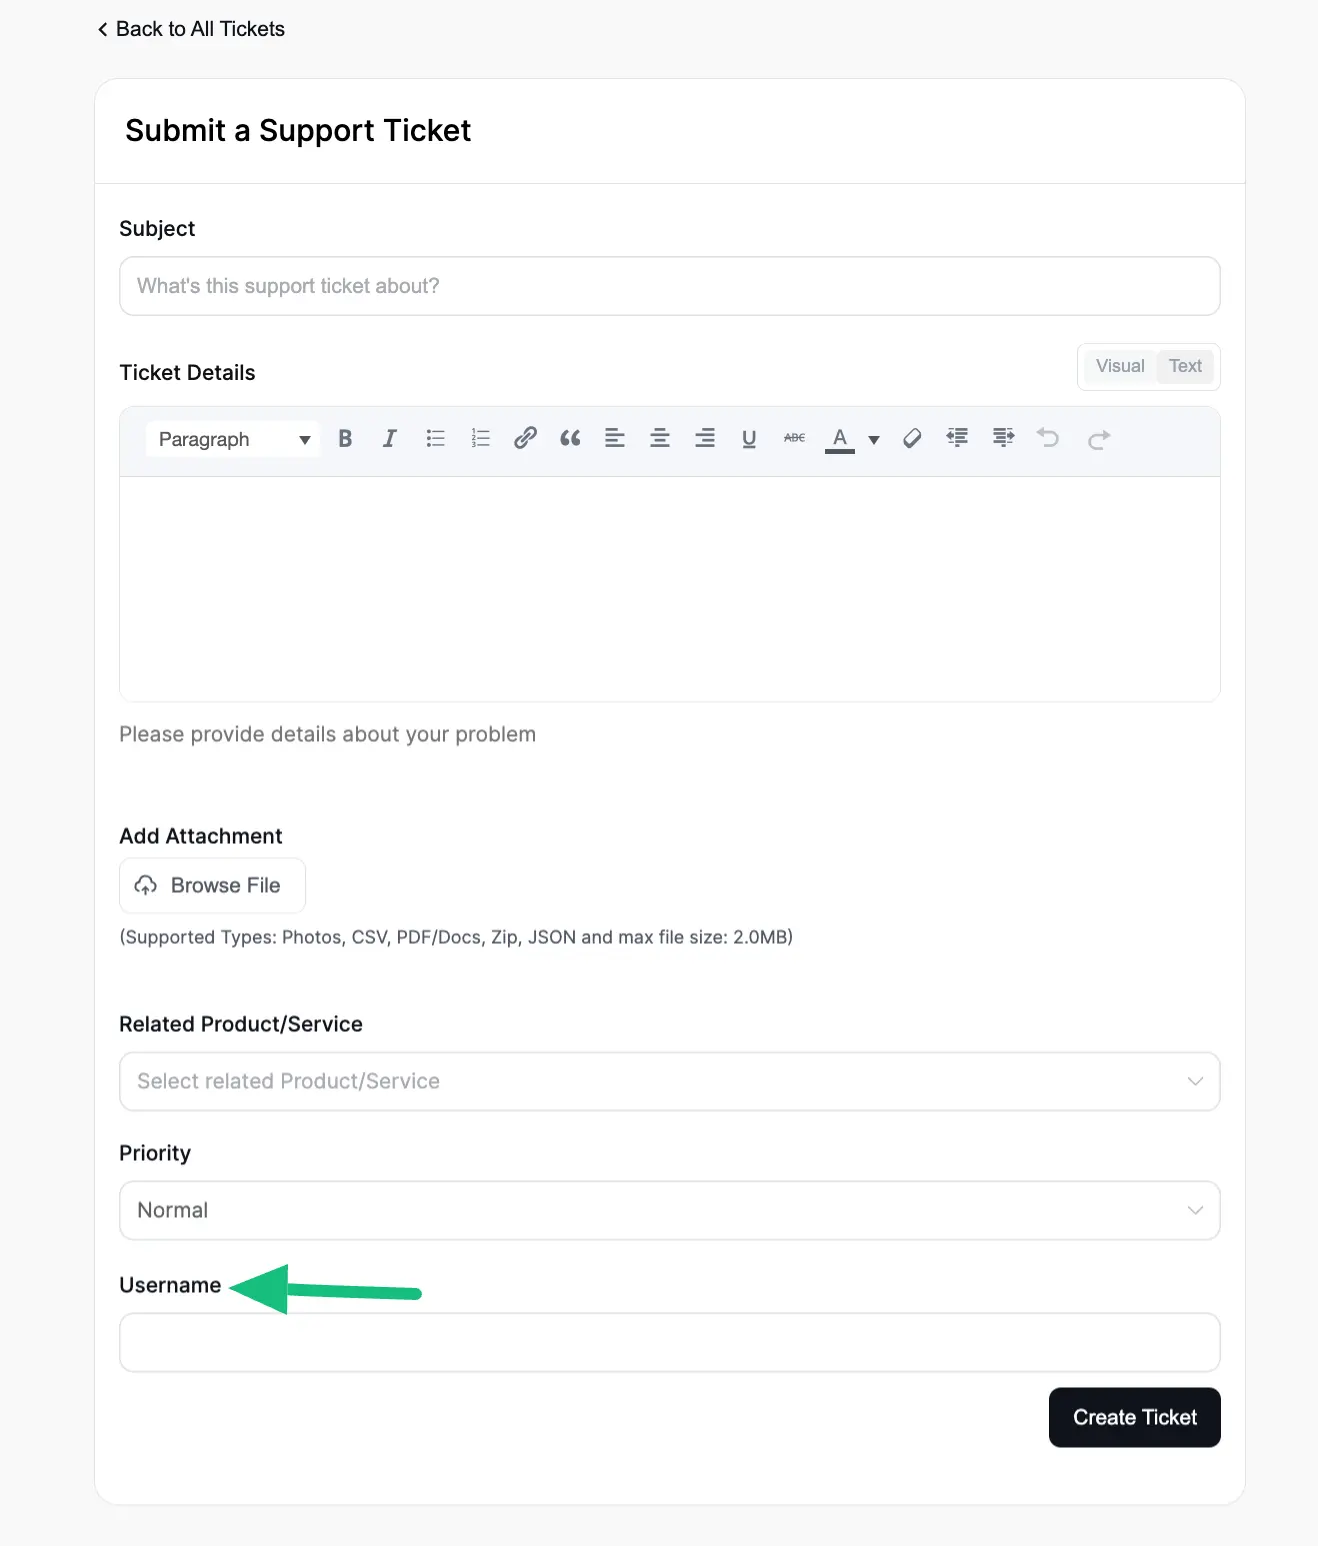
Here, you can see the Custom Field has been added to the Fluent Support Portal.
If you have any further questions, concerns, or suggestions, please do not hesitate to contact our @support team. Thank you.


