Fluent Forms plugin allows you to build beautiful Forms for WordPress with less time and effort. You can easily create a Ticket Submission Form by integrating Fluent Forms with Fluent Support.
This article will guide you through integrating Fluent Forms with Fluent Support.
Fluent Forms Integration With Fluent Support #
To learn how to integrate Fluent Support with Fluent Forms, follow the steps with screenshots below —
Enable Fluent Support Integrations
#
Before enabling Fluent Support Integrations, Fluent Forms must be installed and activated on your WordPress Site.
To learn how to install & activate Fluent Forms click here, to create beautiful and responsive online forms with just a few clicks, go through the following steps.
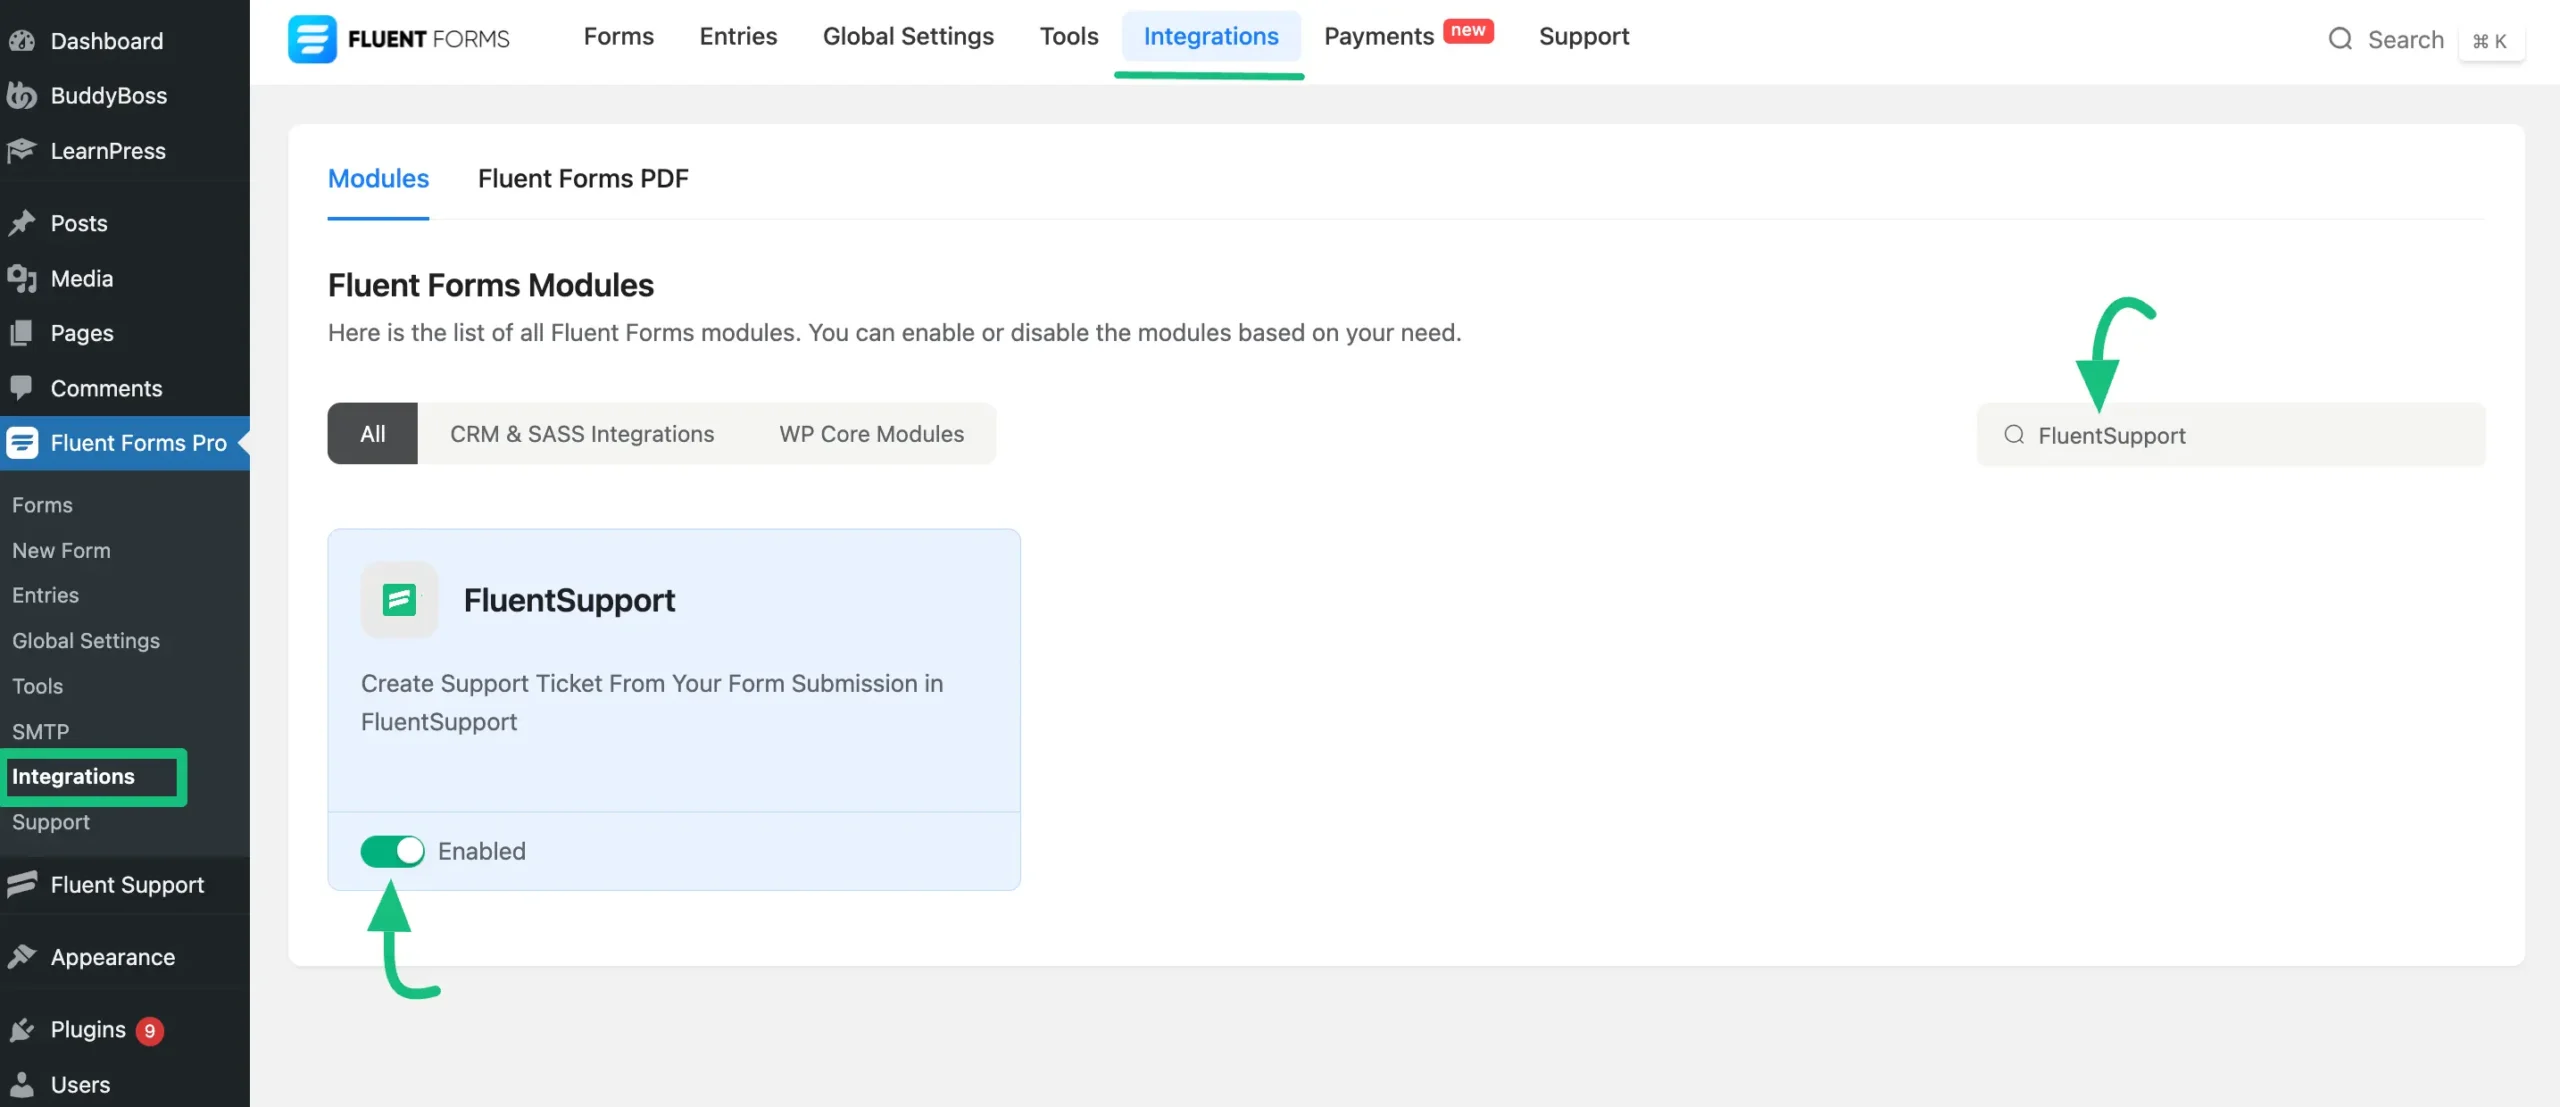
To enable Fluent Support integration, go to Integrations from the Fluent Forms Dashboard, search for FluentSupport, and click the Toggle button.
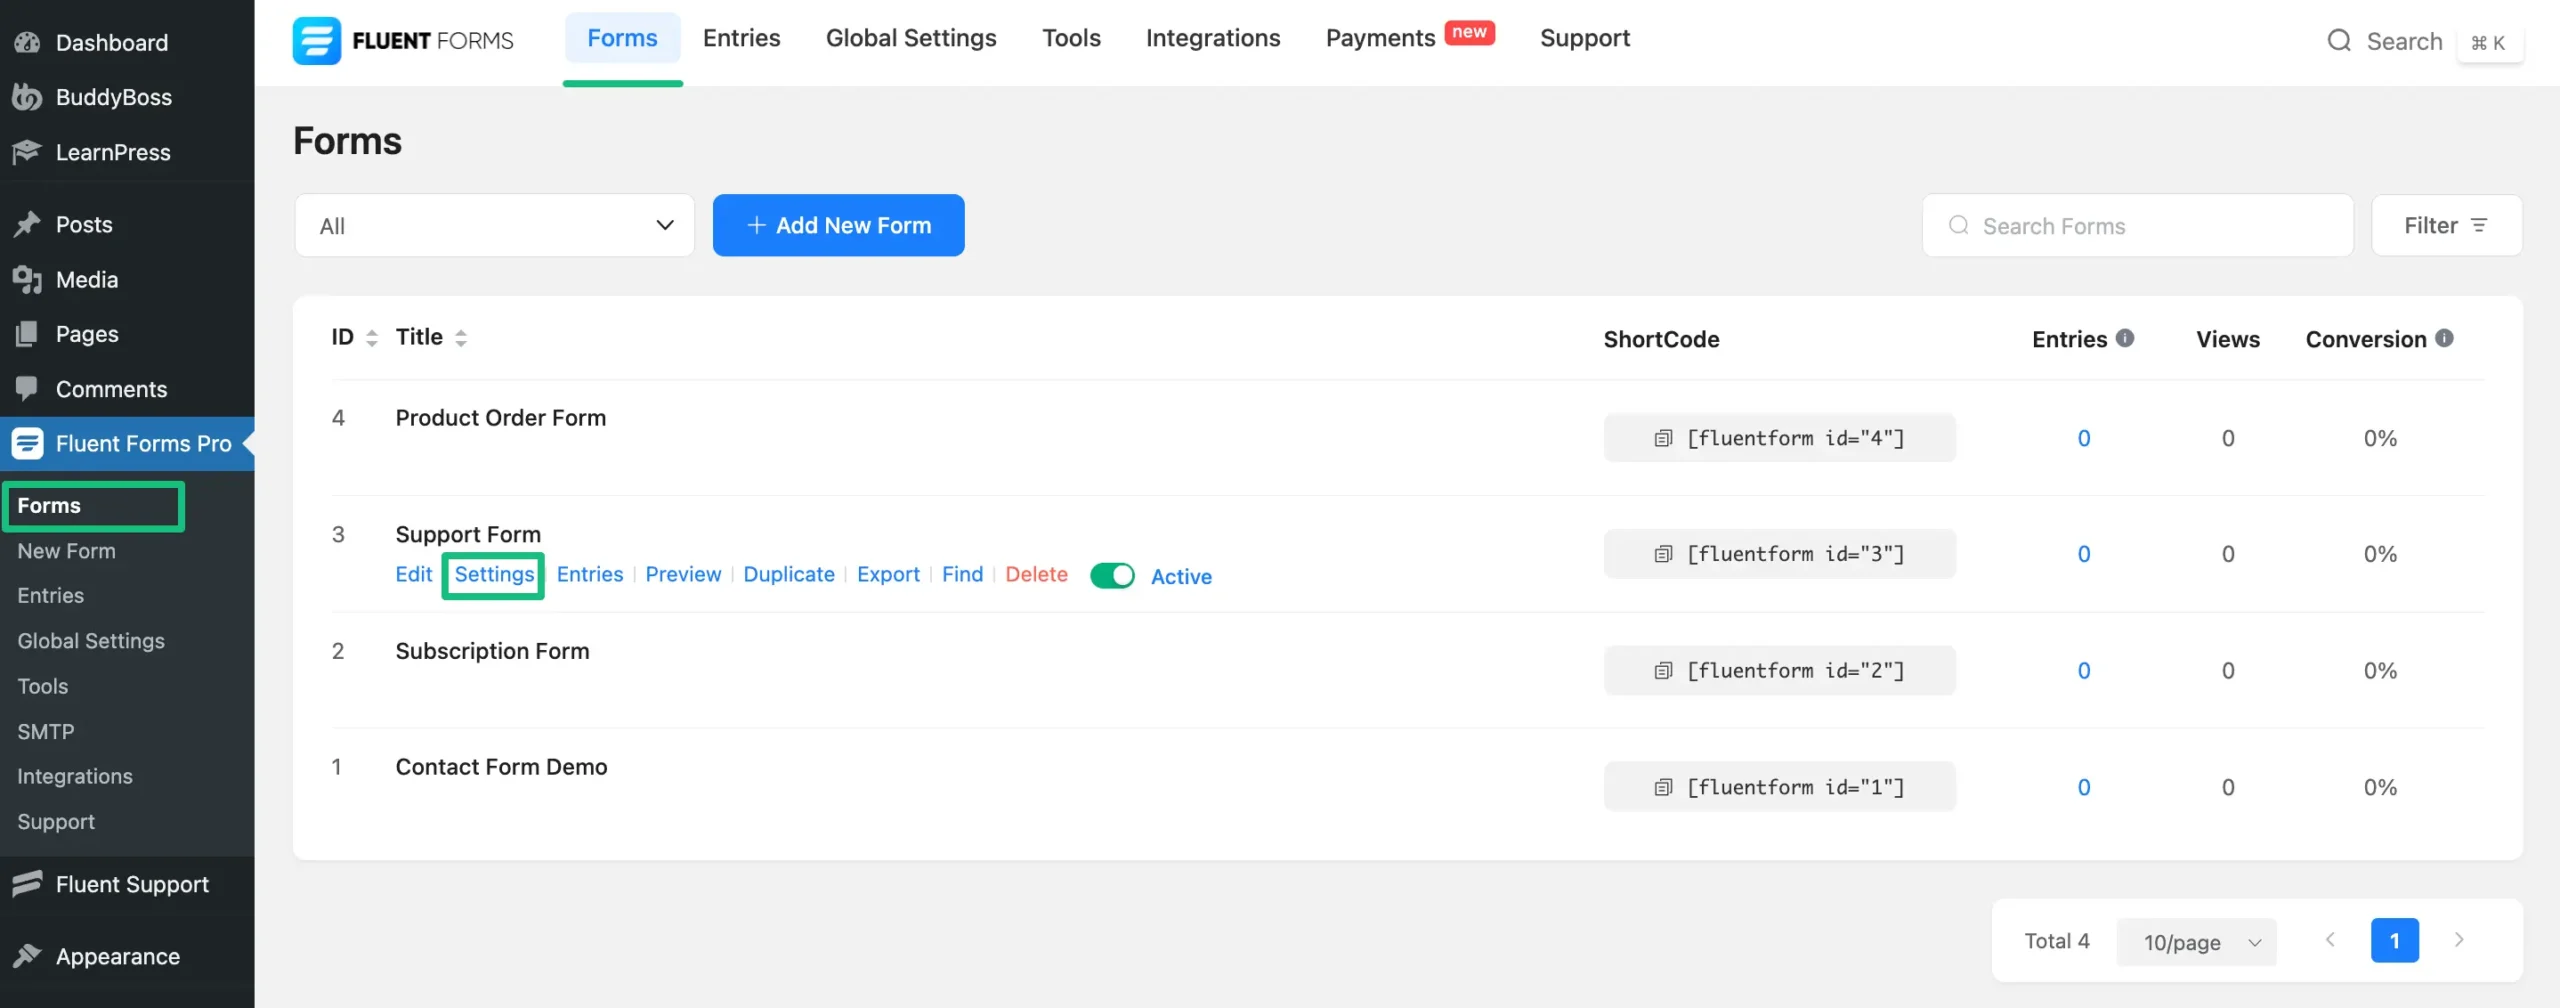
Configure Fluent Support Feed Inside A Particular Form #
You must enable the Fluent Support Feed for a particular form to integrate Fluent Support. To do this follow the screenshot & GIF below —
Go to Forms on Fluent Forms Dashboard, select a specific form, and click on Settings.
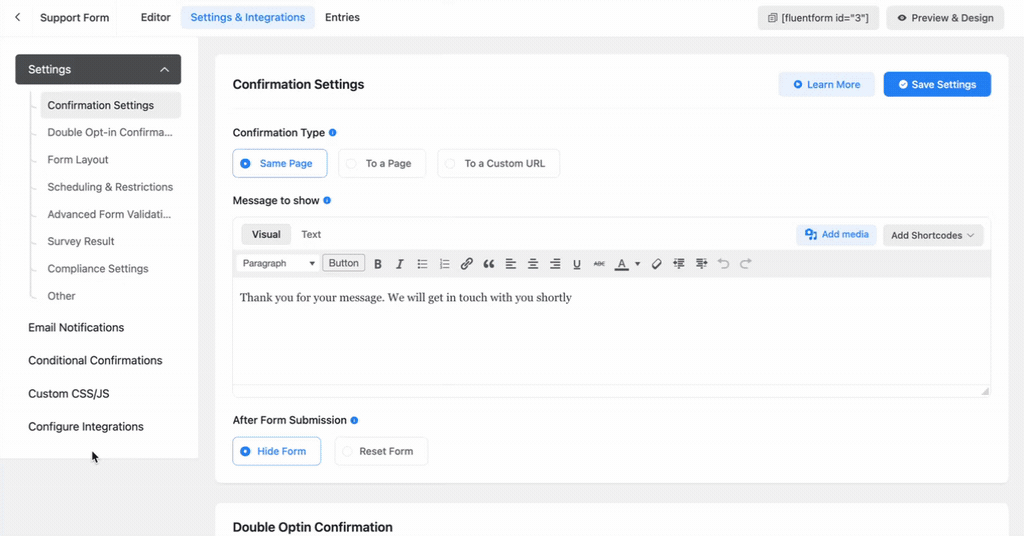
Click on Configure Integrations, press the Add New Integration dropdown, and select FluentSupport Integration.
Map All The FluentSupport Fields #
After configuring FluentSupport, you will find various checkboxes and input fields that need to be mapped. To do this follow the Screenshots below —
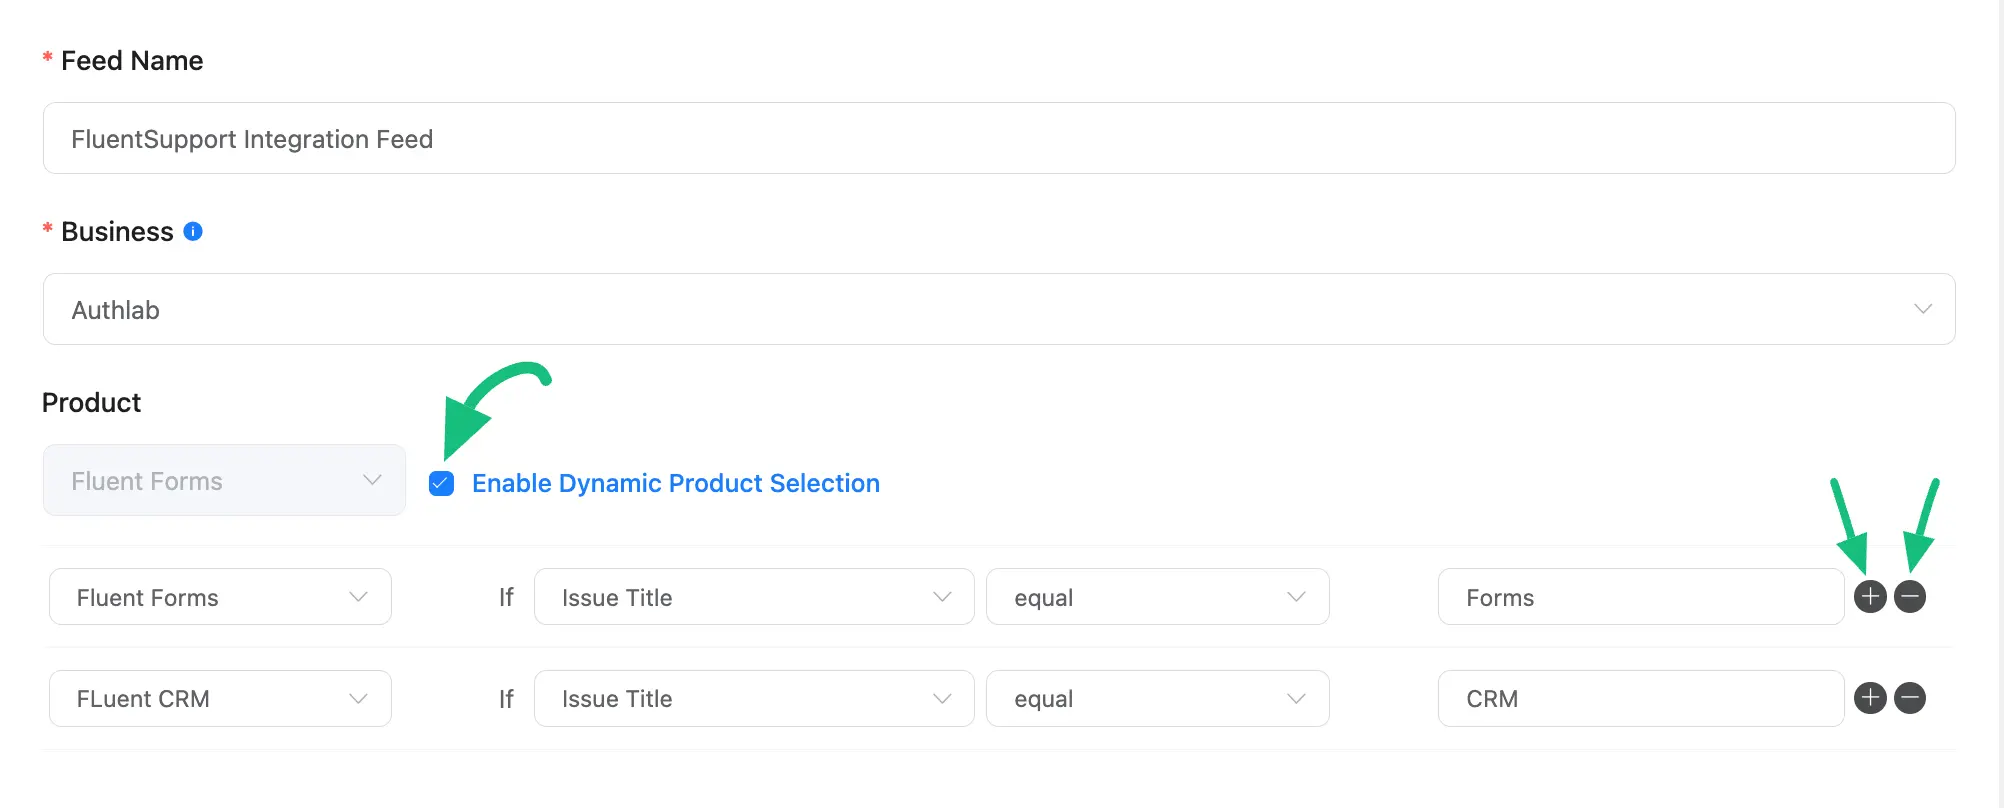
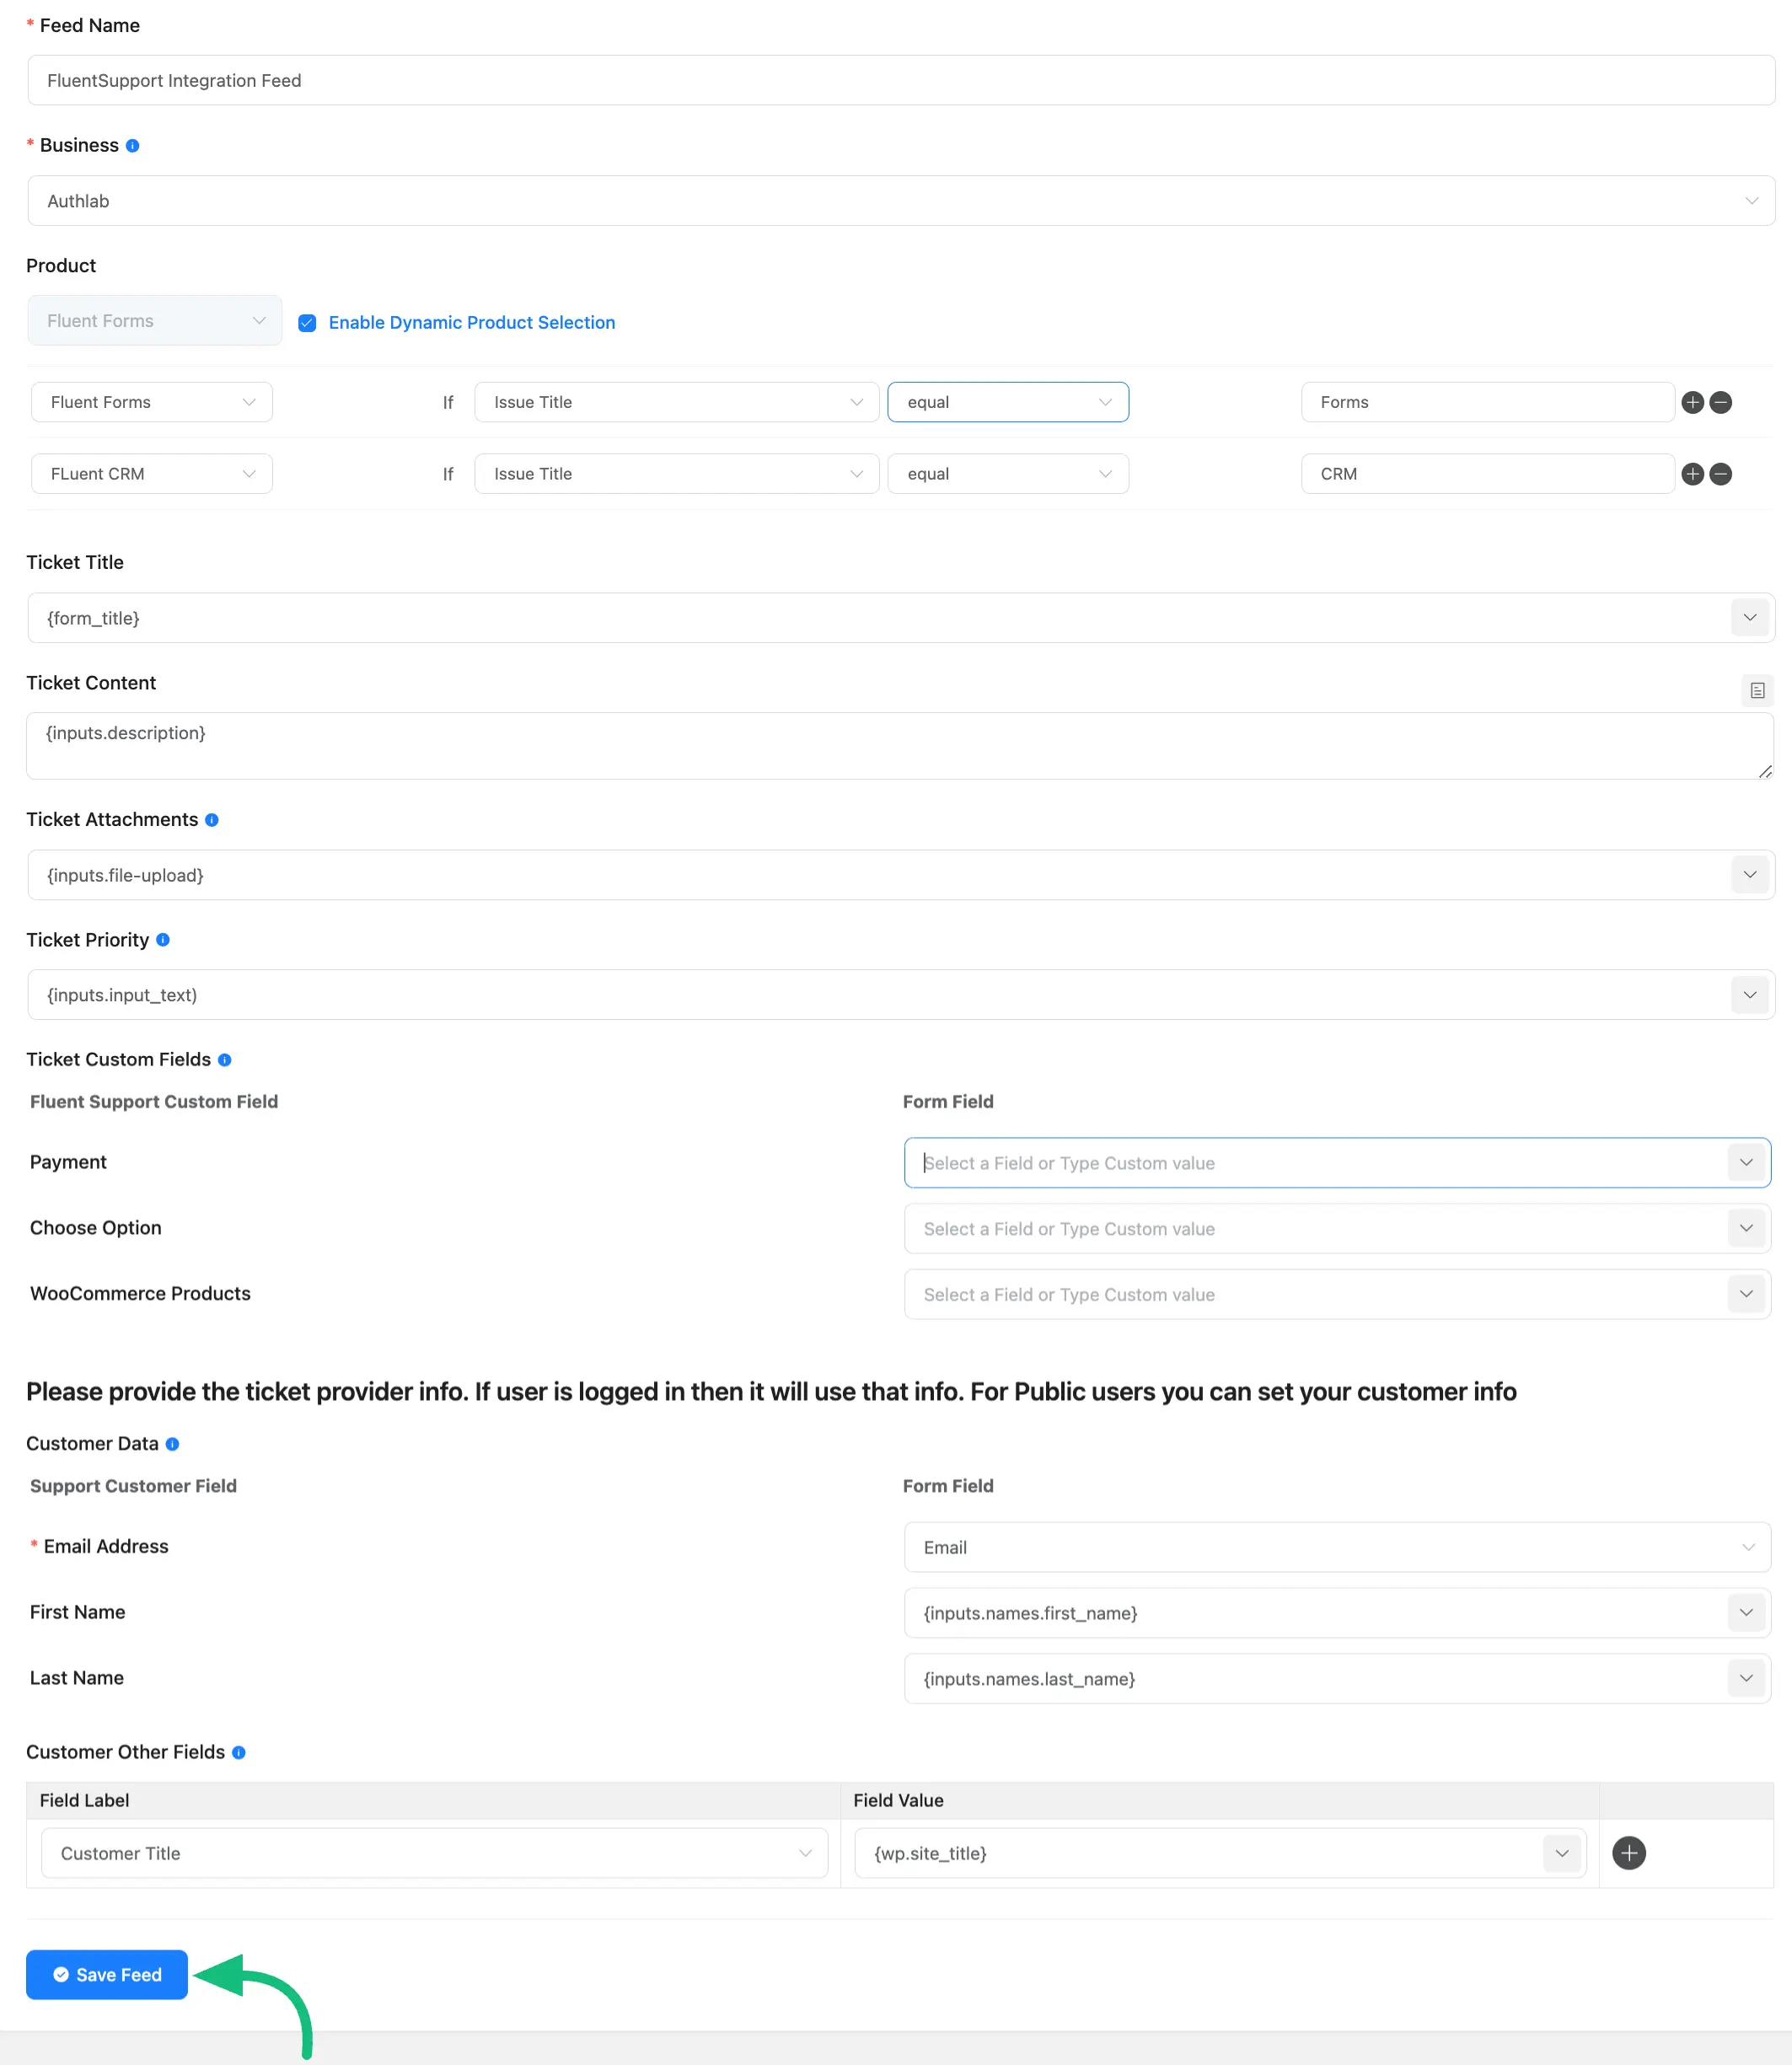
First, give the Feed Name and select your preferred Business & Product from the dropdown.
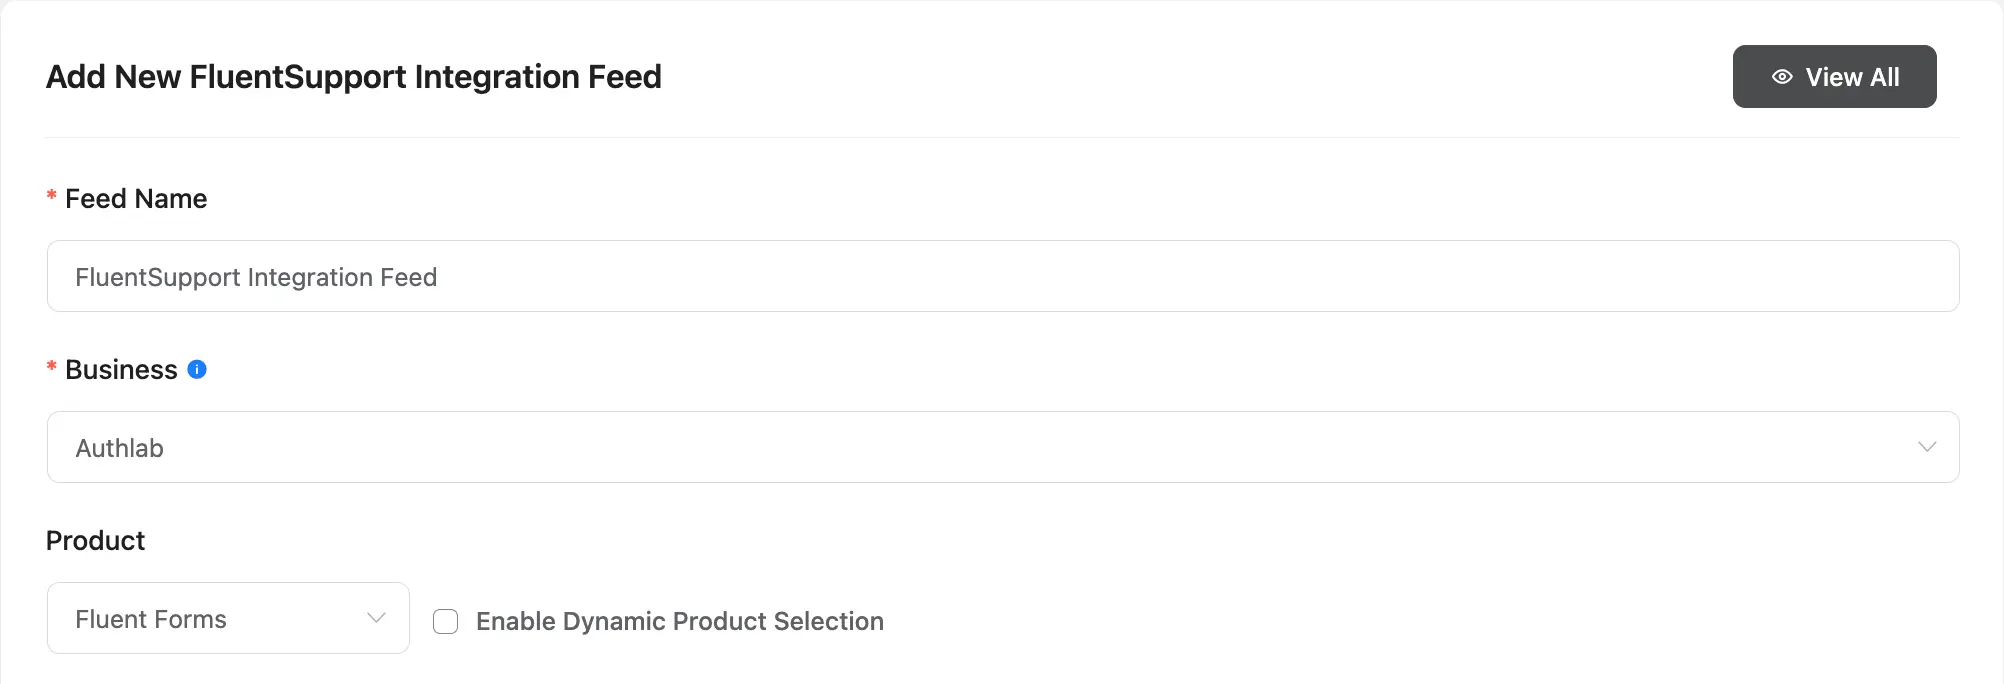
Or, check the Enable Dynamic Product Section to select the product based on certain conditions. To add more conditions click on the Plus Icon and to delete any existing condition click on the Minus Icon.
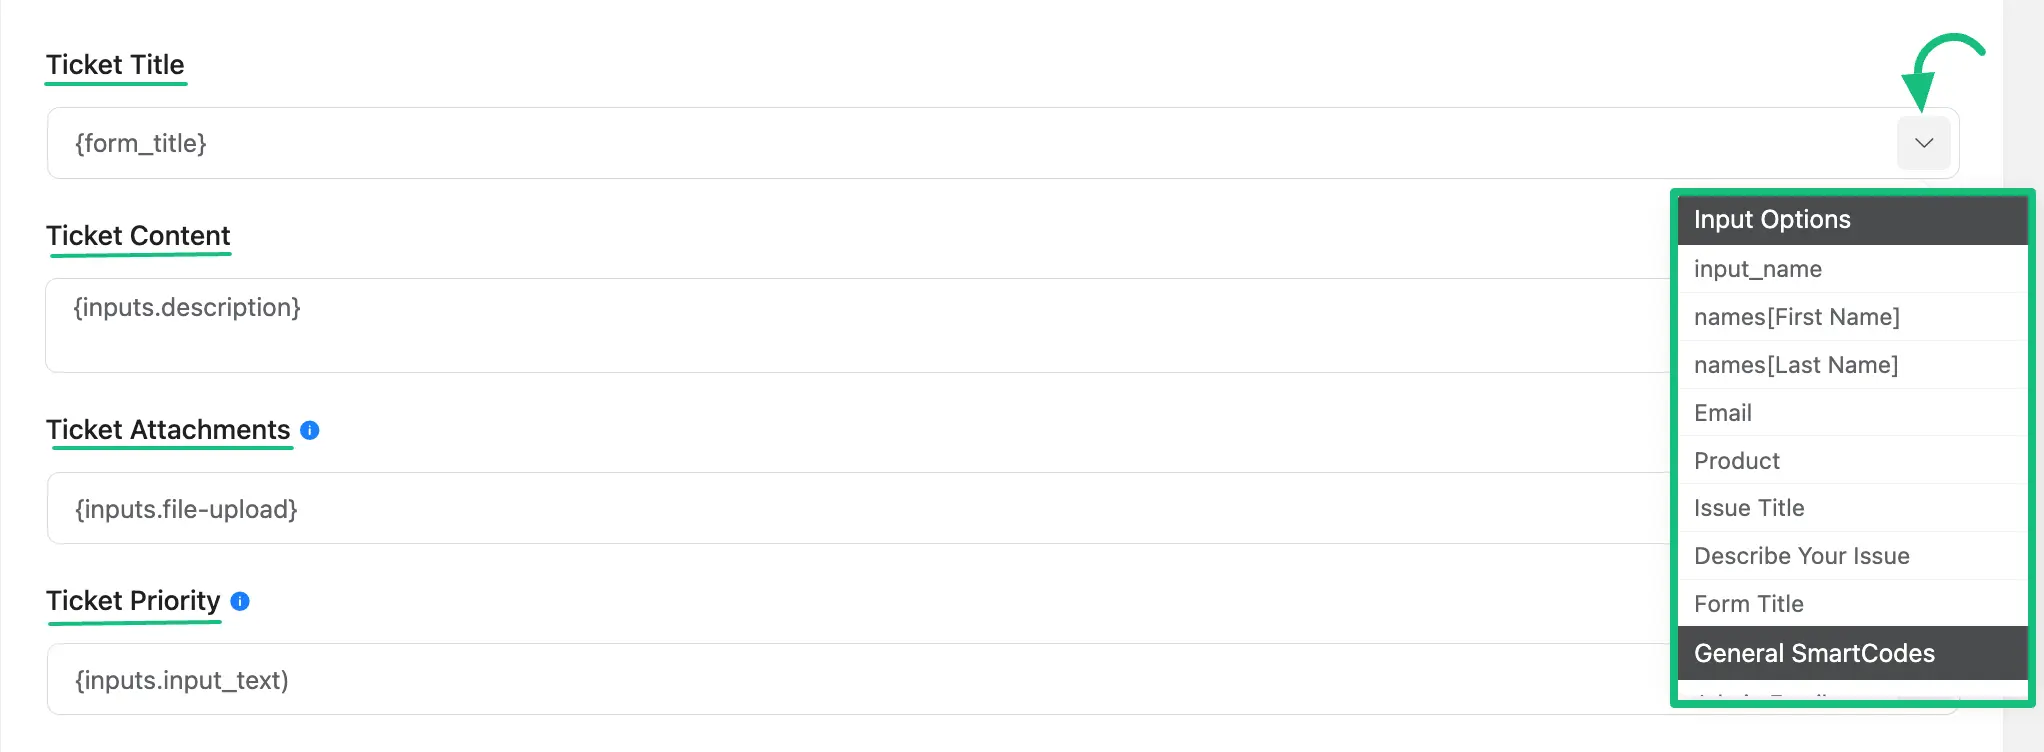
Next, map your Input fields with the corresponding Ticket fields on the left side by clicking the Arrow Icon on the right inside the ticket fields.
If you do not want to choose from the dropdown options, you can enter your own custom value or shortcode.
Once you are done mapping all your fields, click on the Save Feed to save all the settings.
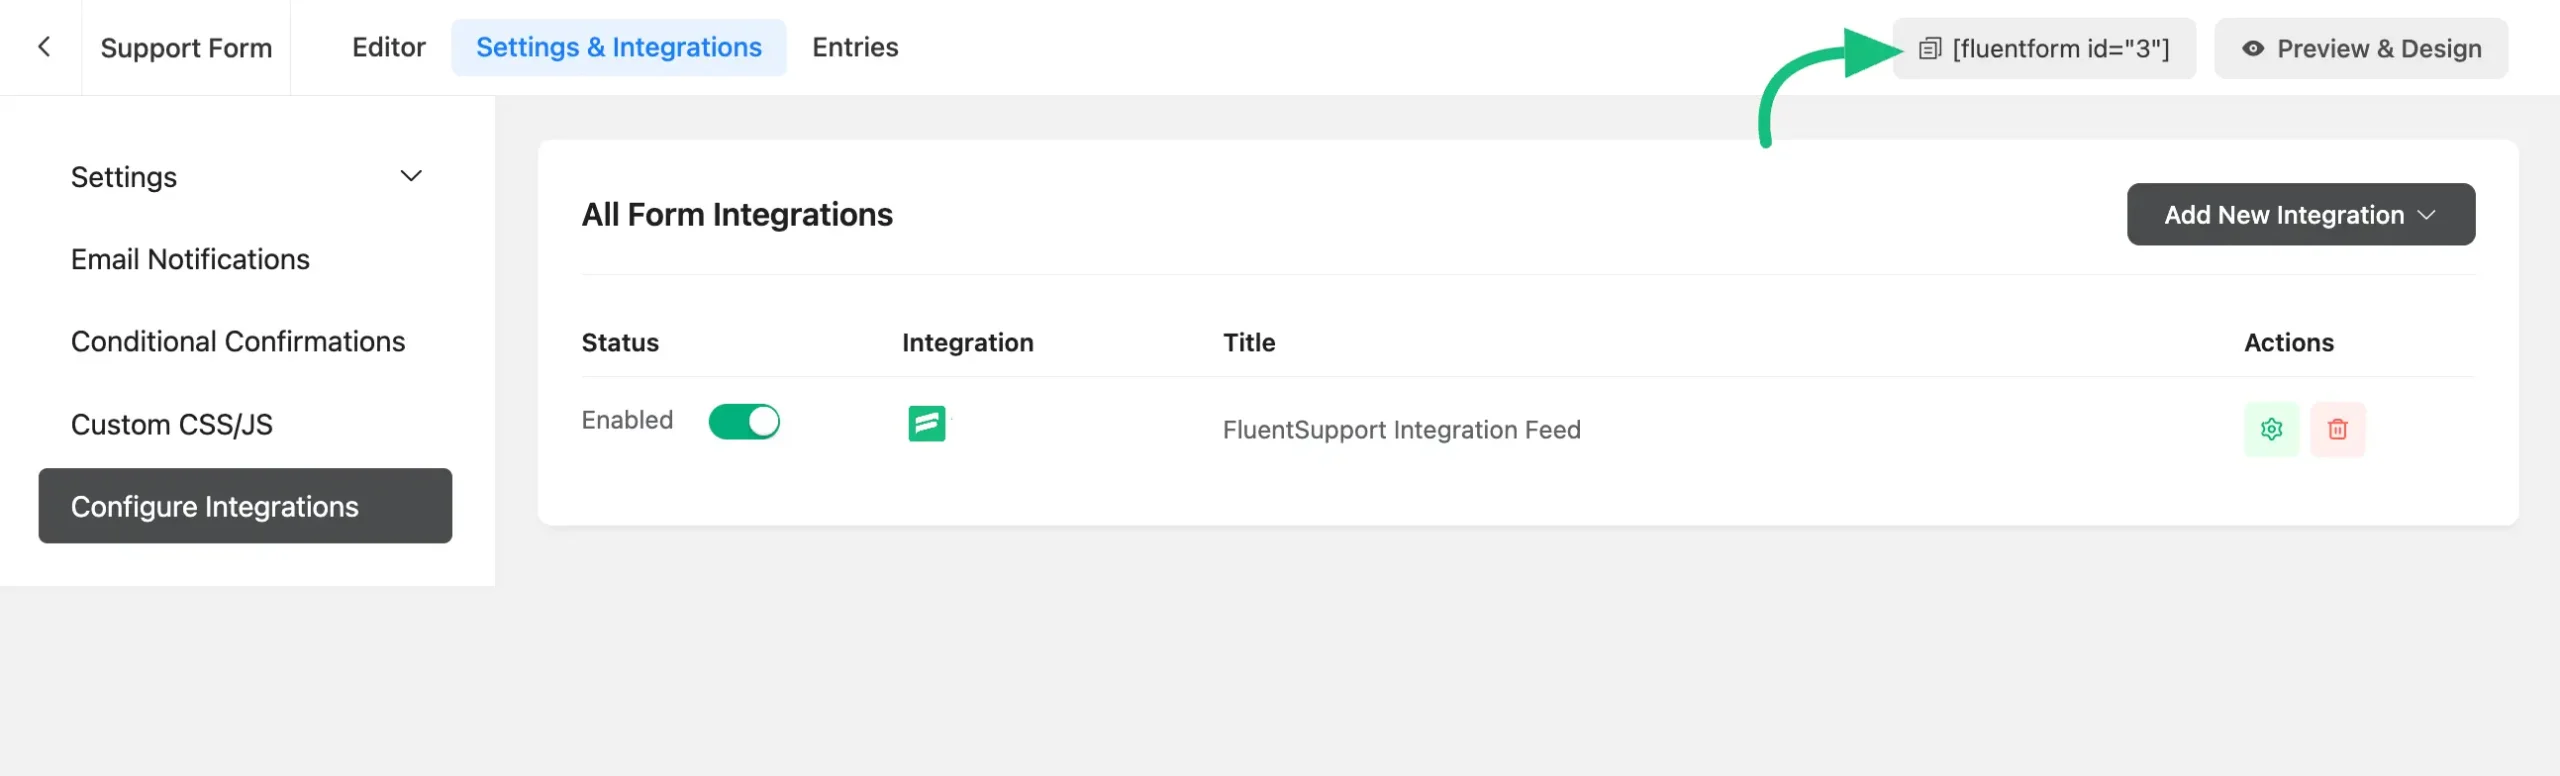
Add That Form On A Page Using Shortcode #
To add the integrated form on a specific page of your site, copy the Shortcode by clicking on it from the top bar, and then paste it onto the desired page.
This is how you can integrate Fluent Forms with Fluent Support!
If you have any further questions, concerns, or suggestions, please do not hesitate to contact our @support team. Thank you.


