The Customer Portal is intended for direct use by end-users where users can view & use the dashboard to submit tickets. This article will guide you to set up your Customer Portal with Global Settings in Fluent Support.
Global Settings #
To learn where you can find the Global Settings to set up the portal, follow the steps with the screenshots below —
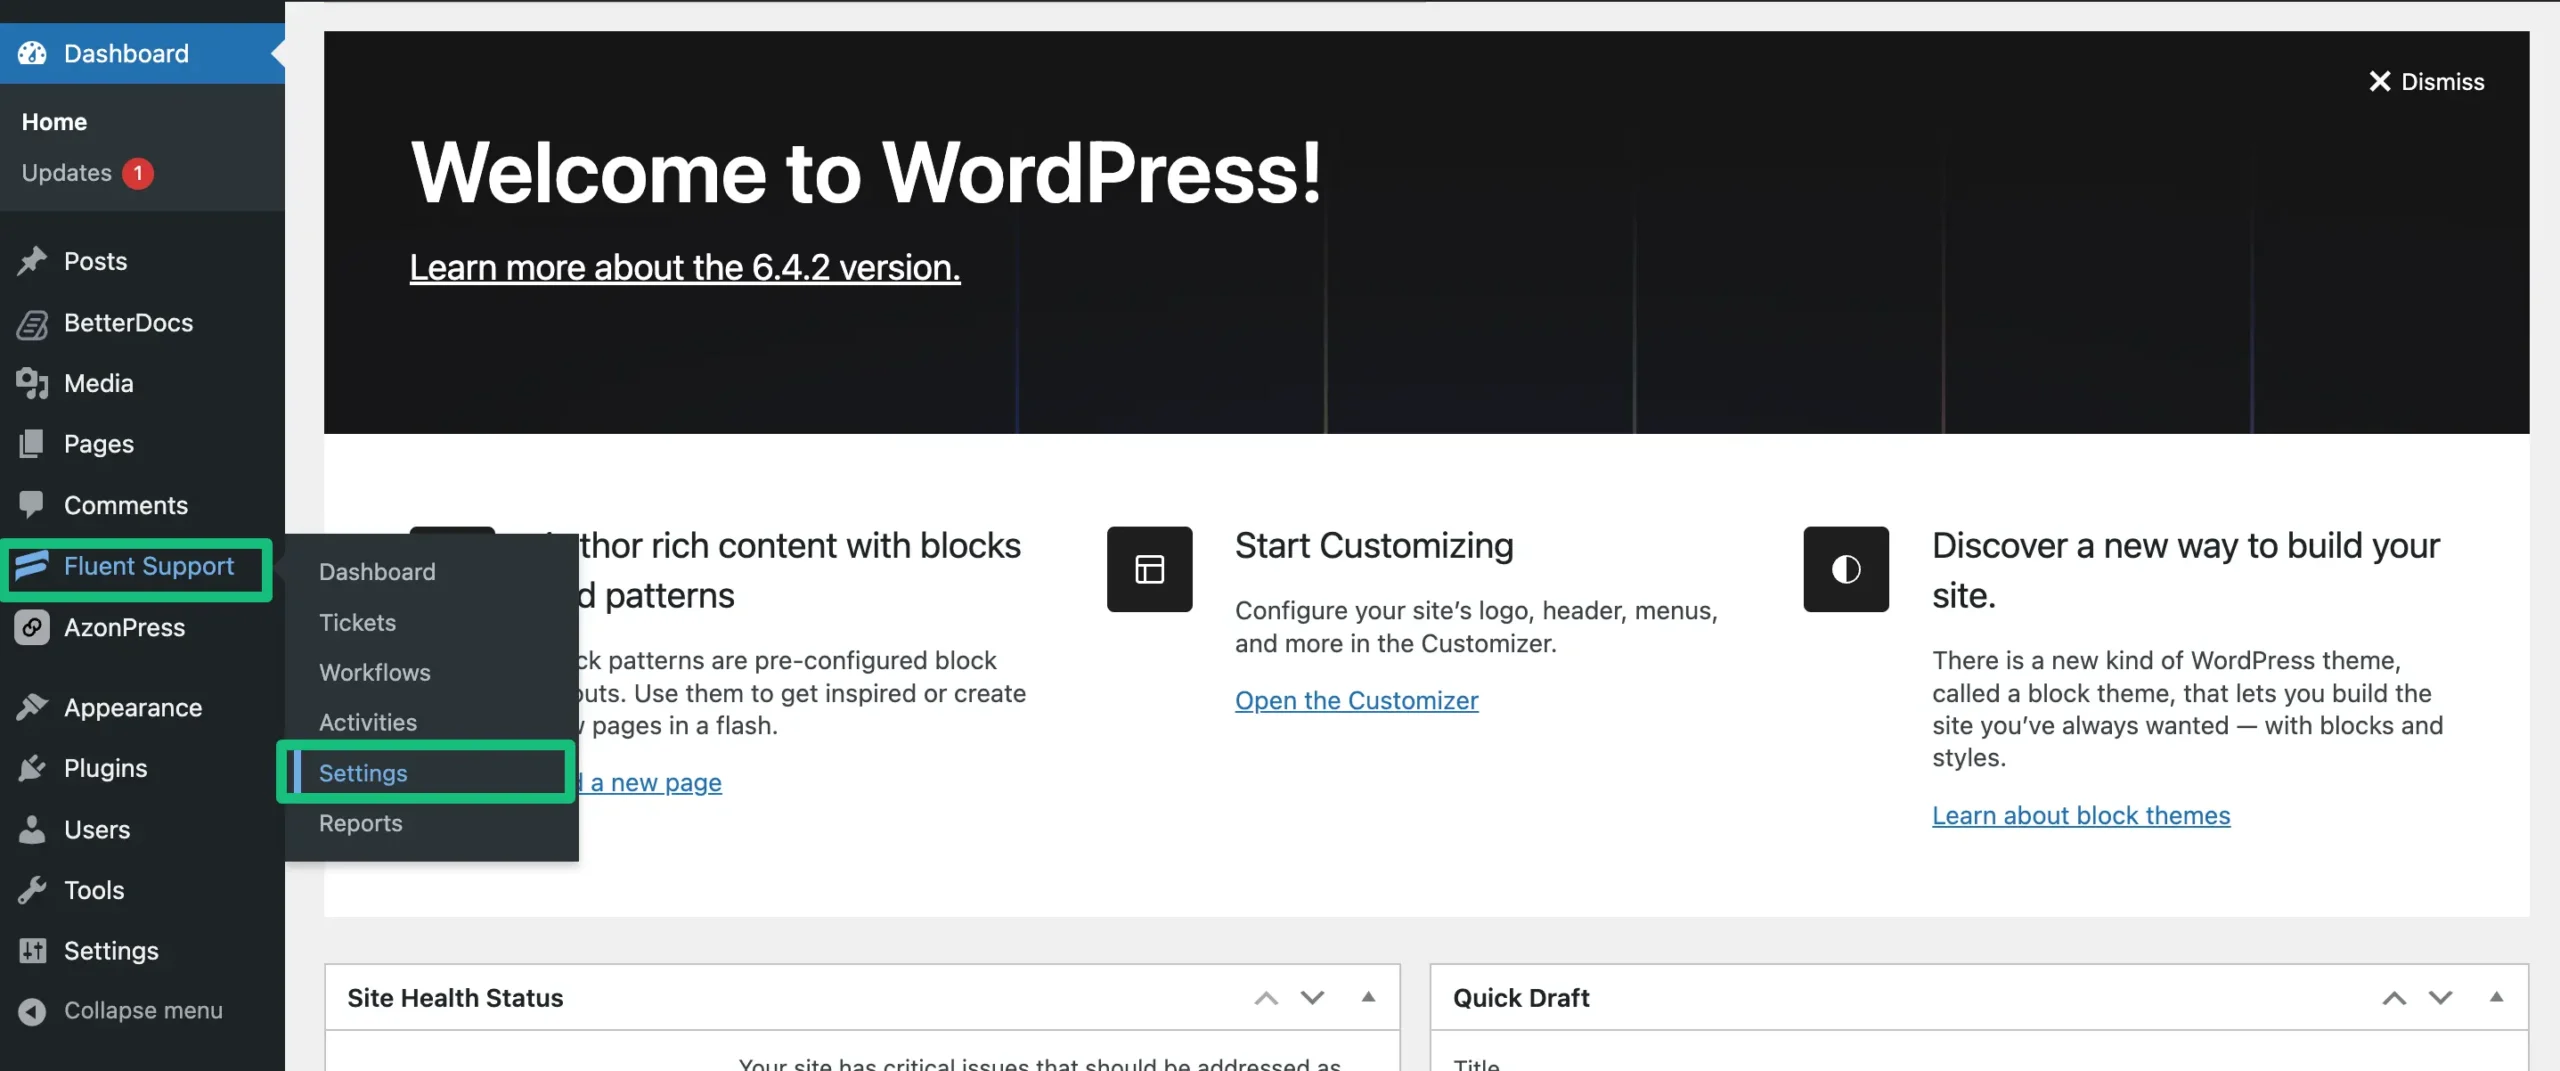
Either go to your Fluent Support and click on Settings.
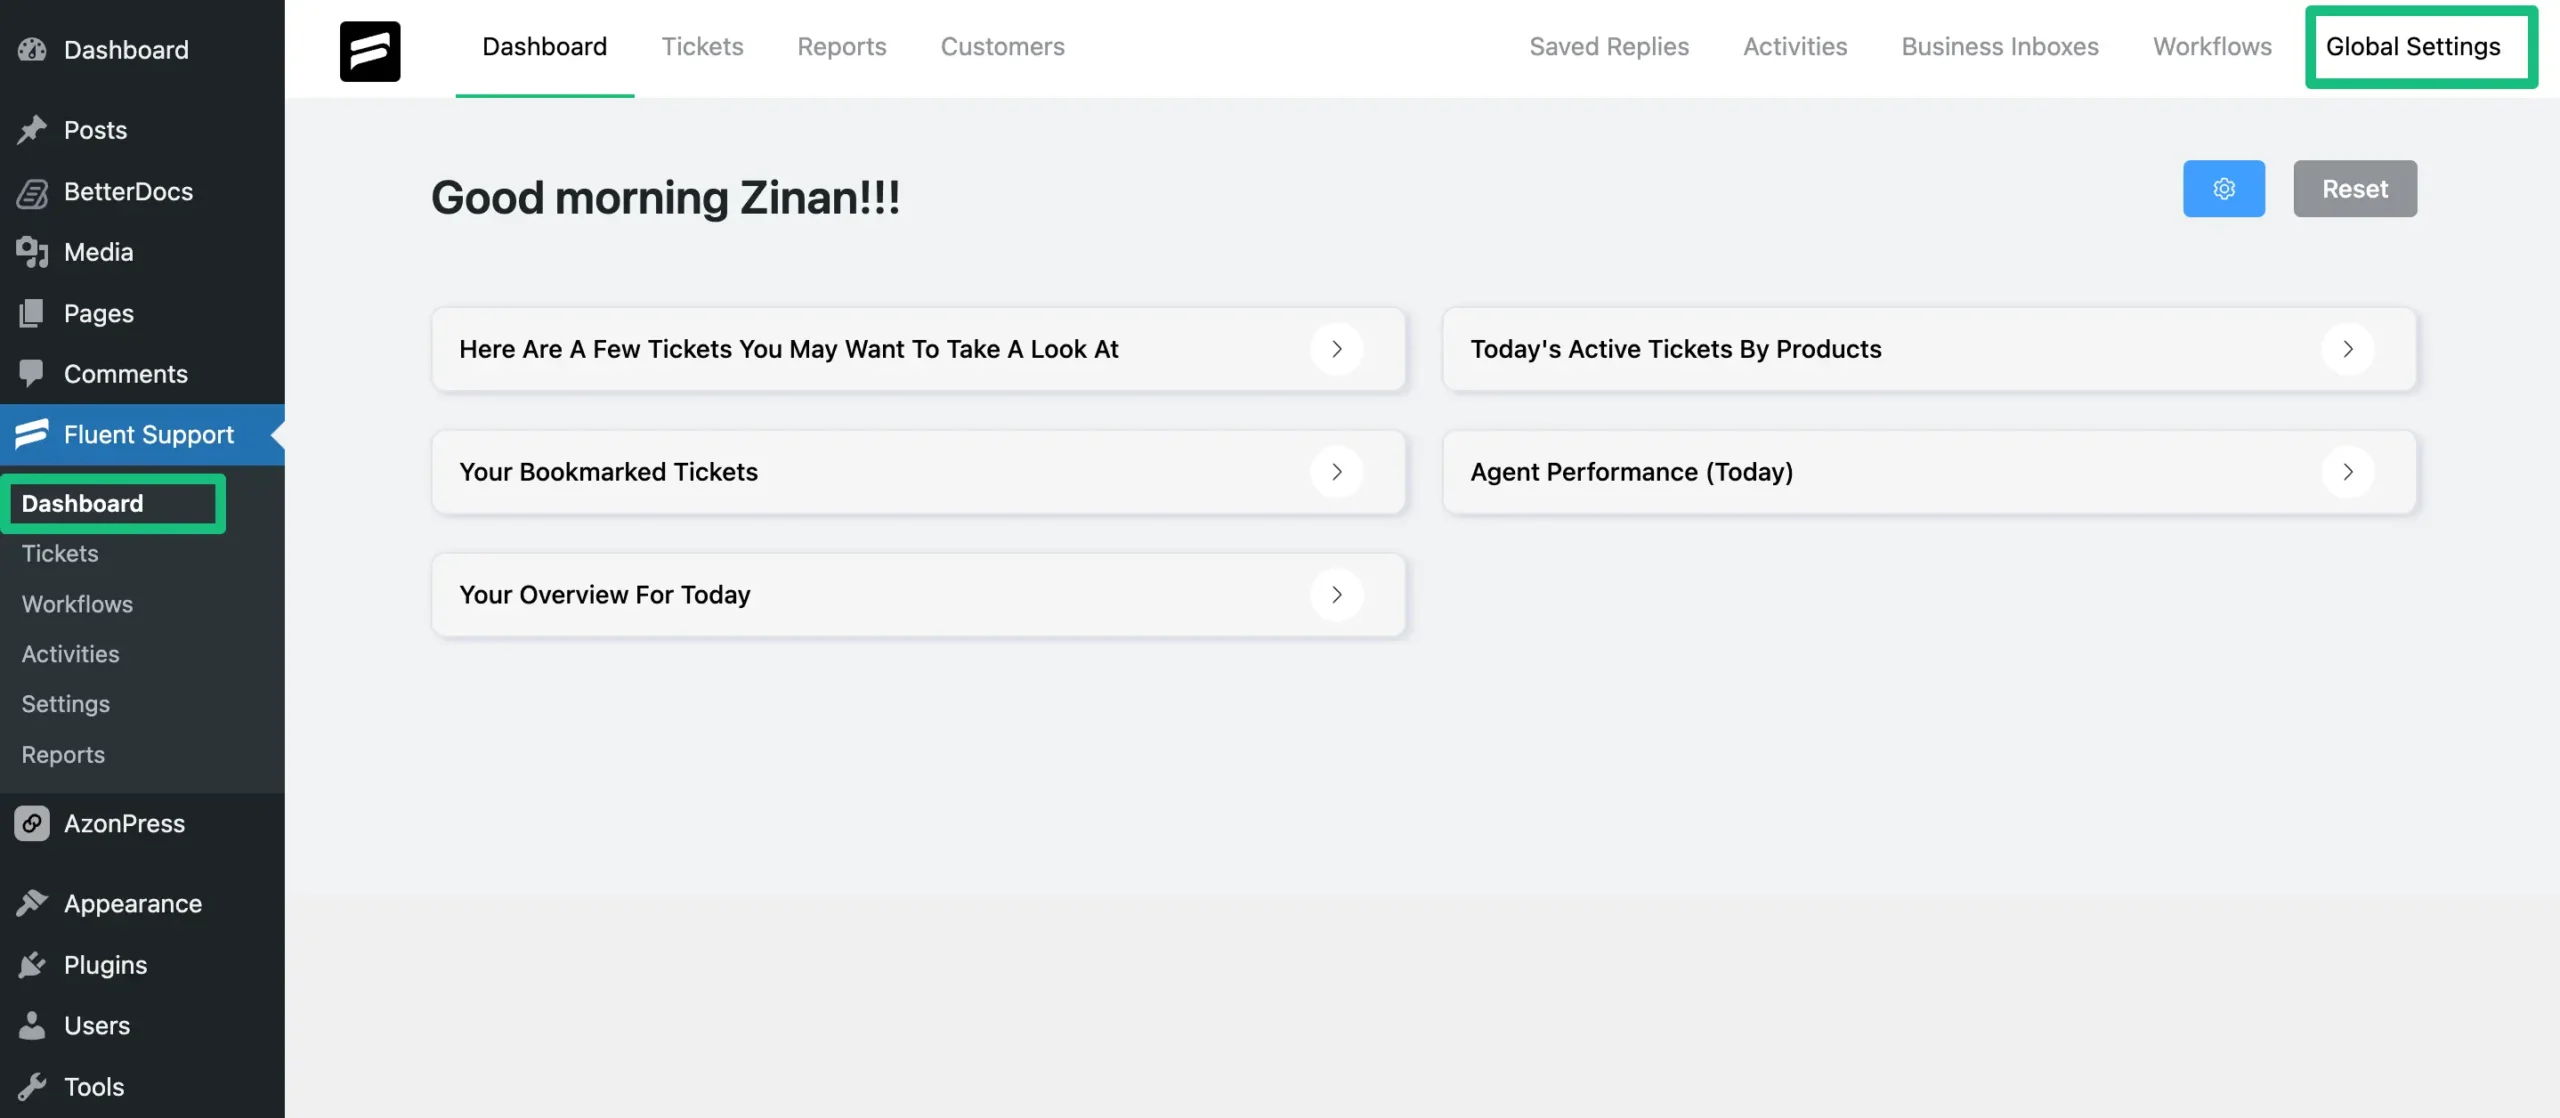
Or, you can go to your Fluent Support Dashboard & click on Global Settings.
This will take you to the Global Settings page, where you can set up the portal page for your customers.
Remember, always press Save Settings after finishing all the customization in your Global Settings to save it. Otherwise, changes will not appear in your Customer Portal.
Setup Customer Support Portal #
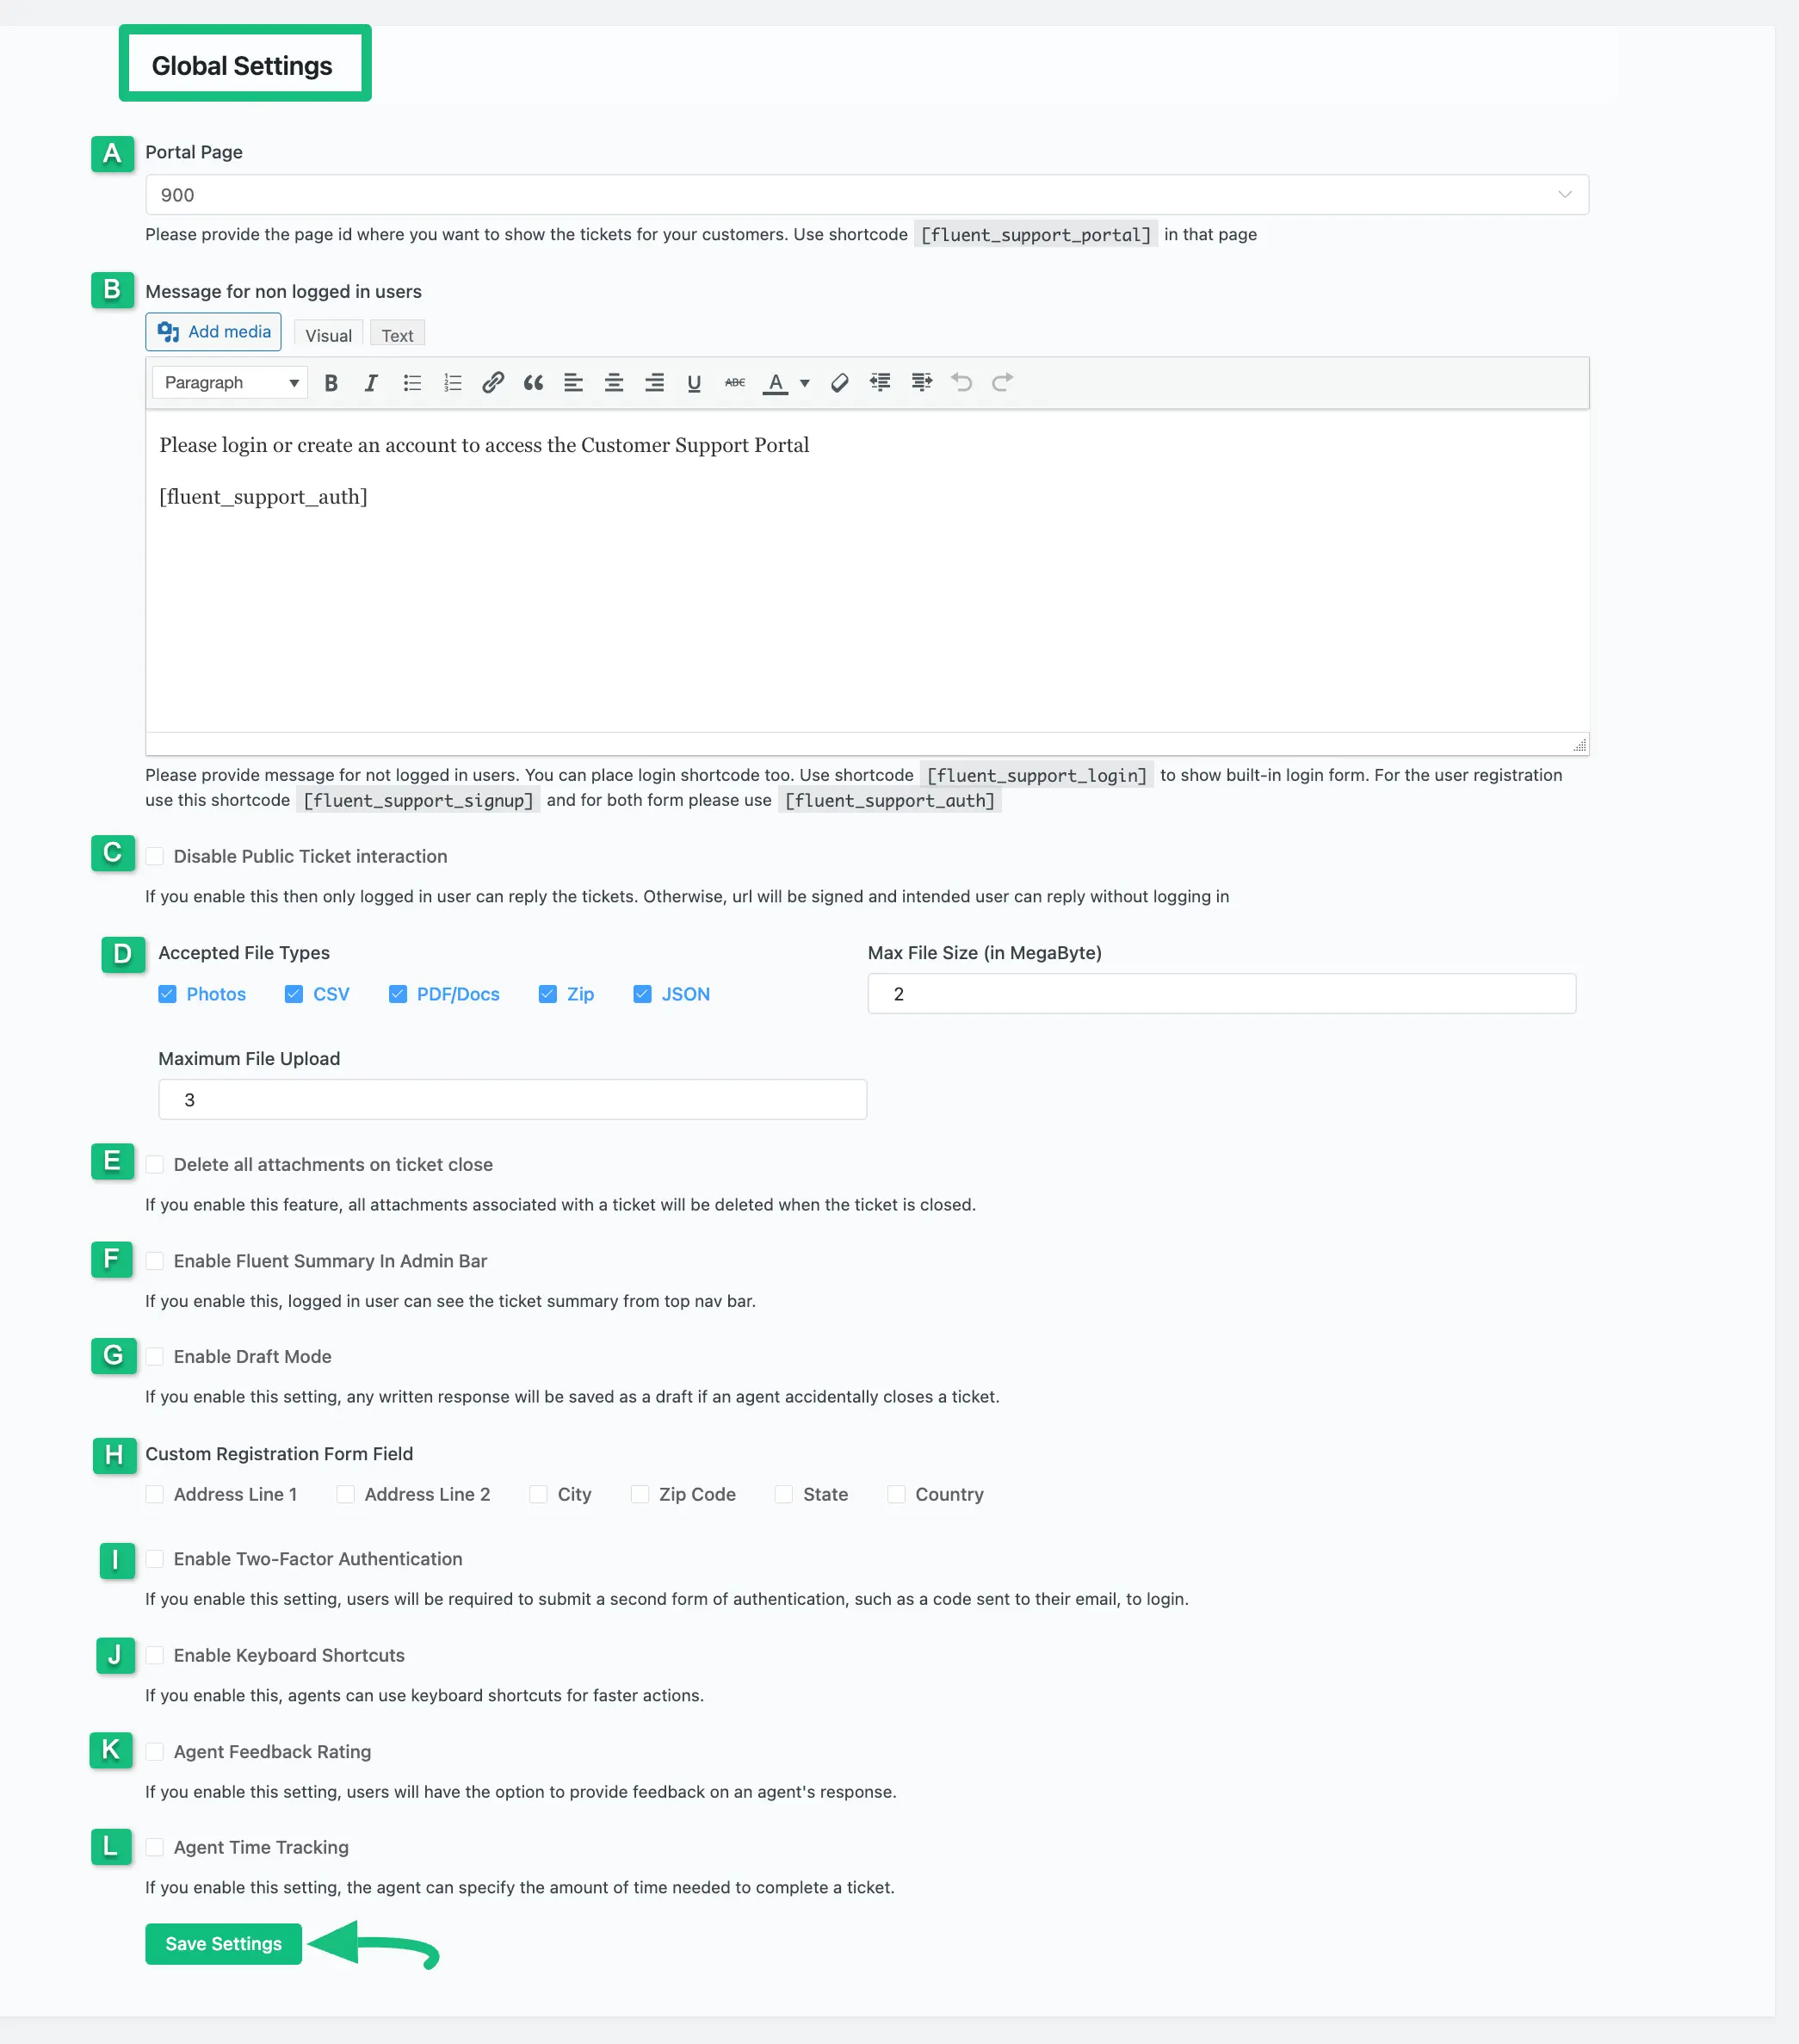
You will find the following Settings Options in Global Settings to set up your Fluent Support Customer Portal. These are:
- Portal Page
- Message for non-logged-in users
- Disable Public Ticket Interaction
- Accepted File Types
- Delete all attachments on ticket close
- Enable Fluent Summary in Admin Bar
- Enable Draft Mode
- Customer Registration Form Field
- Enable Two-Factor Authentication
- Enable Keyboard Shortcuts
- Agent Feedback Rating
- Agent Time Tracking
To learn how to set up a Customer Support Portal with these settings, follow the steps with screenshots below —
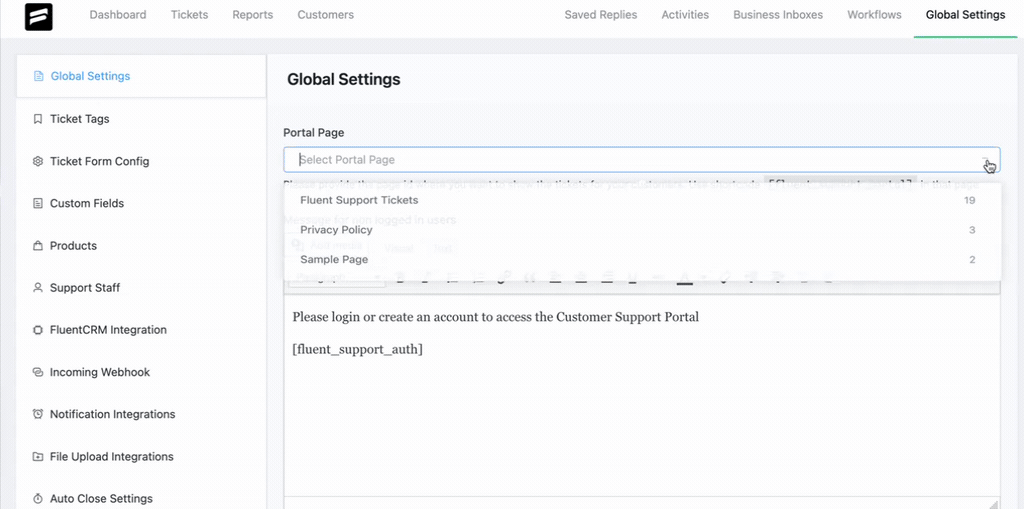
A. Portal Page #
In the ’Portal Page’ option, you can select the Page where you want to show the Support Portal for your customers to submit their tickets. You can select your desired page in two different ways and these are shown in the GIFs below —
- Select the desired page directly from the Dropdown option. Or, copy the Shortcode given just below the Portal Page.
- And, paste it manually on your Desired page.
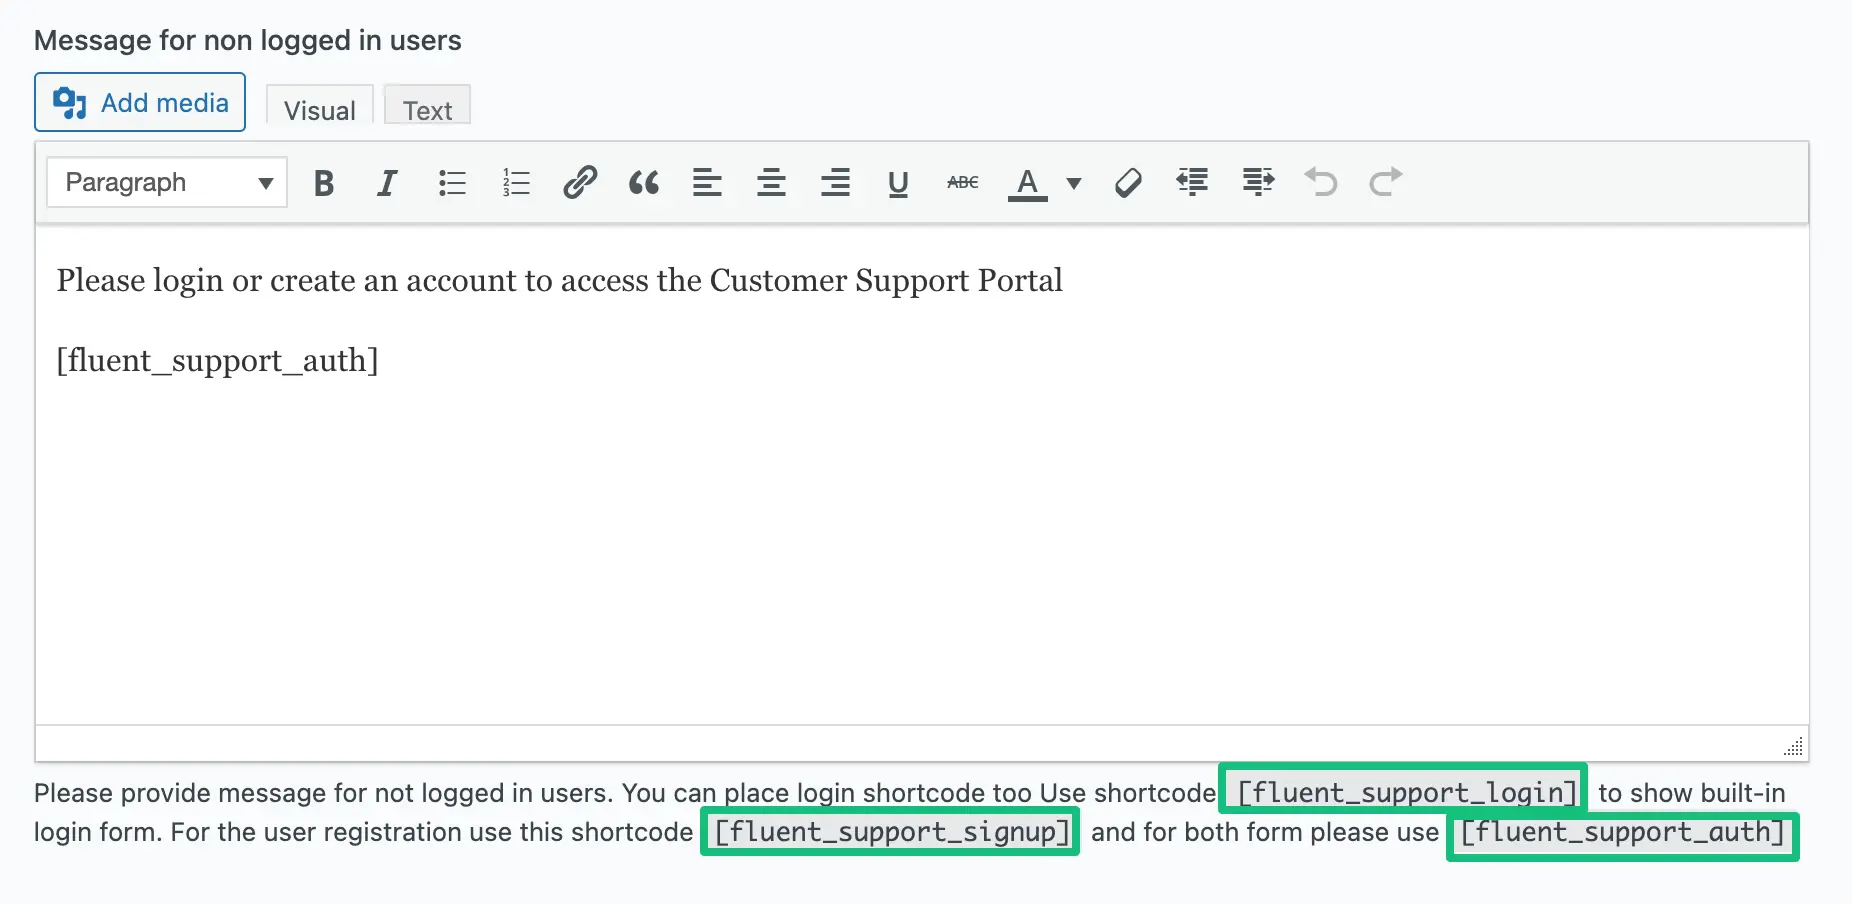
B. Message for non-logged-in users #
In this option, you can customize certain texts for the users who have not logged in.
- You will see a default message (Please login or create an account to access the Customer Support Portal) has been added which you can edit anytime according to your need.
- Also, you can use different Shortcodes provided below to show different Forms.
To know the details of these below-mentioned Shortcodes, check this Documentation.
C. Disable Public Ticket Interaction #
Enabling ‘Disable Public Ticket Interaction’ allows only logged-in users to reply to tickets. If you uncheck the option, users can reply to tickets without logging in using a signed URL.

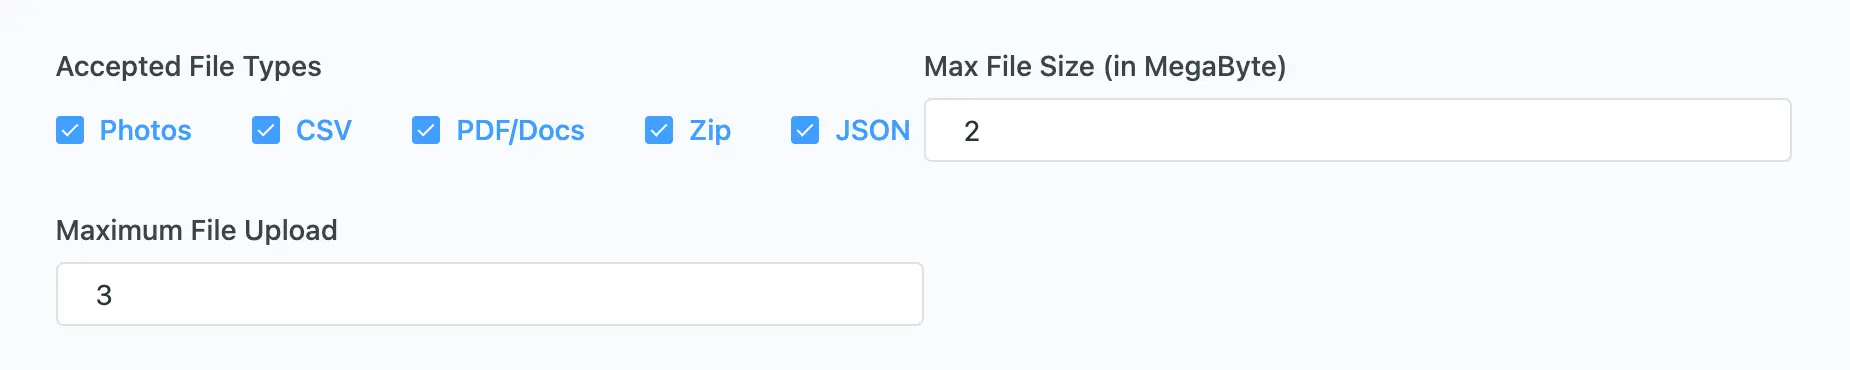
D. Accepted File Types #
Fluent Support accepts photos, CSV, PDF/Docs, Zip, and JSON files. You can also set the maximum file size and number of files to upload.
To learn the details about file Attachment Regulations, read this Documentation.
E. Delete all attachments on ticket close #
If you enable the ‘Delete all attachments on ticket close’ option, it will automatically delete all attachments associated with a particular ticket when it is closed.

F. Enable Fluent Summary in Admin Bar #
Enable the ‘Fluent Summary in Admin Bar’ option allows users to see a ticket summary from the top nav bar.

G. Enable Draft Mode #
The ‘Enable Draft Mode’ allows agents to save responses automatically as drafts to avoid accidental ticket closures or reply to the ticket later.

H. Customer Registration Form Field #
The ‘Customer Registration Form Field’ allows agents to get the information in the customer registration form using the below-mentioned fields.

I. Enable Two-Factor Authentication #
If you enable the ‘Enable Two-Factor Authentication’ option, this will require customers to enter a verification code sent to their email whenever they try to log in to the customer portal.

J. Enable Keyboard Shortcuts #
Enabling the ‘Enable Keyboard Shortcuts’ option allows agents to use keyboard shortcuts for faster actions.

K. Agent Feedback Rating #
Enabling the ‘Agent Feedback Rating’ option allows users to provide feedback on agent responses.

L. Agent Time Tracking #
Enabling the ‘Agent Time Rating’ option allows agents to set the amount of time a user needs to complete a ticket.
Always press Save Settings after finishing all the customization in your Global Settings to save it. Otherwise, changes will not appear in your Customer Portal.
If you have any further questions, concerns, or suggestions, please do not hesitate to contact our @support team. Thank you.


