Upgrade your Fluent Support experience to the next level with the Fluent Support PRO, unlocking every plugin feature. This article will help you upgrade your Fluent Support easily to the PRO Add-On on your WordPress Website. Follow the guidelines accordingly for a successful upgrade.
Before installing Fluent Support PRO, make sure you have the Free version of FluentSupport installed on your site. To learn how to install and activate the free version of Fluent Support, check this Documentation.
Upgrade to Fluent Support Pro Add-on #
To learn how to upgrade your Fluent Support to Fluent Support PRO, follow the steps with the screenshots below —
Once you log into your WP Manage Ninja Dashboard, you will find Fluent Support under Downloads.
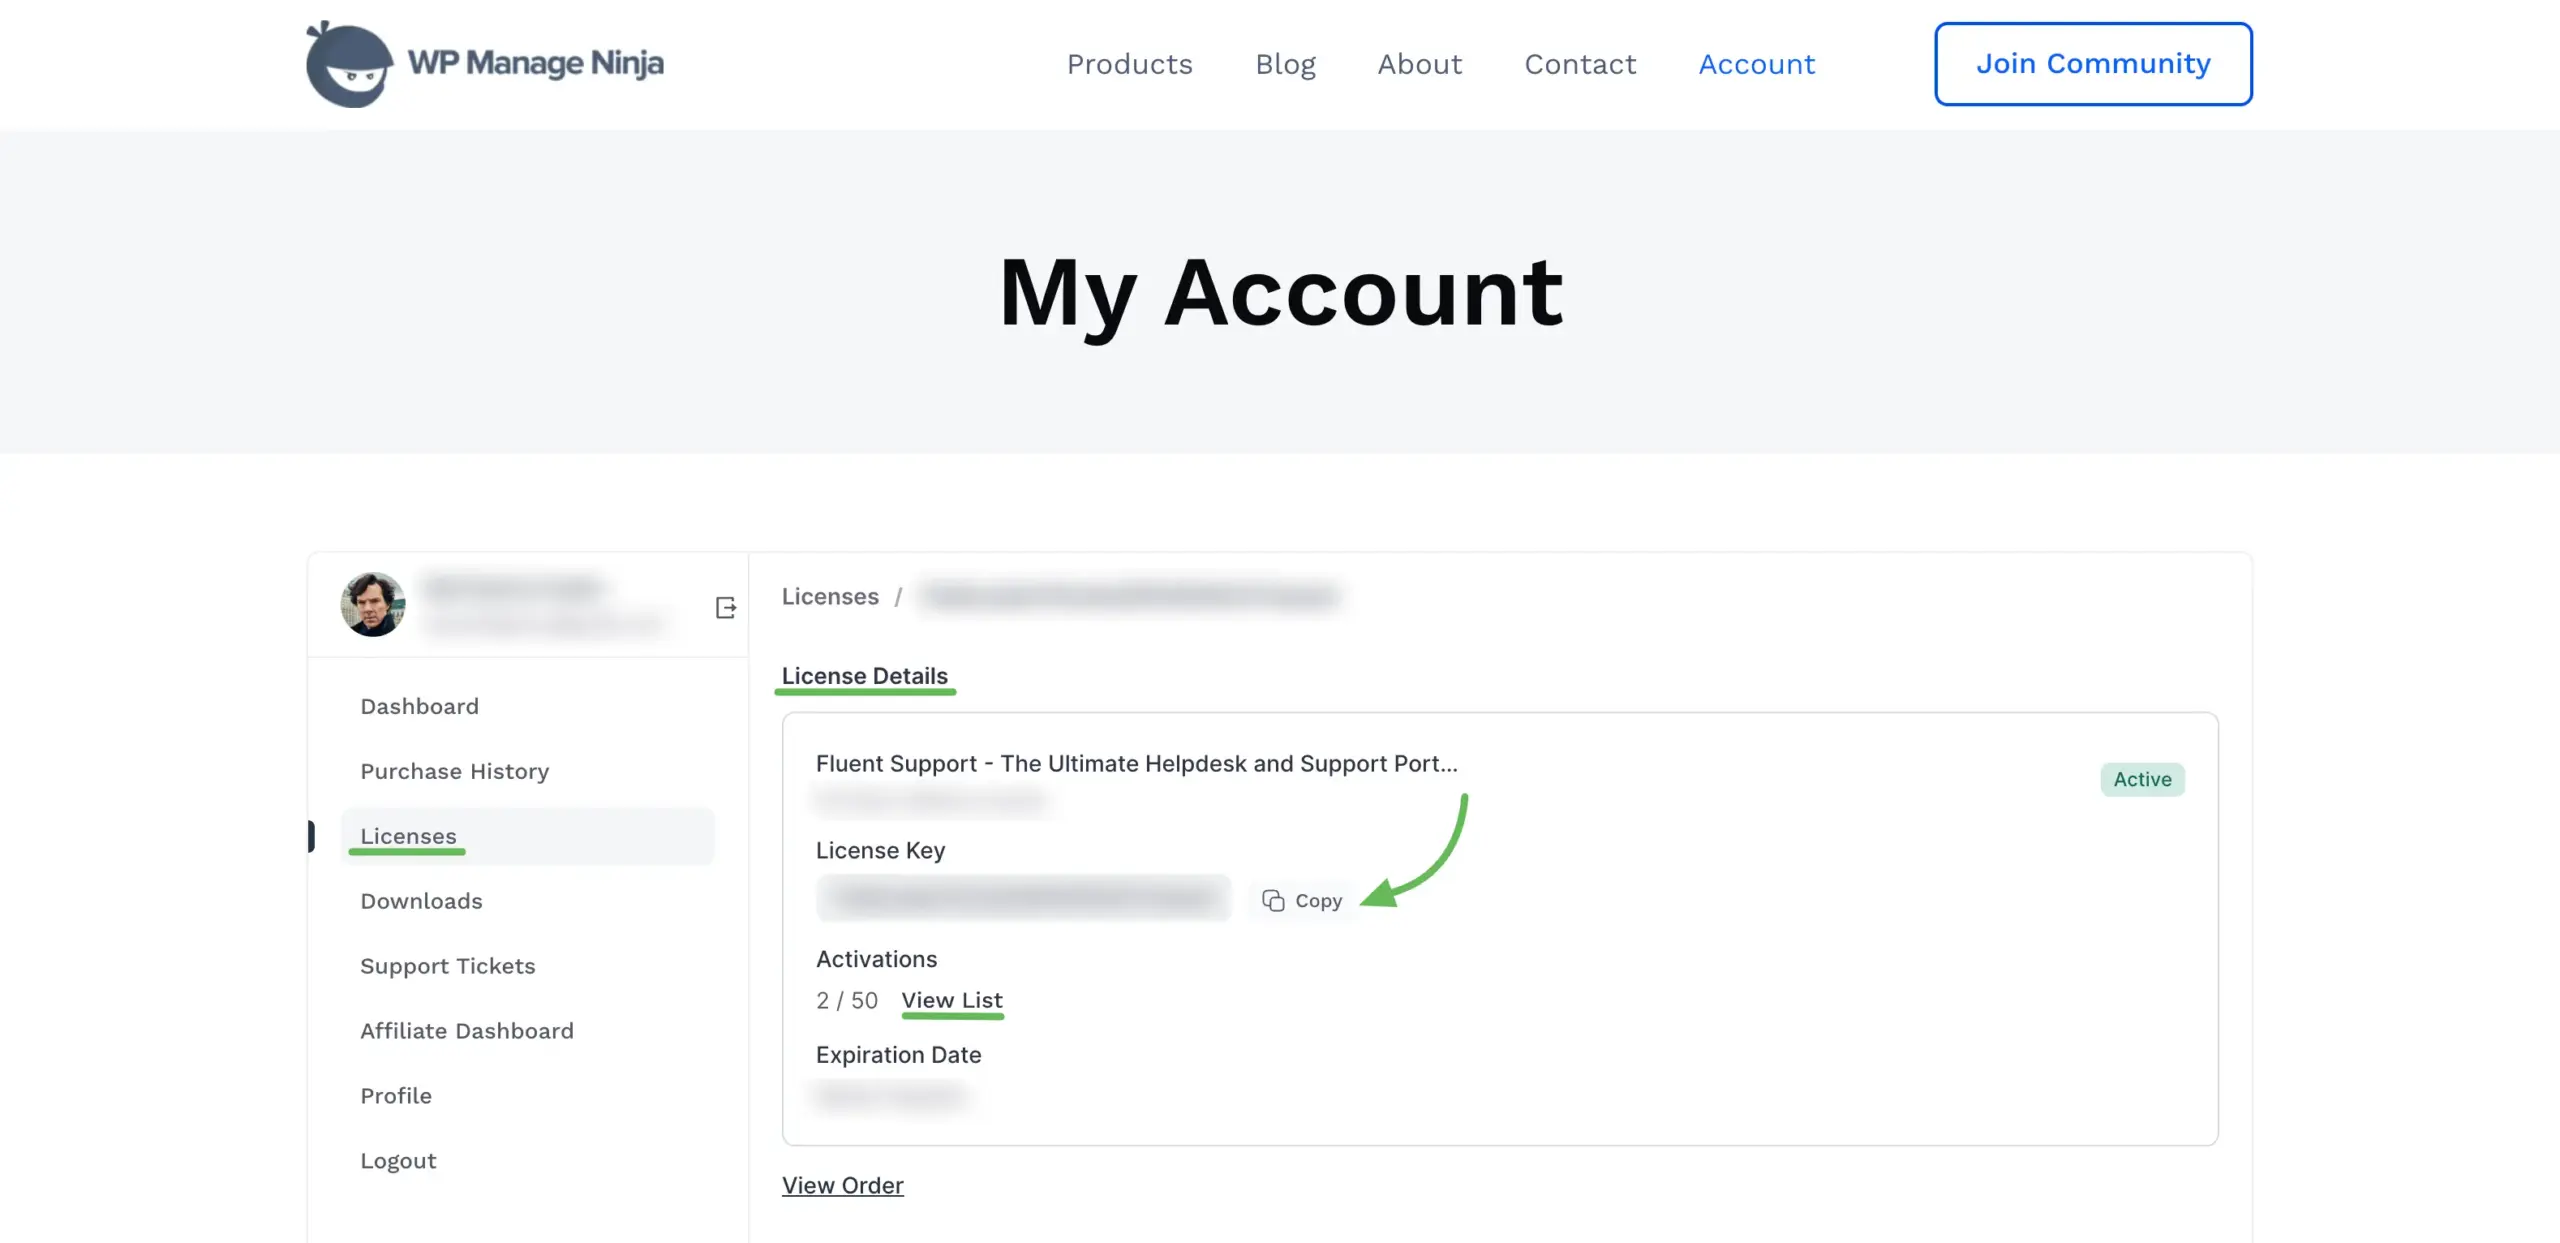
Now, click Download and then download the PRO Add-On to your device in .zip format. To access your Fluent Support license, navigate to Licenses in the left sidebar. You’ll find your Fluent Support license key there.
Click View List to see all active sites currently using this license key.
Also, copy the License Key since you need it later to Activate your PRO Features.
Install & Activate Fluent Support PRO #
To learn how to install & activate Fluent Support PRO on your WordPress site, follow the steps with the screenshots below —
Do not Deactivate or Delete the free version of the Fluent Support plugin from the plugins list as it is required for the Fluent Support PRO to function.
Plus, you will be asked for a License Key to activate all the PRO features that you will find in your wpmanageninja.com user dashboard.
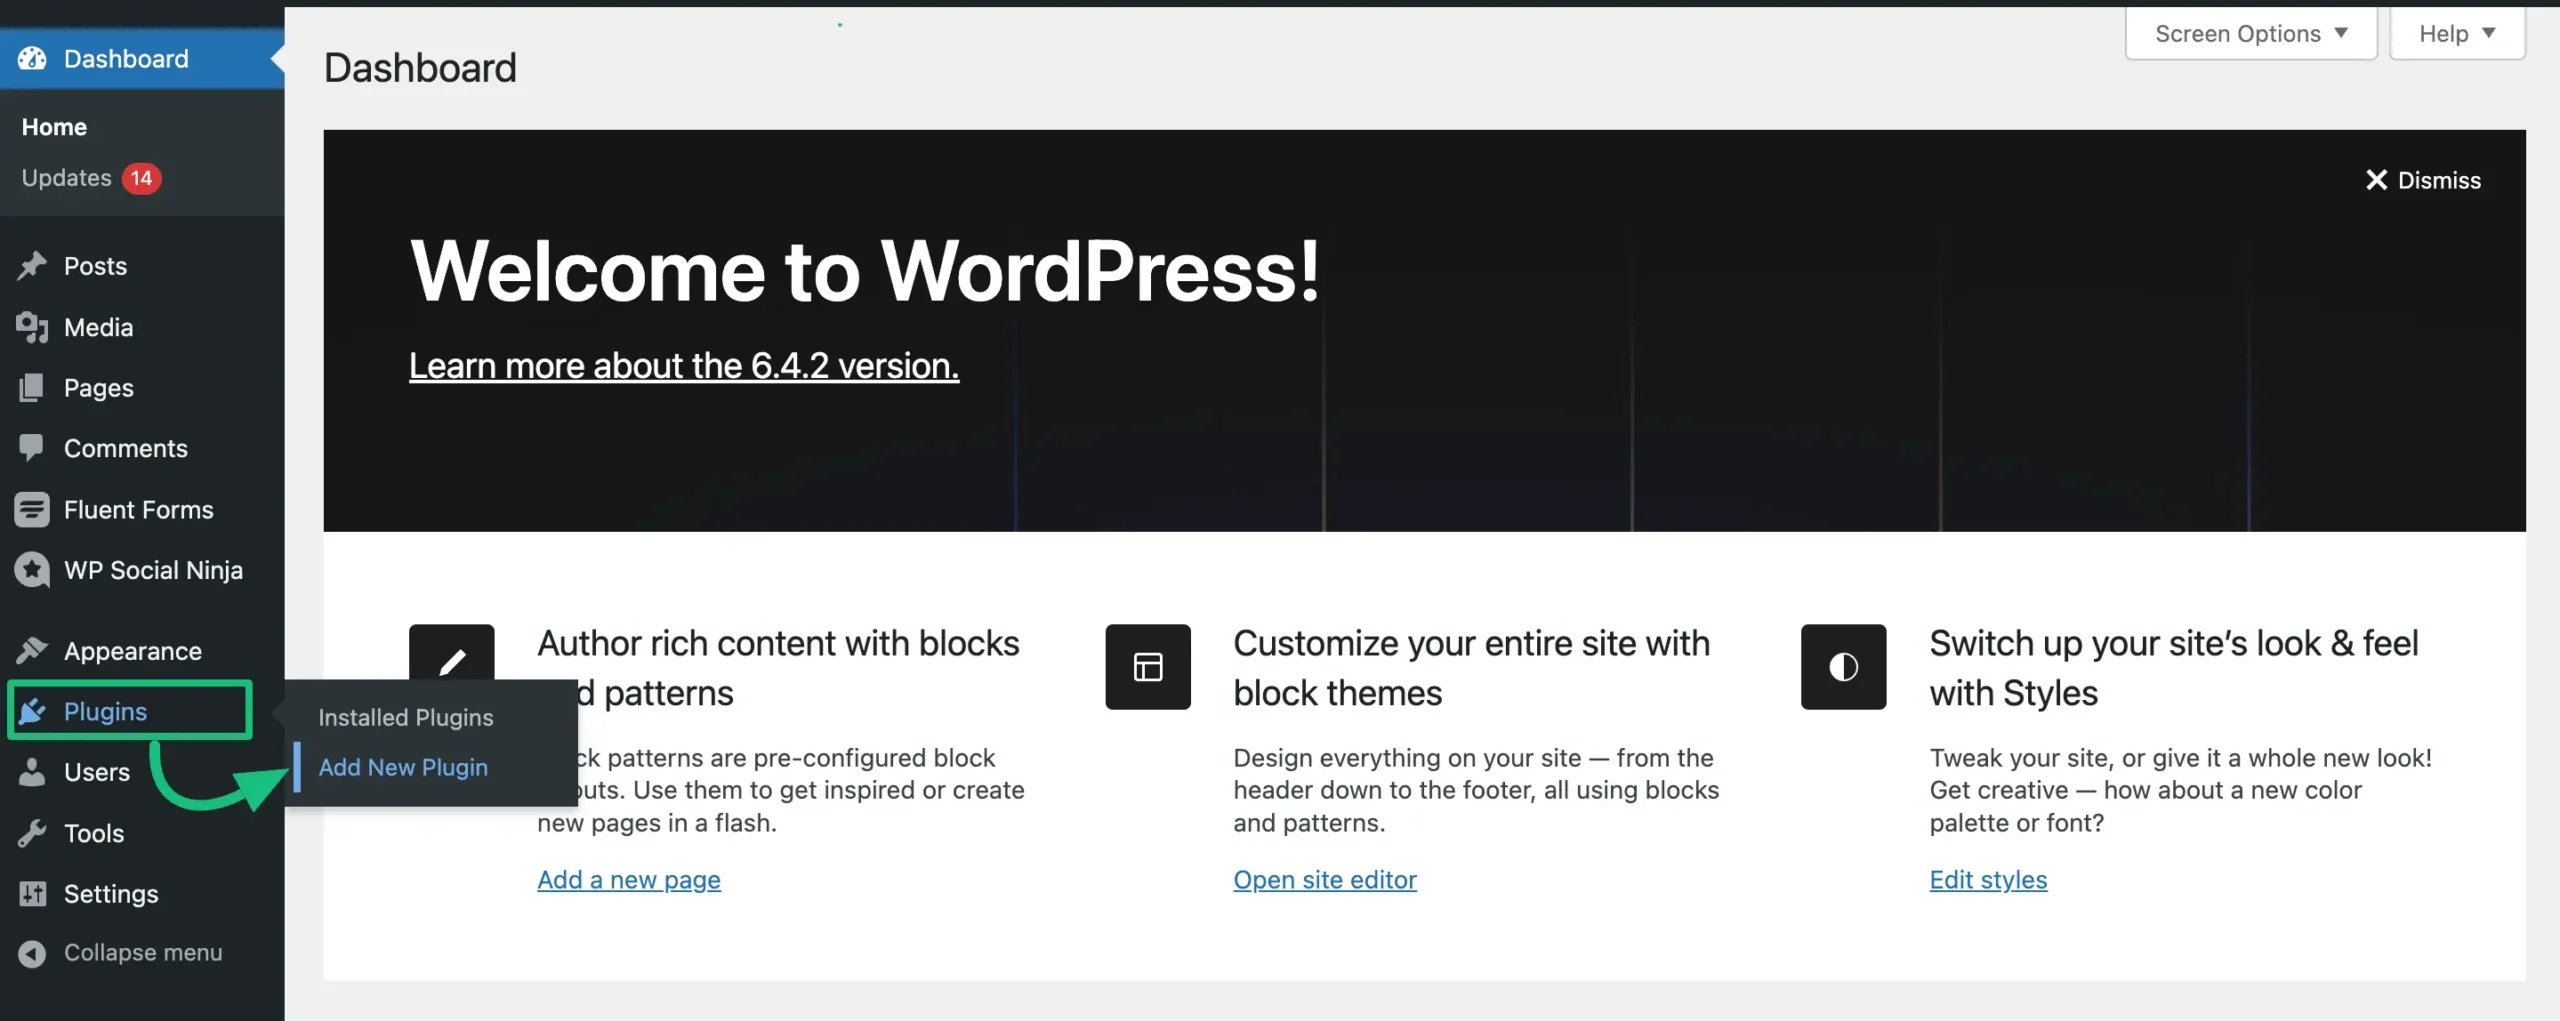
First, from your WordPress Dashboard, go to Plugins and click on Add New Plugin.
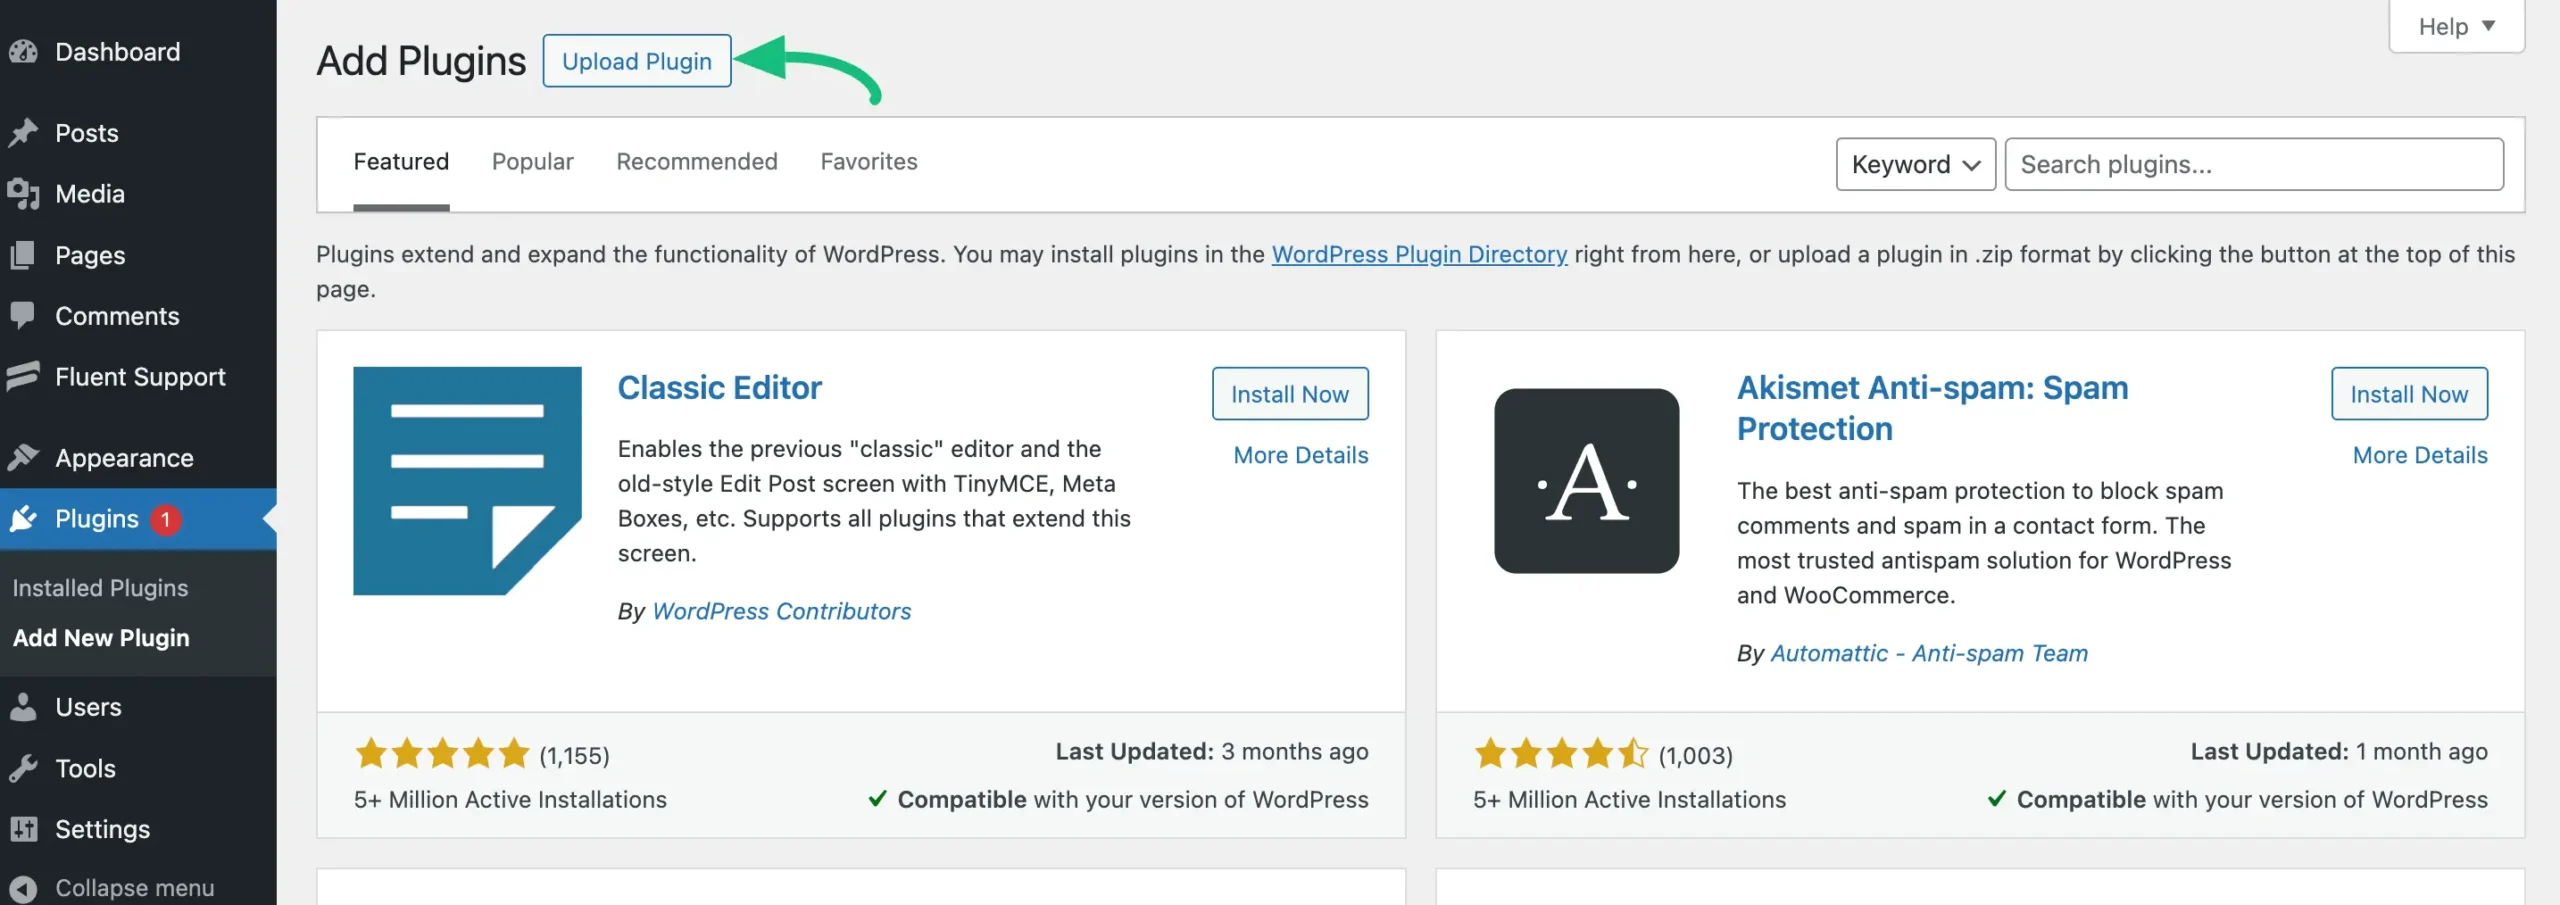
Click on Upload Plugin.
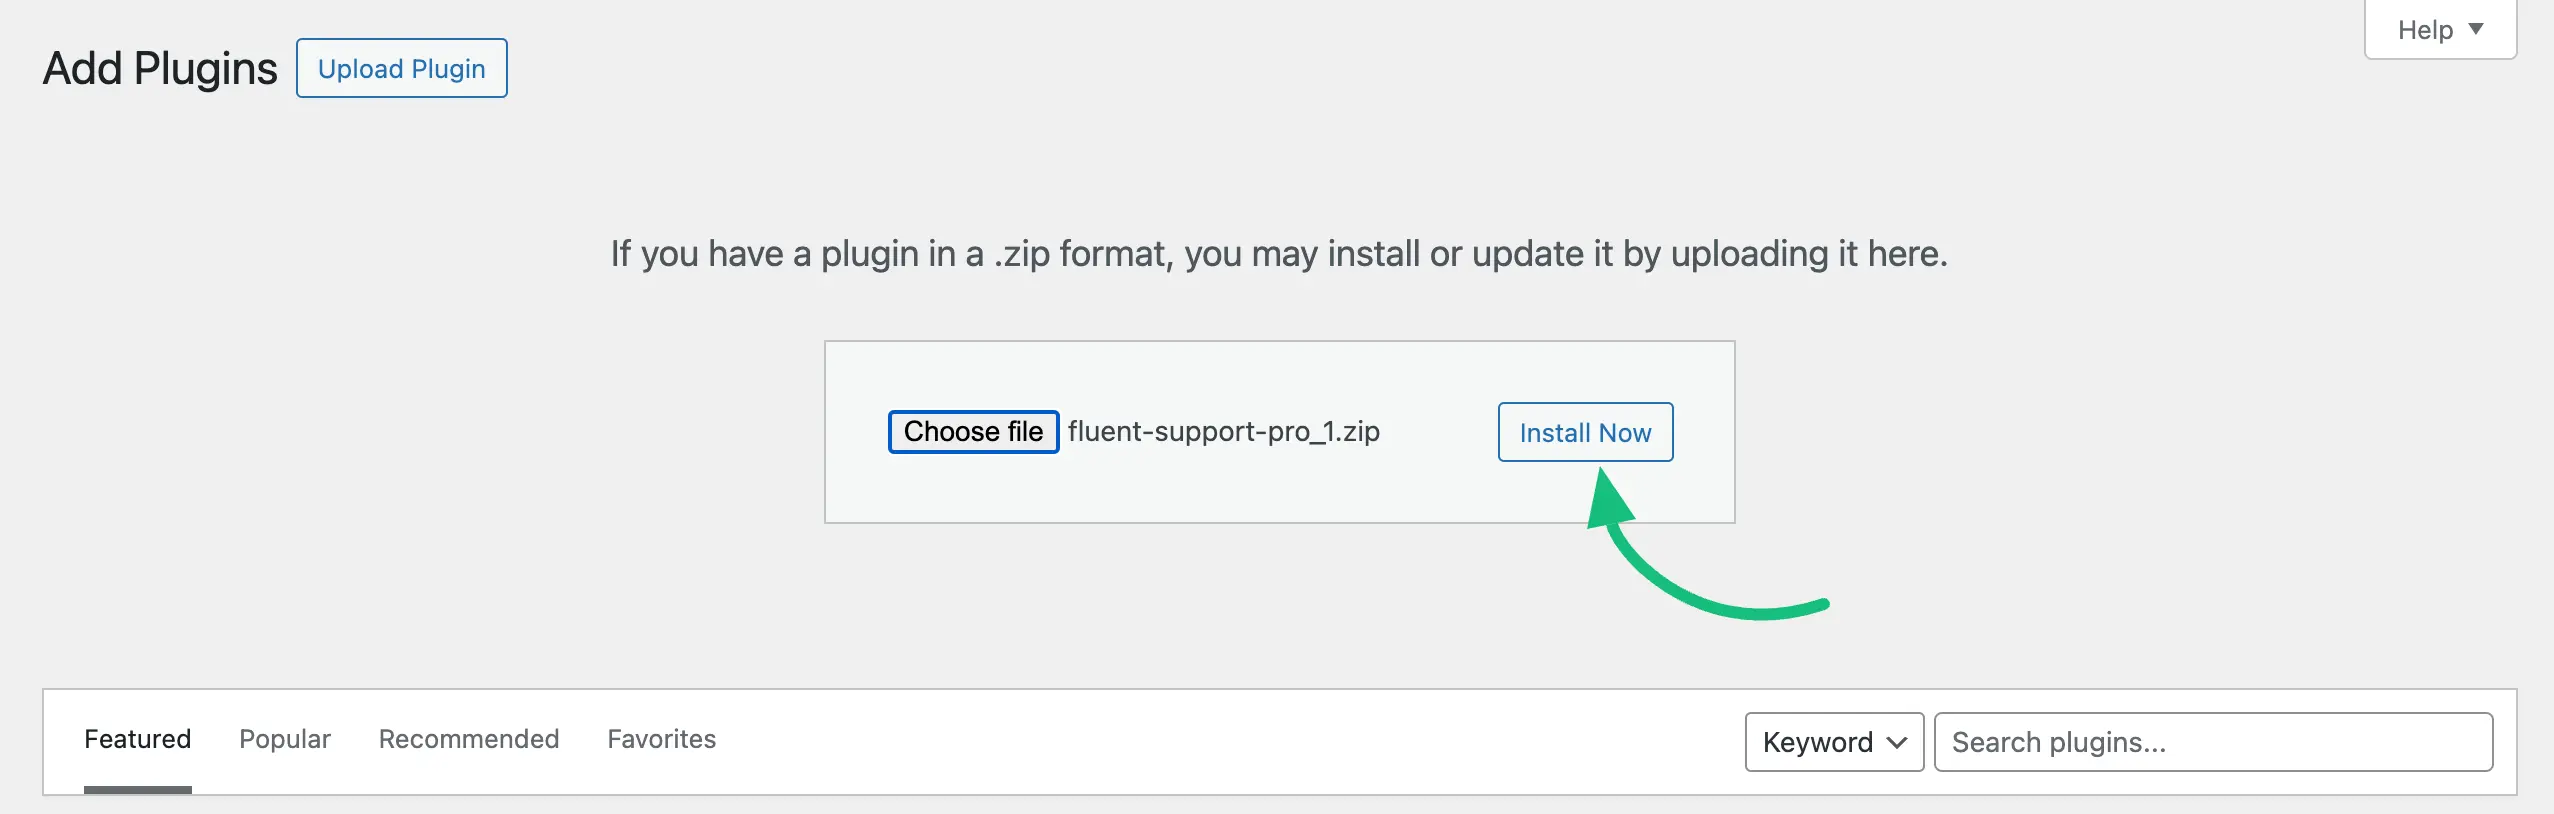
Click on the Choose file to upload the zip file of the Fluent Support Pro plugin.
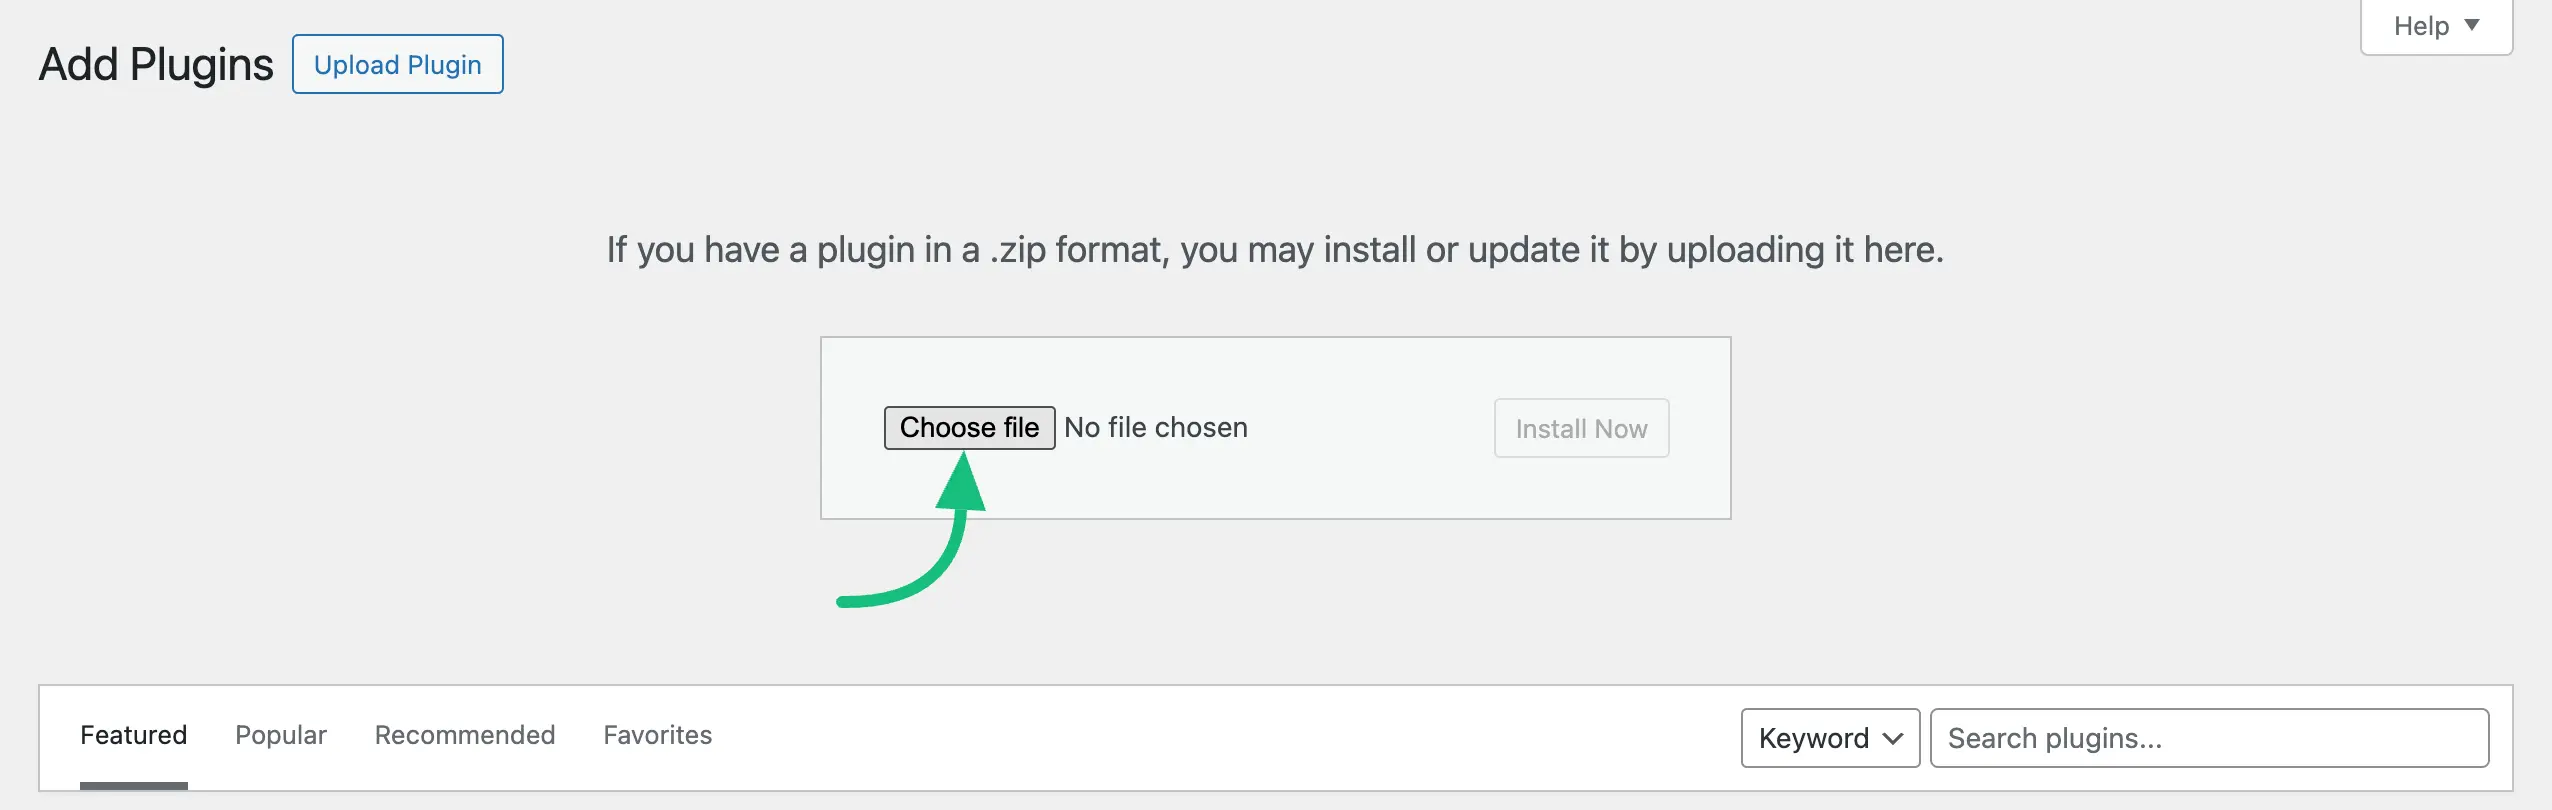
Select the Zip file of the Fluent Support Pro plugin from your device that you have downloaded before and click the Install Now button. Now, the Fluent Support PRO plugin will be successfully installed on your WordPress site!
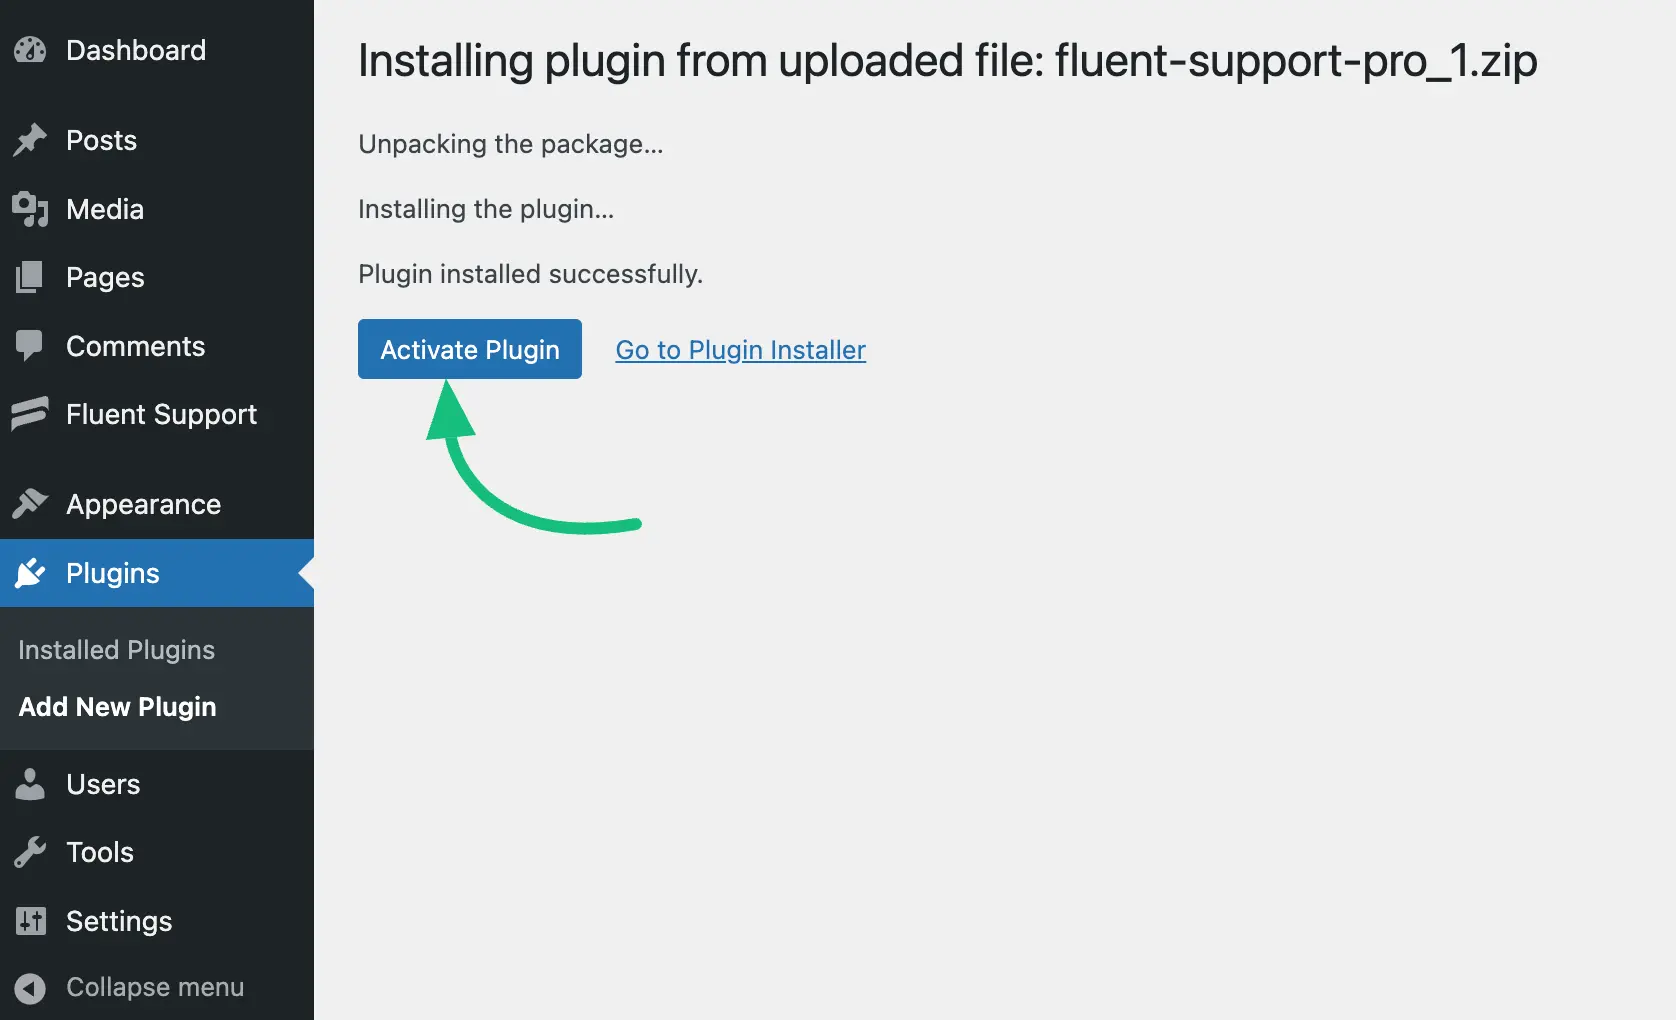
Now, to activate, click on the Activate Plugin.
But, you need the Fluent Support License Key to successfully activate all the Fluent Support PRO features.
Activate Fluent Support Pro with License Key #
To learn where to use the Fluent Support License Key to activate the Fluent Support Pro plugin, follow the steps with the screenshots below —
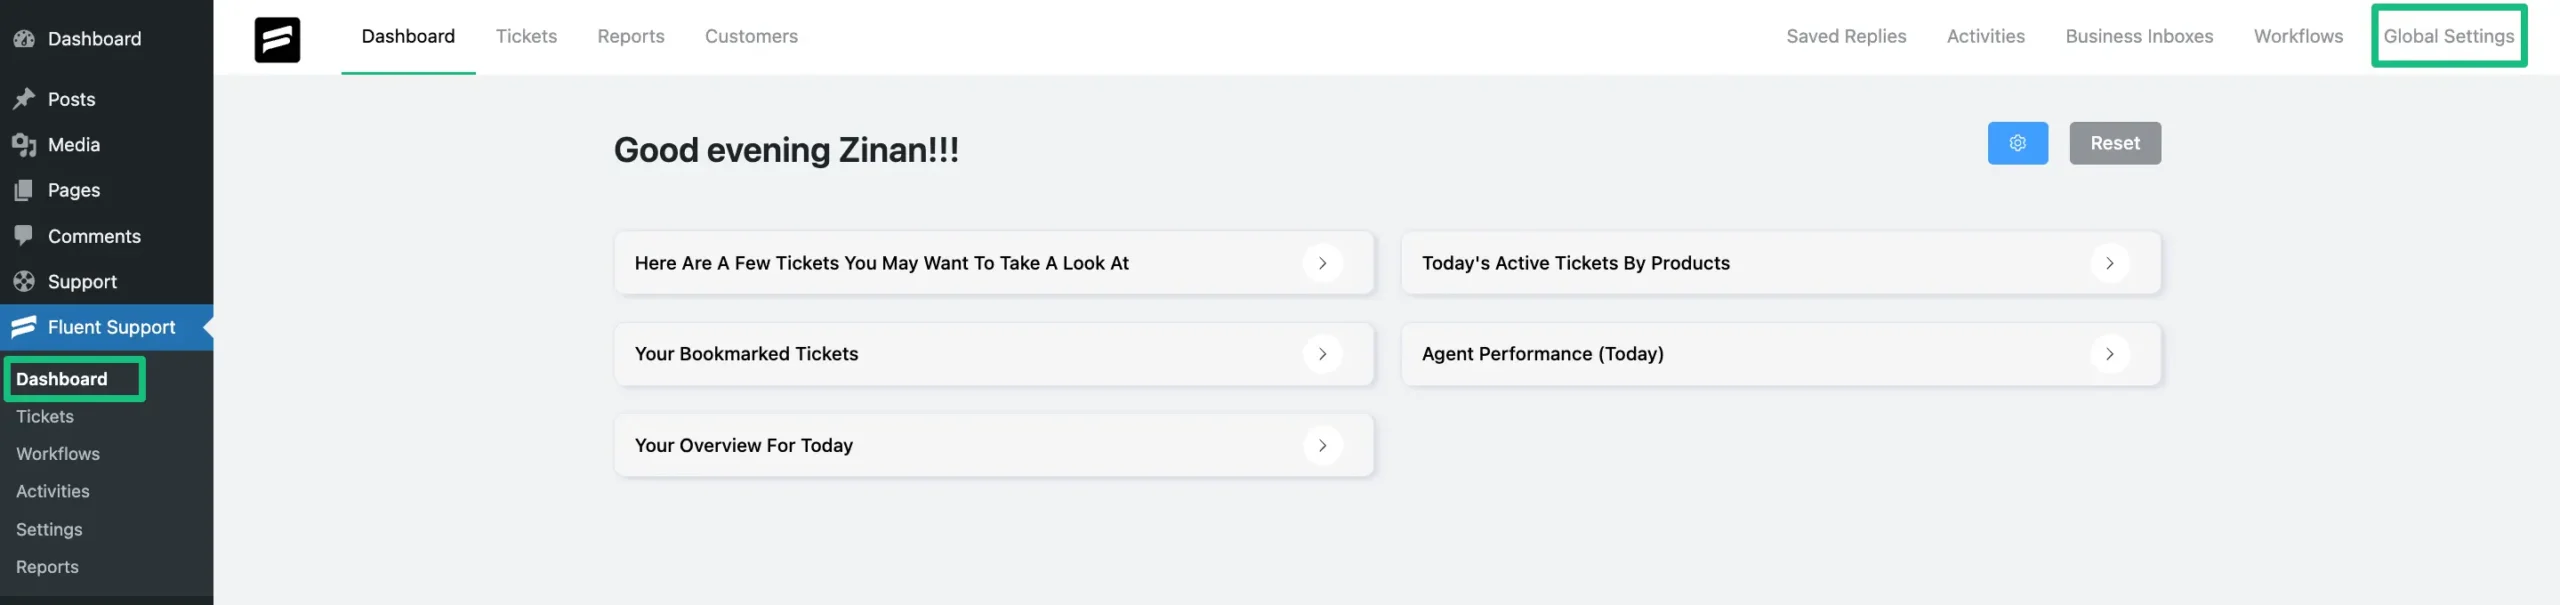
From your Fluent Support’s Dashboard, click on Global Settings.
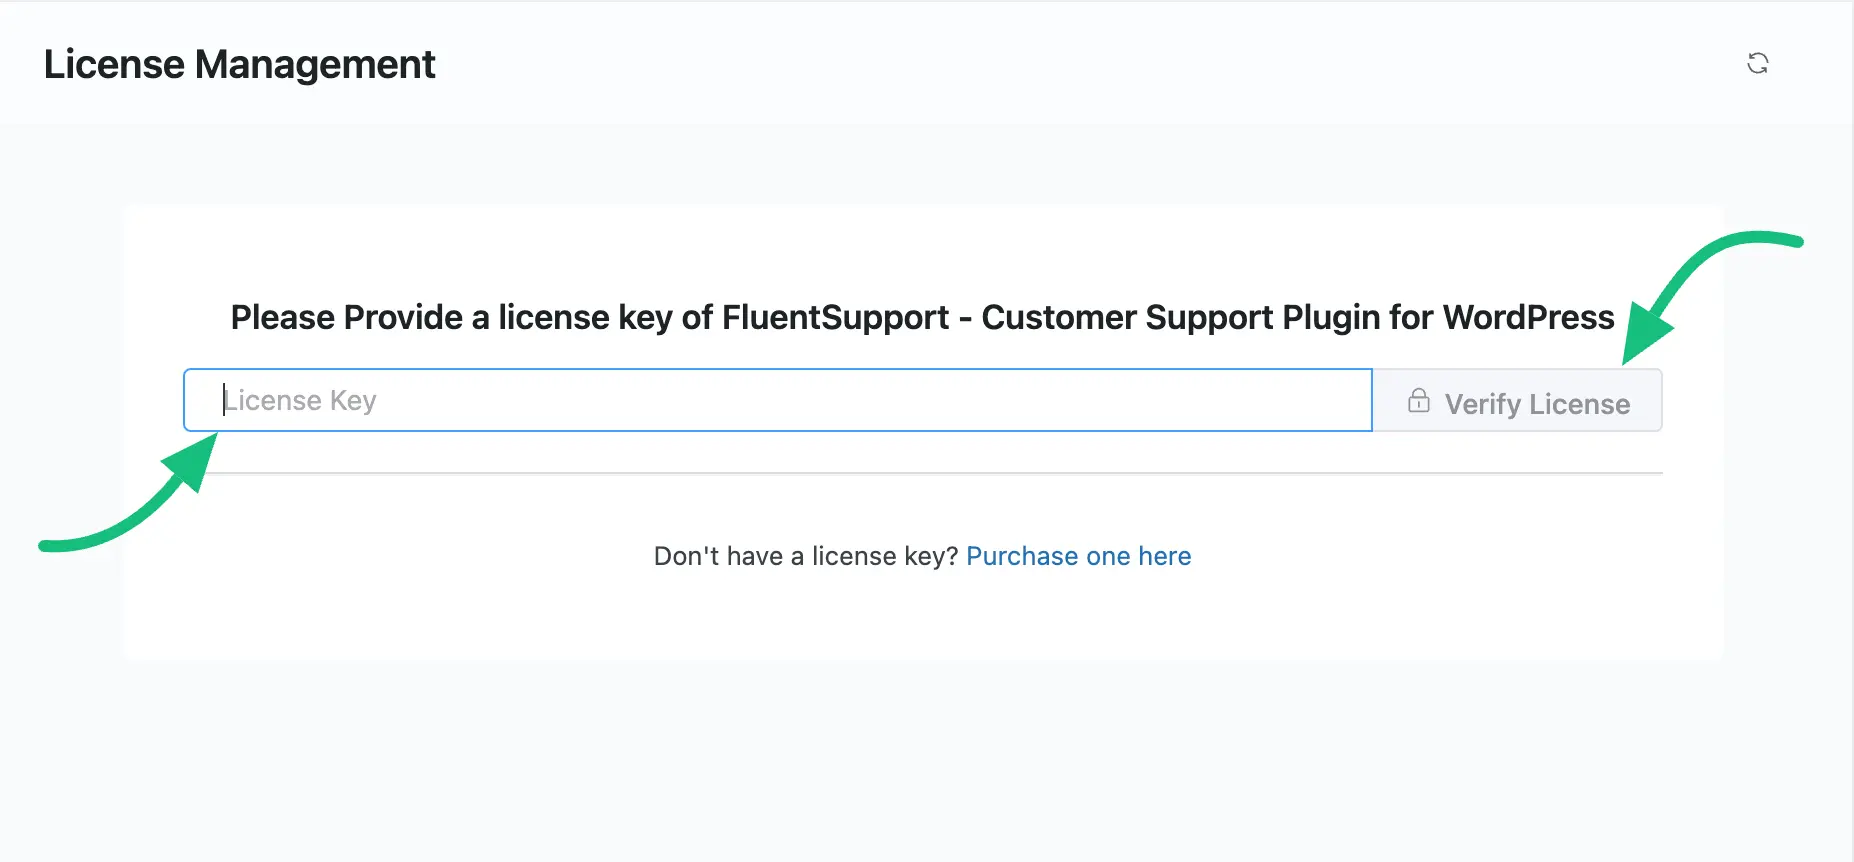
From your left side panel, click on License Management.
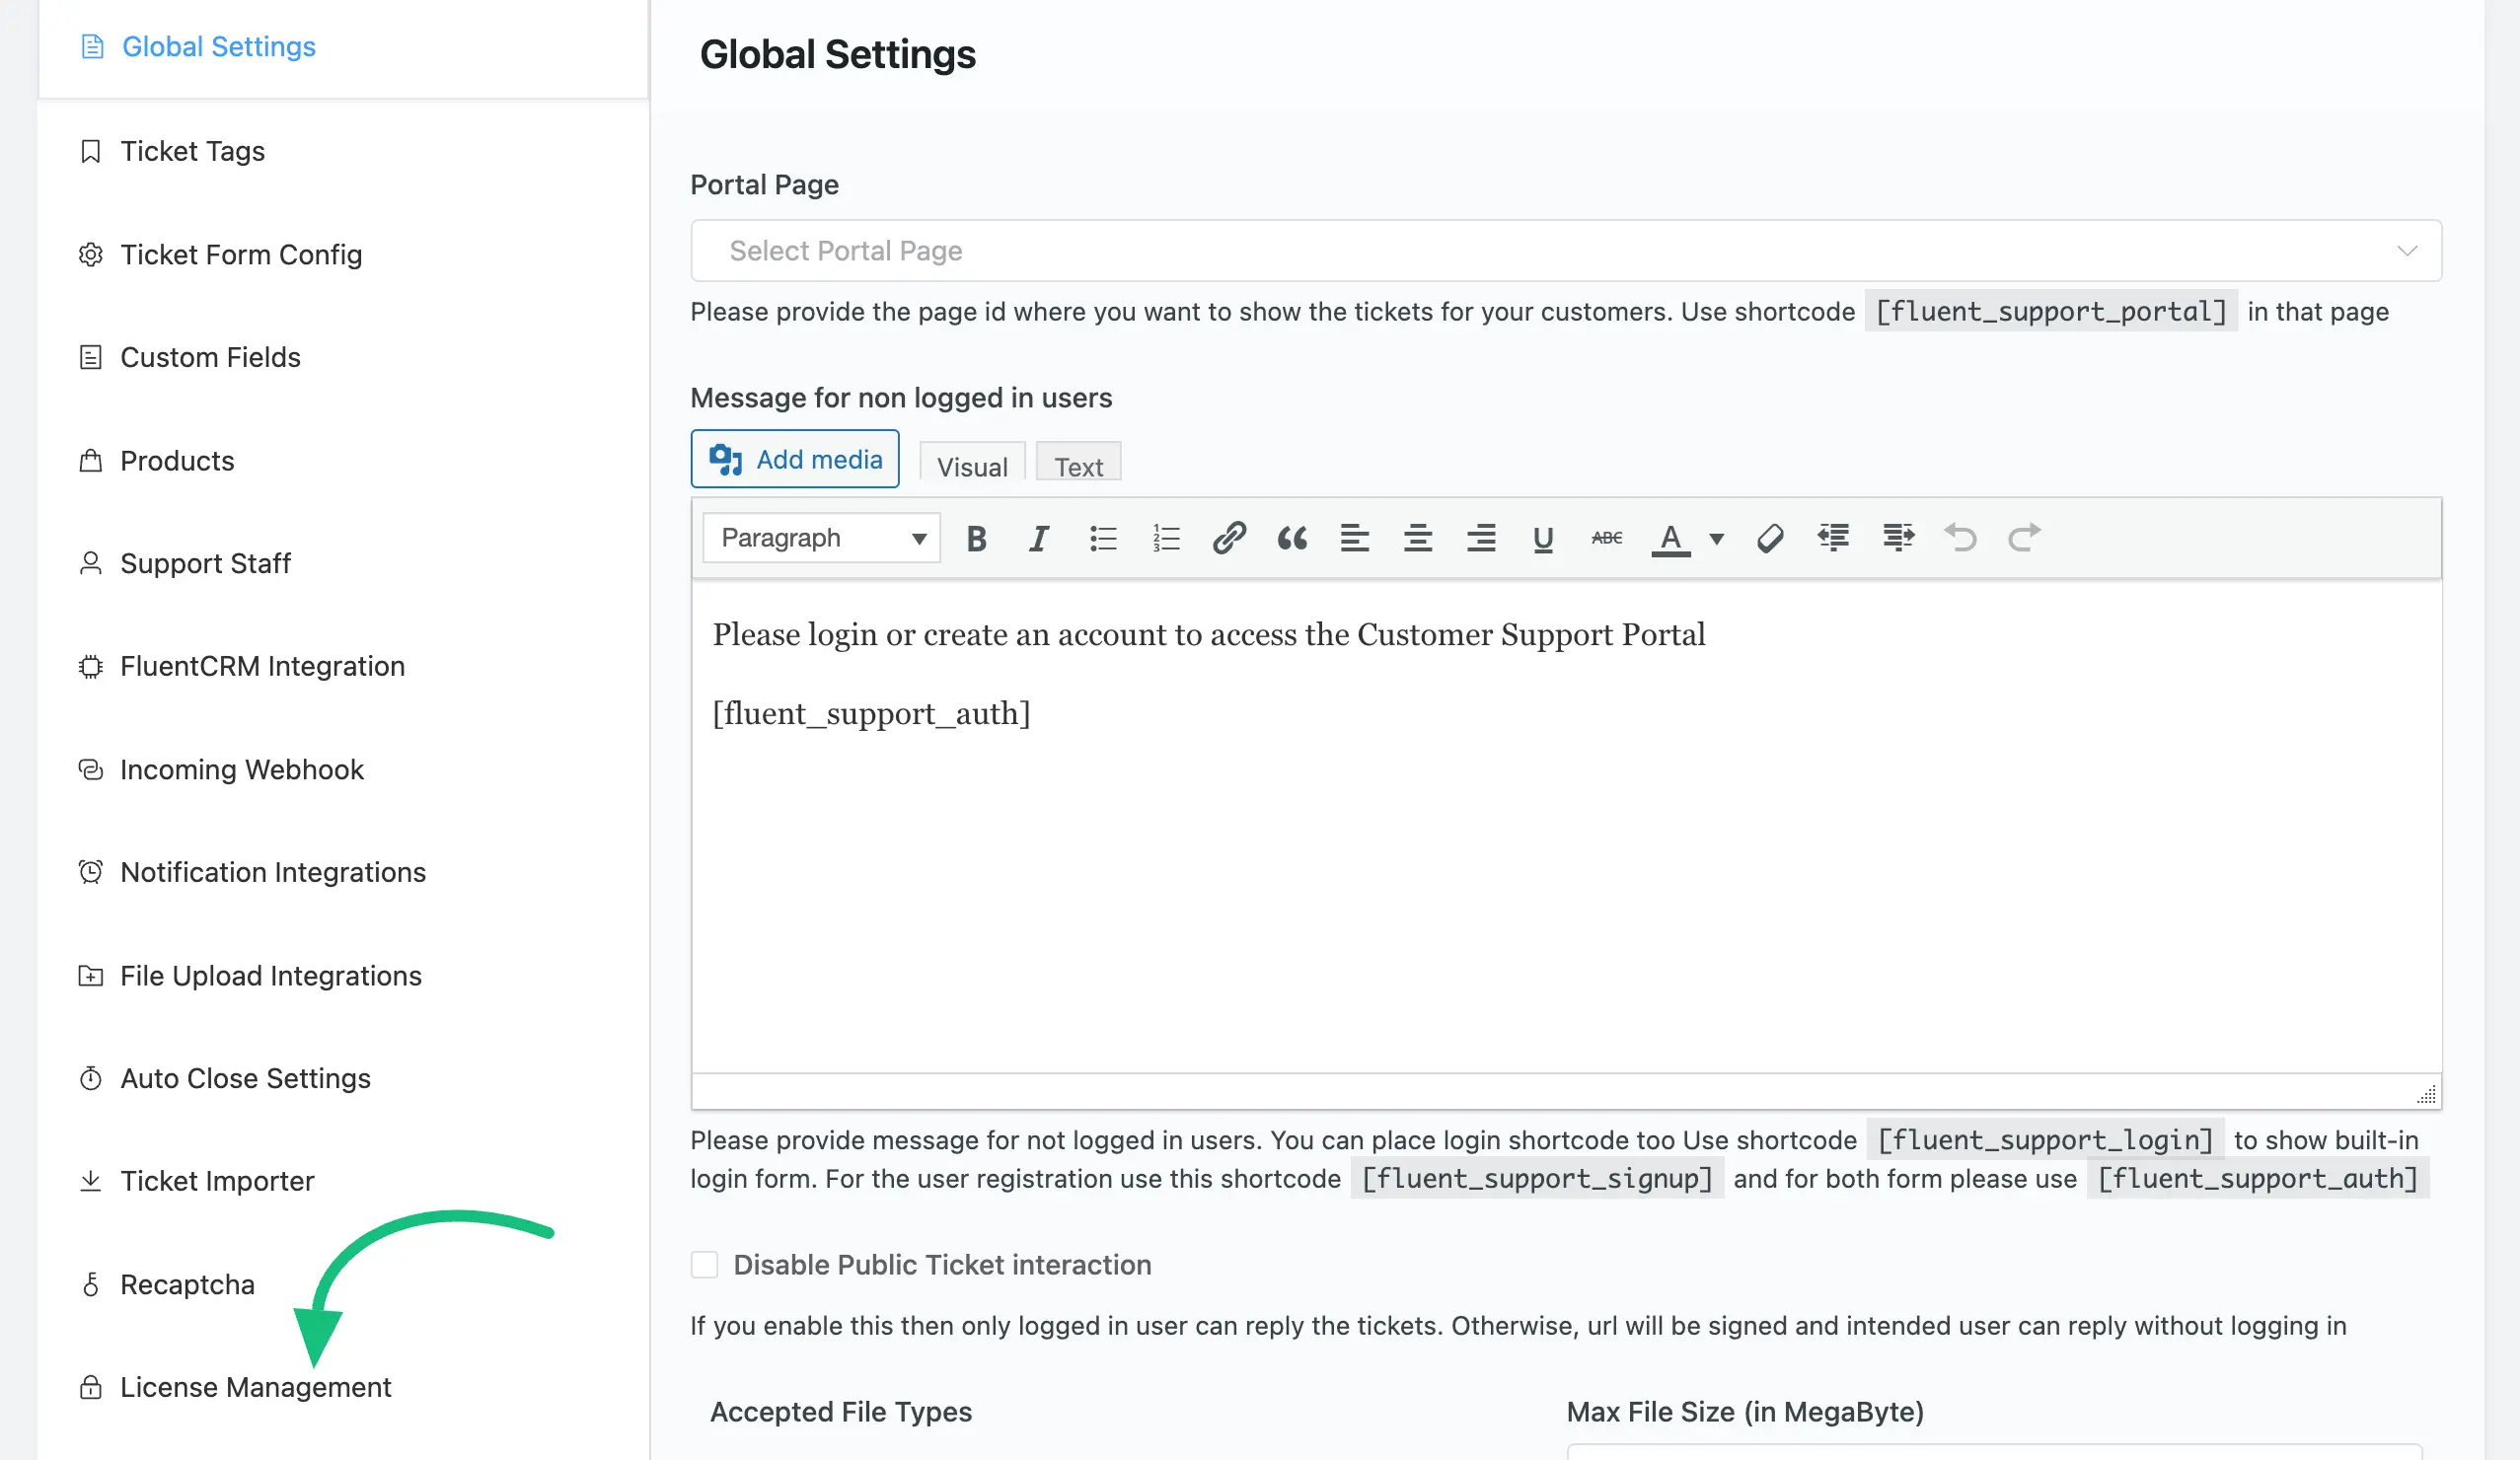
Finally, paste the Fluent Support Licence Key that you’ve copied before from your wpmanageninja.com user dashboard. And, click on the Verify License and your Fluent Support Pro version will be activated.
Congratulations now you can explore all the amazing Premium features of the Fluent Support Pro!
We hope this article helps you have an amazing experience.
If you have any further questions, concerns, or suggestions, please do not hesitate to contact our @support team. Thank you.


