HelpScout is a SaaS tool for customer communication. HelpScout users can easily transfer their tickets to Fluent Support through an API. This article will guide you through the process.
Import Tickets From Help Scout Into Fluent Support #
To learn how to import tickets from Help Scout into Fluent Support, follow the steps with screenshots below —
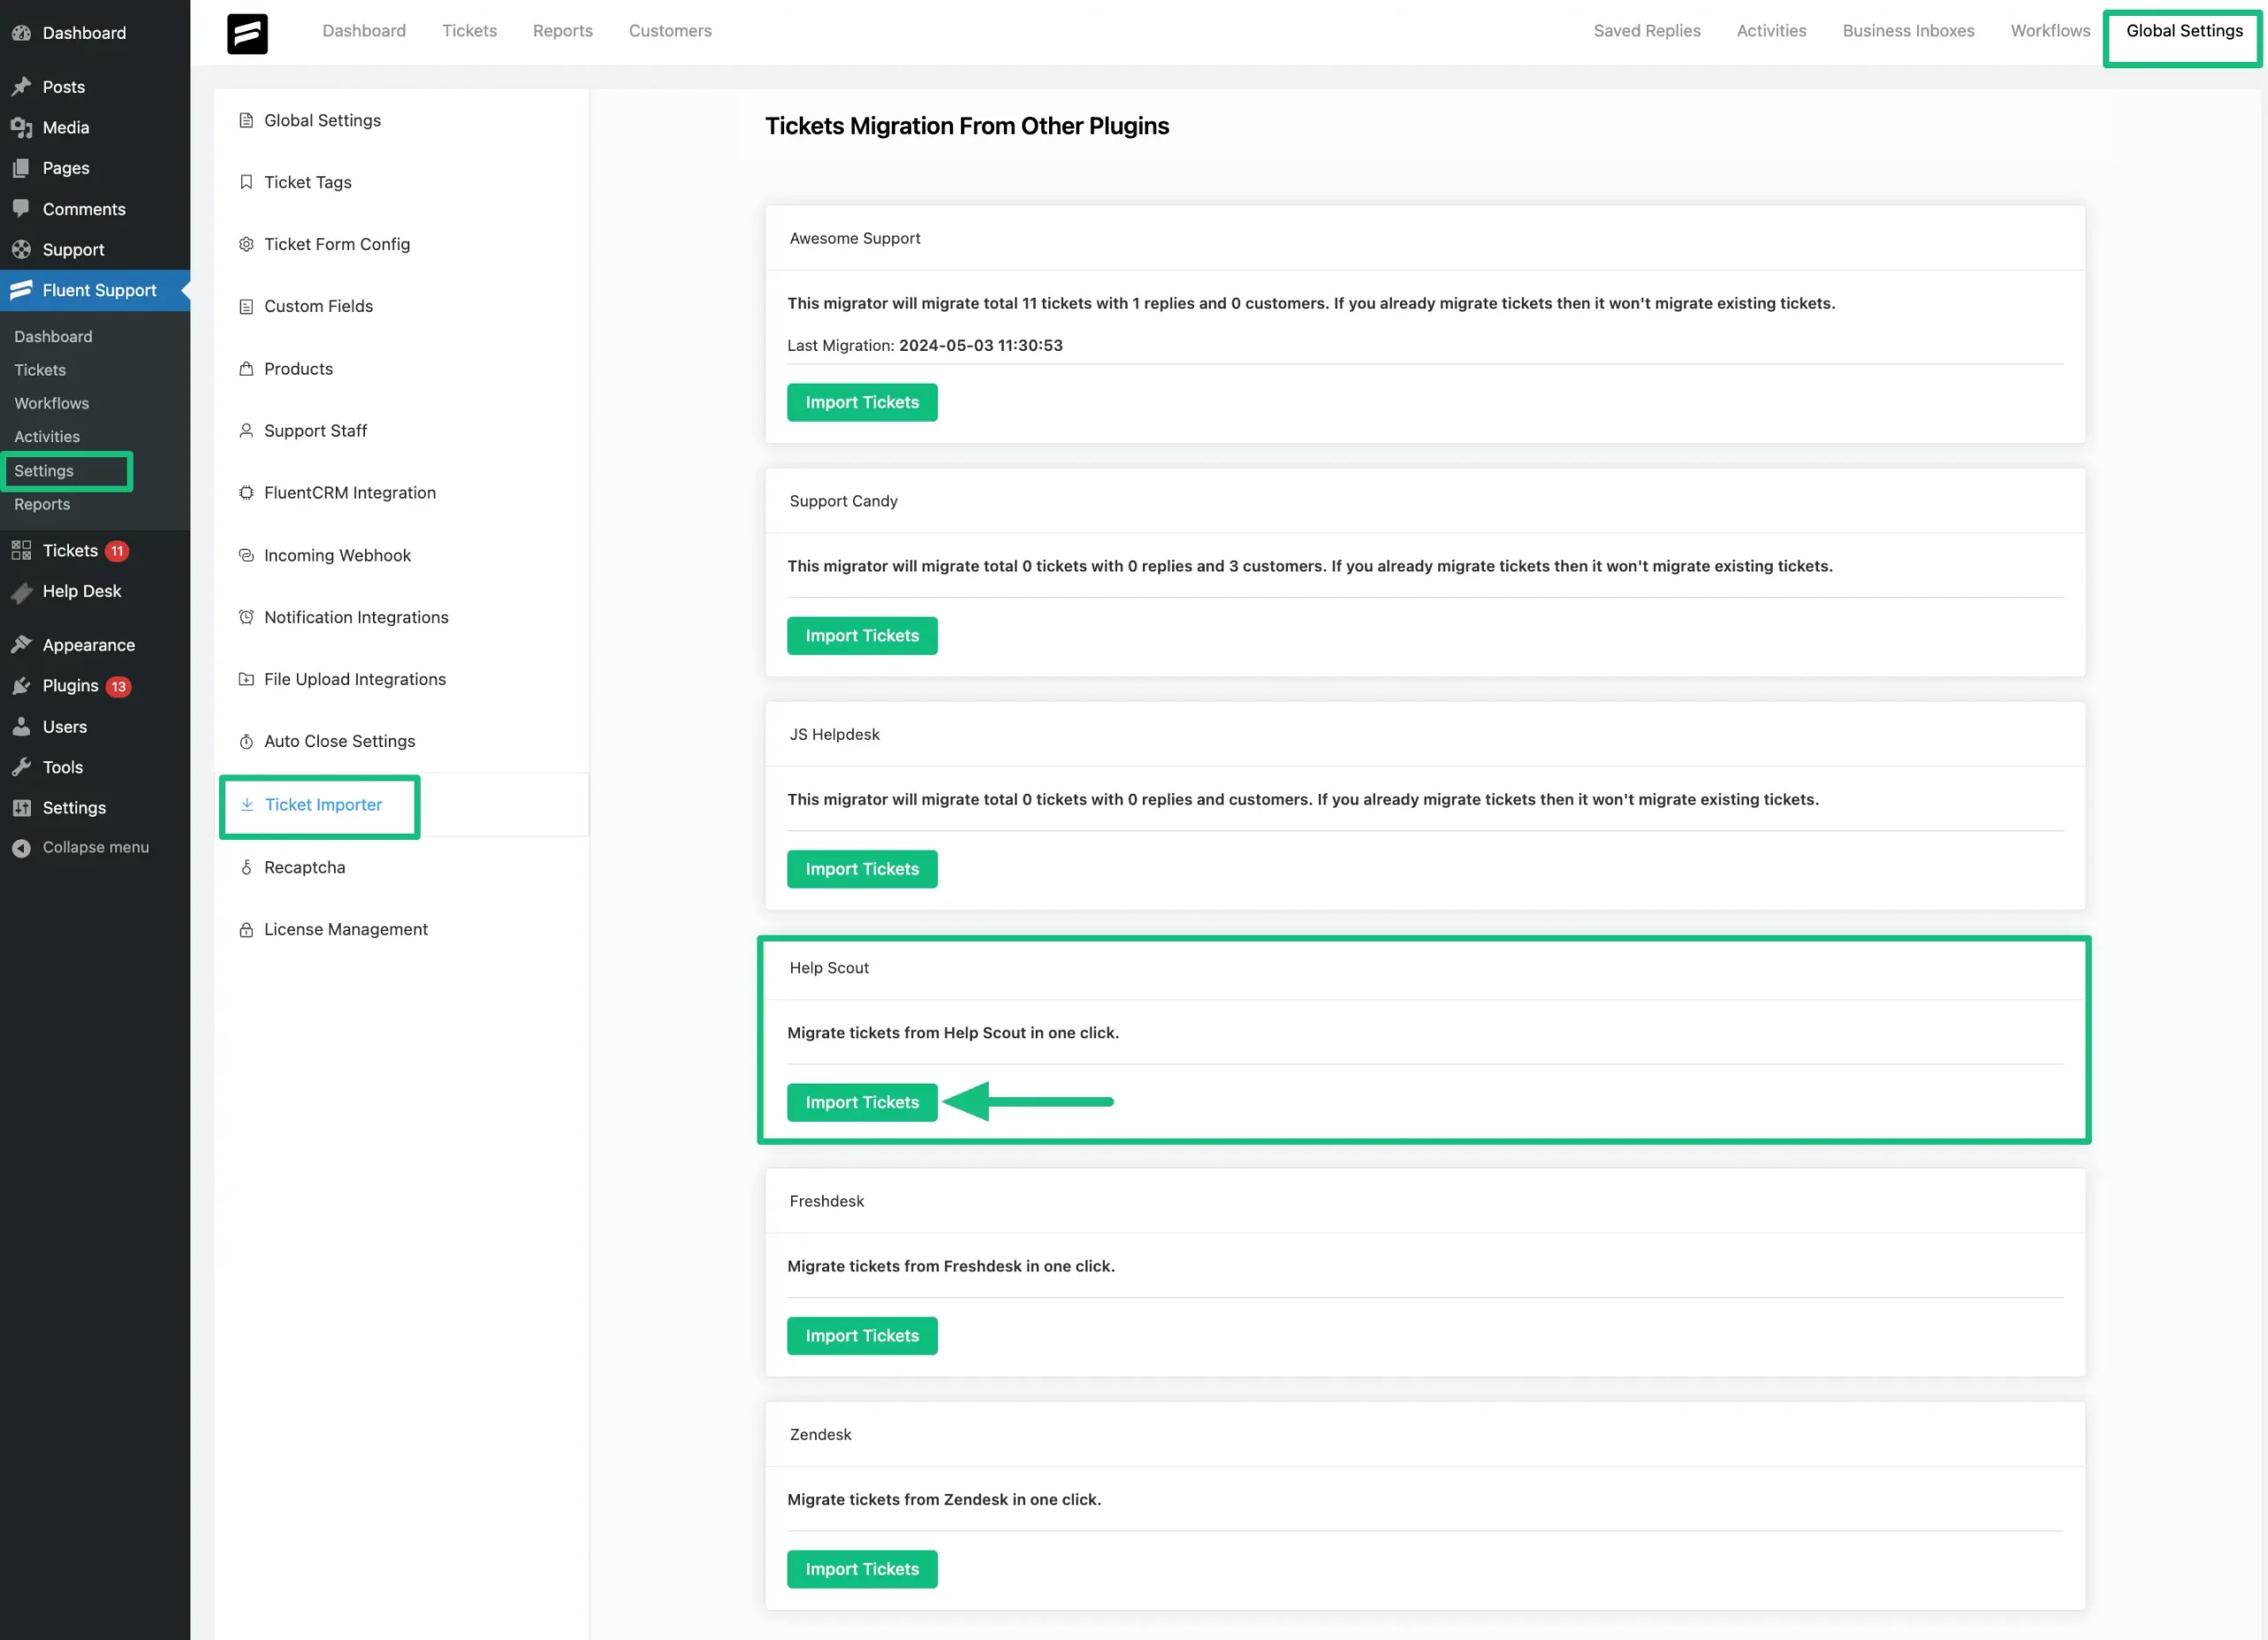
From the Fluent Support Dashboard, go to Settings or Global Settings, select the Ticket Importer, find Help Scout for ticket migration, and click Import Tickets.
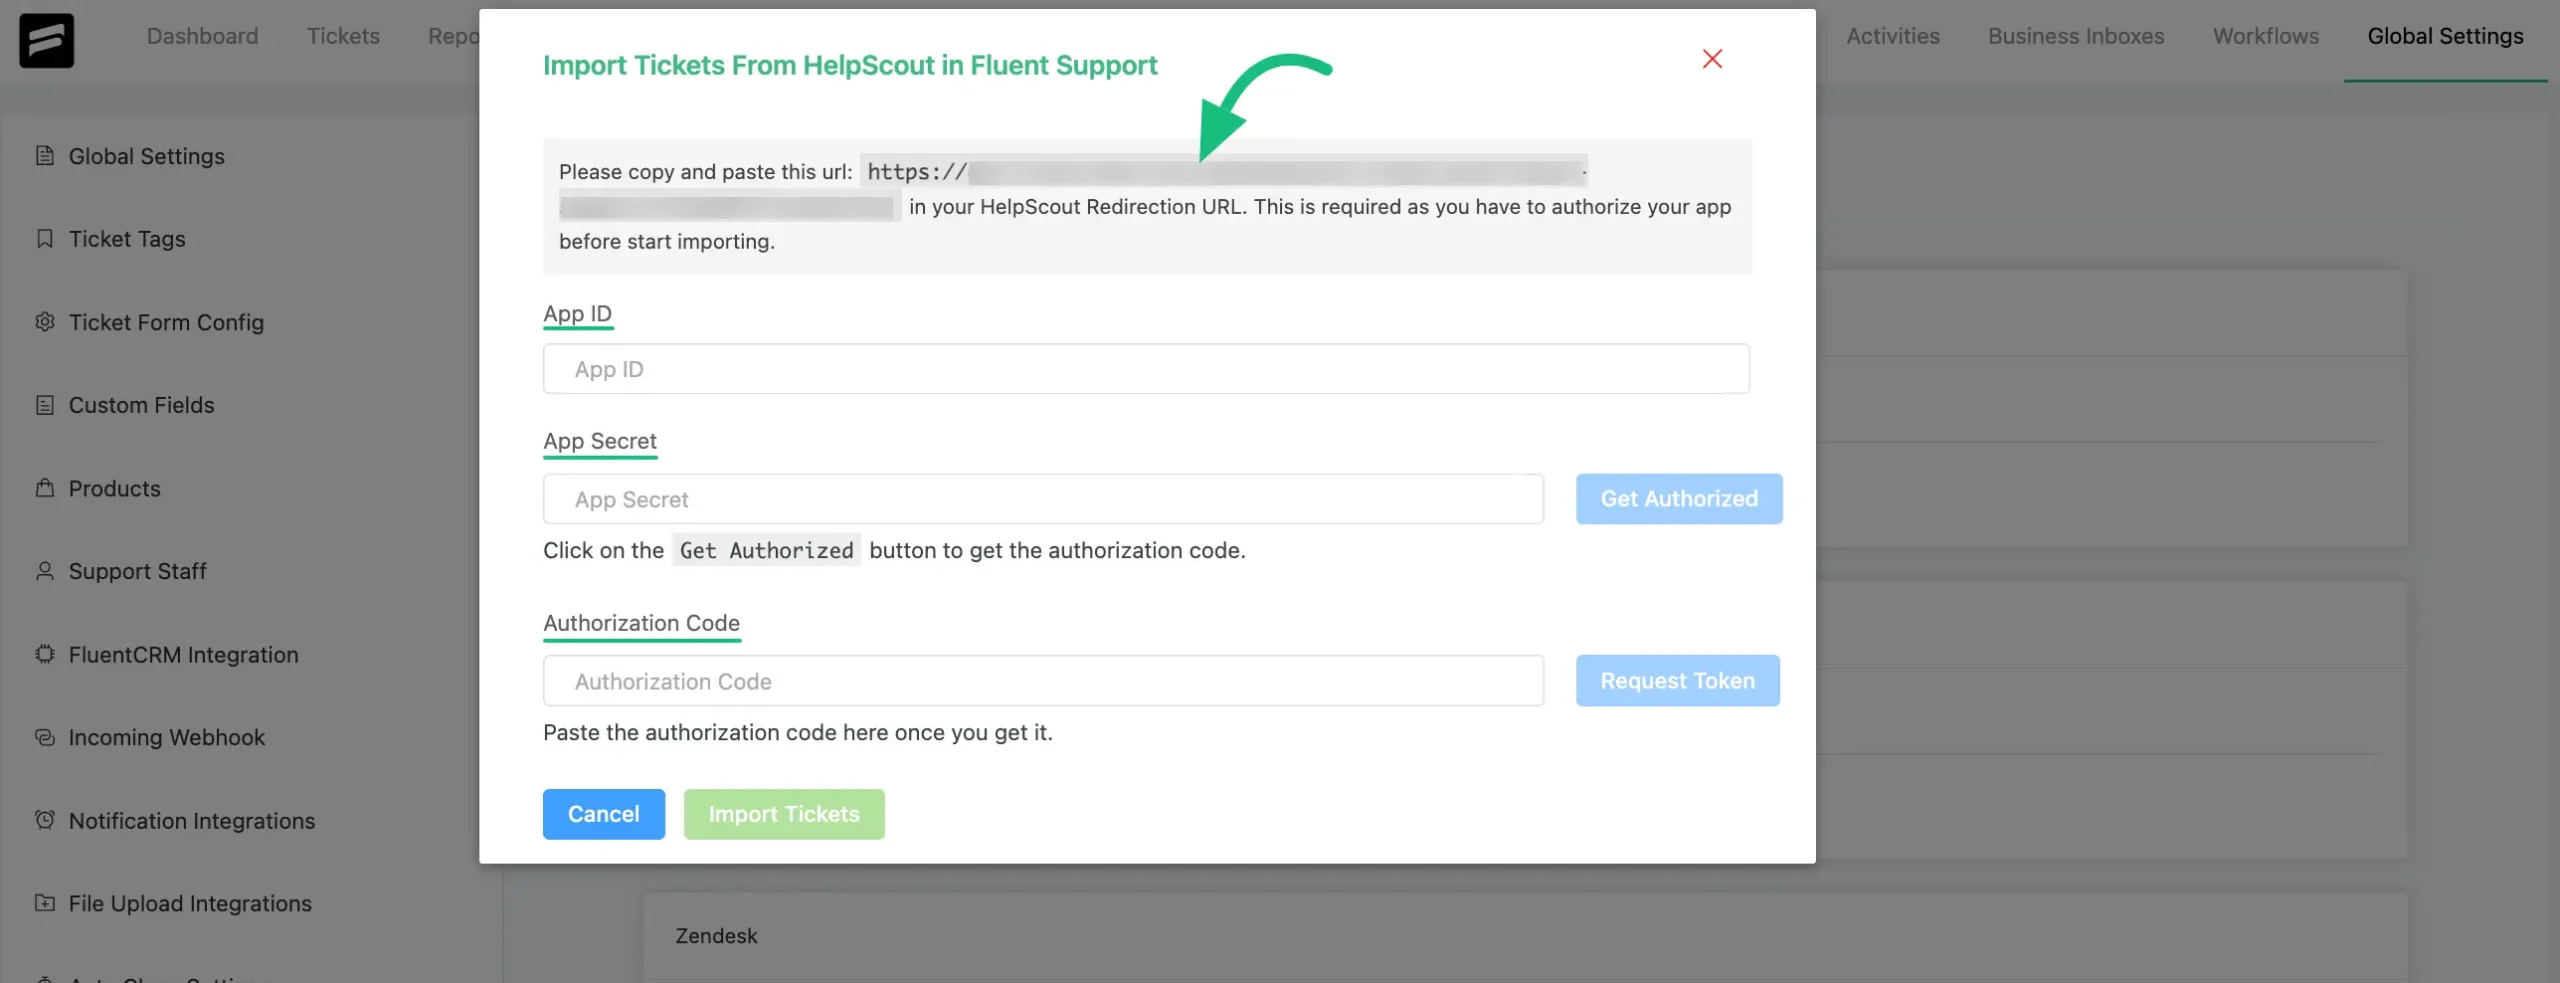
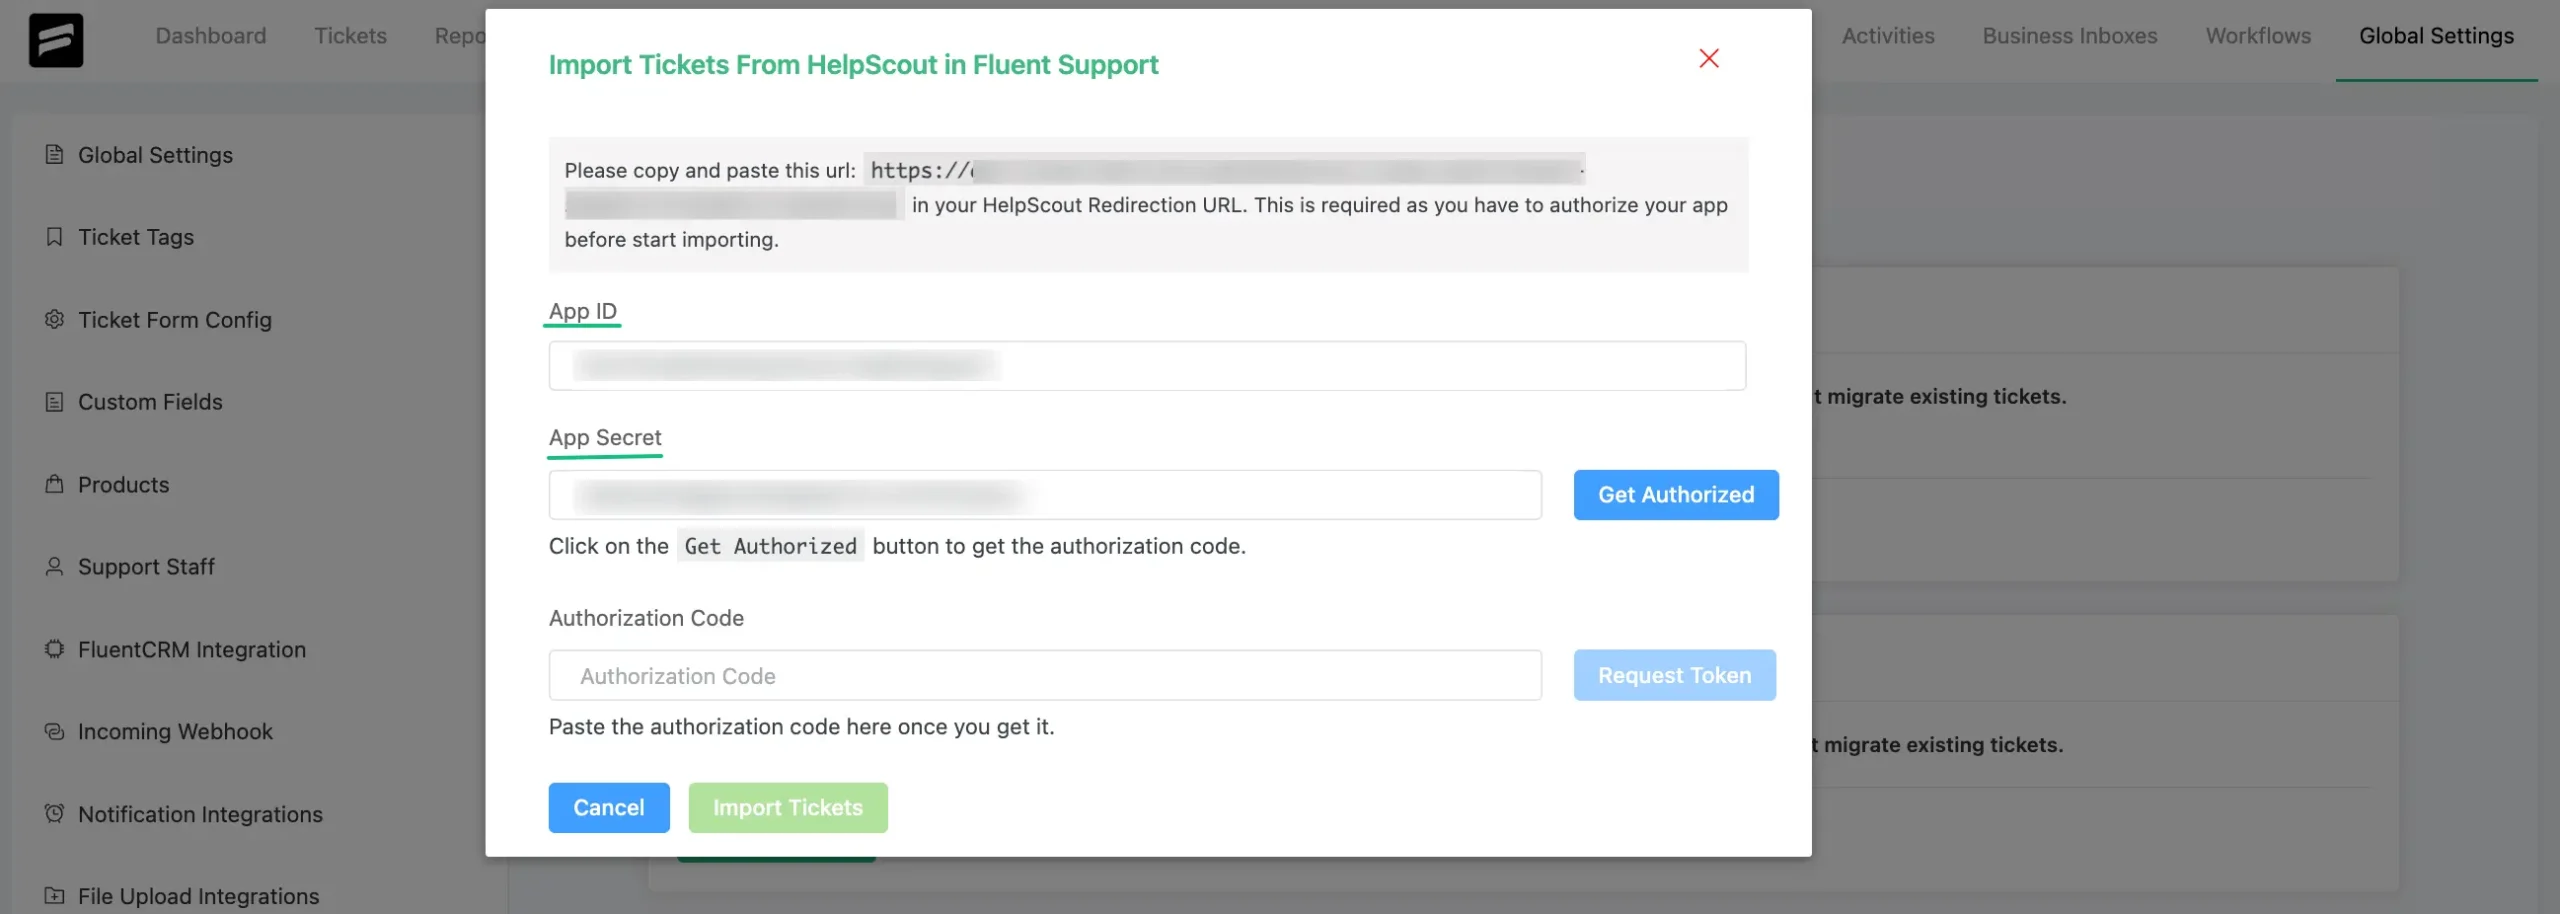
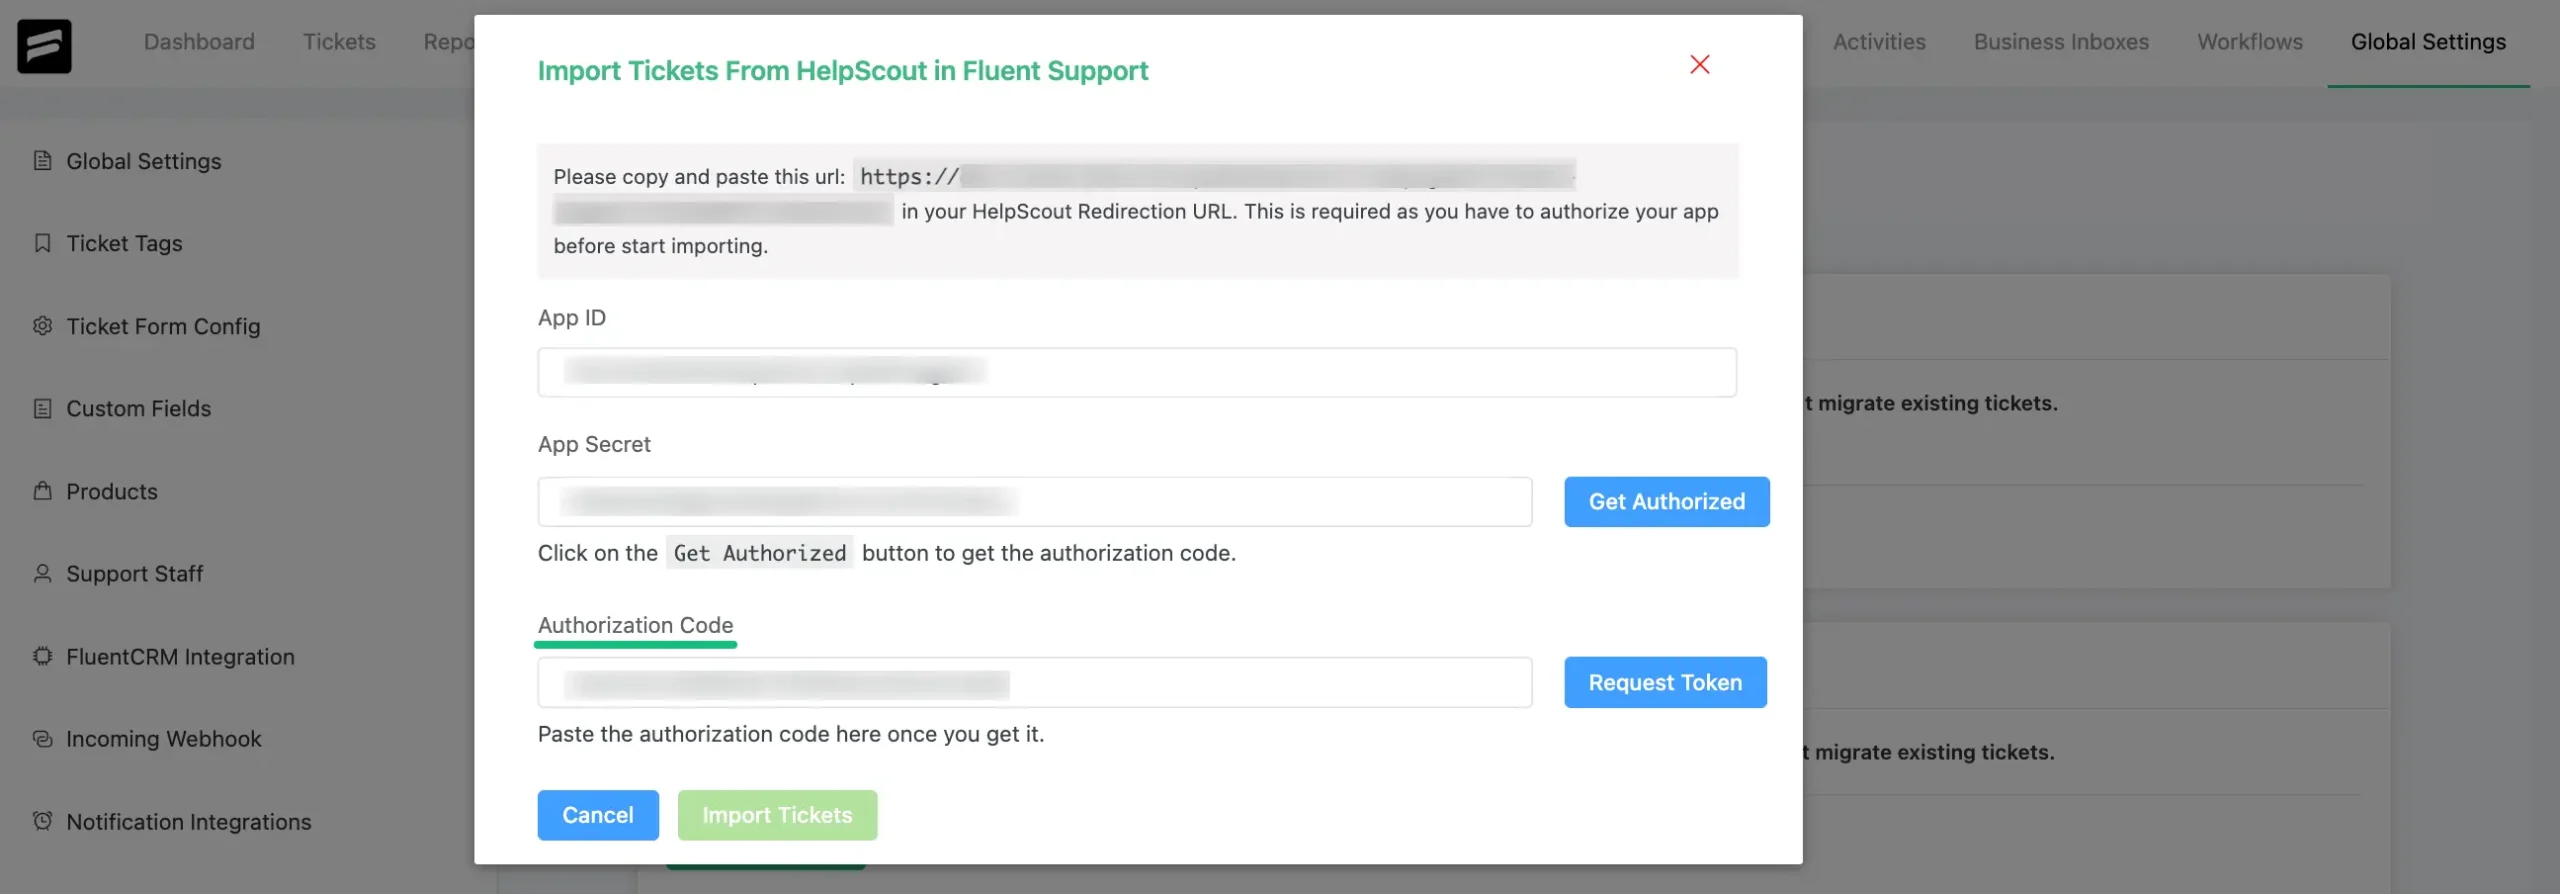
A popup page will appear asking for your App ID, App Secret, and Authorization Code. Now, copy the HelpScout Redirection URL for future use.
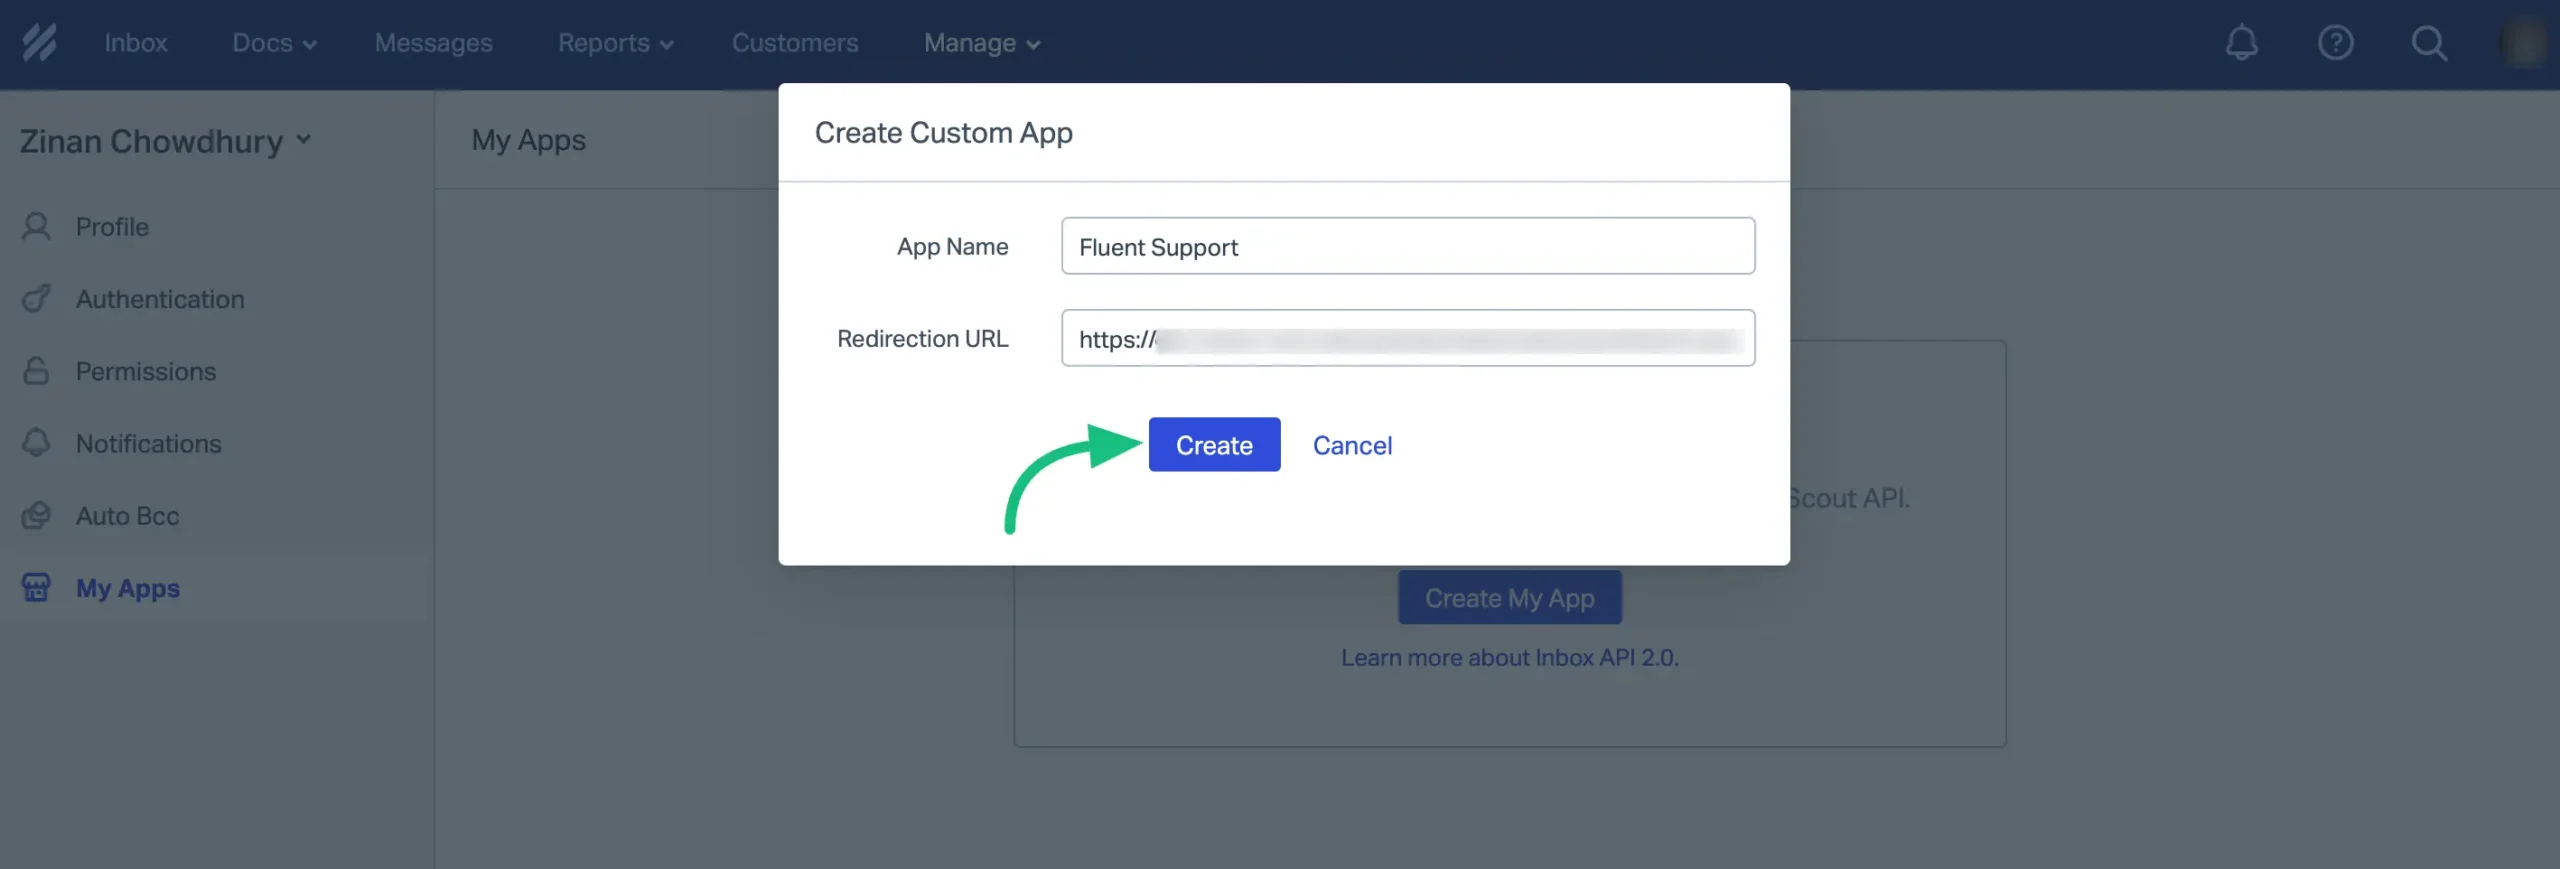
To get the App ID and Secret, go to your HelpScout account. Go to the Profile Icon from the right-hand corner of the Dashboard, select Your Profile, choose My Apps, and click the Create My App button.
Name your App, paste the previously copied URL into the Redirection URL field, and click the Create button.
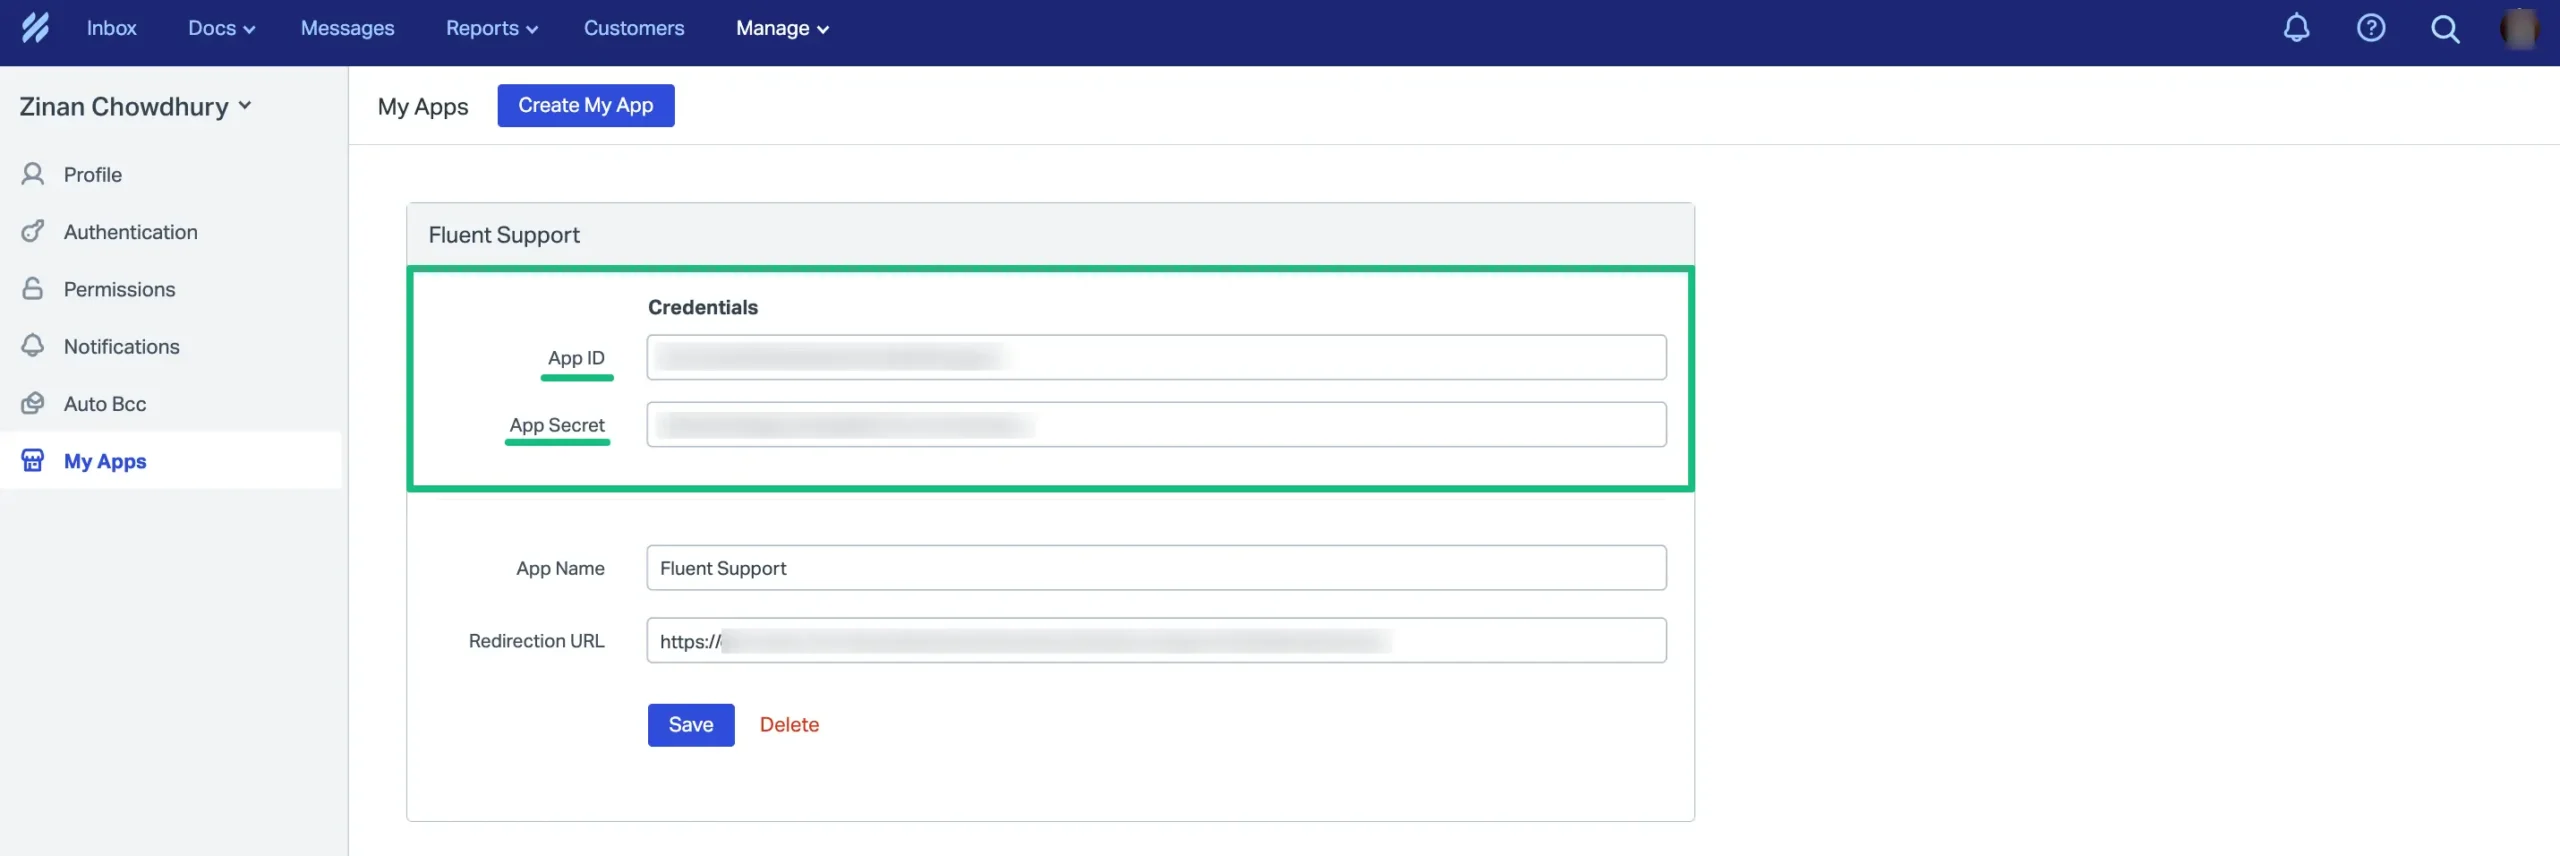
Now, copy the App ID and App Secret from here.
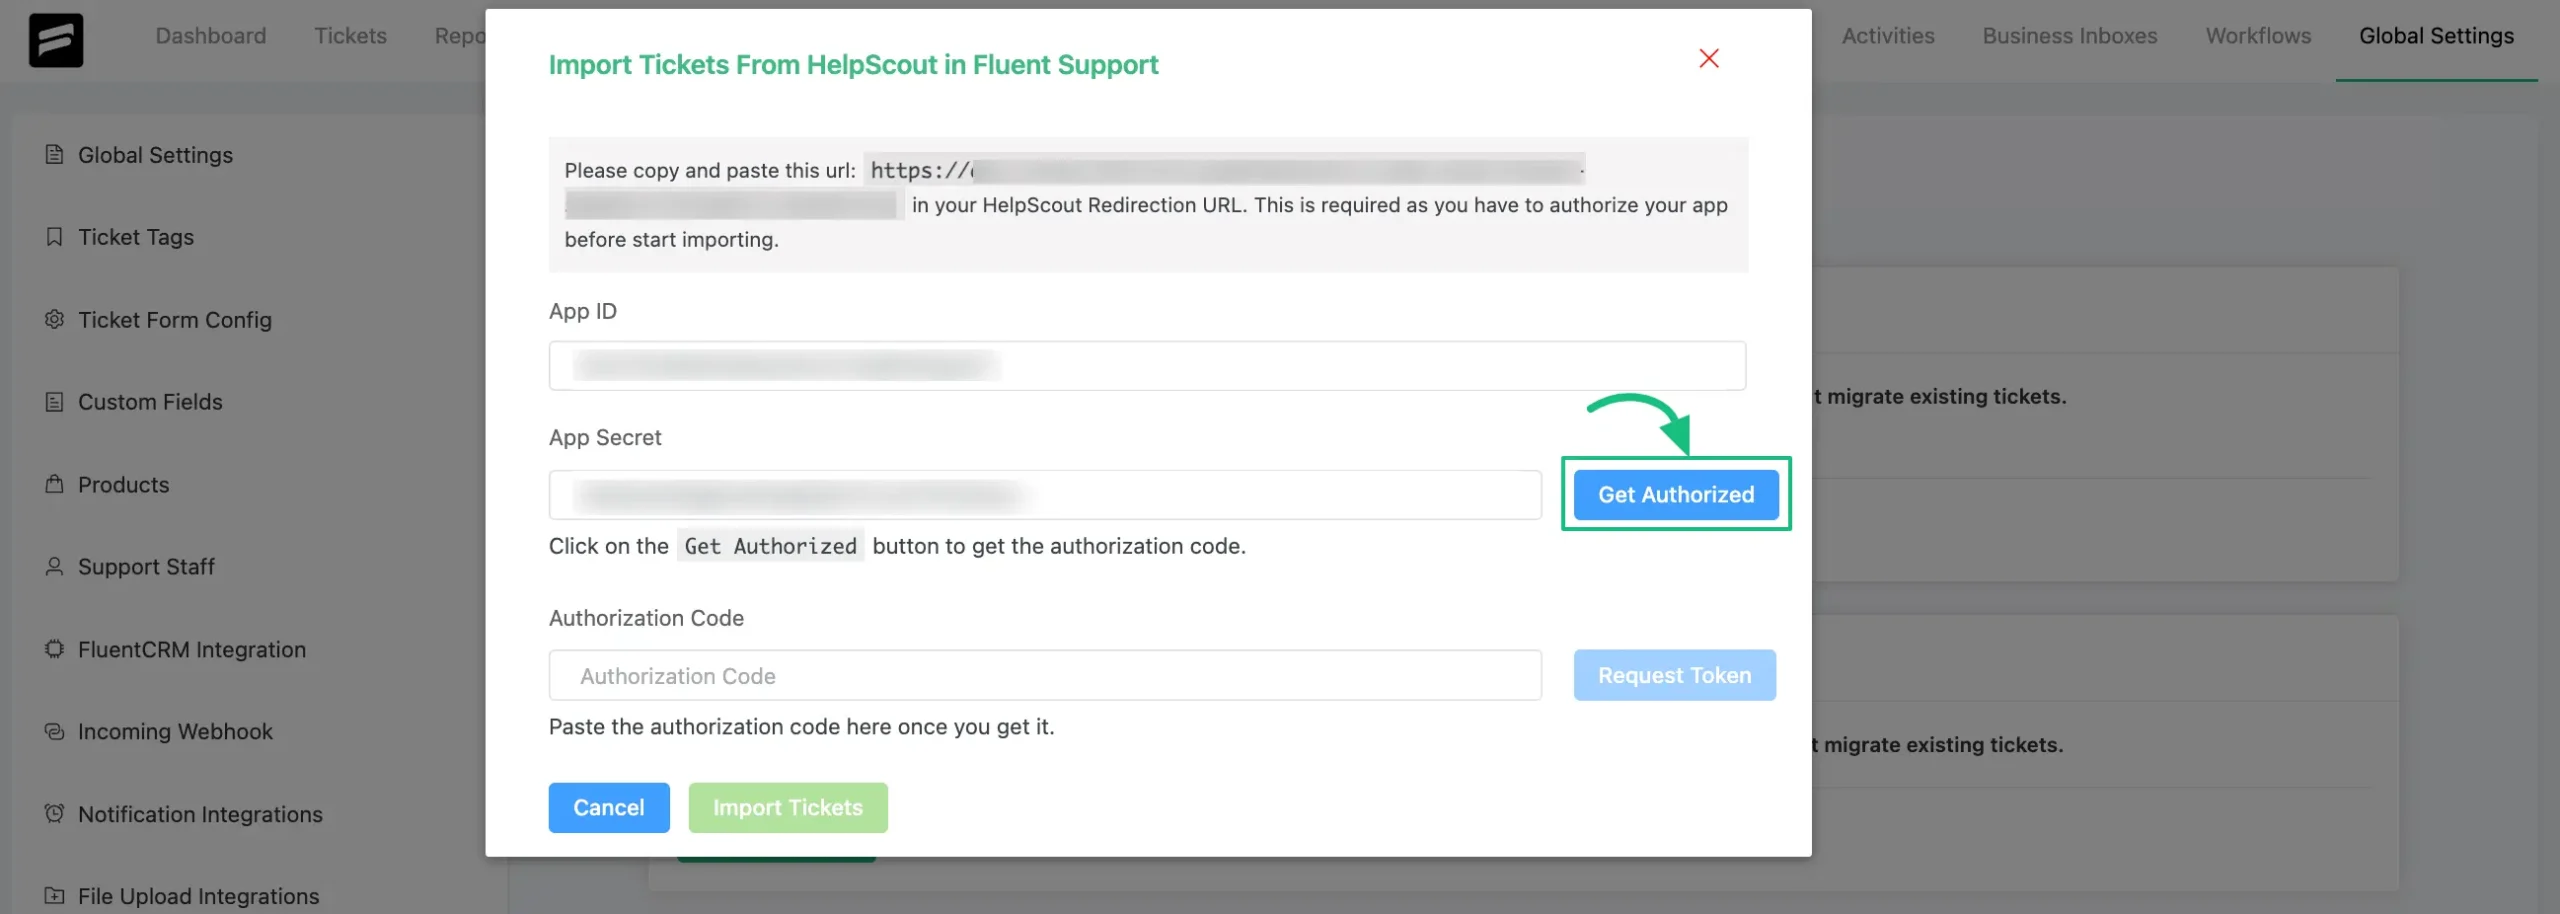
Return to the Help Scout popup page from the Fluent Support Dashboard and paste the App ID & App Secret copied from your Help Scout account into the desired field.
To obtain the Authorization Code, click the Get Authorized button now.
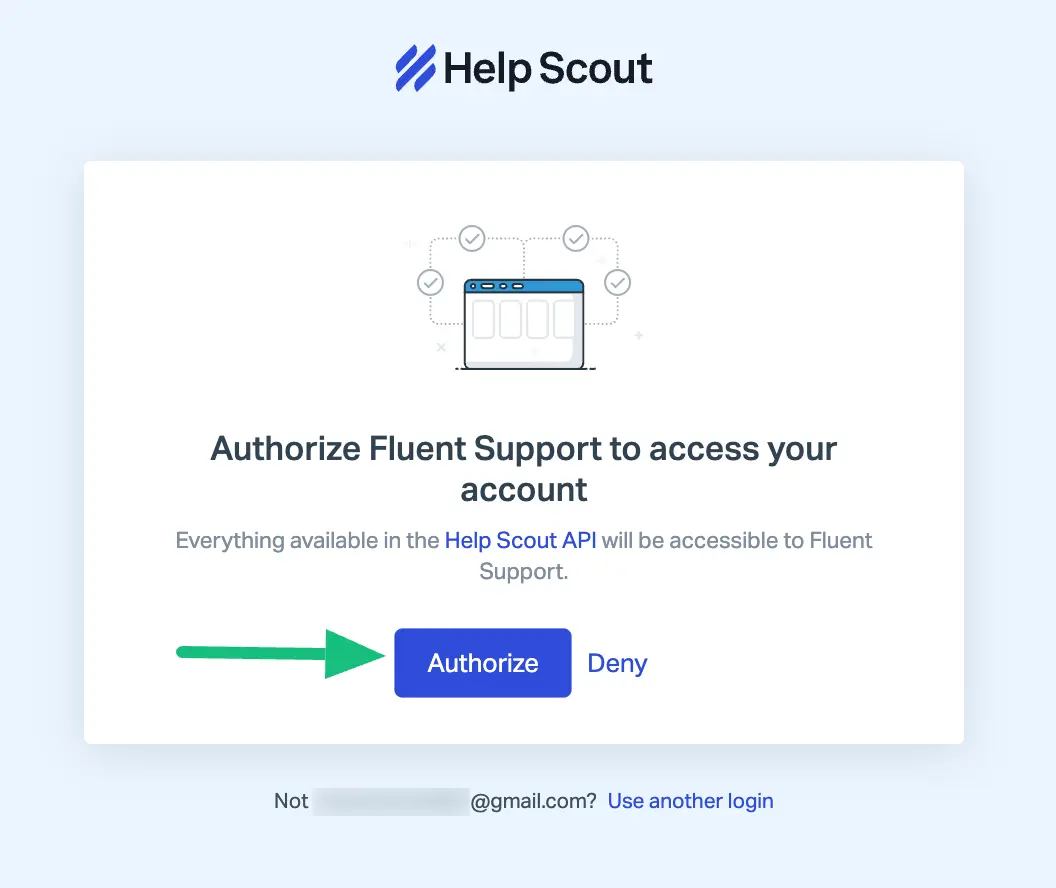
It will bring you back to the HelpScout page, now click on the Authorize button.
You will receive your Authorization code here, now simply copy it.
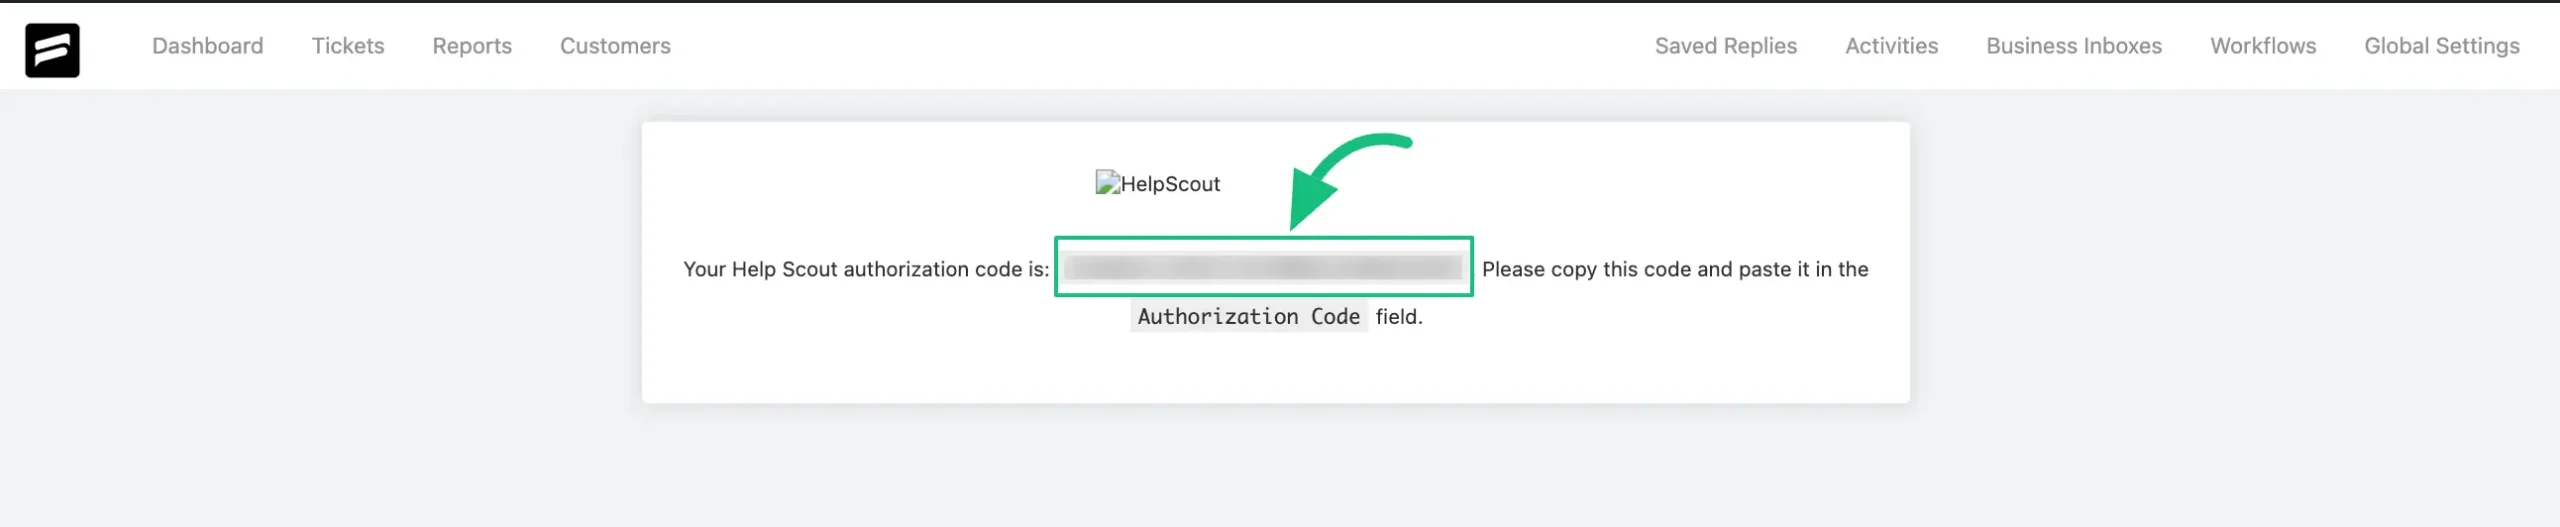
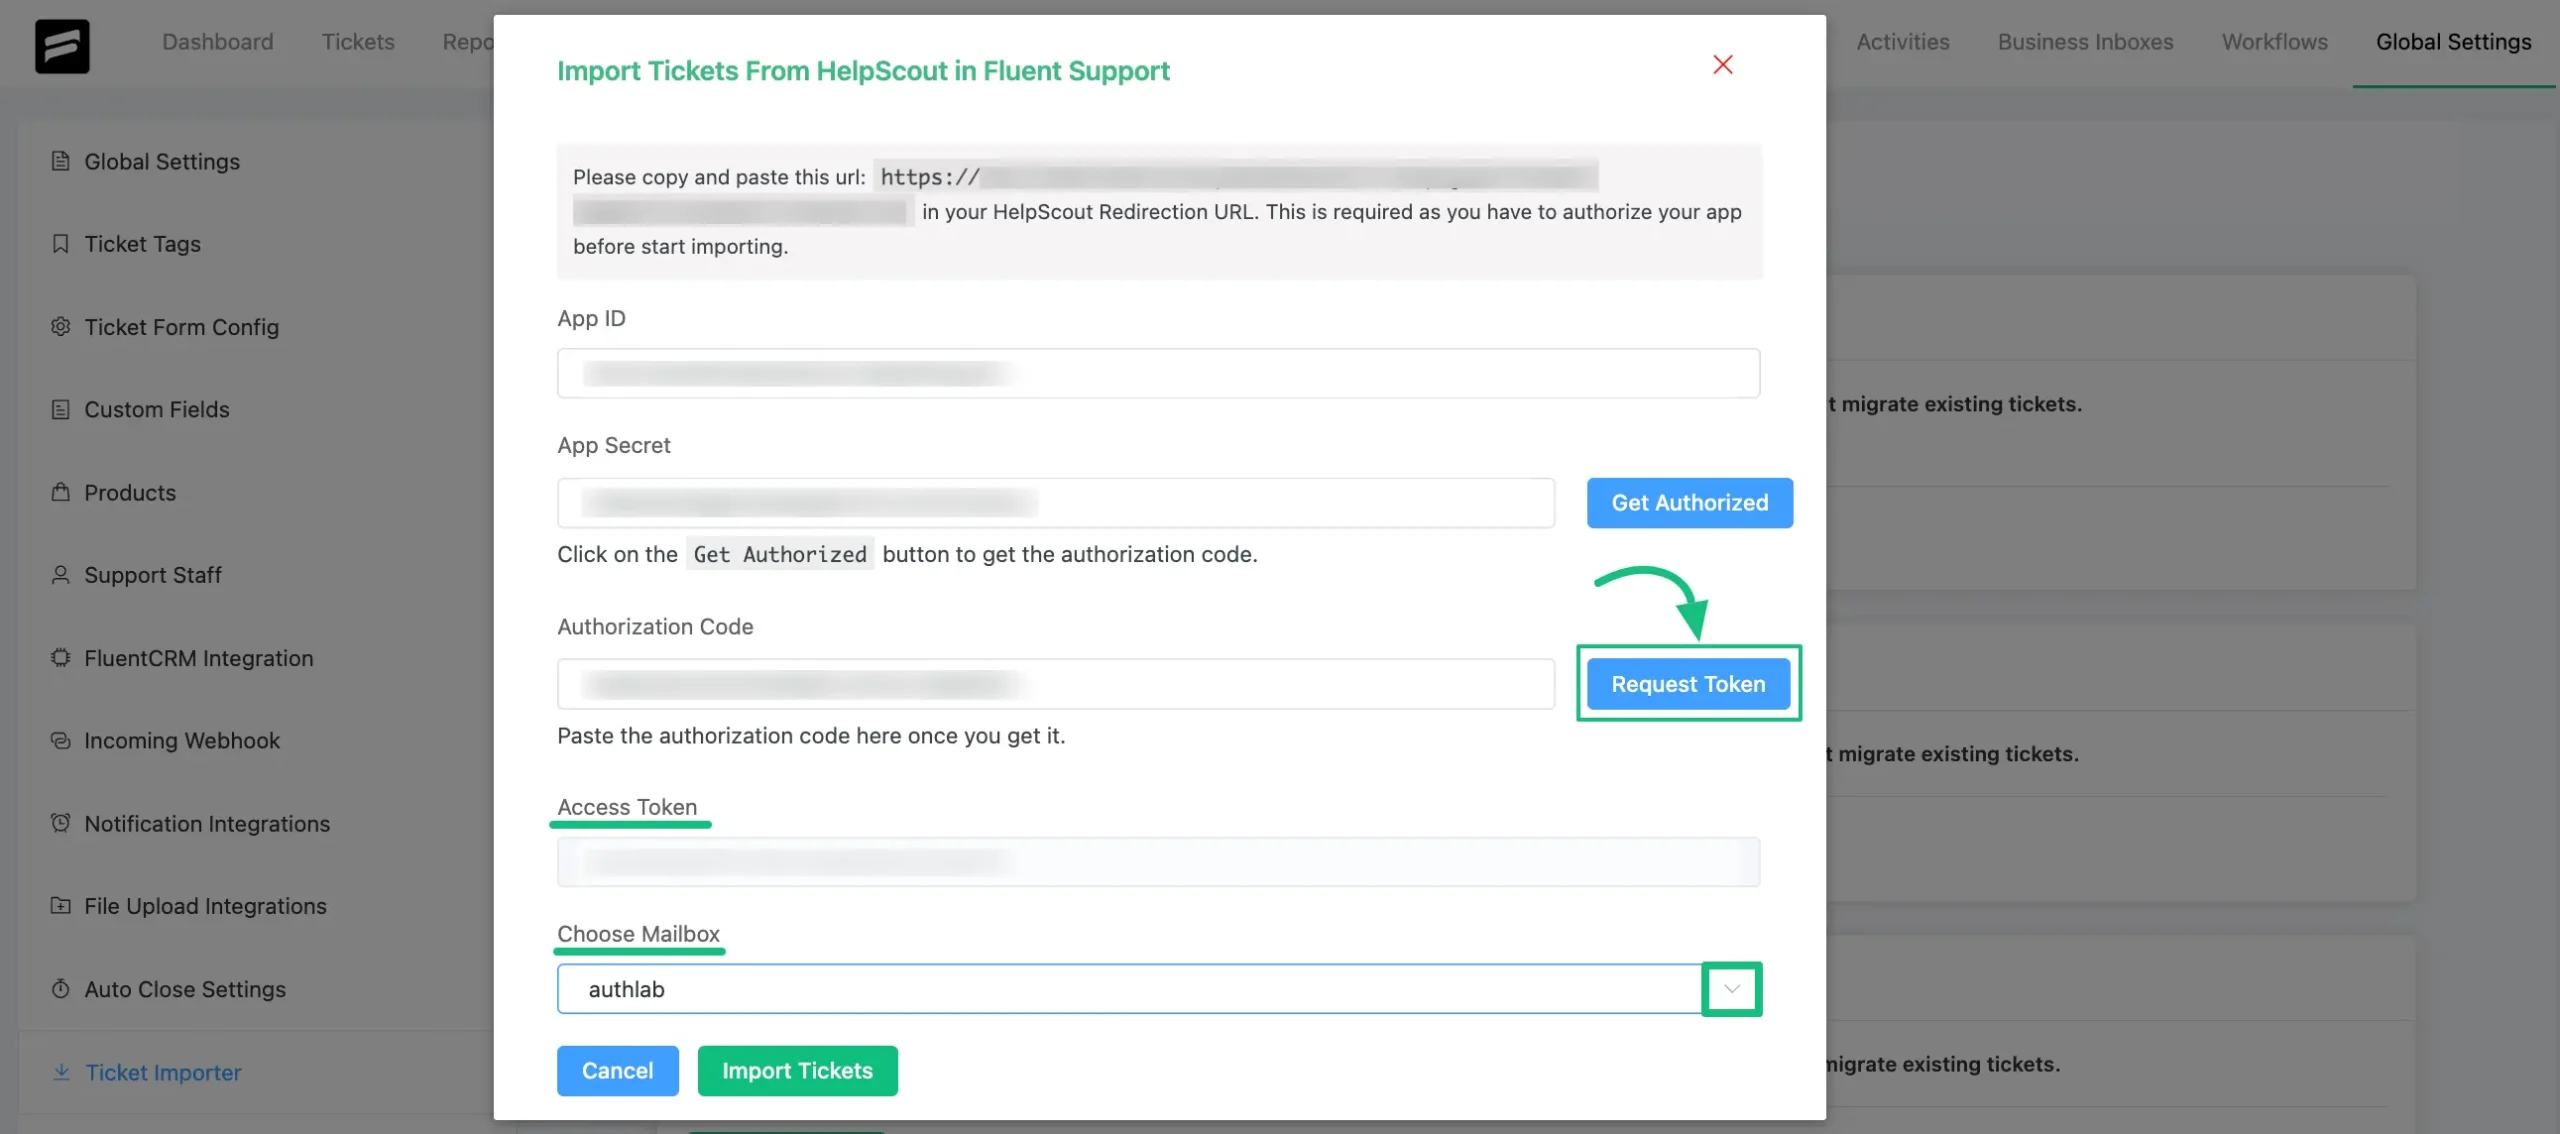
Return to the Help Scout popup page again and paste this in the Authorization Code field.
Click the Request Token to get your Access Token. Your all mailboxes will appear in the dropdown list under the Choose Mailbox field. Select the required mailbox to import tickets.
You can choose only one Mailbox at a time, and without selecting the specific mailbox you won’t be able to import your tickets.
Once you are done, click the Import Tickets button.

Congratulations, you are now ready to proceed! The importation of tickets will begin, and a notification will be sent once all your tickets have been successfully imported.
Here, you can see all the Tickets are Imported and the migration date & time are displayed as well.

This is how you can migrate your all tickets from Help Scout to Fluent Support!
If you have any further questions, concerns, or suggestions, please do not hesitate to contact our @support team. Thank you.


