“Business Inboxes” is another amazing feature of Fluent Support which manages support tickets from multiple businesses and their accounts according to your preferences. This article helps you learn how to create the initial Business Inbox right after installing and activating the Fluent Support plugin.
How To Create A New Business Inbox Initially #
Initially, there is No Need to create a Separate Business Inbox, because a Web-based Business Inbox will be created automatically when you provide all the necessary information to set up your support portal under the Dashboard section.
To learn how to set up the support portal to create the initial Business Inbox, follow the steps with the screenshots below —
Go to Fluent Support and click on Dashboard
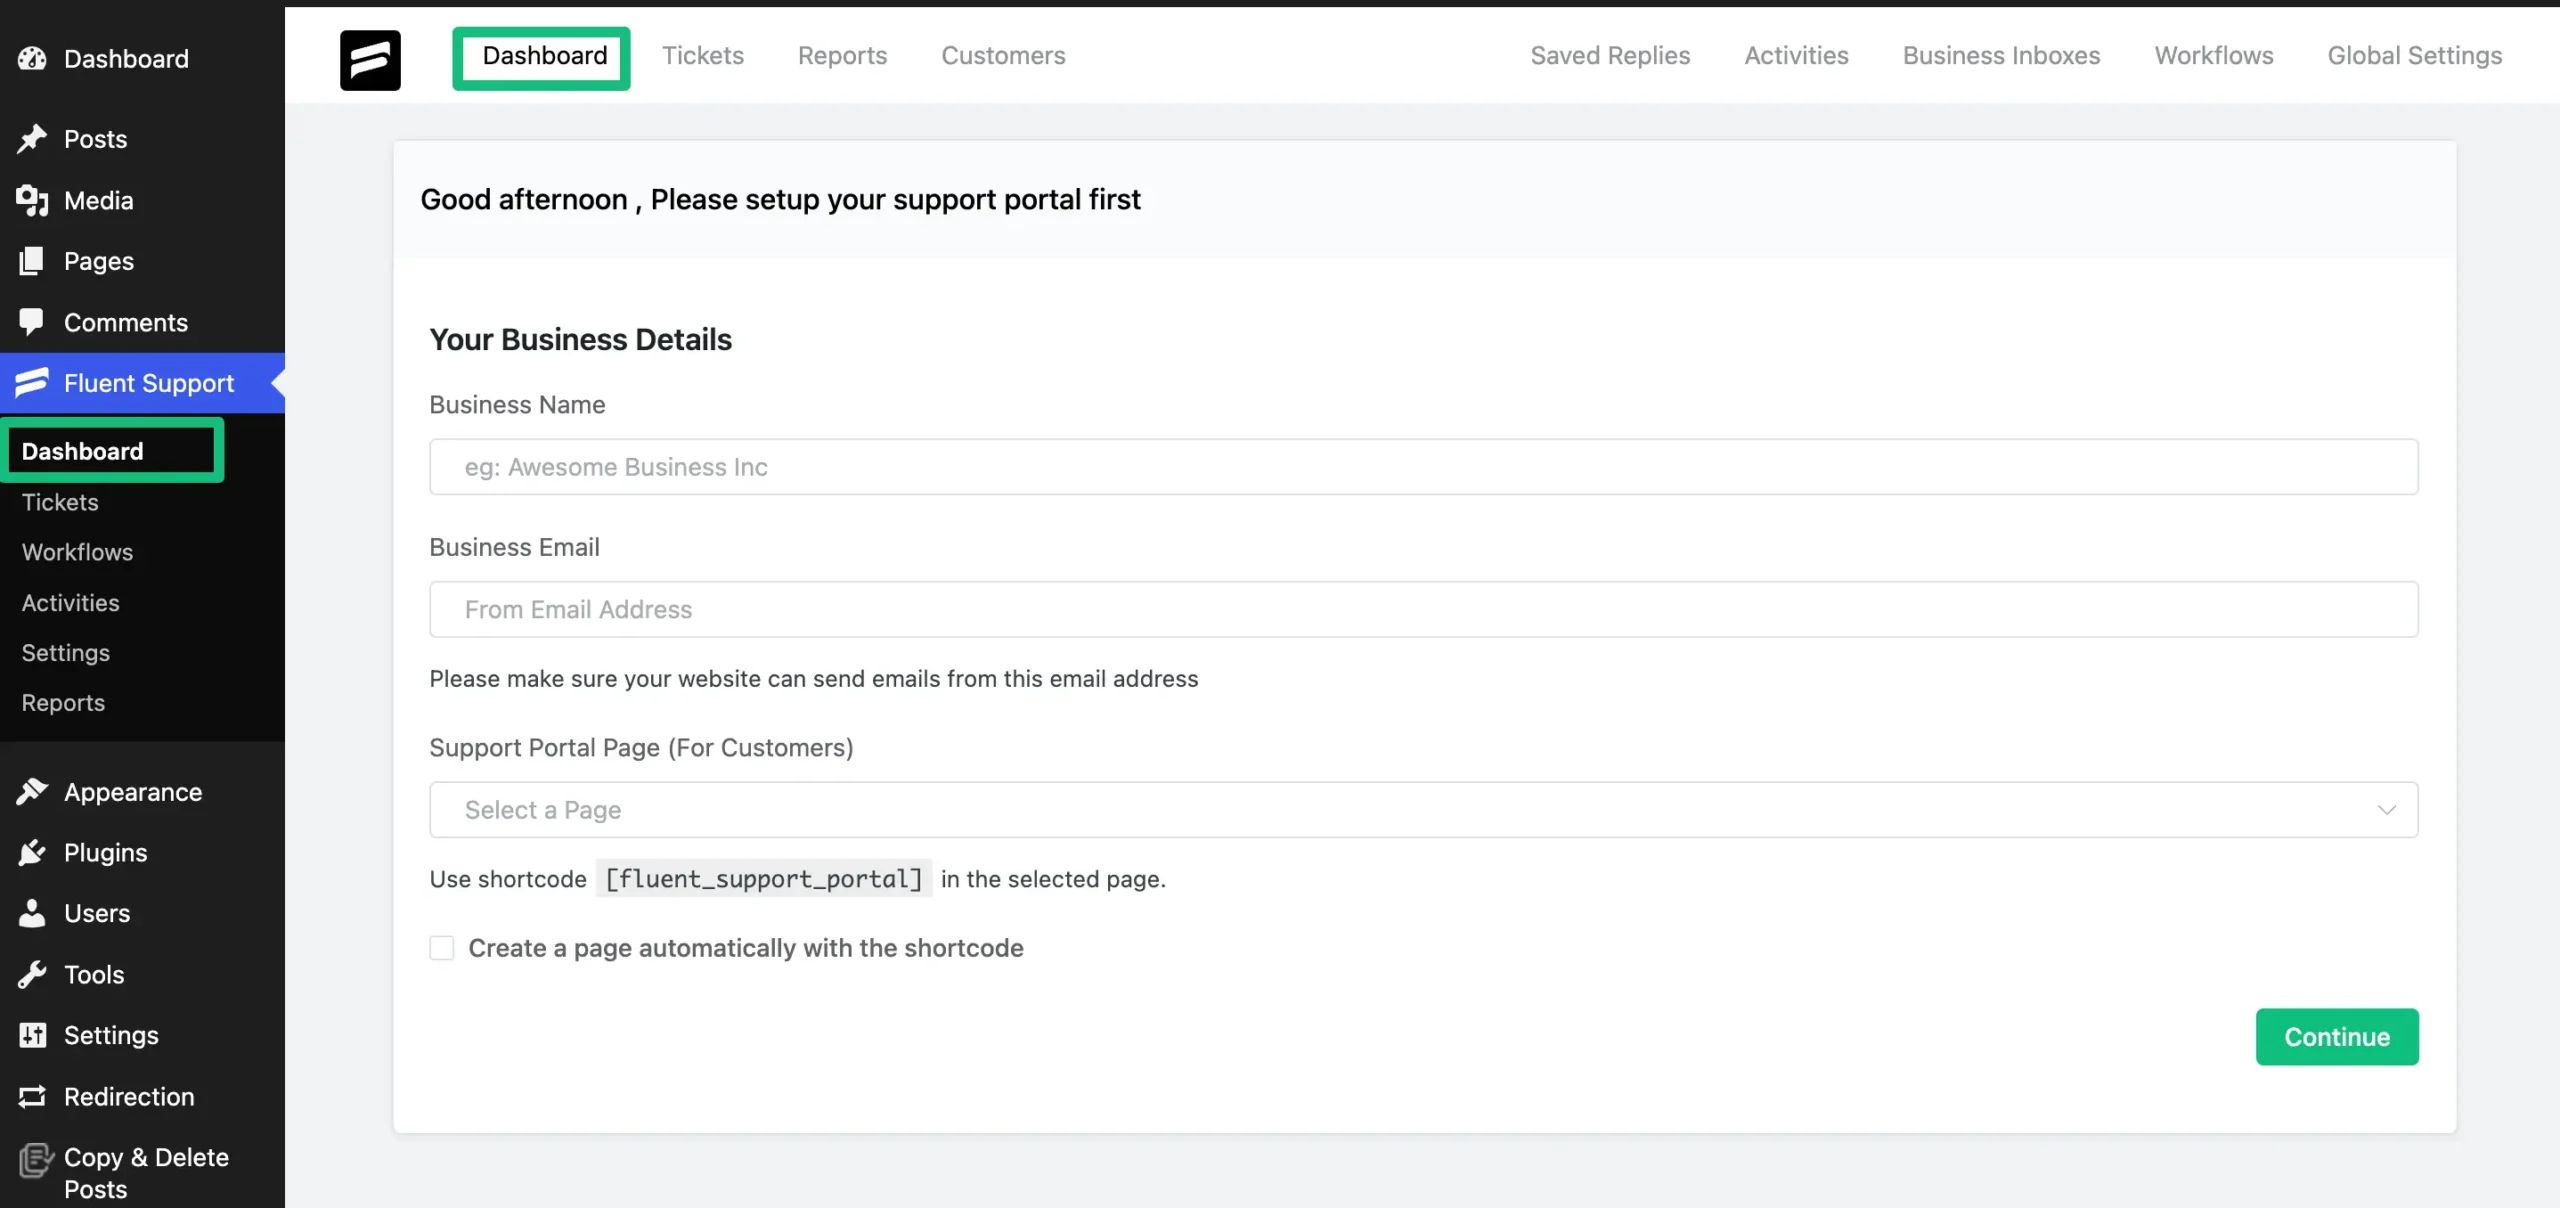
Fill out all the necessary information to set up your Support Portal, as shown in the screenshot below.
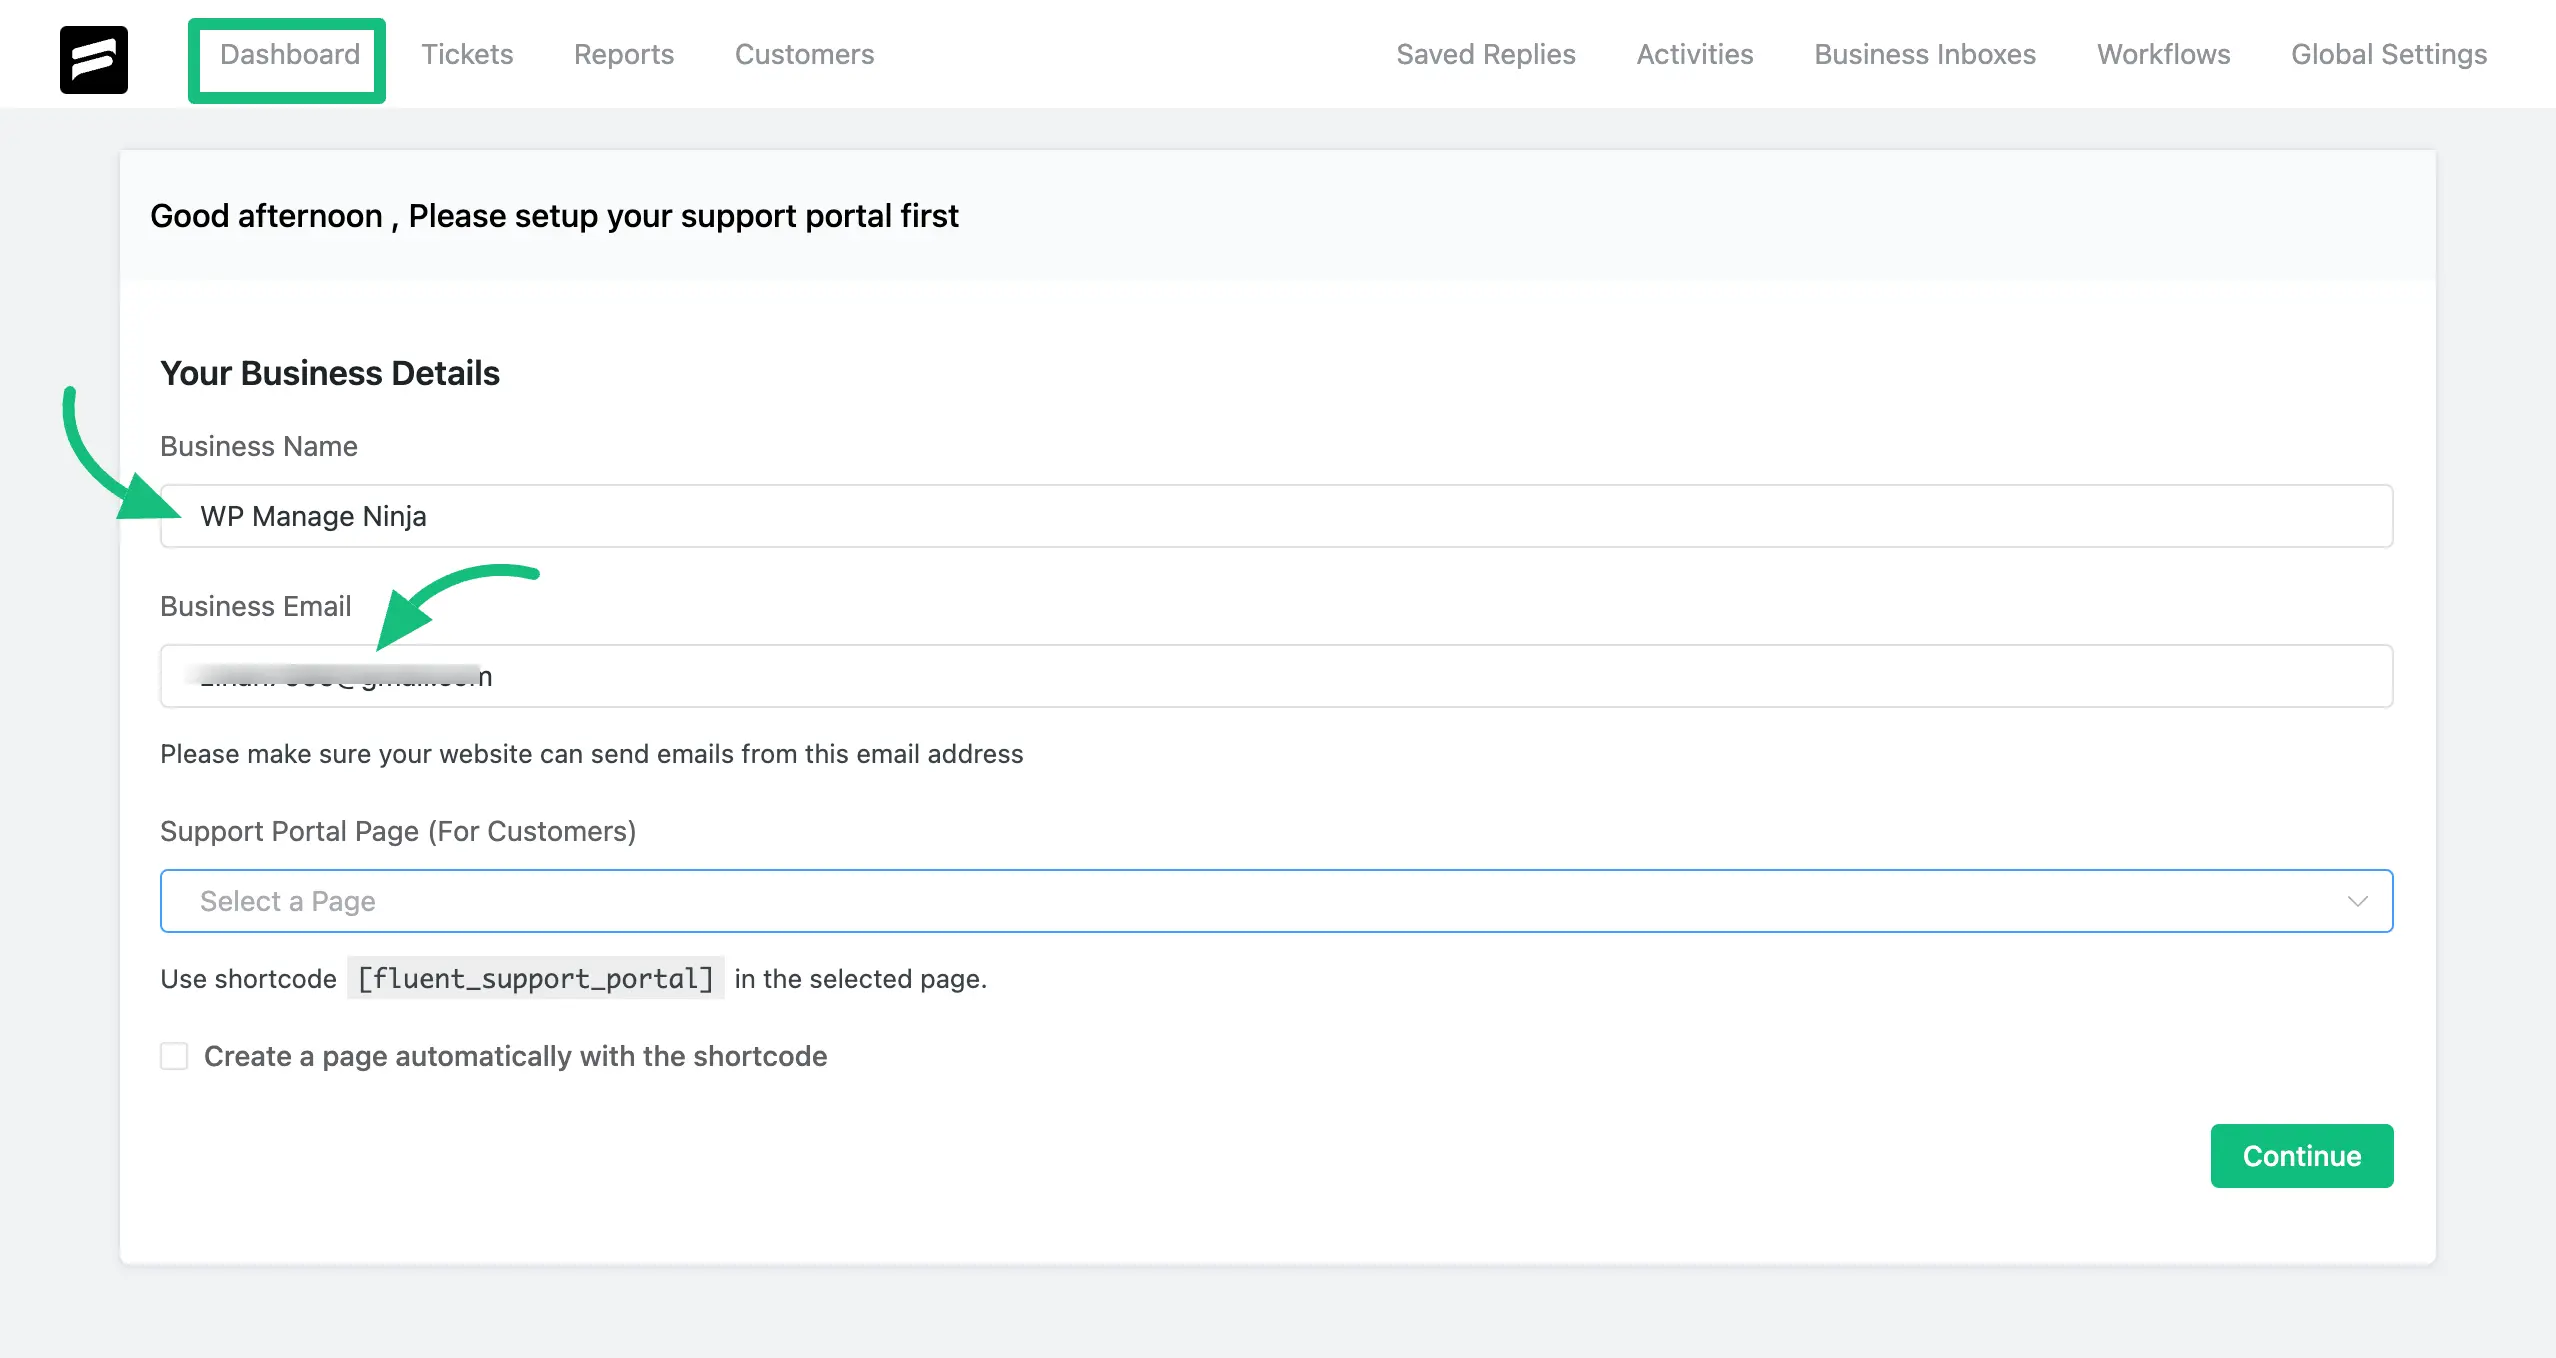
Select the Page from the Dropdown menu where you want to set up your Support Portal. Copy the Shortcode provided below and paste it on the selected page.
You can Paste the Shortcode anywhere on any Page of your WordPress Site according to your preference.

Or, you can simply enable the create a page automatically with the shortcode button to create a Separate Page for setting up your support portal automatically.
However, if you want to set up your support portal on a specific page or block of your website, ignore the automatic option and follow the instructions given above in the drop-down menu option.
After entering all the necessary information, click on the Continue button.
Your Support Portal will then be connected to your WordPress Site, and an automatic business inbox will also be created.

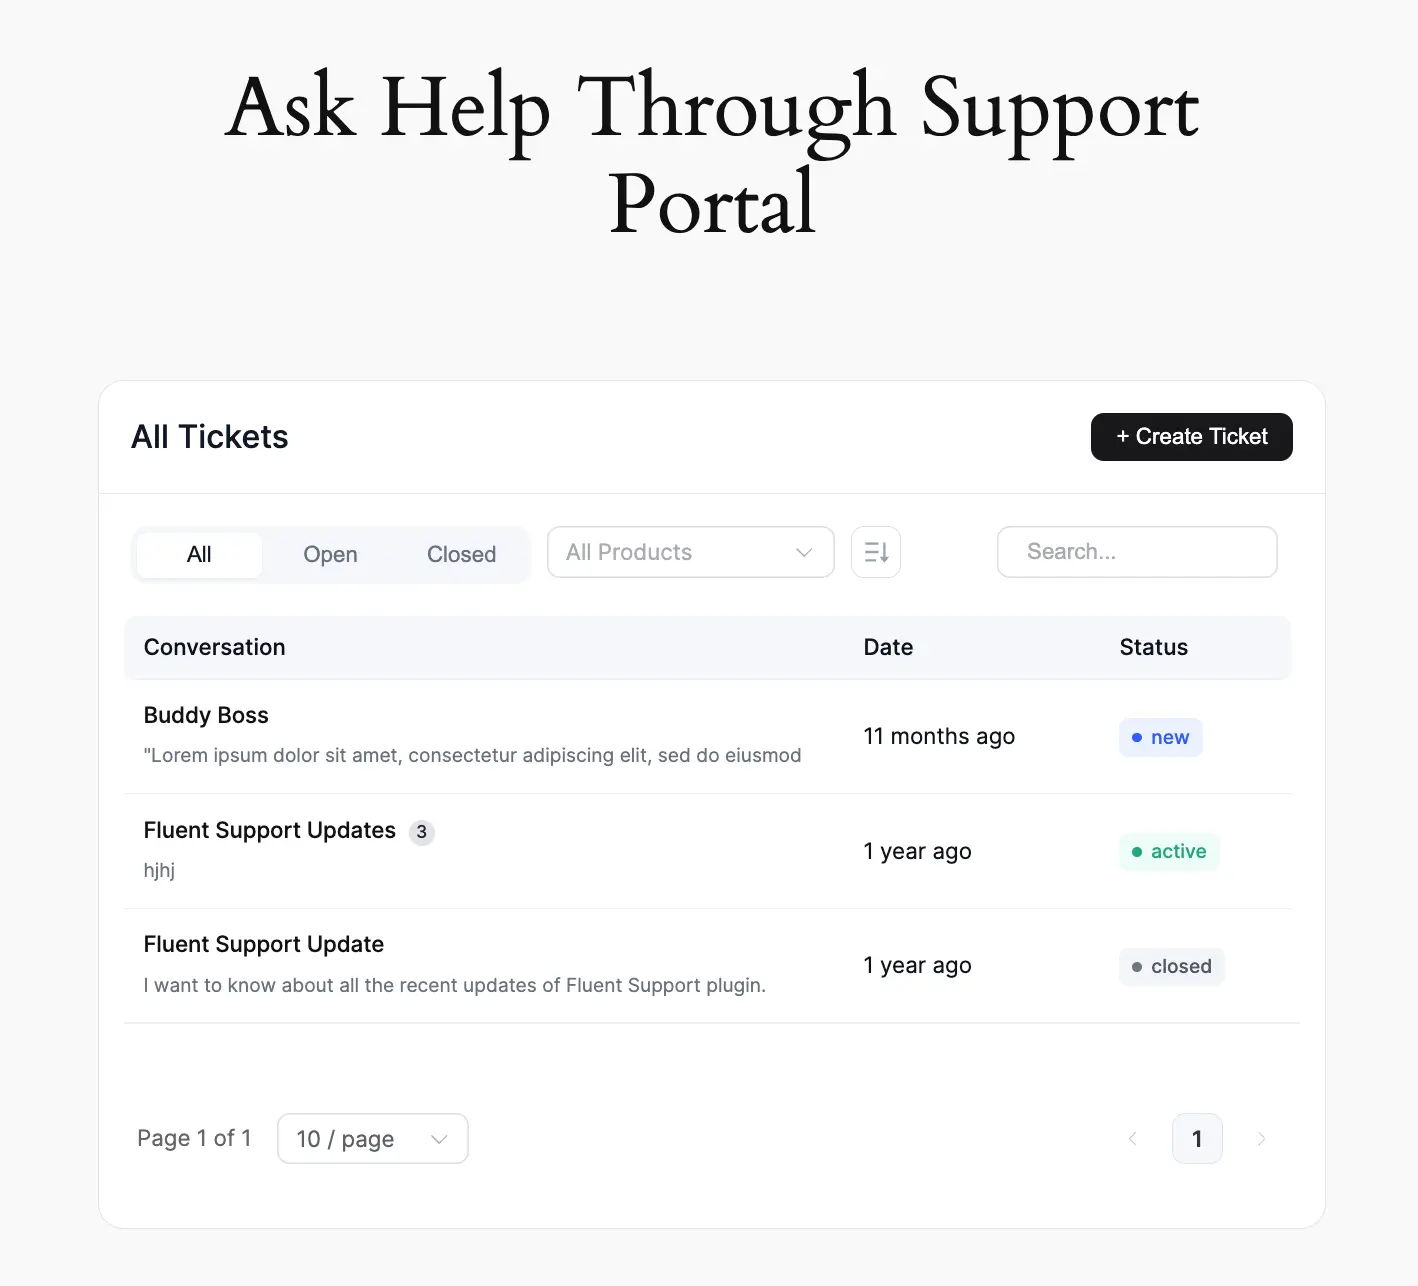
Preview of Customer Support Portal #
Here you can see the preview of the Customer Support Portal using the shortcode.
Customize Your Support Portal #
If you want to customize the design of your Support Portal for your customer, you can do this easily by adding the Fluent Support (Customer Portal) Gutenberg Block to your page or post.
To learn how to Add and Customize the Customer Portal, check this Documentation.
If you have any further questions, concerns, or suggestions, please do not hesitate to contact our @support team. Thank you.


