This article will provide detailed guidelines on setting up automatic forwarding of all emails from a Google Workspace mailbox or Gmail address to Fluent Support.
Auto-Forward from Google Workspace to Fluent Support #
Before starting the procedure, ensure you have followed the first steps; setting up a new Business Inbox in Fluent Support and your Fluent Support Mailbox Address is ready.
To know the details of setting up a Business Inbox, check this Documentation.
Now to learn how to set up auto-forwarding from Google Workspace to Fluent Support, follow the steps with the screenshots below —
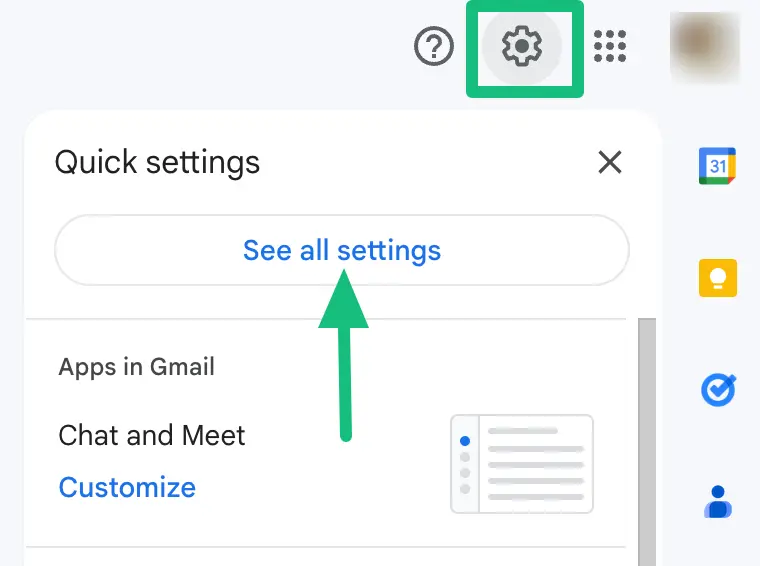
Go to your Gmail inbox, click on the Gear Icon located in the top right corner, and click on the See all settings option from the drop-down menu.
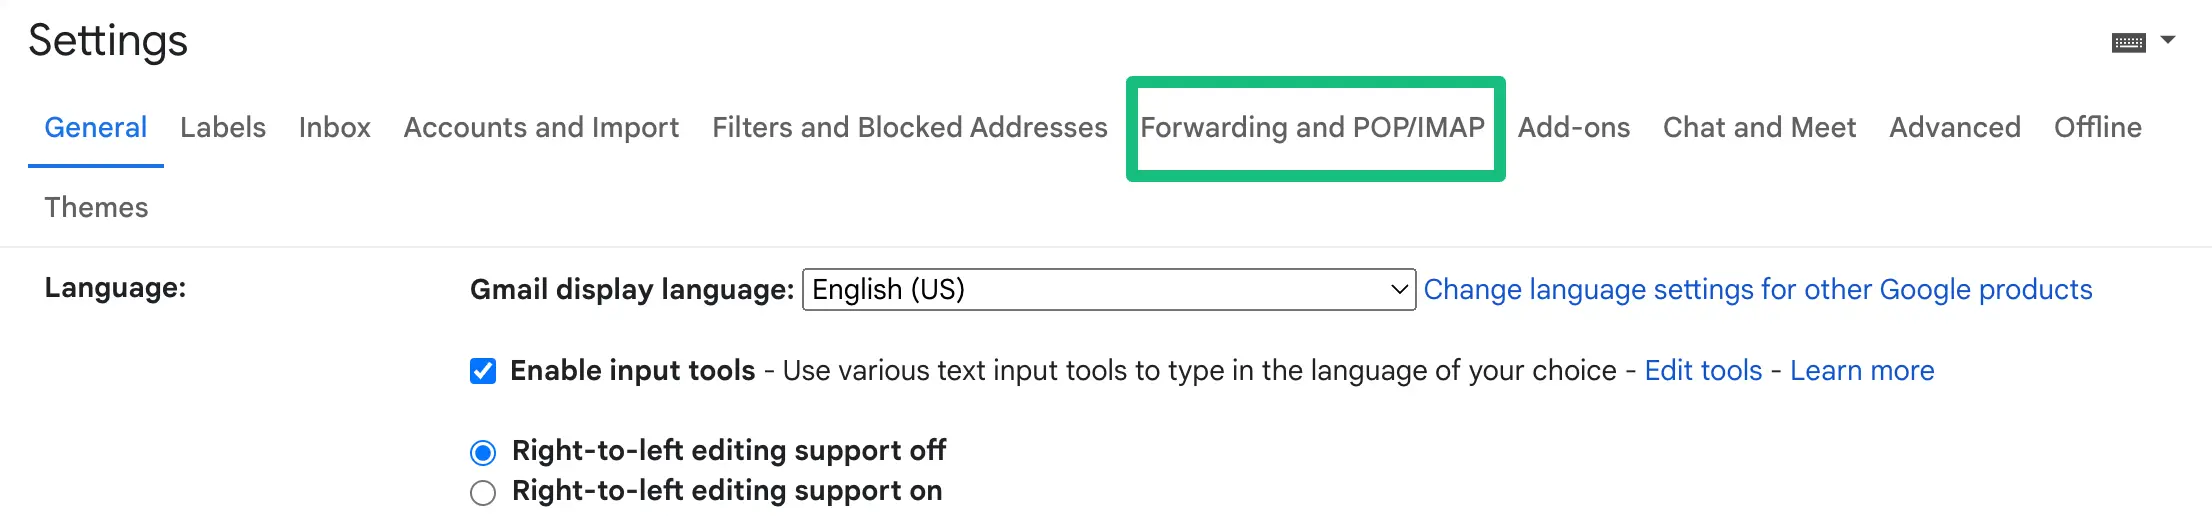
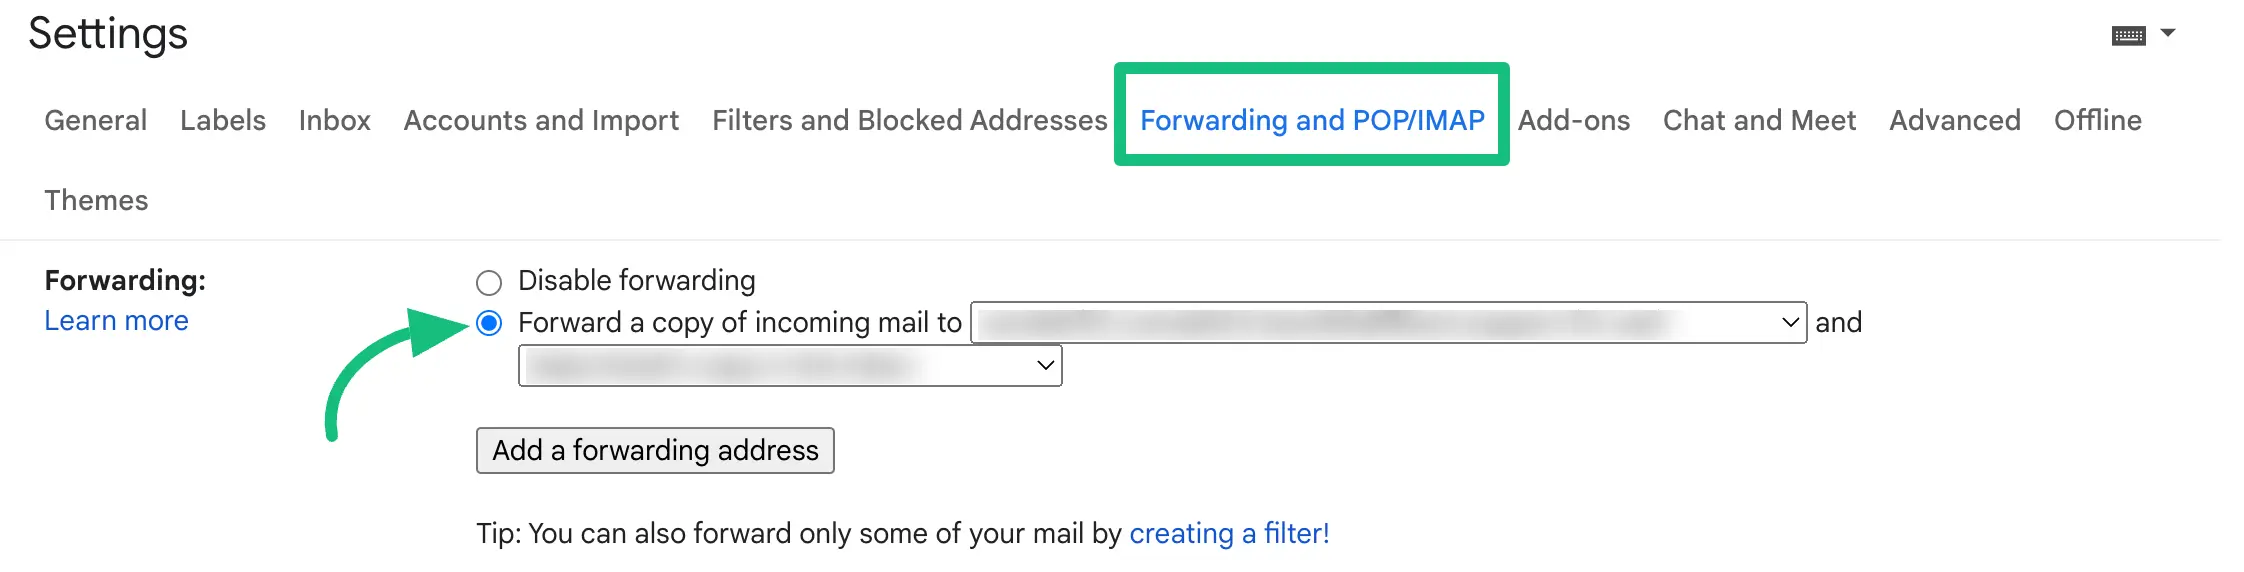
From Settings, click on Forwarding and POP/IMAP tab from the top menu.
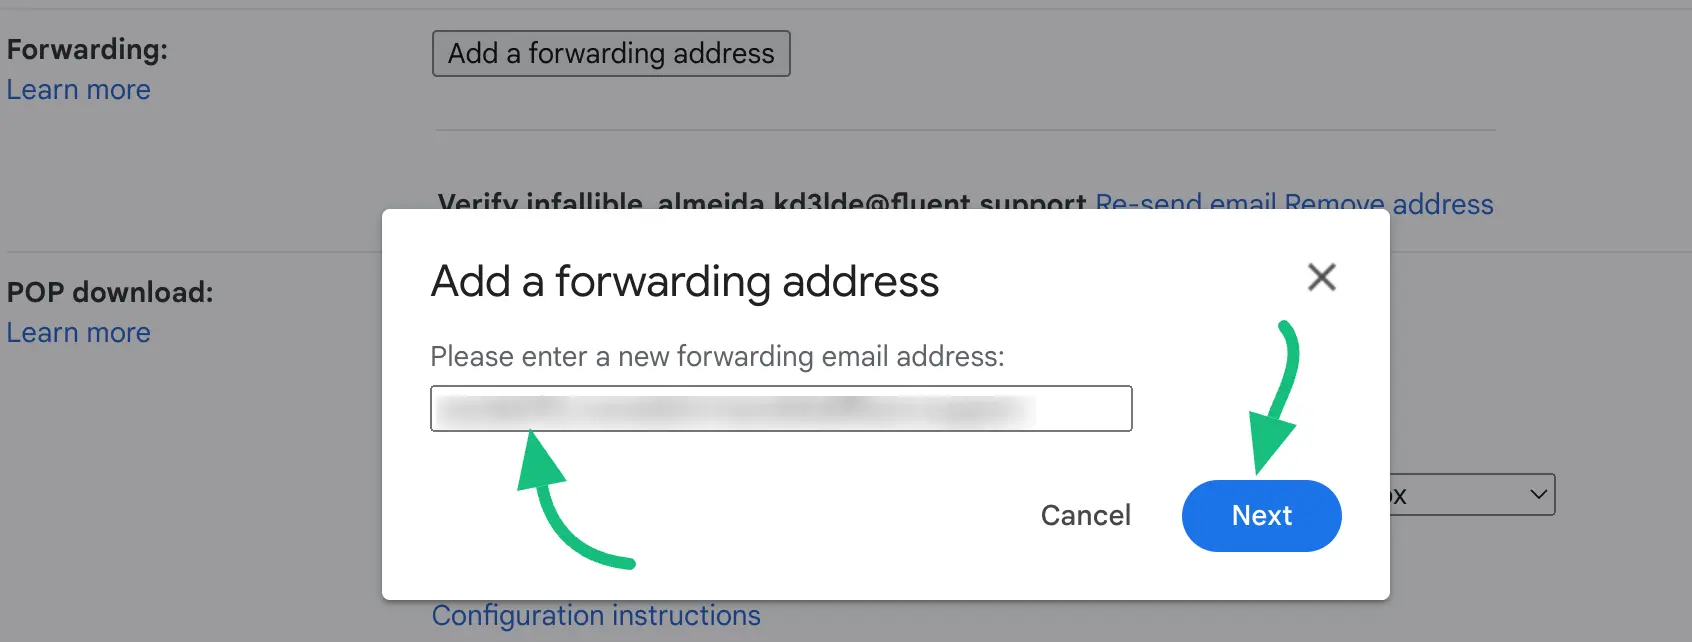
Click on the Add a forwarding address button & a pop-up will appear asking for your forwarding address.

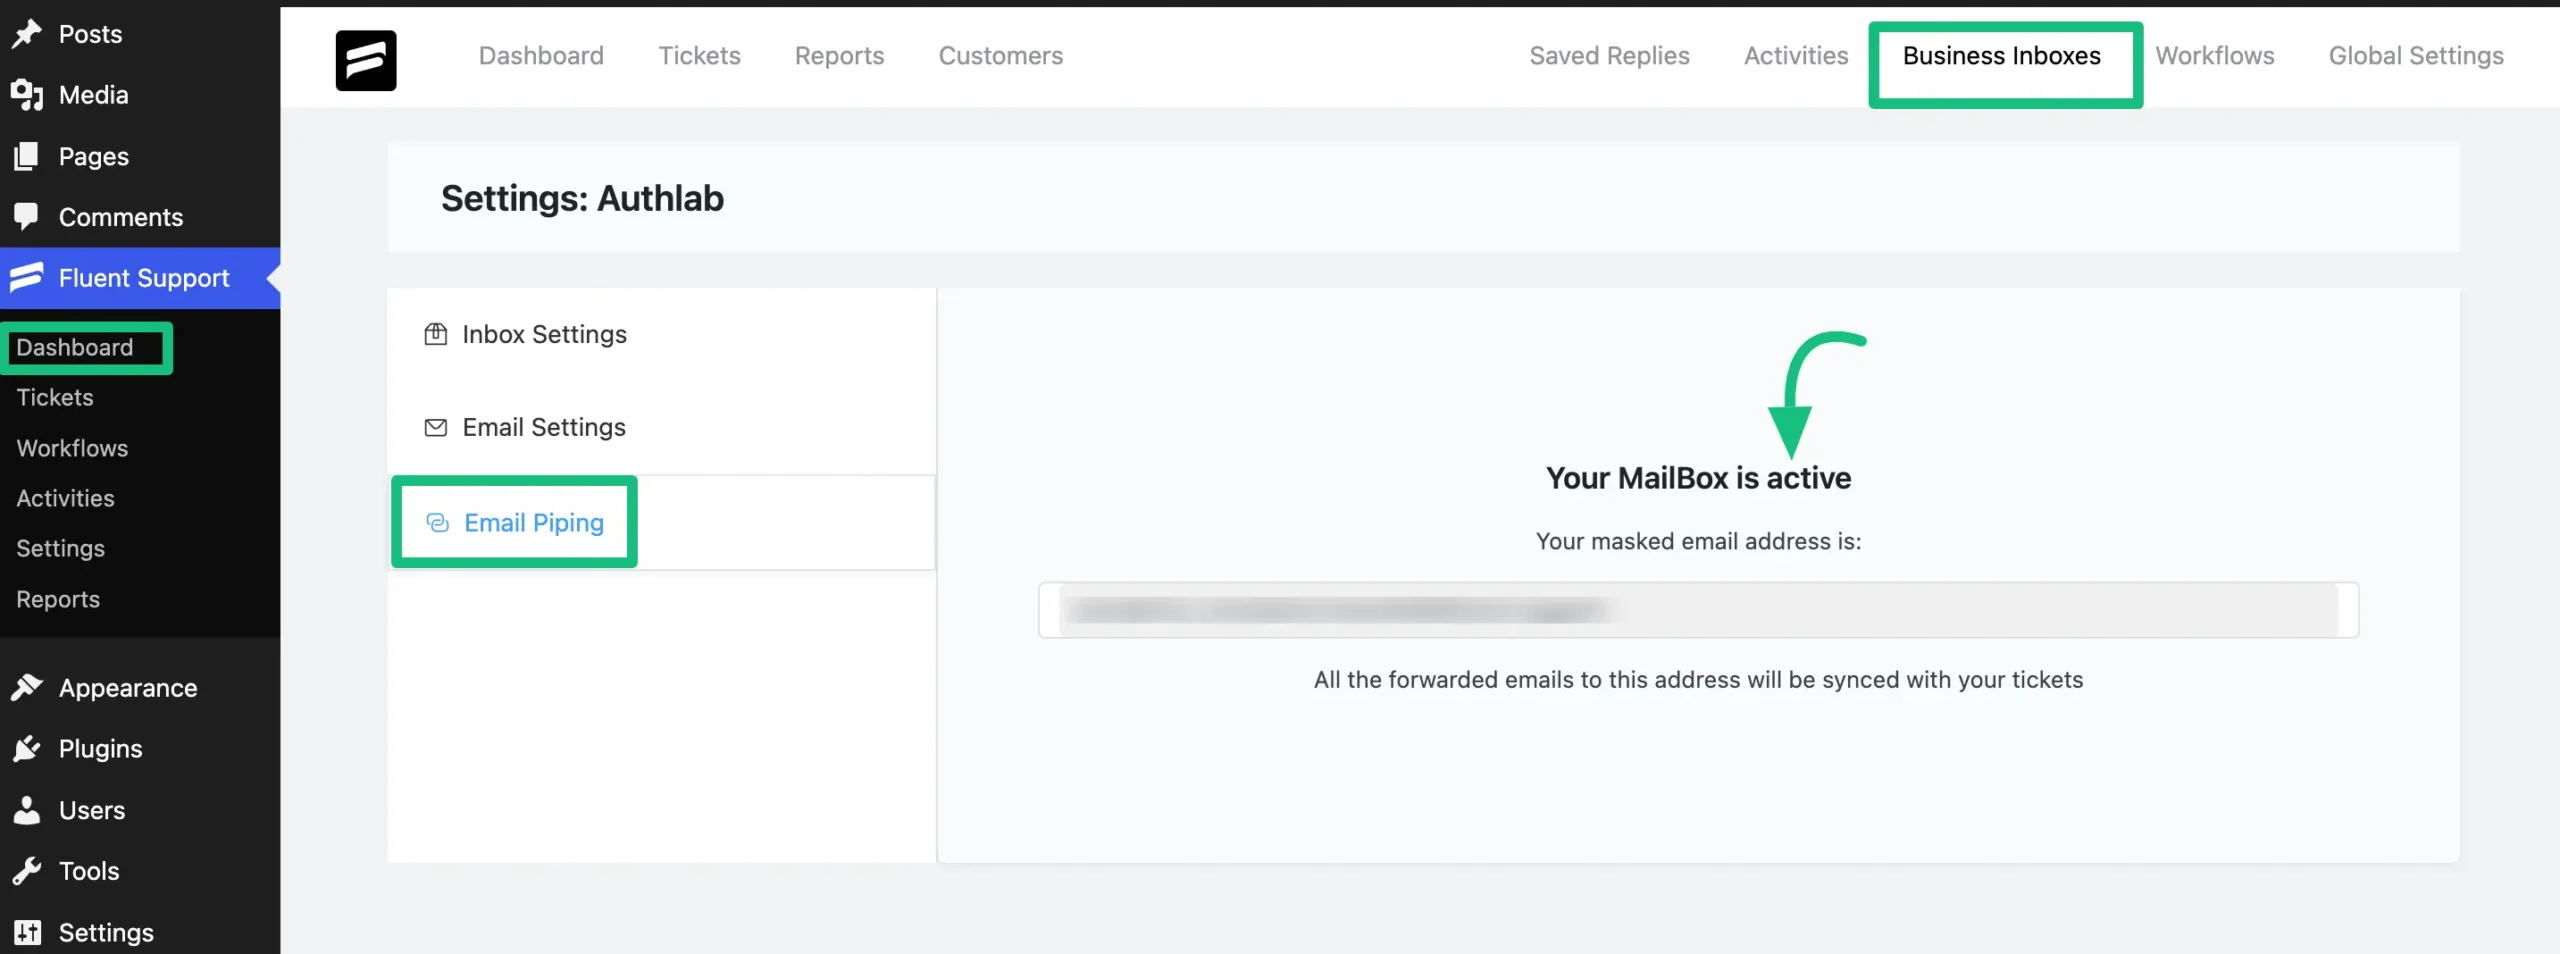
Now paste the Mailbox Email Address you got from the Email Piping settings of Fluent Support, and press the Next button.
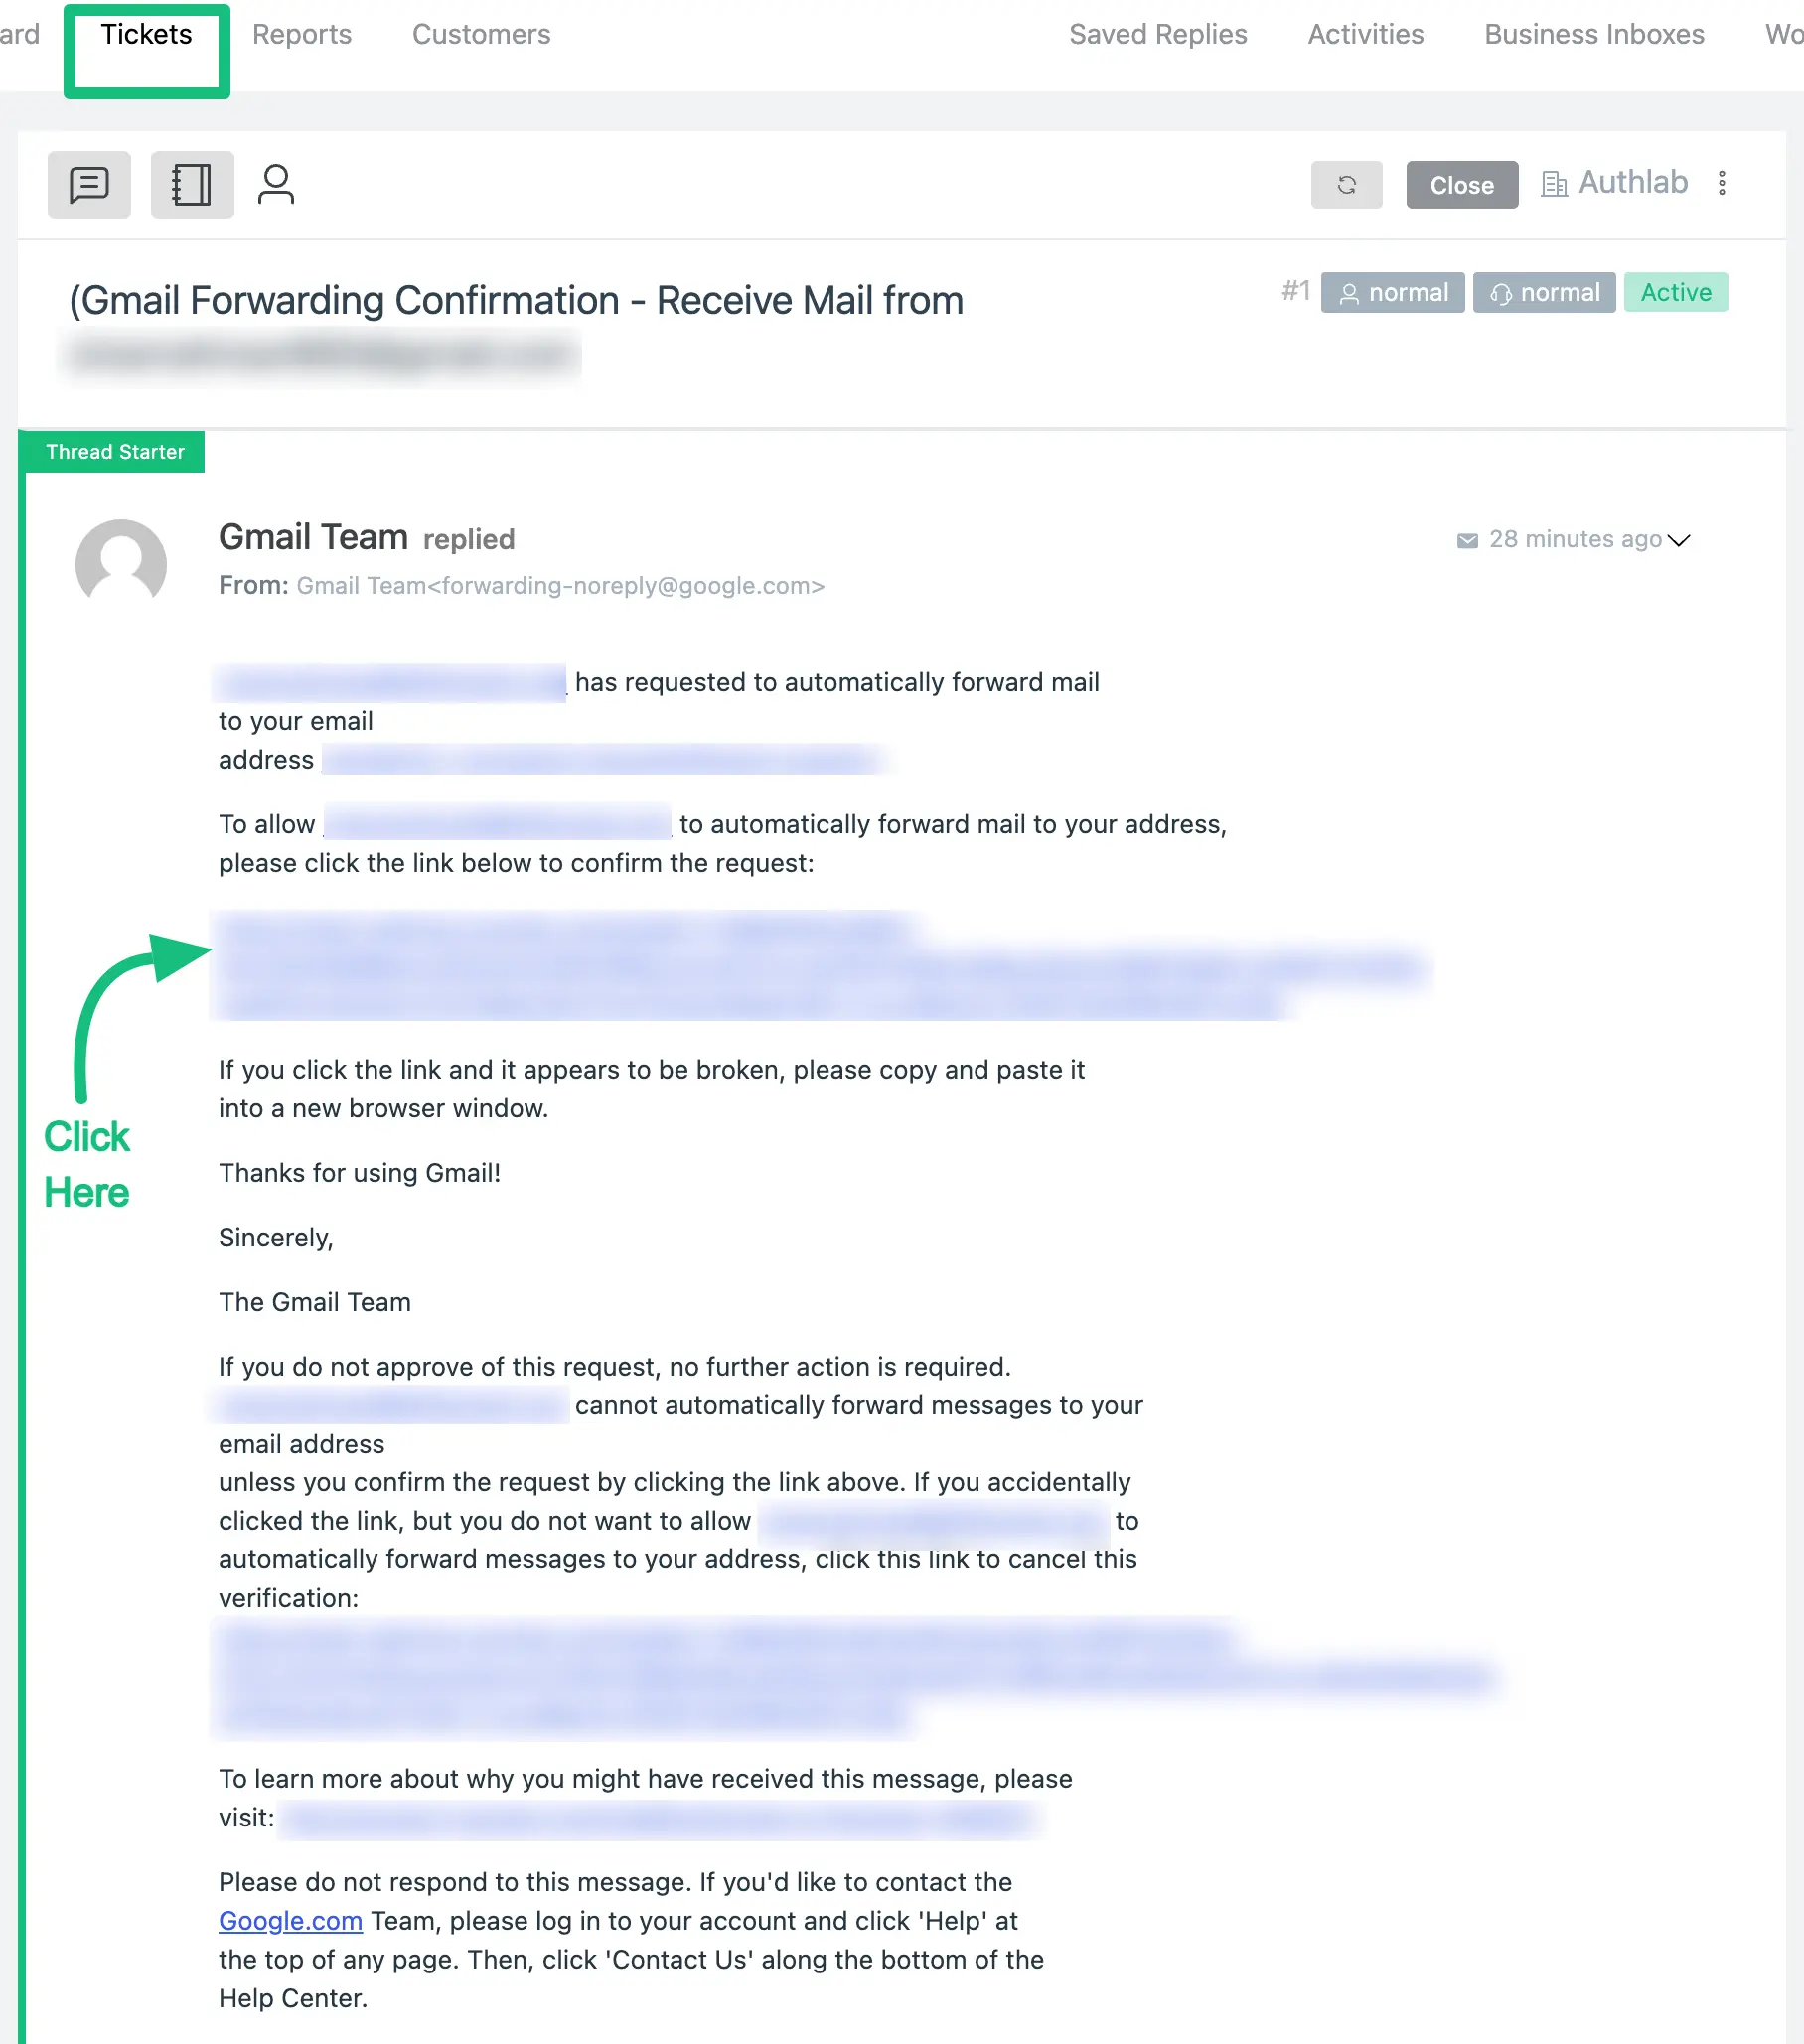
You should receive a confirmation email from Google in your Fluent Support Dashboard’s Tickets section. Click the link to confirm your forwarding address.
Again, go back to Forwarding and POP/IMAP tab under Gmail Settings, and enable email forwarding by selecting the option Forwarding a copy of incoming mail to.
Ensure the dropdown’s forwarding address is your Fluent Support Mailbox address.
And, don’t forget to press the Save Changes once you’re done editing your forwarding rule.
You can also choose what to do with the messages in your Gmail inbox. We recommend keeping a copy in the inbox, but it’s up to you.
That’s it! Your email forwarding is set and the mailbox is activated!
Now when anyone sends an email to your email address, a new ticket will be created in Fluent Support
If you have any further questions, concerns, or suggestions, please do not hesitate to contact our @support team. Thank you.


