Forward Customer Emails to Helpdesk by Converting into Tickets
By Prosanjit Dhar
August 29, 2025
Last Modified: November 13, 2025
Getting lots of customer support emails directly in your personal inbox is nothing but chaos. After all, a mailbox isn’t a dedicated support portal. That’s where Fluent Support steps in.
Instead of letting your inbox overflow, you can forward those support emails directly to your helpdesk by automatically turning them into tickets your team can track and resolve.
TL;DR
- Managing customer support emails in a personal inbox is very annoying, and you can’t scale with it.
- But with Fluent Support, you can easily forward them to an organized dashboard and automatically convert them into trackable tickets.
- Most importantly, it works with any email provider (Gmail, Outlook, Yahoo, Amazon WorkMail, etc.) and the setup is quick and reliable.
- By setting it up, you’ll get every query in one place with clear visibility, prioritization, and faster resolutions.
- Also, your agents are empowered with many collaboration tools, accountability, and an organized workflow instead of digging through inbox clutter.
- Lastly, your customers enjoy faster replies, with a personalized and smooth customer support experience.
What is a customer support email?
Customer support emails are the traditional way customers reach out with questions, complaints, or requests. While it’s simple, managing support this way is messy. You don’t get ticket tracking, ticket prioritization, ticket tagging or collaboration features.
Use Fluent Support to streamline your entire customer support process.
That’s why converting these emails into helpdesk tickets is a smarter move. It brings organization, visibility, and speed into your support process.
Let’s see how this works with Fluent Support for the most common email providers.
Create a mailbox email address in Fluent Support
First, you’ll need to set up a Business Inbox with Email Piping. Once that’s active, Fluent Support will give you a unique Mailbox Email Address.
This is the address where your incoming emails will be forwarded, and that’s what turns them into support tickets.
Here are the steps:
Make sure your Fluent Support license is active (Email Piping is a Pro feature).
- Go to the Fluent Support dashboard and open Business Inboxes.
- Add a new inbox and choose Web and Email-Based (Mailbox).
- Read and accept the terms, then enable the Fluent Support email parsing.
- After that, you’ll get a new Mailbox email issued from the system.
Now, you can use this email address as your own support email for forwarding or any support-related queries.
Forward customer support emails to the helpdesk
After obtaining the Mailbox email address for piping, the next step is setting up forwarding inside your own mailbox. This way, every customer email is routed to Fluent Support and instantly becomes a ticket.
Let’s see how you can set it up with the most common providers:
Gmail
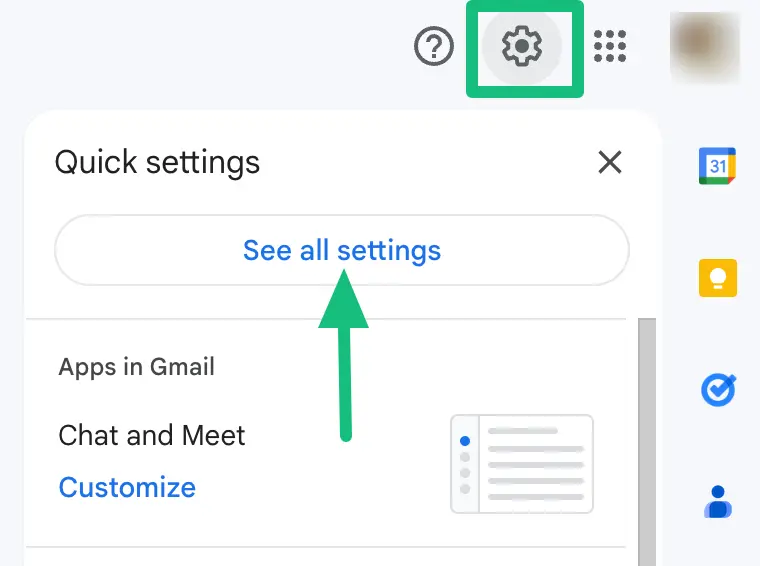
- Go to your Gmail inbox and click the Gear Icon, then See all settings.
- From the top menu, select Forwarding and POP/IMAP.

- Click Add a forwarding address and paste the Fluent Support Mailbox Email Address.
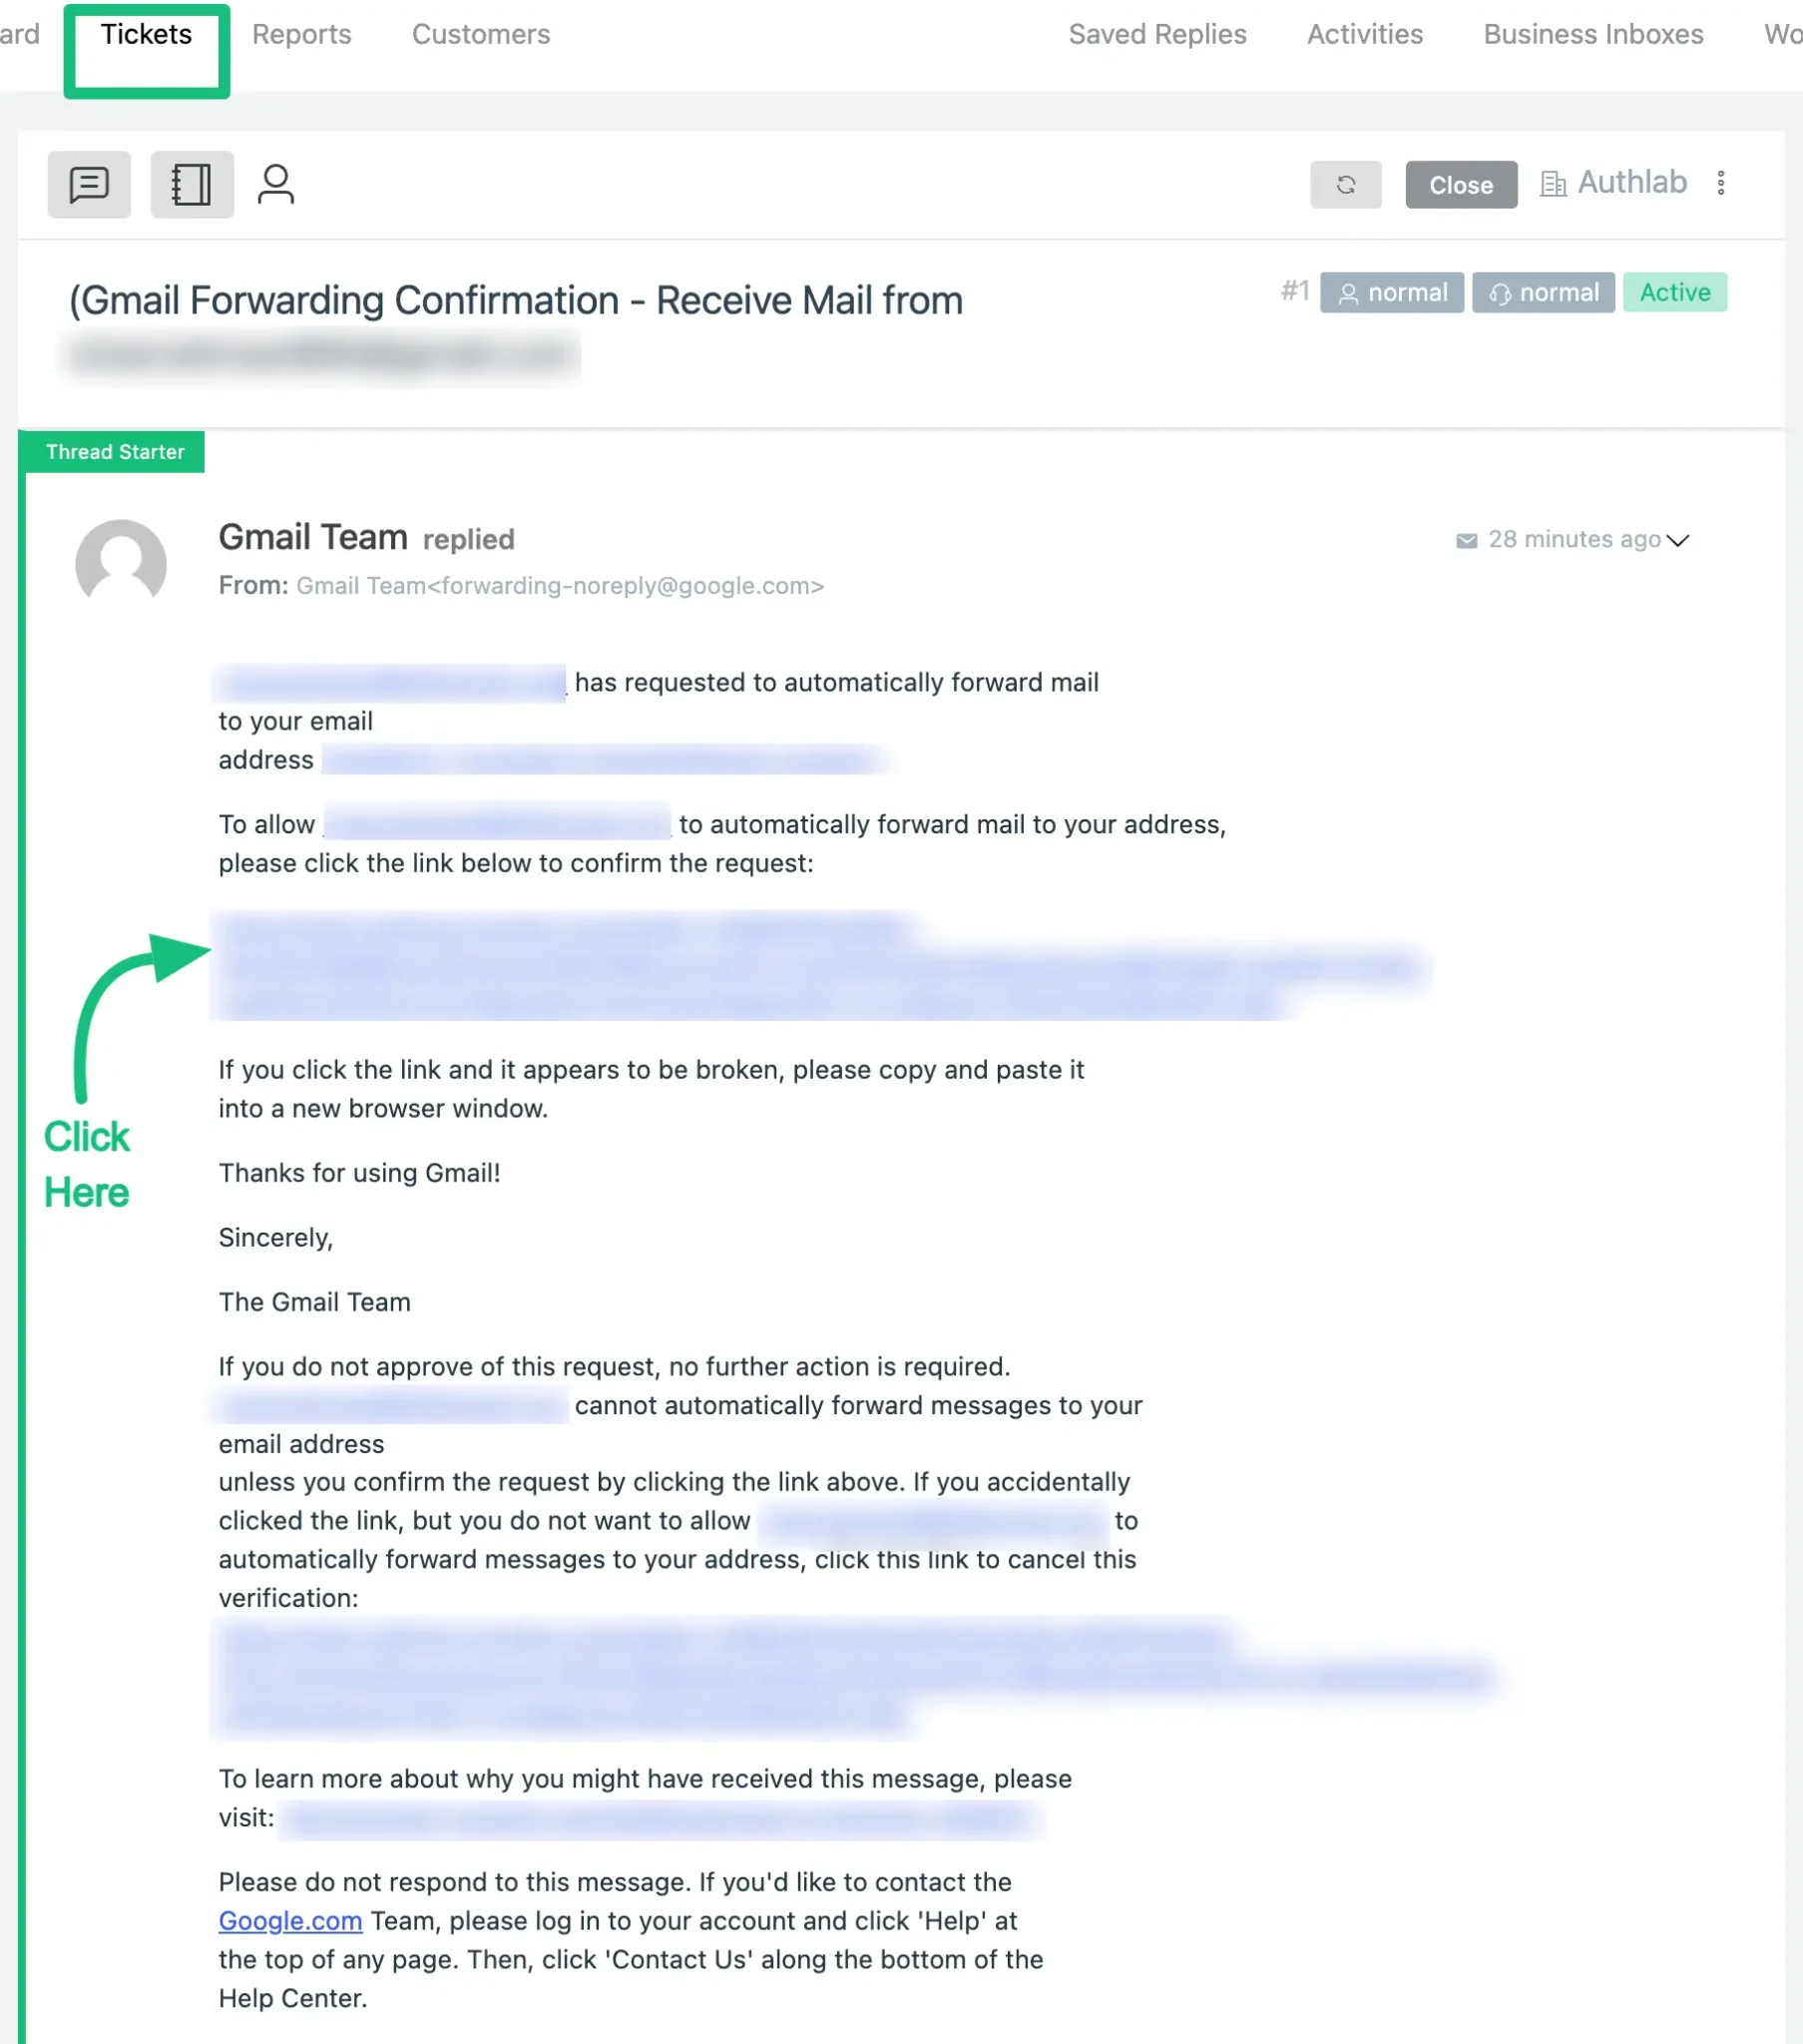
- Confirm the forwarding request from your Fluent Support dashboard.
- Then go back to Gmail and enable Forward a copy of incoming mail to and select the Fluent Support Mailbox.
- Save changes.
That’s it! Now every new email automatically creates a ticket inside Fluent Support.
Outlook (Microsoft 365)
- Log in to your Outlook Web Access.
- Open Mailbox Settings and click Email → Forwarding.
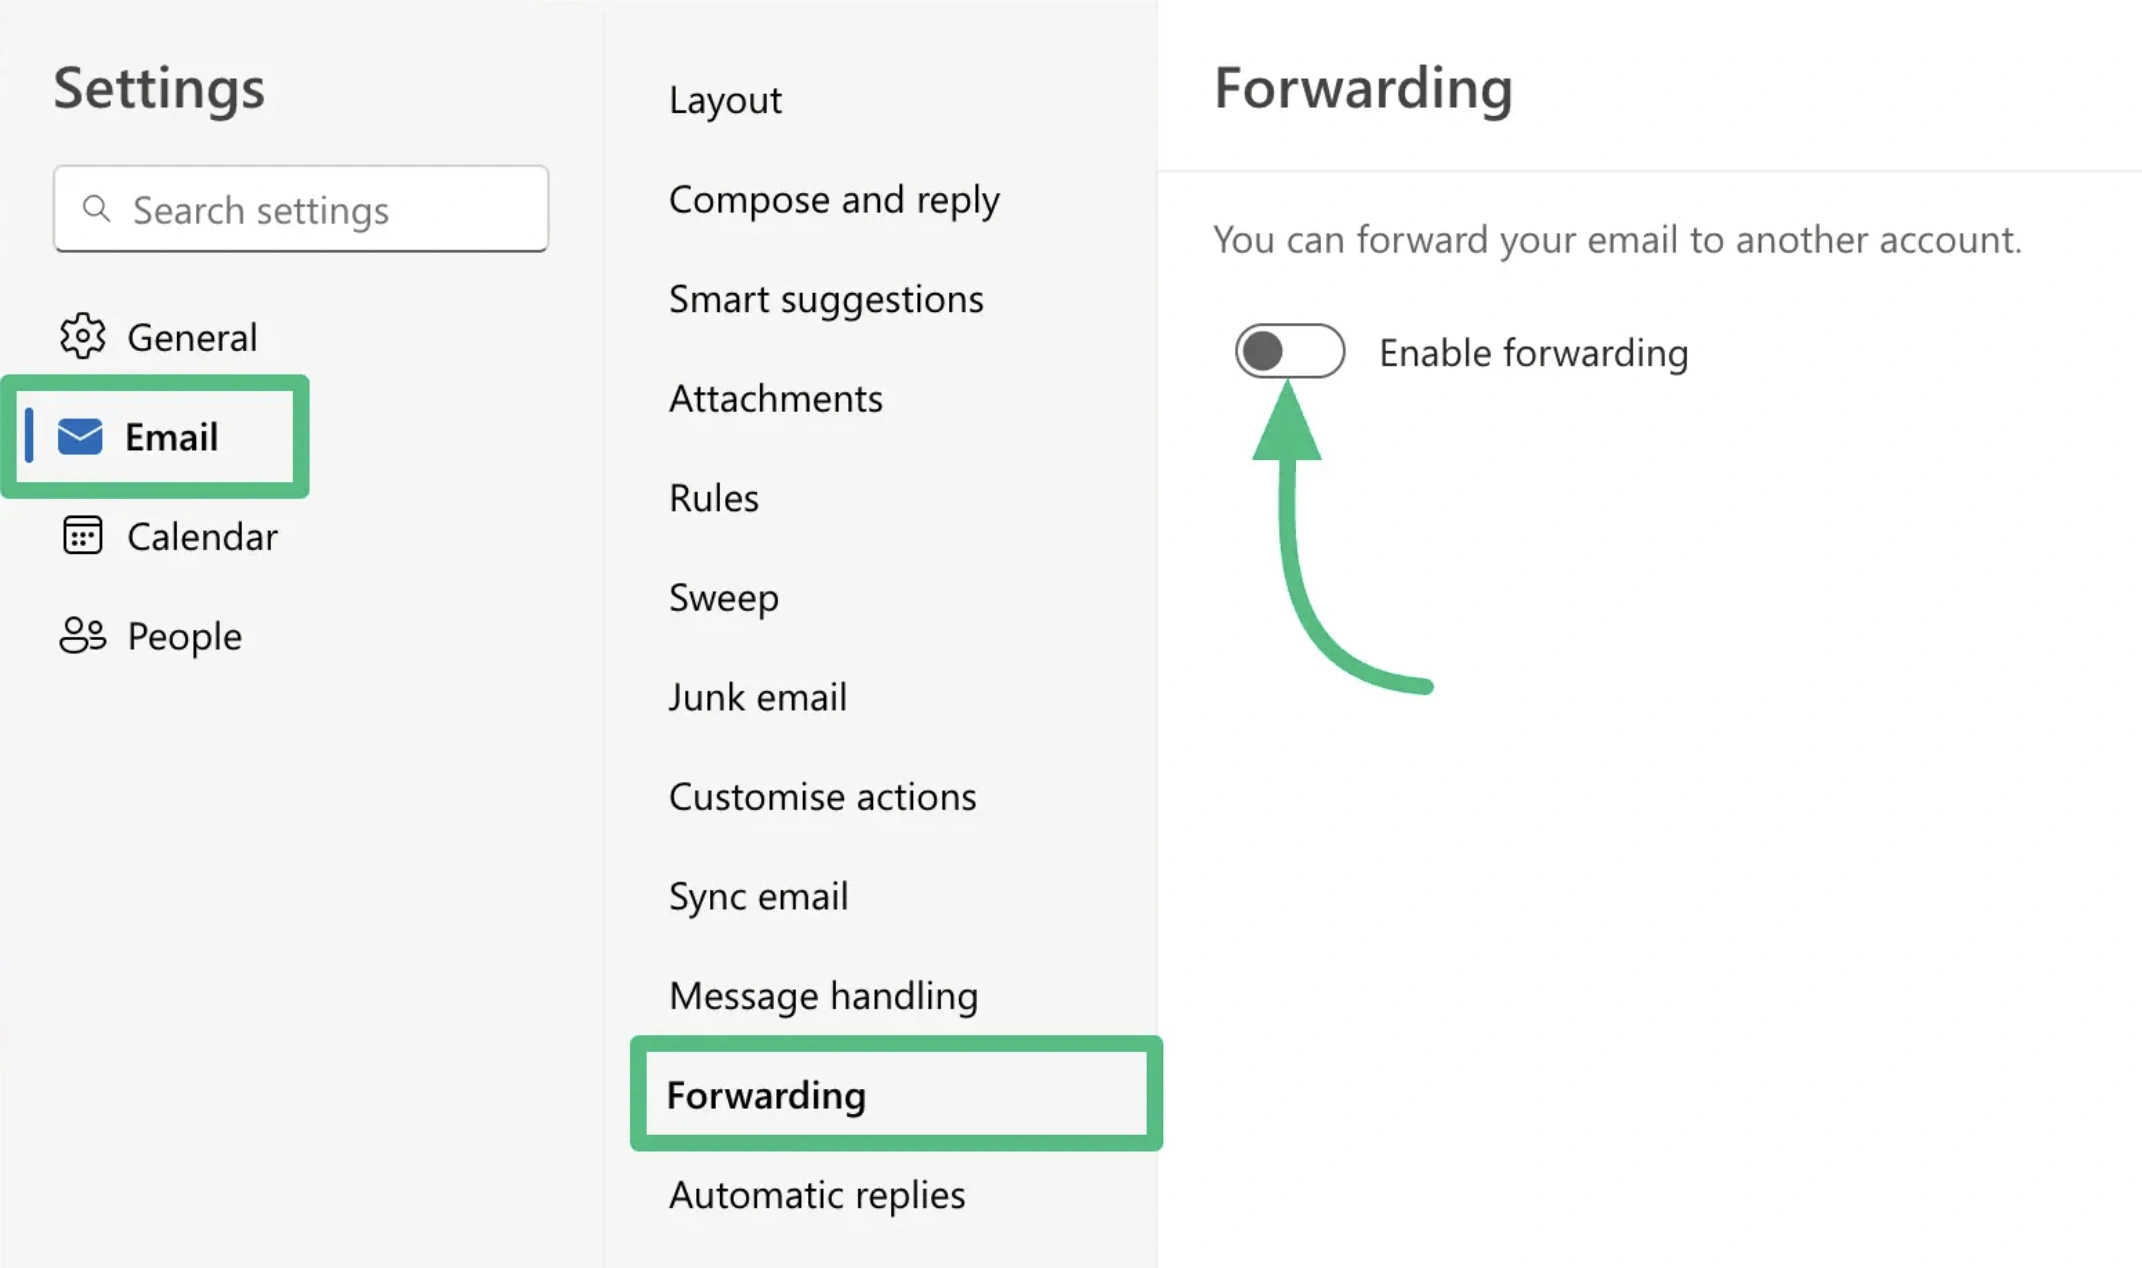
- Enable forwarding and paste your Fluent Support Mailbox email address.
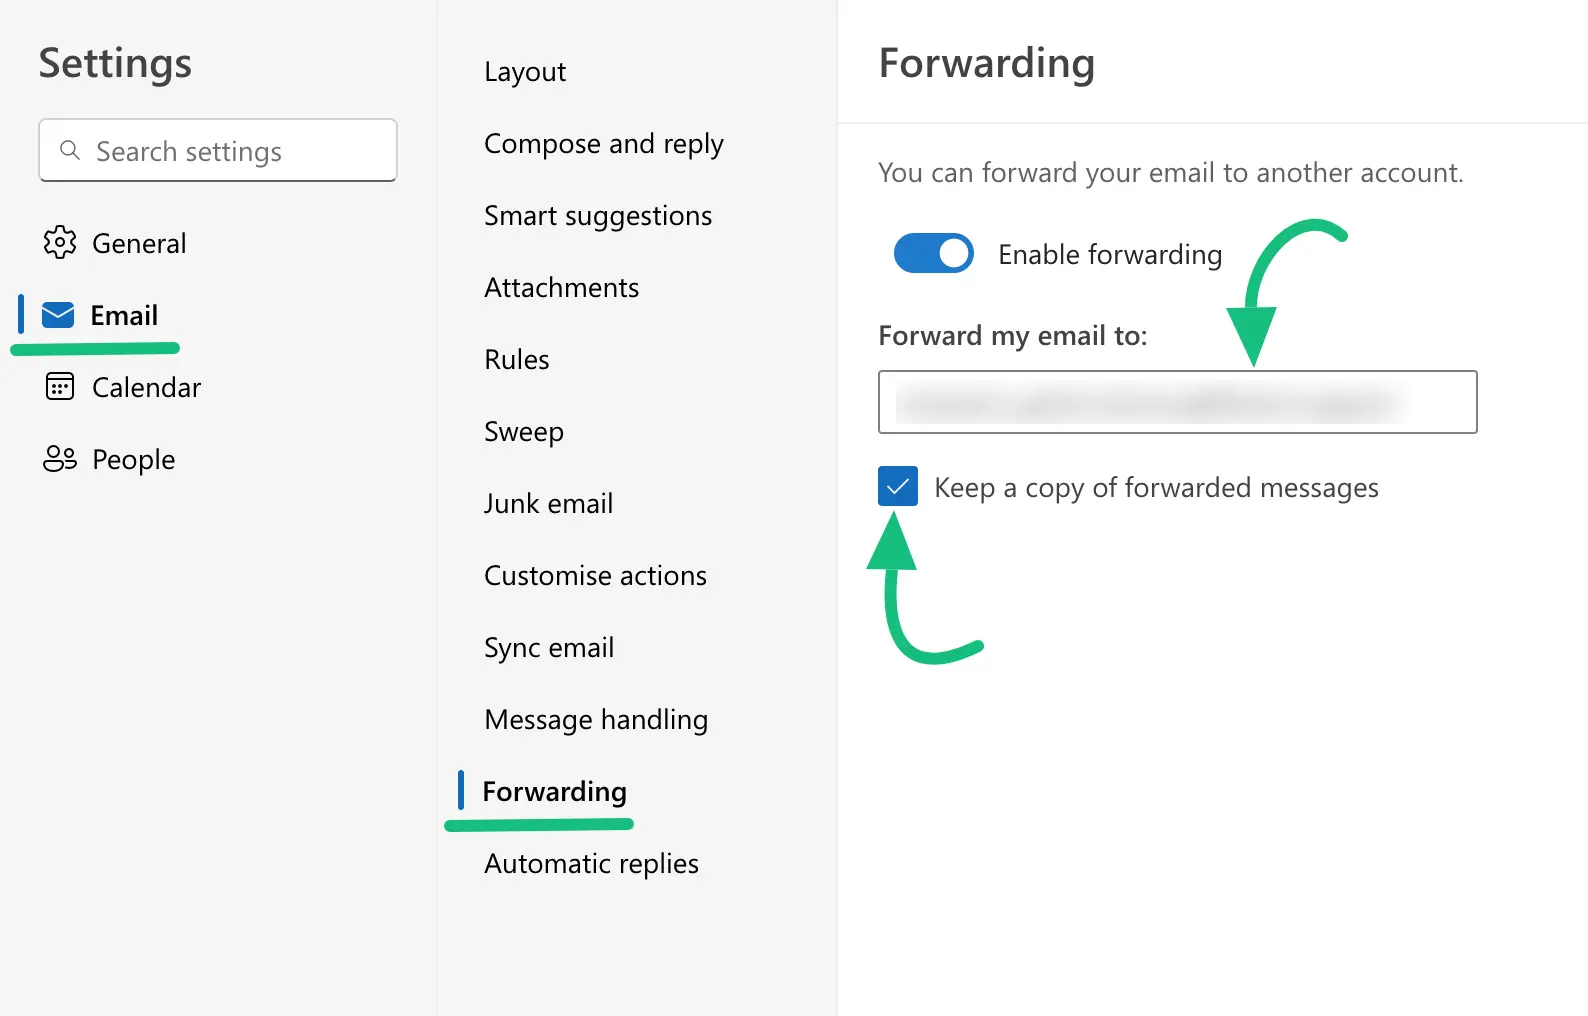
- Save changes.
If the forwarding doesn’t activate, you can also create a rule under Mailbox Settings → Email → Rules → Add new rule and set forwarding manually.
Yahoo Mail
- In Yahoo Mail, go to Settings → More Settings → Mailboxes.
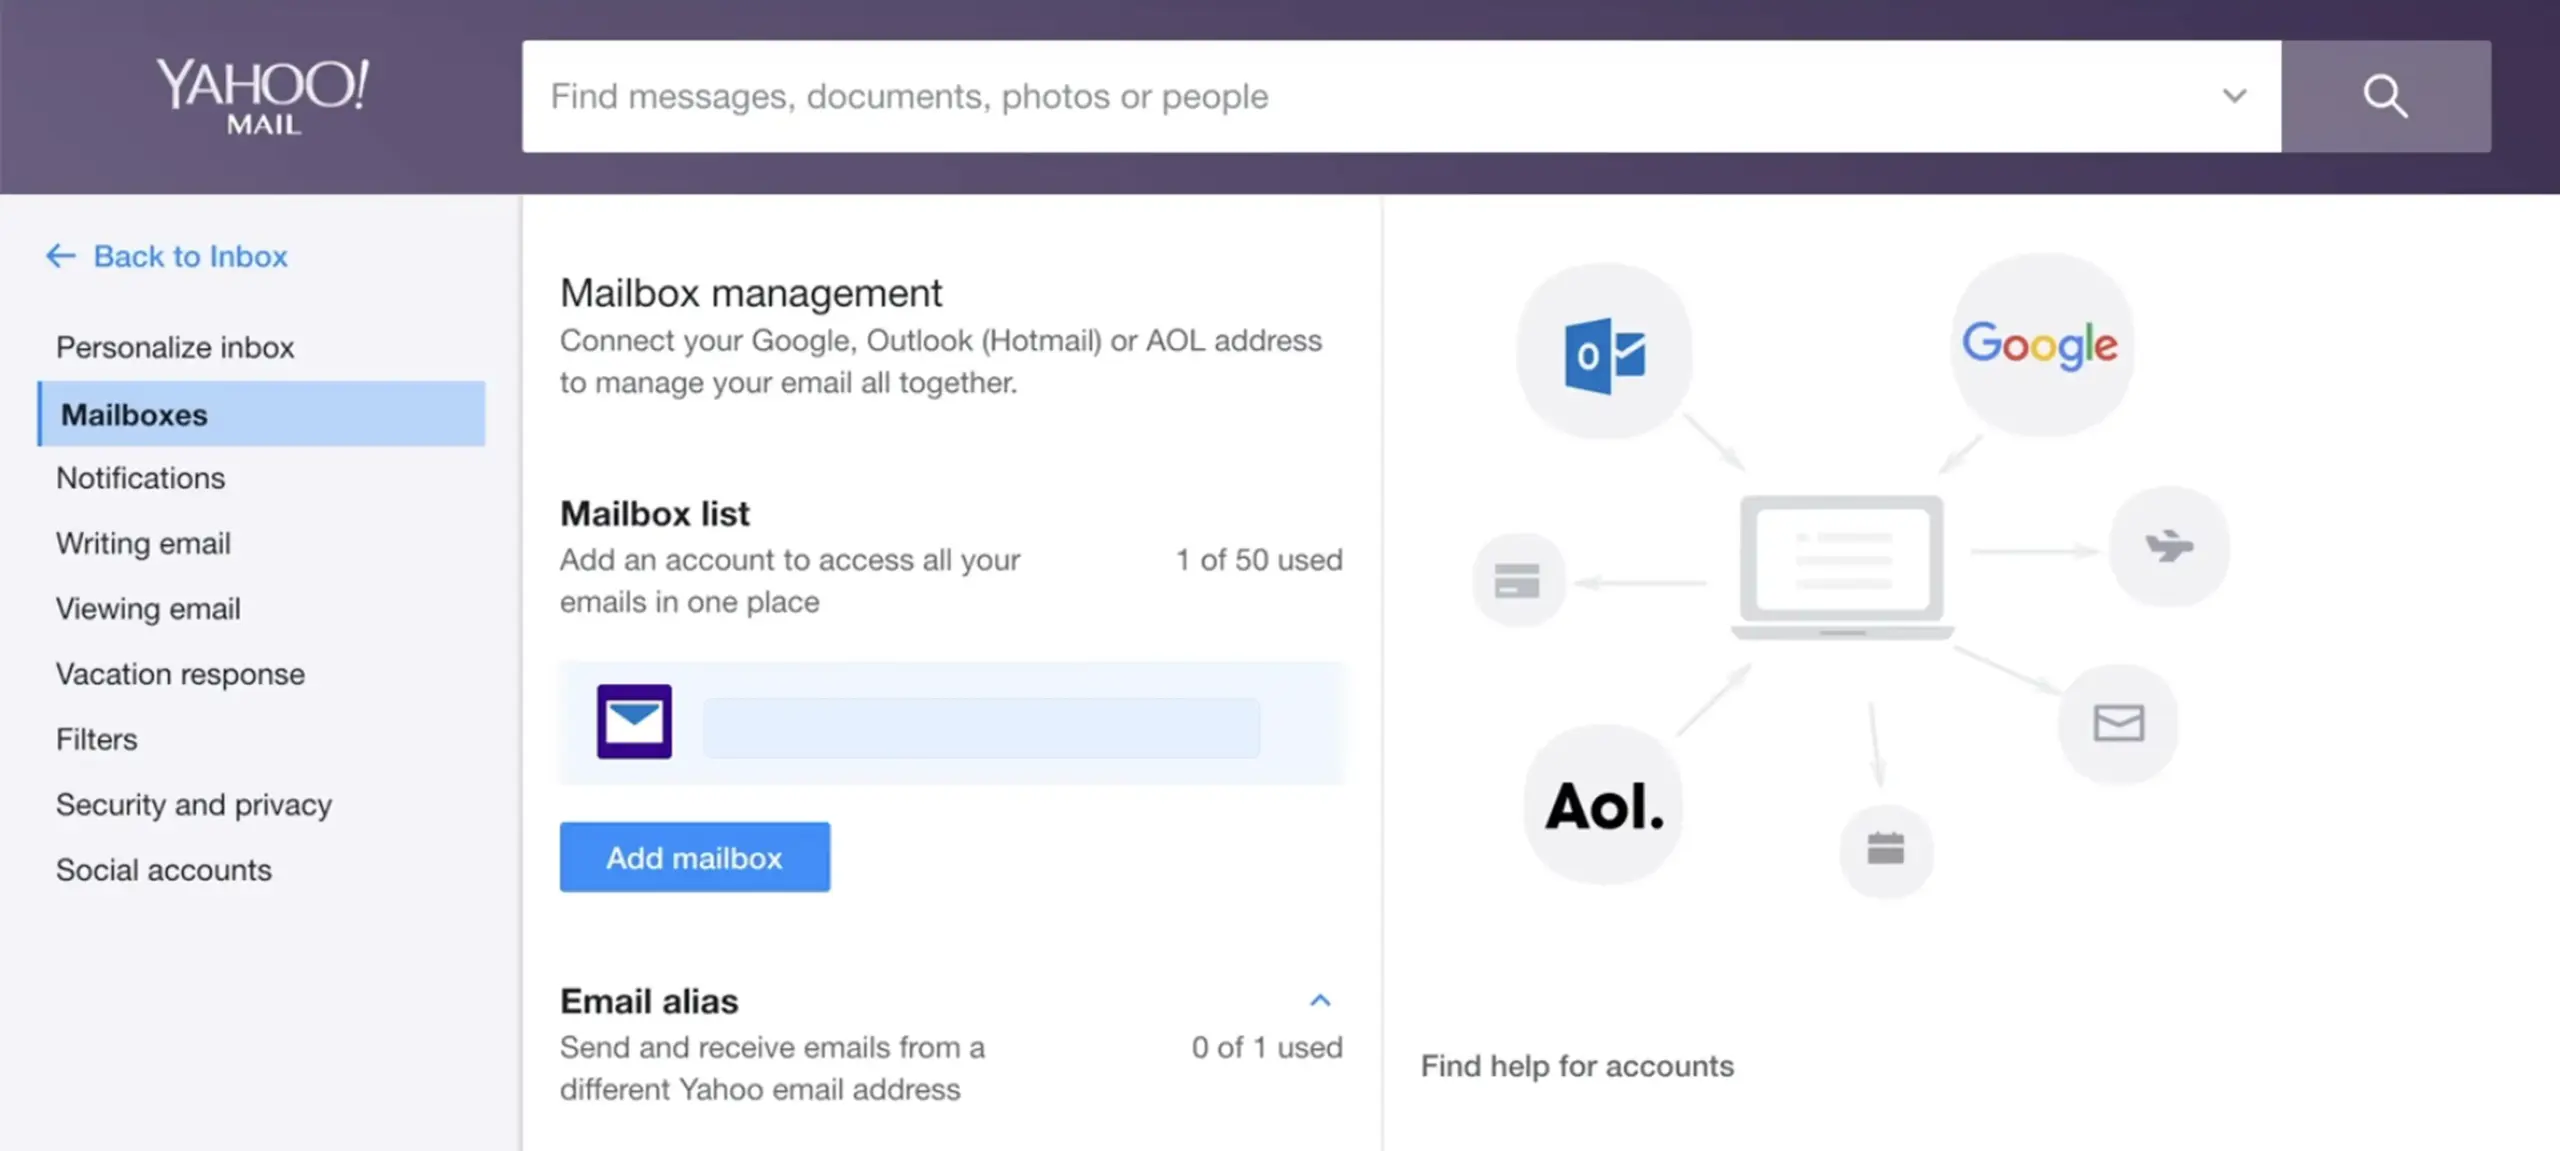
- Select your primary mailbox account.
- Under Forwarding, enter the Mailbox email address.
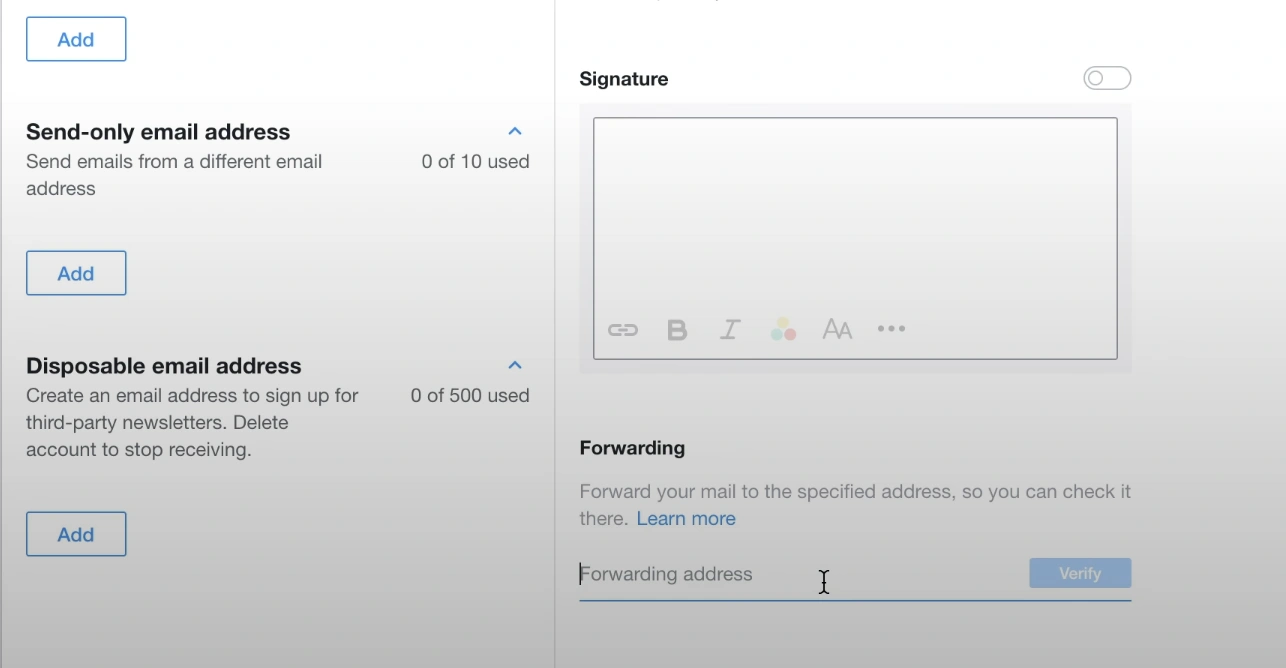
- The verification will be sent to your helpdesk dashboard. From there, click Verify.
Yahoo requires a Yahoo Mail Plus or Access + Forwarding subscription to enable auto-forwarding. Availability may vary by region.
Amazon WorkMail
- Log in to the Amazon WorkMail web application.
- Go to Settings → Email rules → New rule.
- Give the rule a name and mark it as active.
- Under conditions, select “When the message is received from” and specify the senders if needed.
- Under actions, set it to Forward to your Fluent Support Mailbox email address.
- Save the rule.
For more help, check Amazon WorkMail email rules.
Now, WorkMail will automatically forward incoming messages and create Fluent Support tickets.
Wrapping up
Fluent Support not only transforms customer emails into trackable tickets but also gives you a clear view and all the necessary tools to streamline your customer support process.
Once you set it up, you will be in full control, and your customer will enjoy a faster, personalized, and smoother support experience.
Start off with a powerful ticketing system that delivers smooth collaboration right out of the box.






Leave a Reply