What are Webhooks? A Simple Guide to Use Webhooks

By Prosanjit Dhar
September 9, 2025
Last Modified: September 9, 2025


Webhooks are one of the easiest ways to automate your workflow and keep your apps talking to each other.
In Fluent Support, webhooks enable you to create tickets from other apps or servers and send ticket or customer details to tools like Slack, Google Sheets, or your CRM in real-time.
In this guide, we’ll explain what webhooks are, how they work, share a simple example, and show you exactly how Fluent Support makes them useful for your support team.

What are webhooks?
Webhooks are an automated way to transfer messages or data between apps based on specific triggers or events. Think of it as automatic notifications between apps.
Instead of constantly checking, webhooks let apps push information to each other instantly.
And it has two main parts:
- Event trigger: Something happens (like a new order, a new ticket, or a status change).
- Webhook URL: The “address” where the data is sent.
No heavy coding. No manual export-import. Just apps sending each other short, structured messages whenever something new happens.
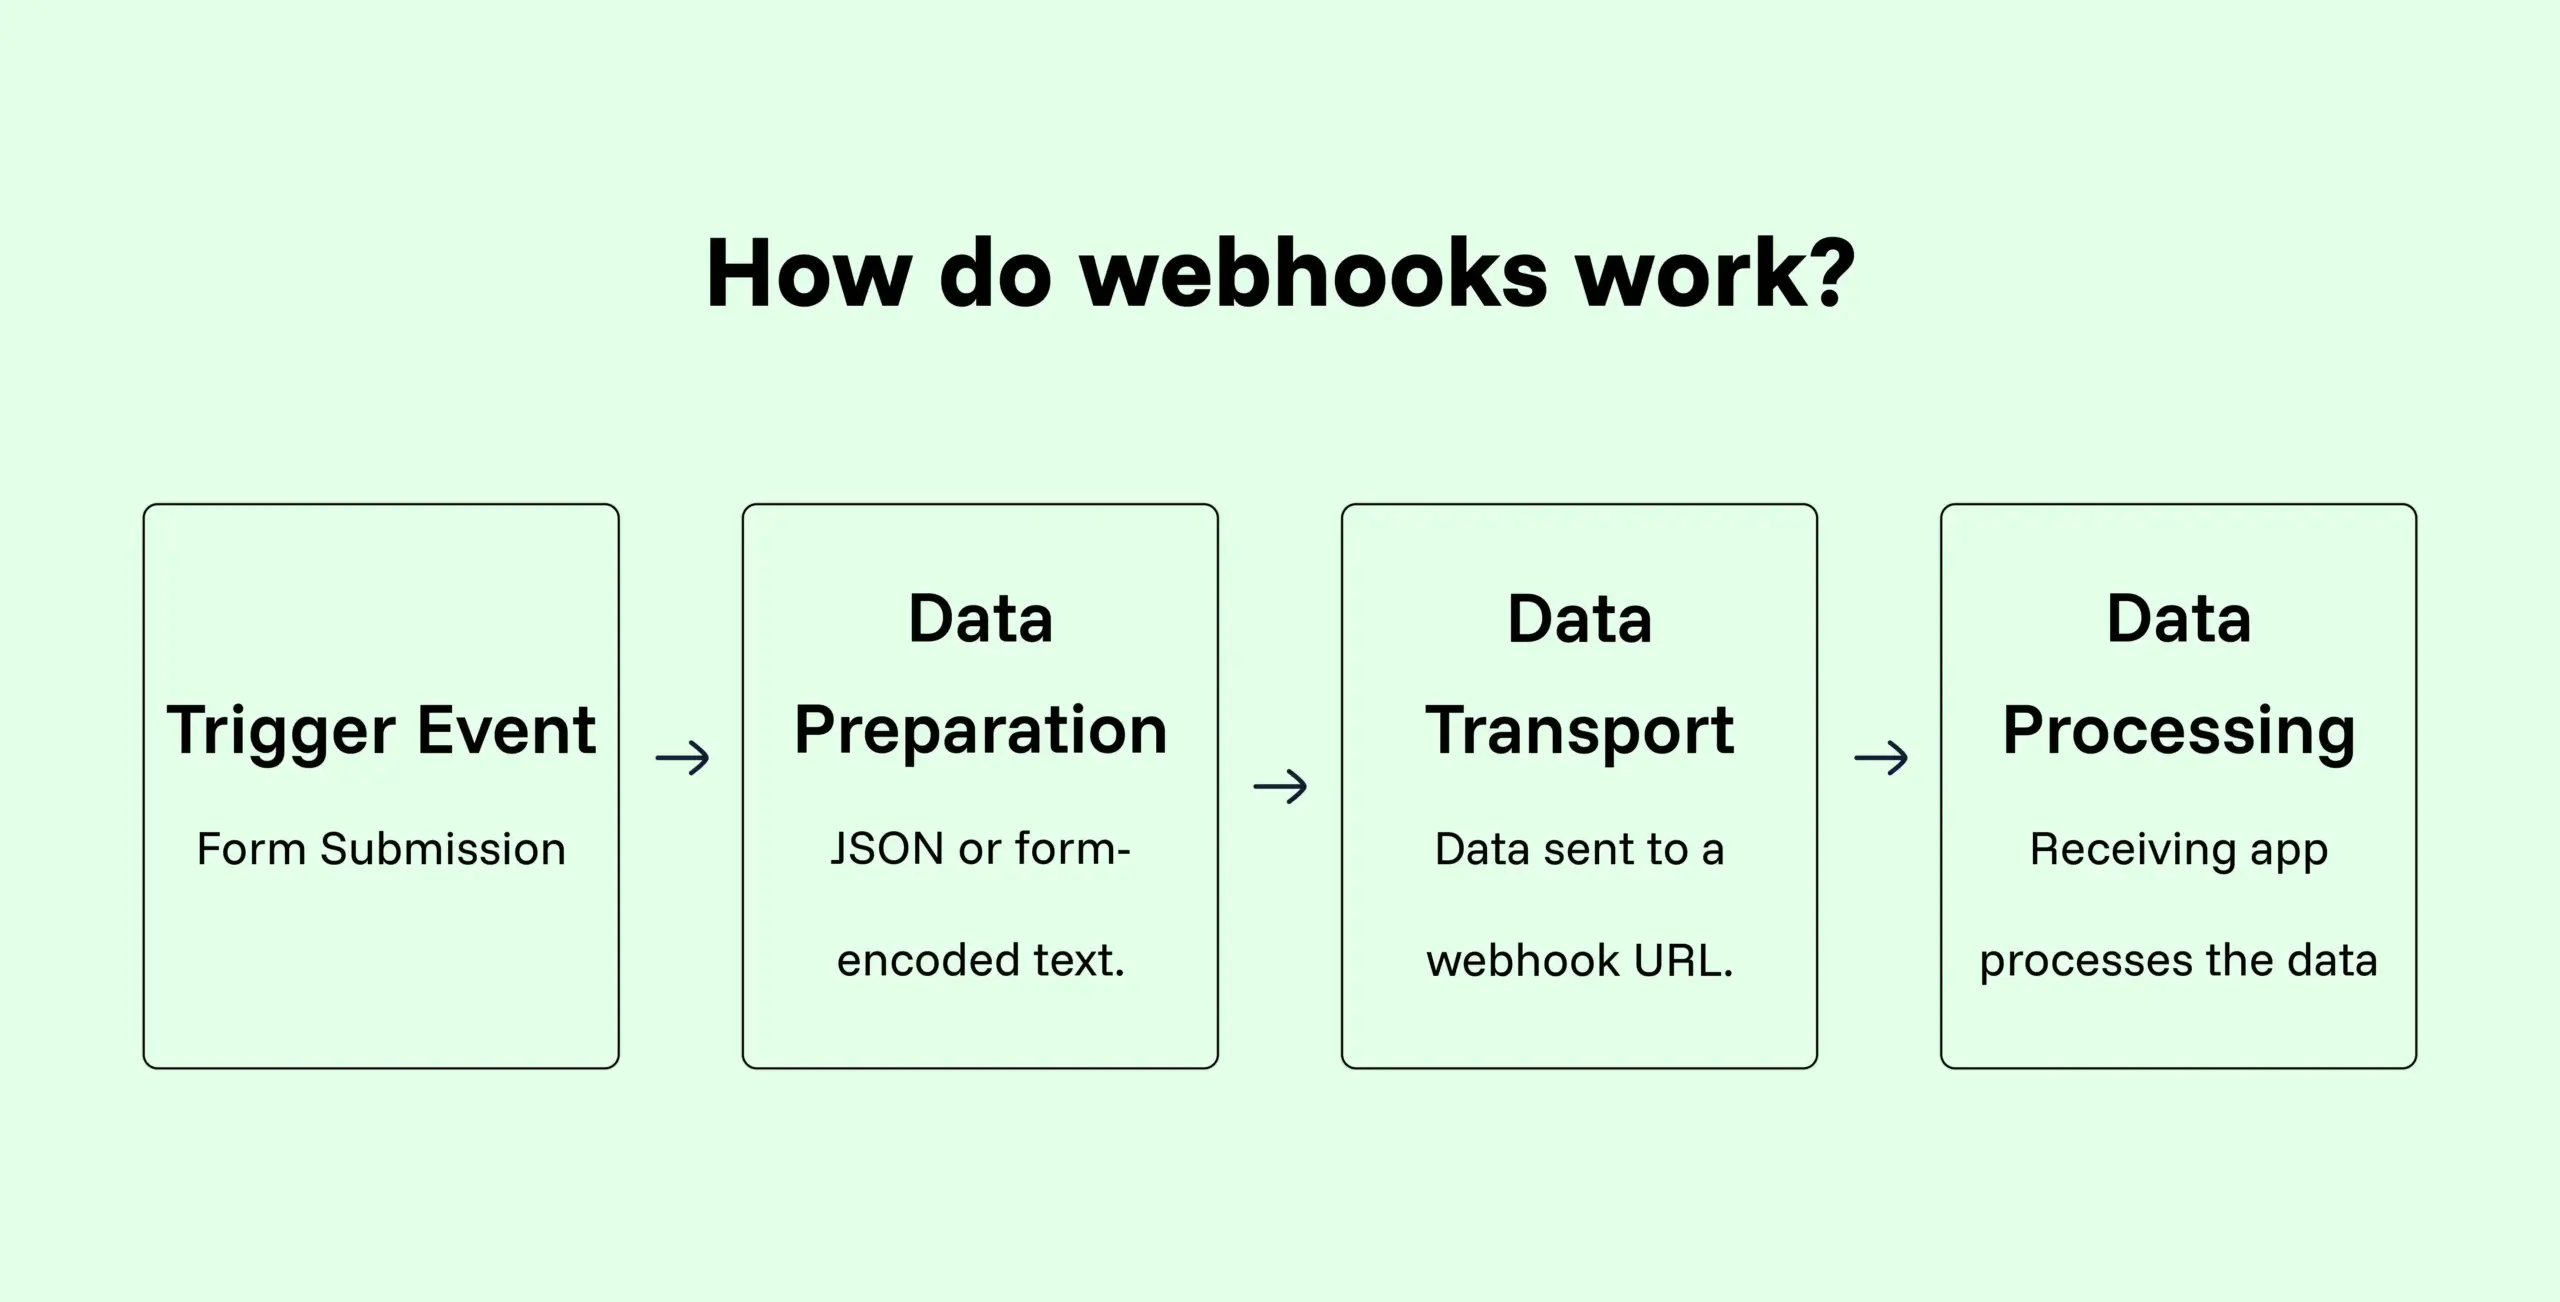
How do webhooks work?
So, a webhook is basically a chain reaction. It starts with a trigger event and ends with the data being processed by the receiving app.
Just like this simple transition shown below.
It’s like setting up call forwarding for your apps. Instead of letting the phone ring endlessly, you just tell the system: “When this happens, send the call here.”
Webhooks example
Now, let’s bring this procedure to a real scenario. Suppose you fill out a pre-sales form on your website.
Name: Tom
Subject: Pricing
Message: Can you do bulk licenses?
You didn’t have to hunt down a support email. Your team didn’t have to copy-paste his form submission. The webhook just handled it.
How to use webhooks in Fluent Support
Fluent Support gives you two clear ways to use webhooks:
Incoming webhook
Bring data into Fluent Support from another app or server and create tickets in Fluent Support.
- Go to Fluent Support Dashboard → Global Settings.
- Click Incoming Webhook.
- Fluent Support will generate a unique webhook URL.
- Copy that URL and paste it into the sending app’s webhook settings (e.g., Fluent Forms, or even a custom server).
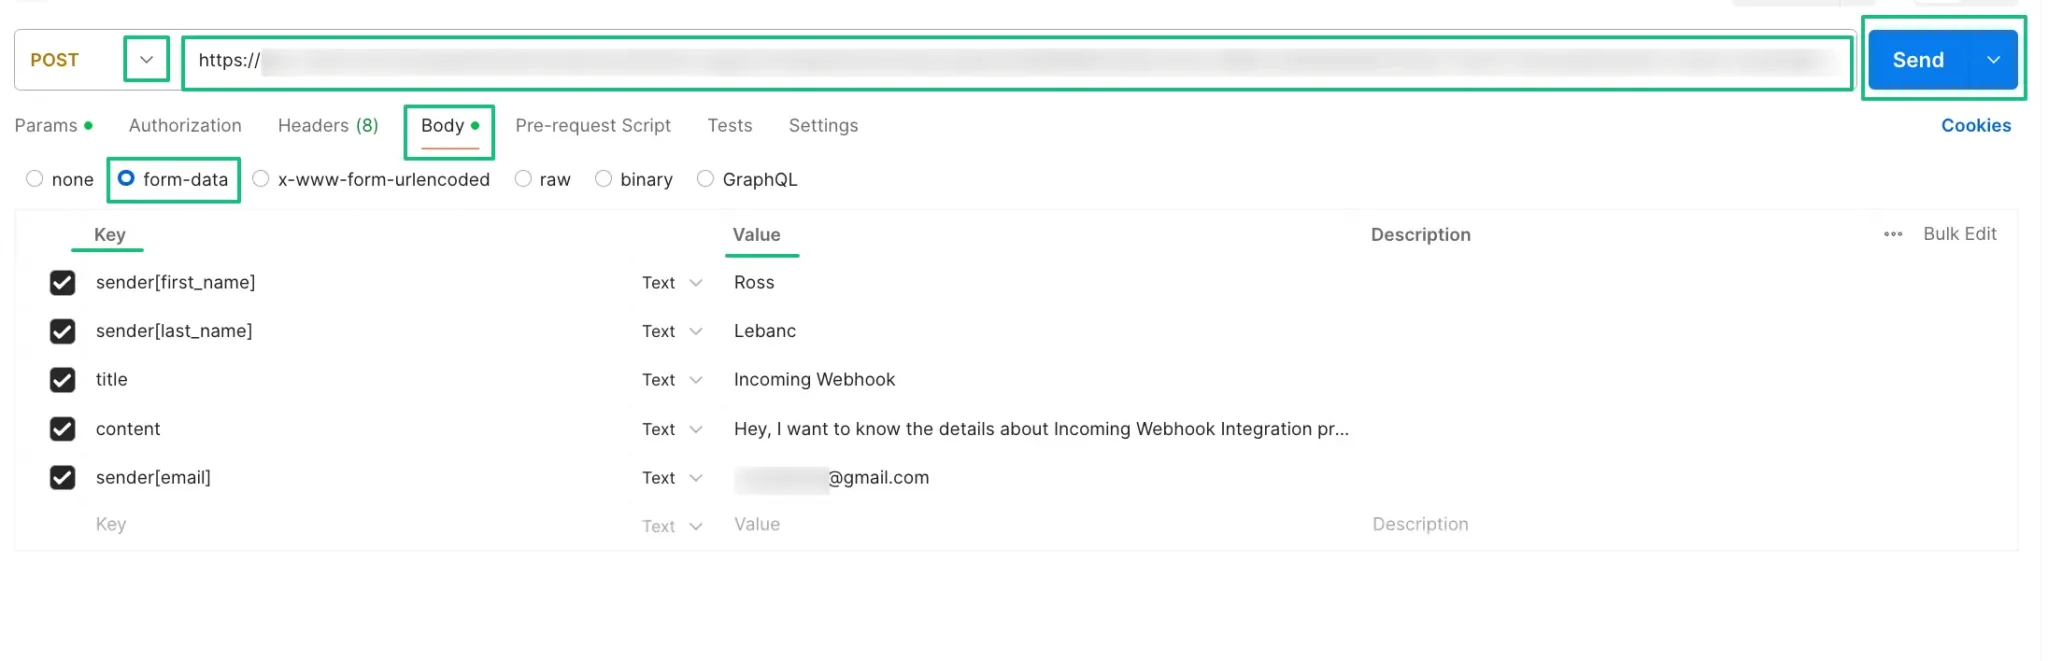
- Map the data fields (Name, Email, Subject, Message, etc.) to match Fluent Support’s ticket fields.
- Save → Now whenever data is sent to that URL, Fluent Support will automatically create a new ticket.
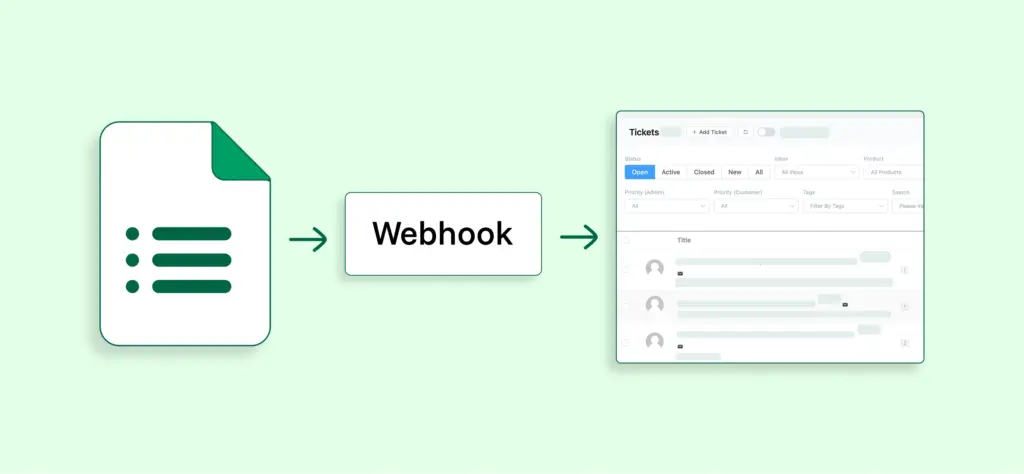
Create support tickets in Fluent Support from any app or server.
Outgoing webhook
Push ticket, agent, or customer data out of Fluent Support into other apps.
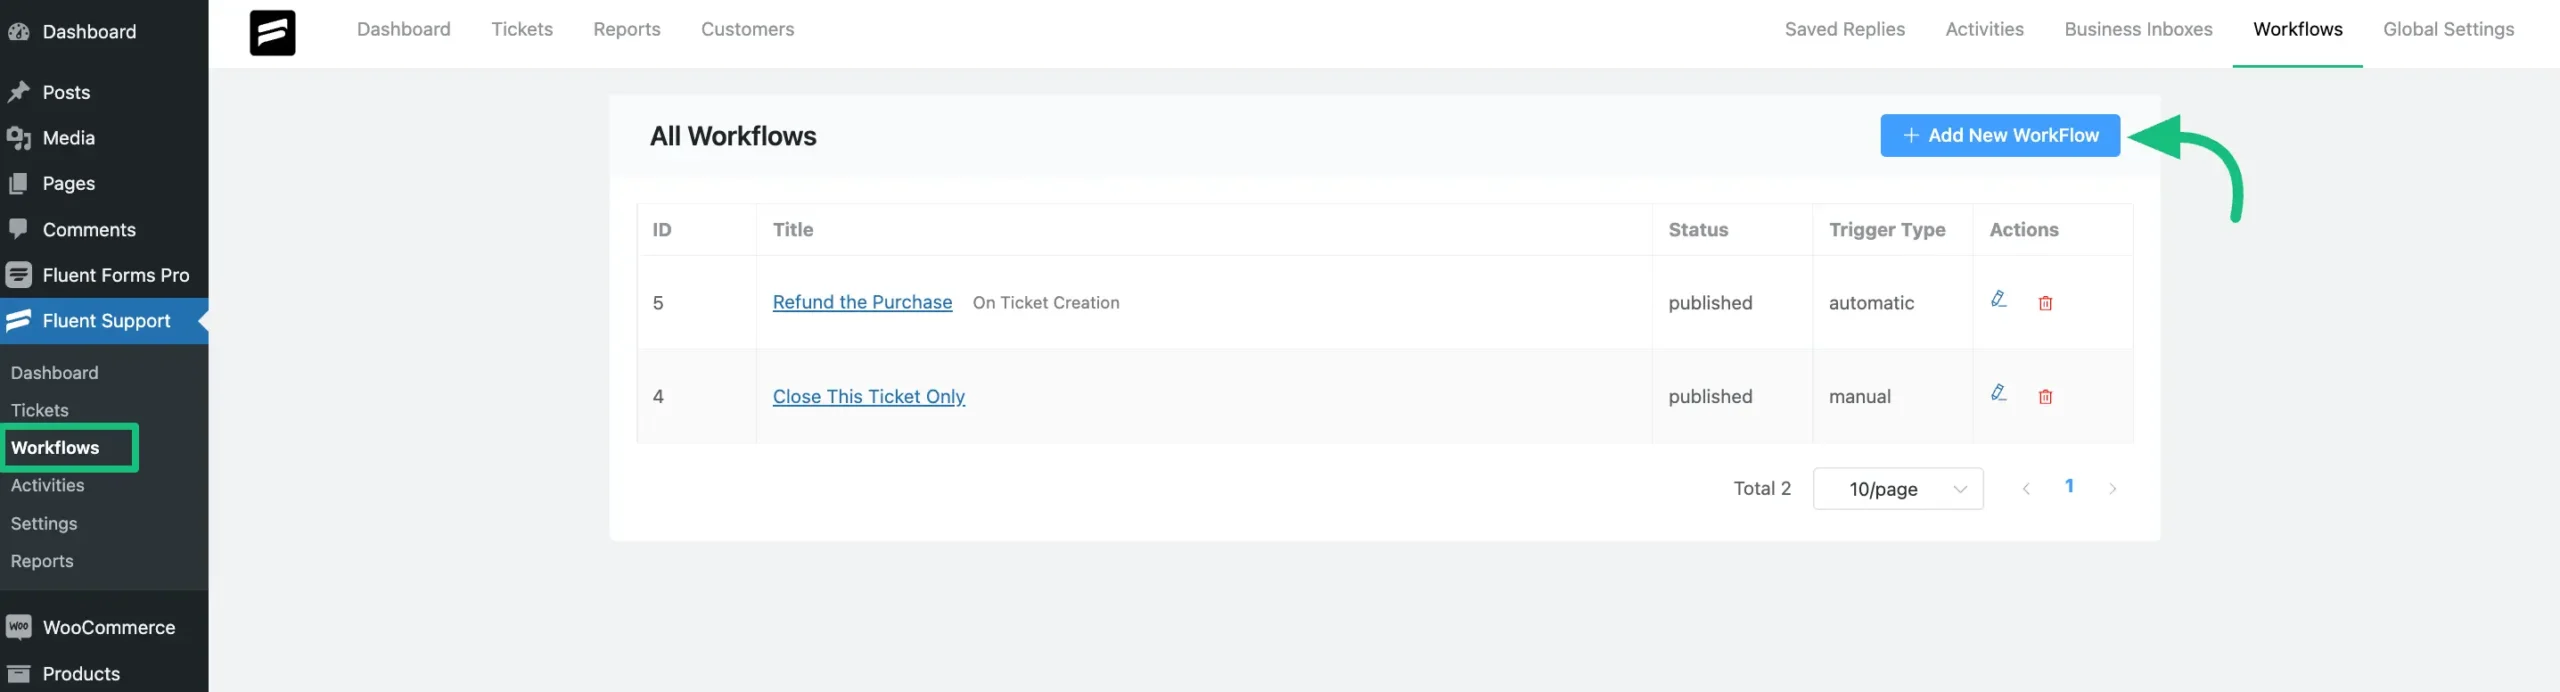
- From your Fluent Support Dashboard, go to Workflows and click Add New Workflow.
- Choose your Workflow Type:
- Automatic runs whenever the trigger occurs, e.g., new ticket created.
- Manual runs only when you manually trigger it.
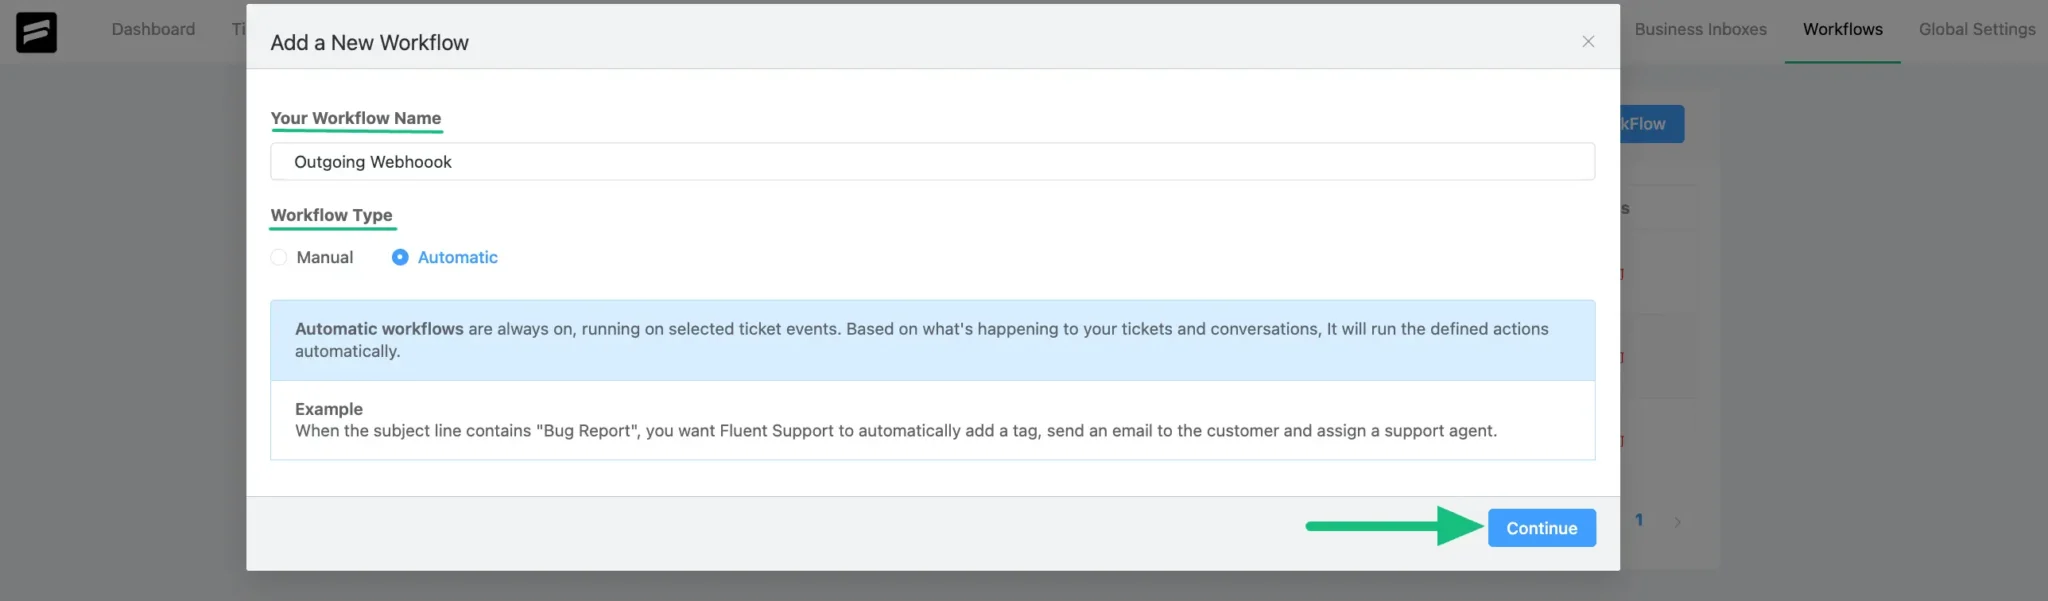
- Give your workflow a Name and type, and then click Continue.
- Select a Trigger you want, like “On Ticket Creation,” “On Ticket Closed,” etc.
- Add your Conditions (e.g., only trigger if ticket status = open, or if customer email contains @gmail.com).
- For the action, choose “Trigger Outgoing Webhook.”

- Fill in the required fields:
- Webhook URL → the receiving app’s URL.
- Content Type → choose Form (to map form-style fields) or JSON (structured data).
- Include Data → select the ticket, customer, or agent details you want to send.
- Action Title → name the action so you can identify it later.
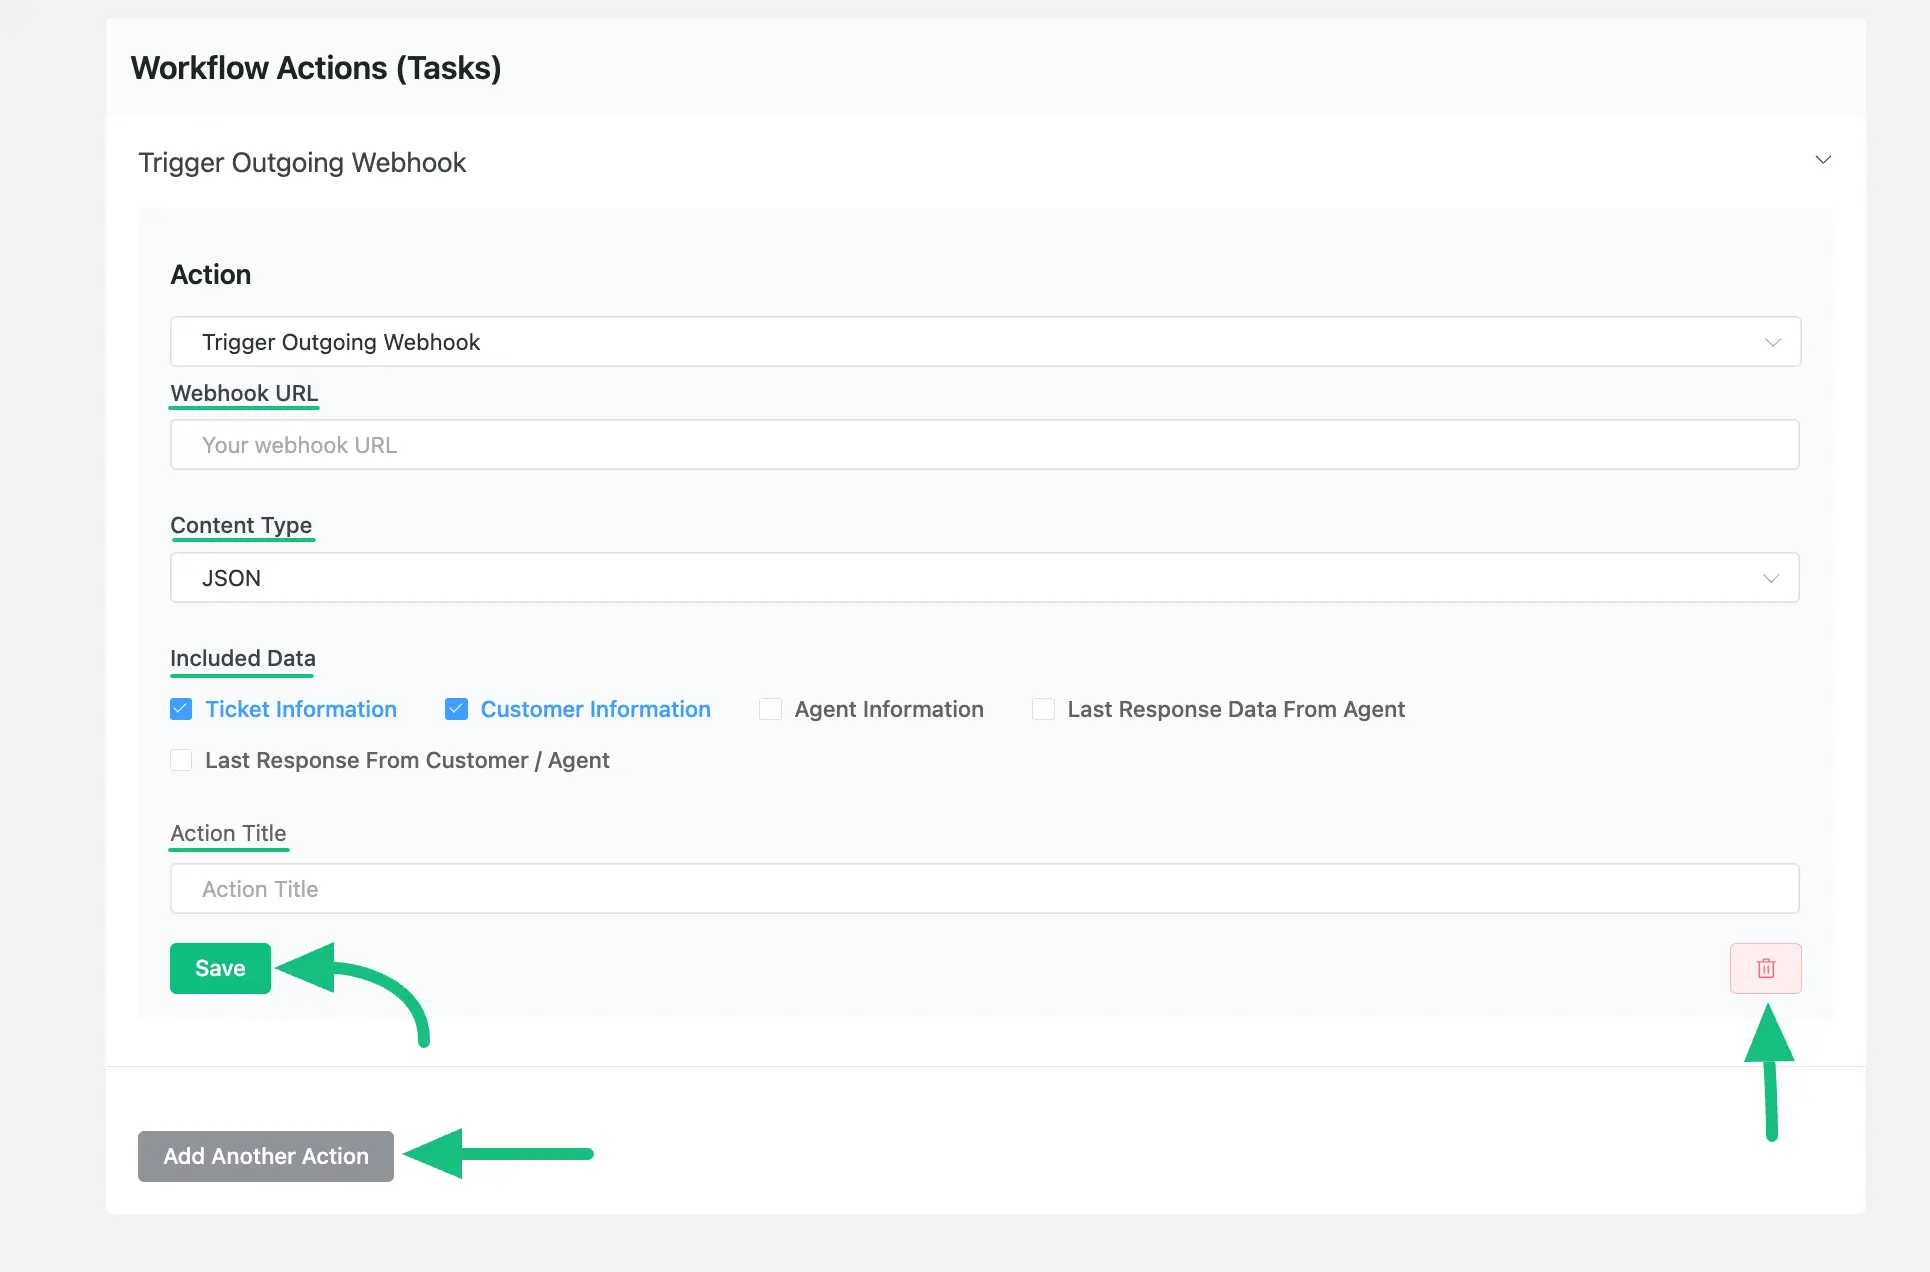
- Lastly, publish the workflow to enable the outgoing webhook process.
Send tickets and other data from Fluent Support to any apps.
Wrapping up
Webhooks aren’t complicated. They’re just automated messages that let your tools “talk” to each other without manual effort.
Inside Fluent Support, they’re even easier. So, you can handle fewer hurdles, faster responses, and a support workflow that runs itself.
Start off with a powerful ticketing system that delivers smooth collaboration right out of the box.
Related Articles
Consumer Behavior: Types, Factors, and the Buying Decision Process
Consumer behavior is how and why people choose,…Klarna News: AI Just Got Demoted, Here’s What We Learned
In 2024, Klarna’s CEO told the world his…


Leave a Reply