Zendesk is a SaaS platform for complete customer service solutions. Zendesk users can easily transfer their tickets to Fluent Support through an API. This article will guide you through the process.
Import Tickets From Zendesk Into Fluent Support #
To learn how to import tickets from Zendesk into Fluent Support, follow the steps with screenshots below —
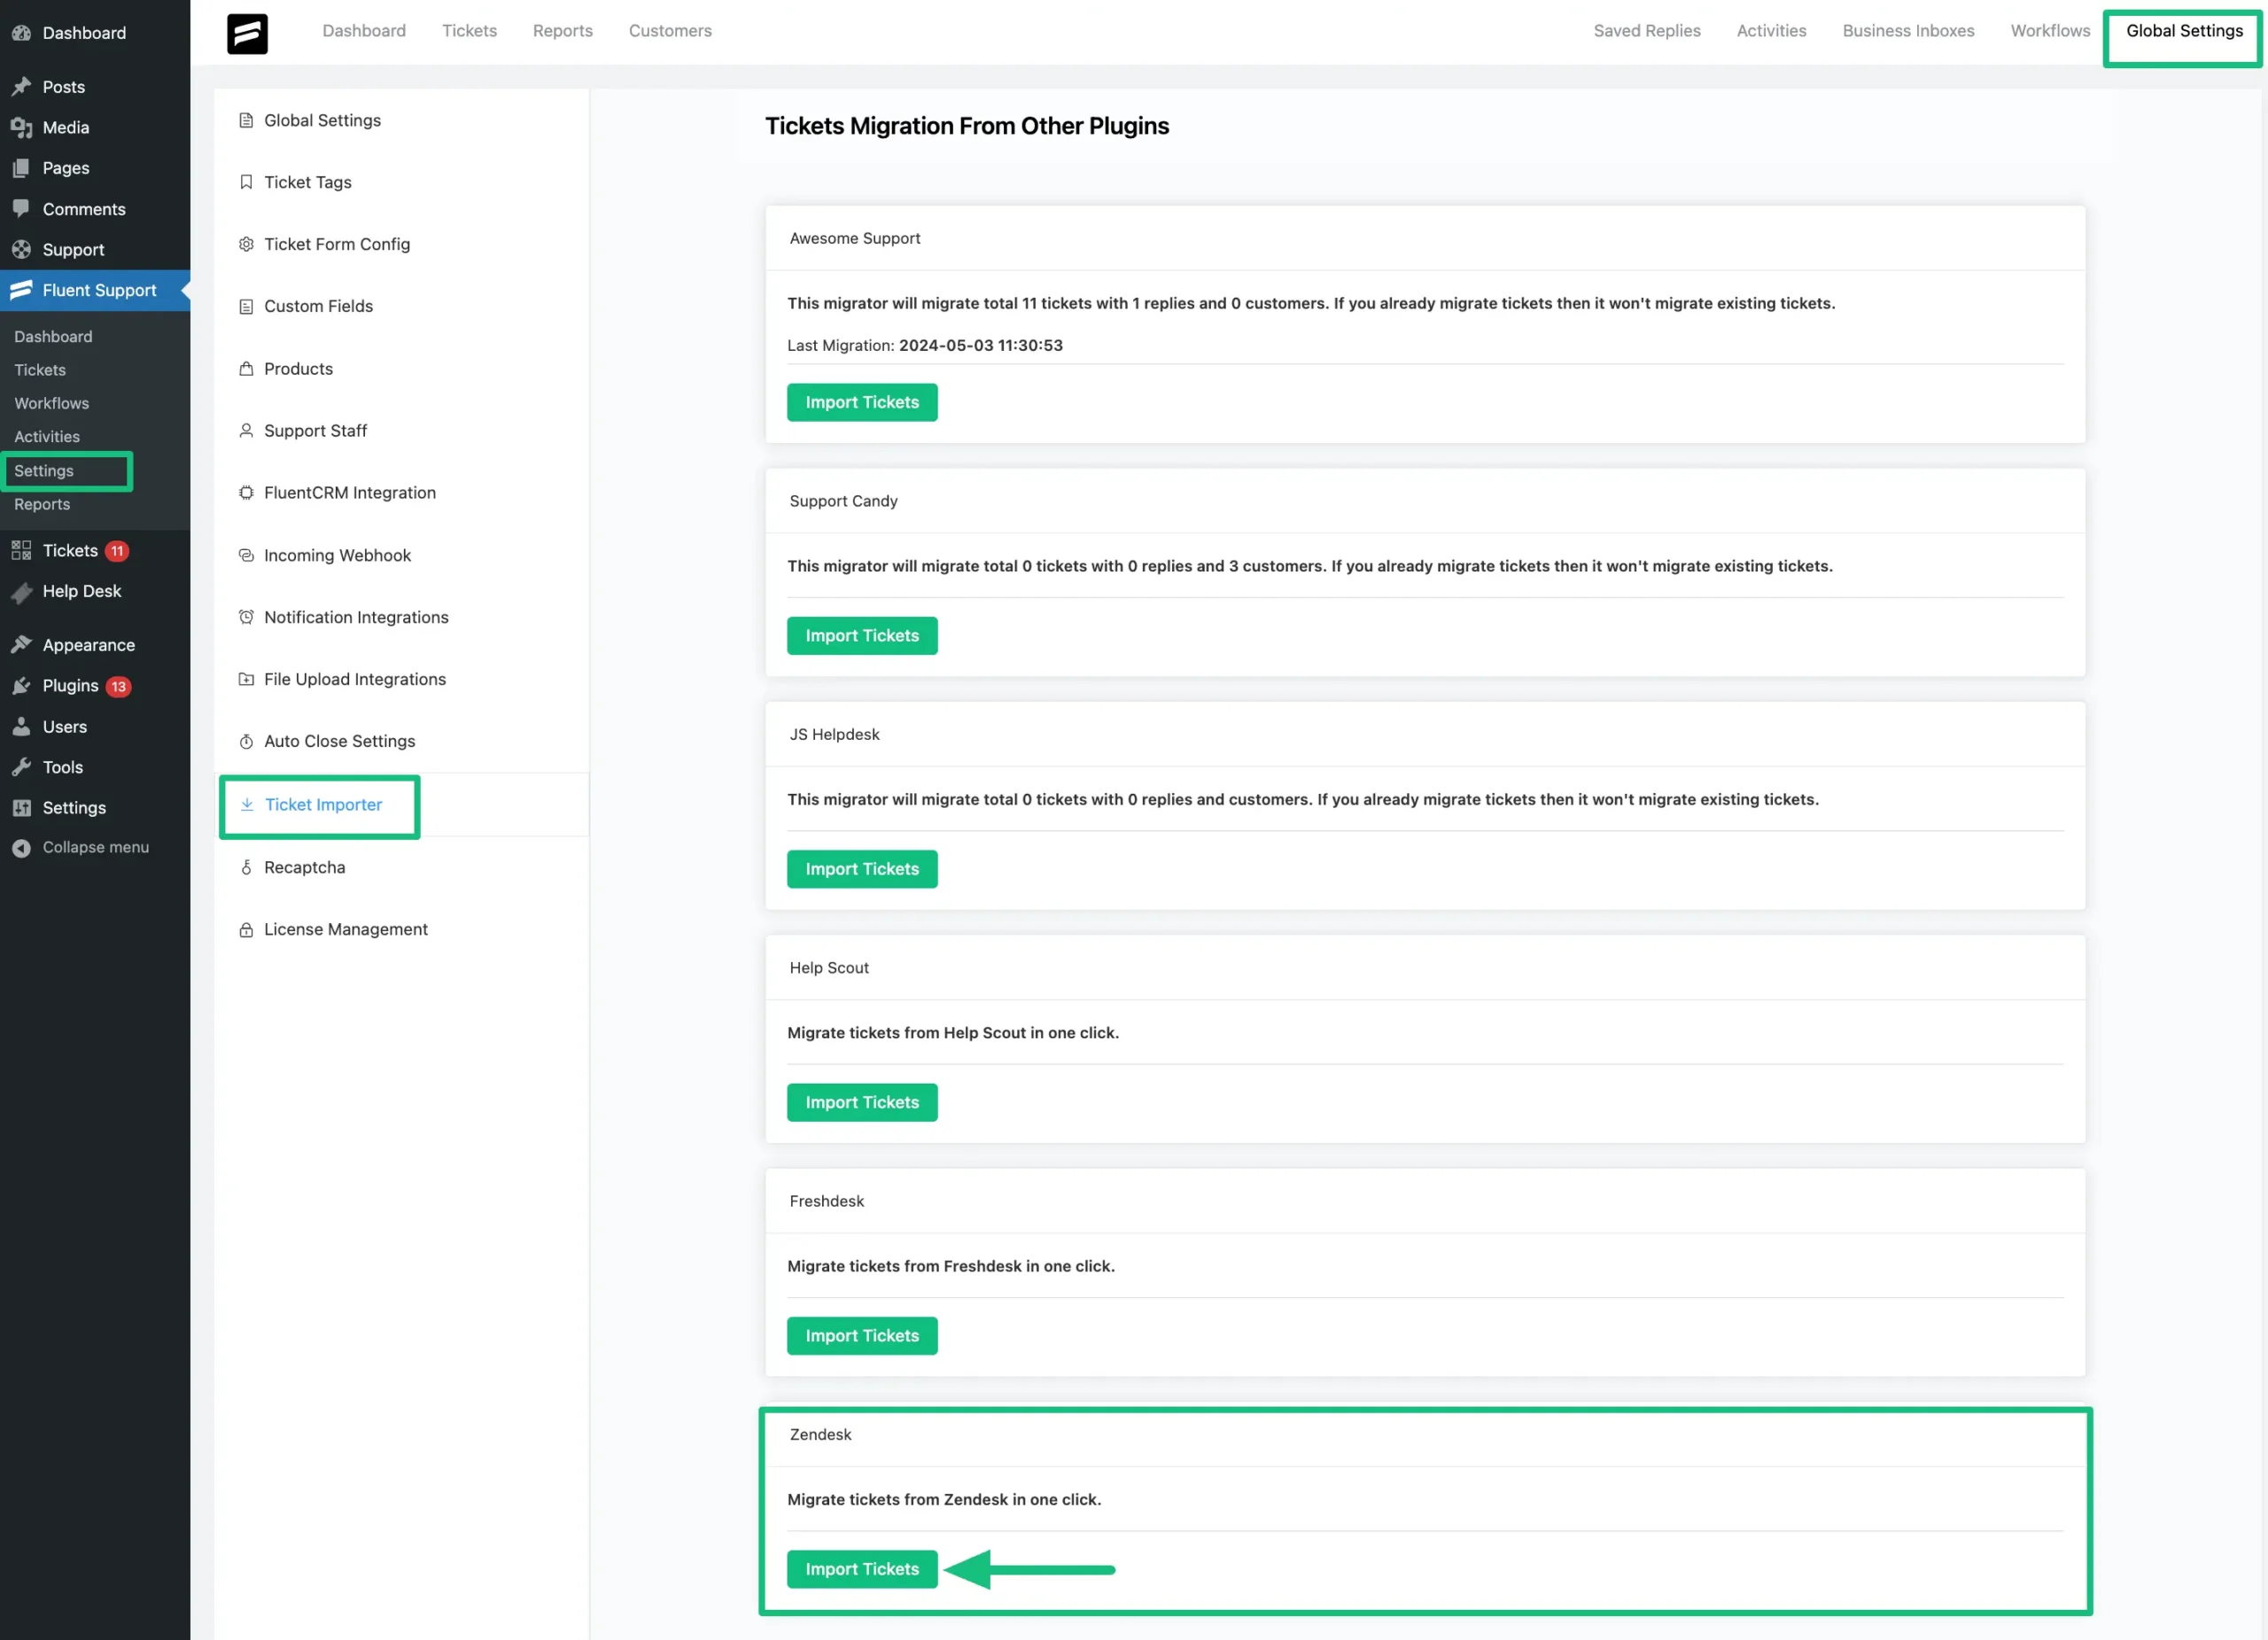
From the Fluent Support Dashboard, go to Settings or Global Settings, select the Ticket Importer, find Zendesk for ticket migration, and click Import Tickets.
A popup page will appear asking for your Zendesk Domain, Email Address, and API Key.

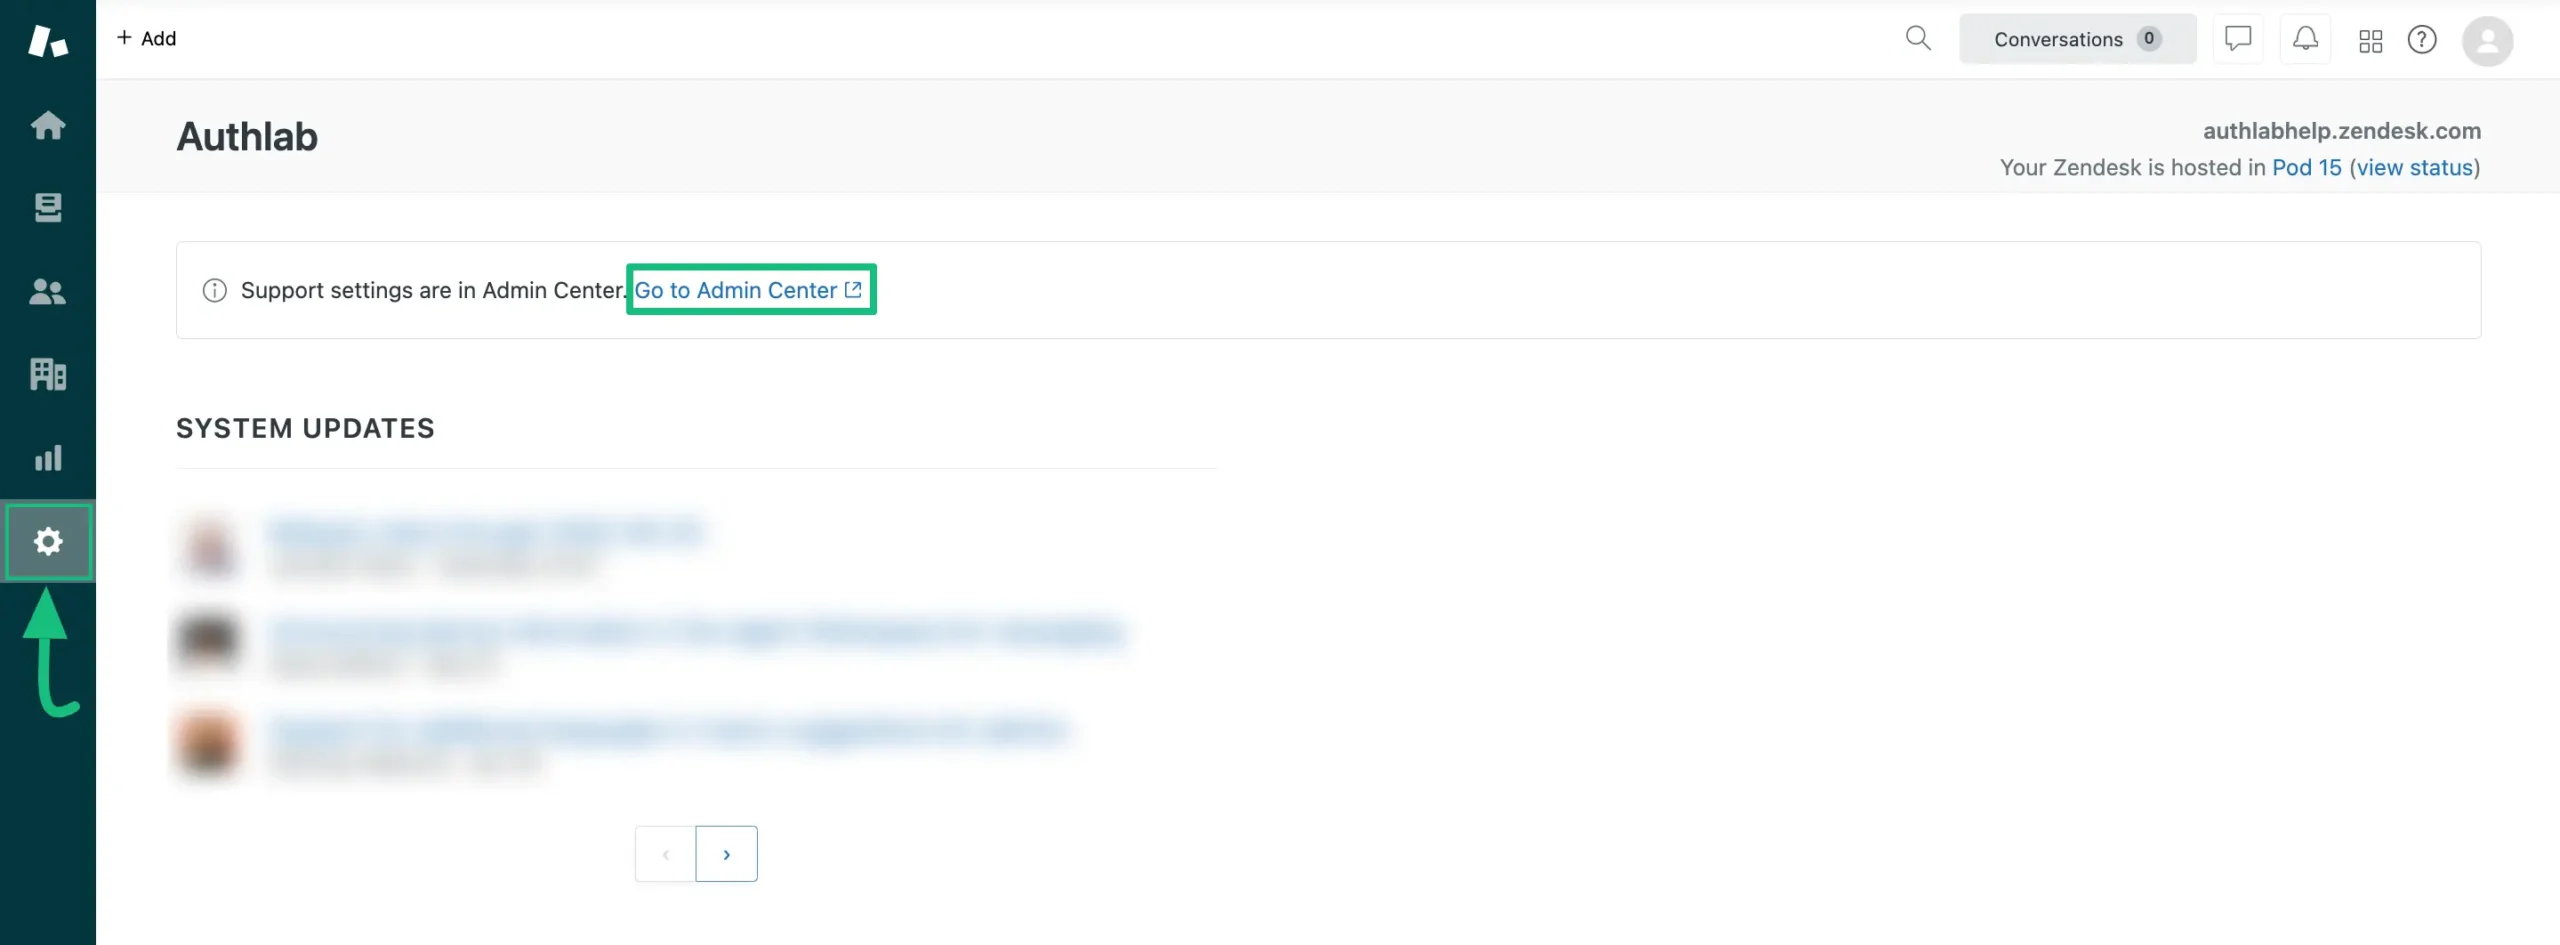
To get the Zendesk Domain and API Key, go to your Zendesk account. Press the Settings Icon from the left sidebar and click the Go to Admin Center.
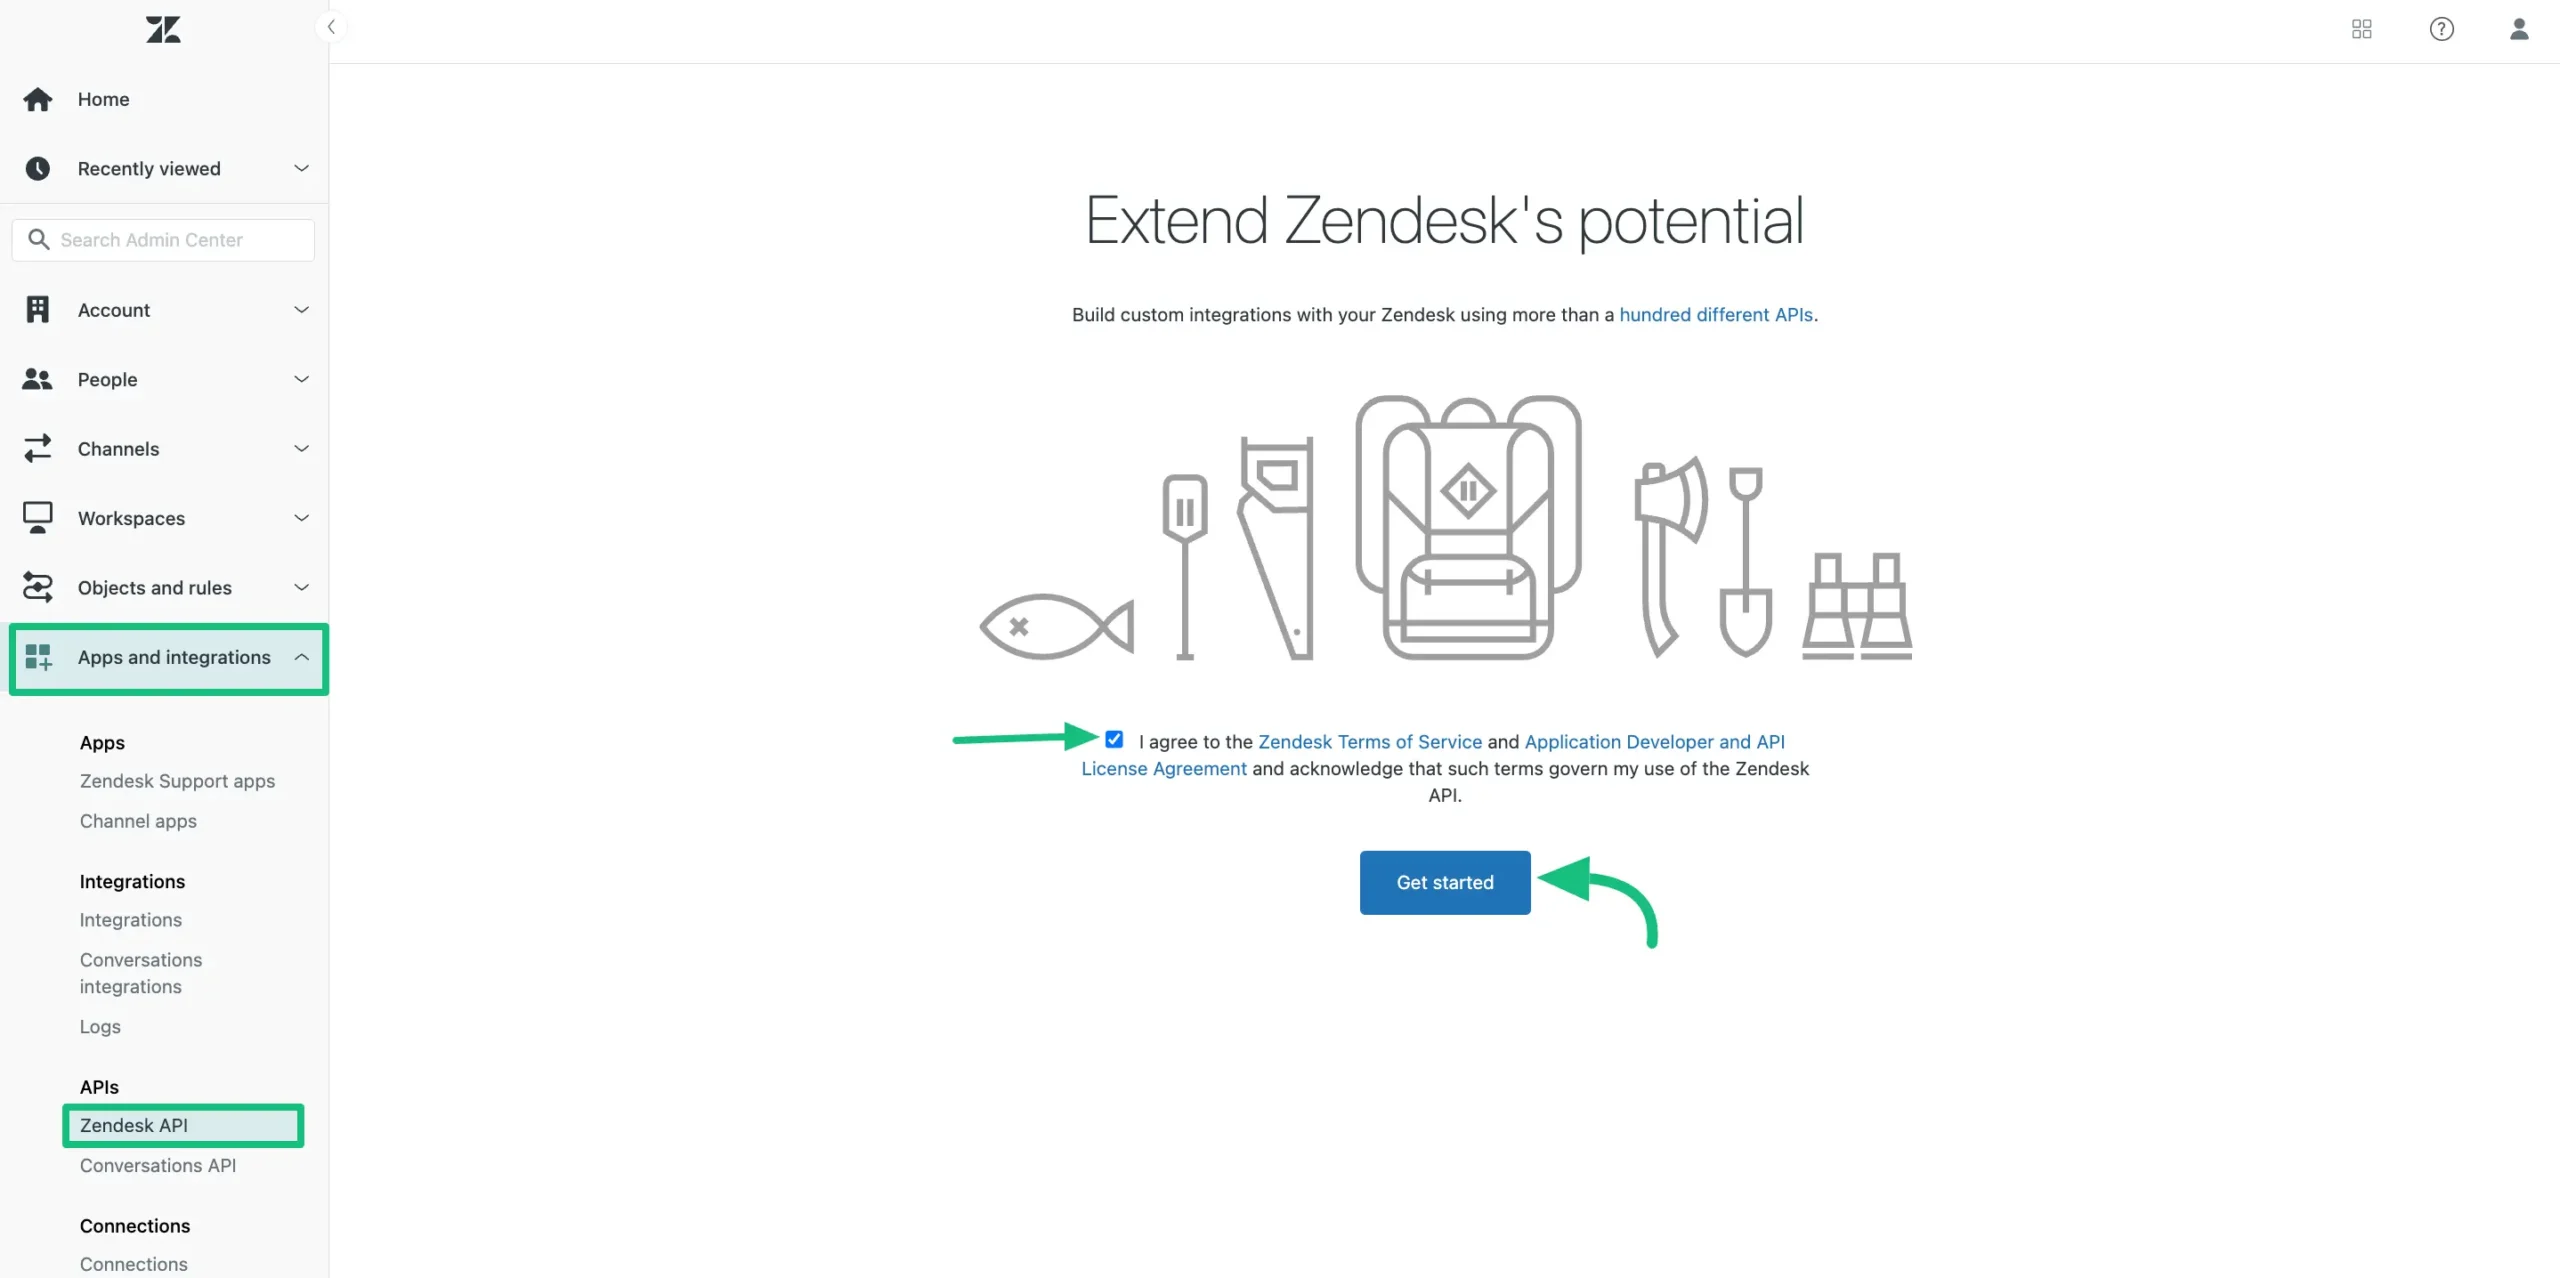
From the Apps and Integration in the left sidebar, select the Zendesk API, agree with the Zendesk Terms & Conditions, and click the Get Started button to begin.
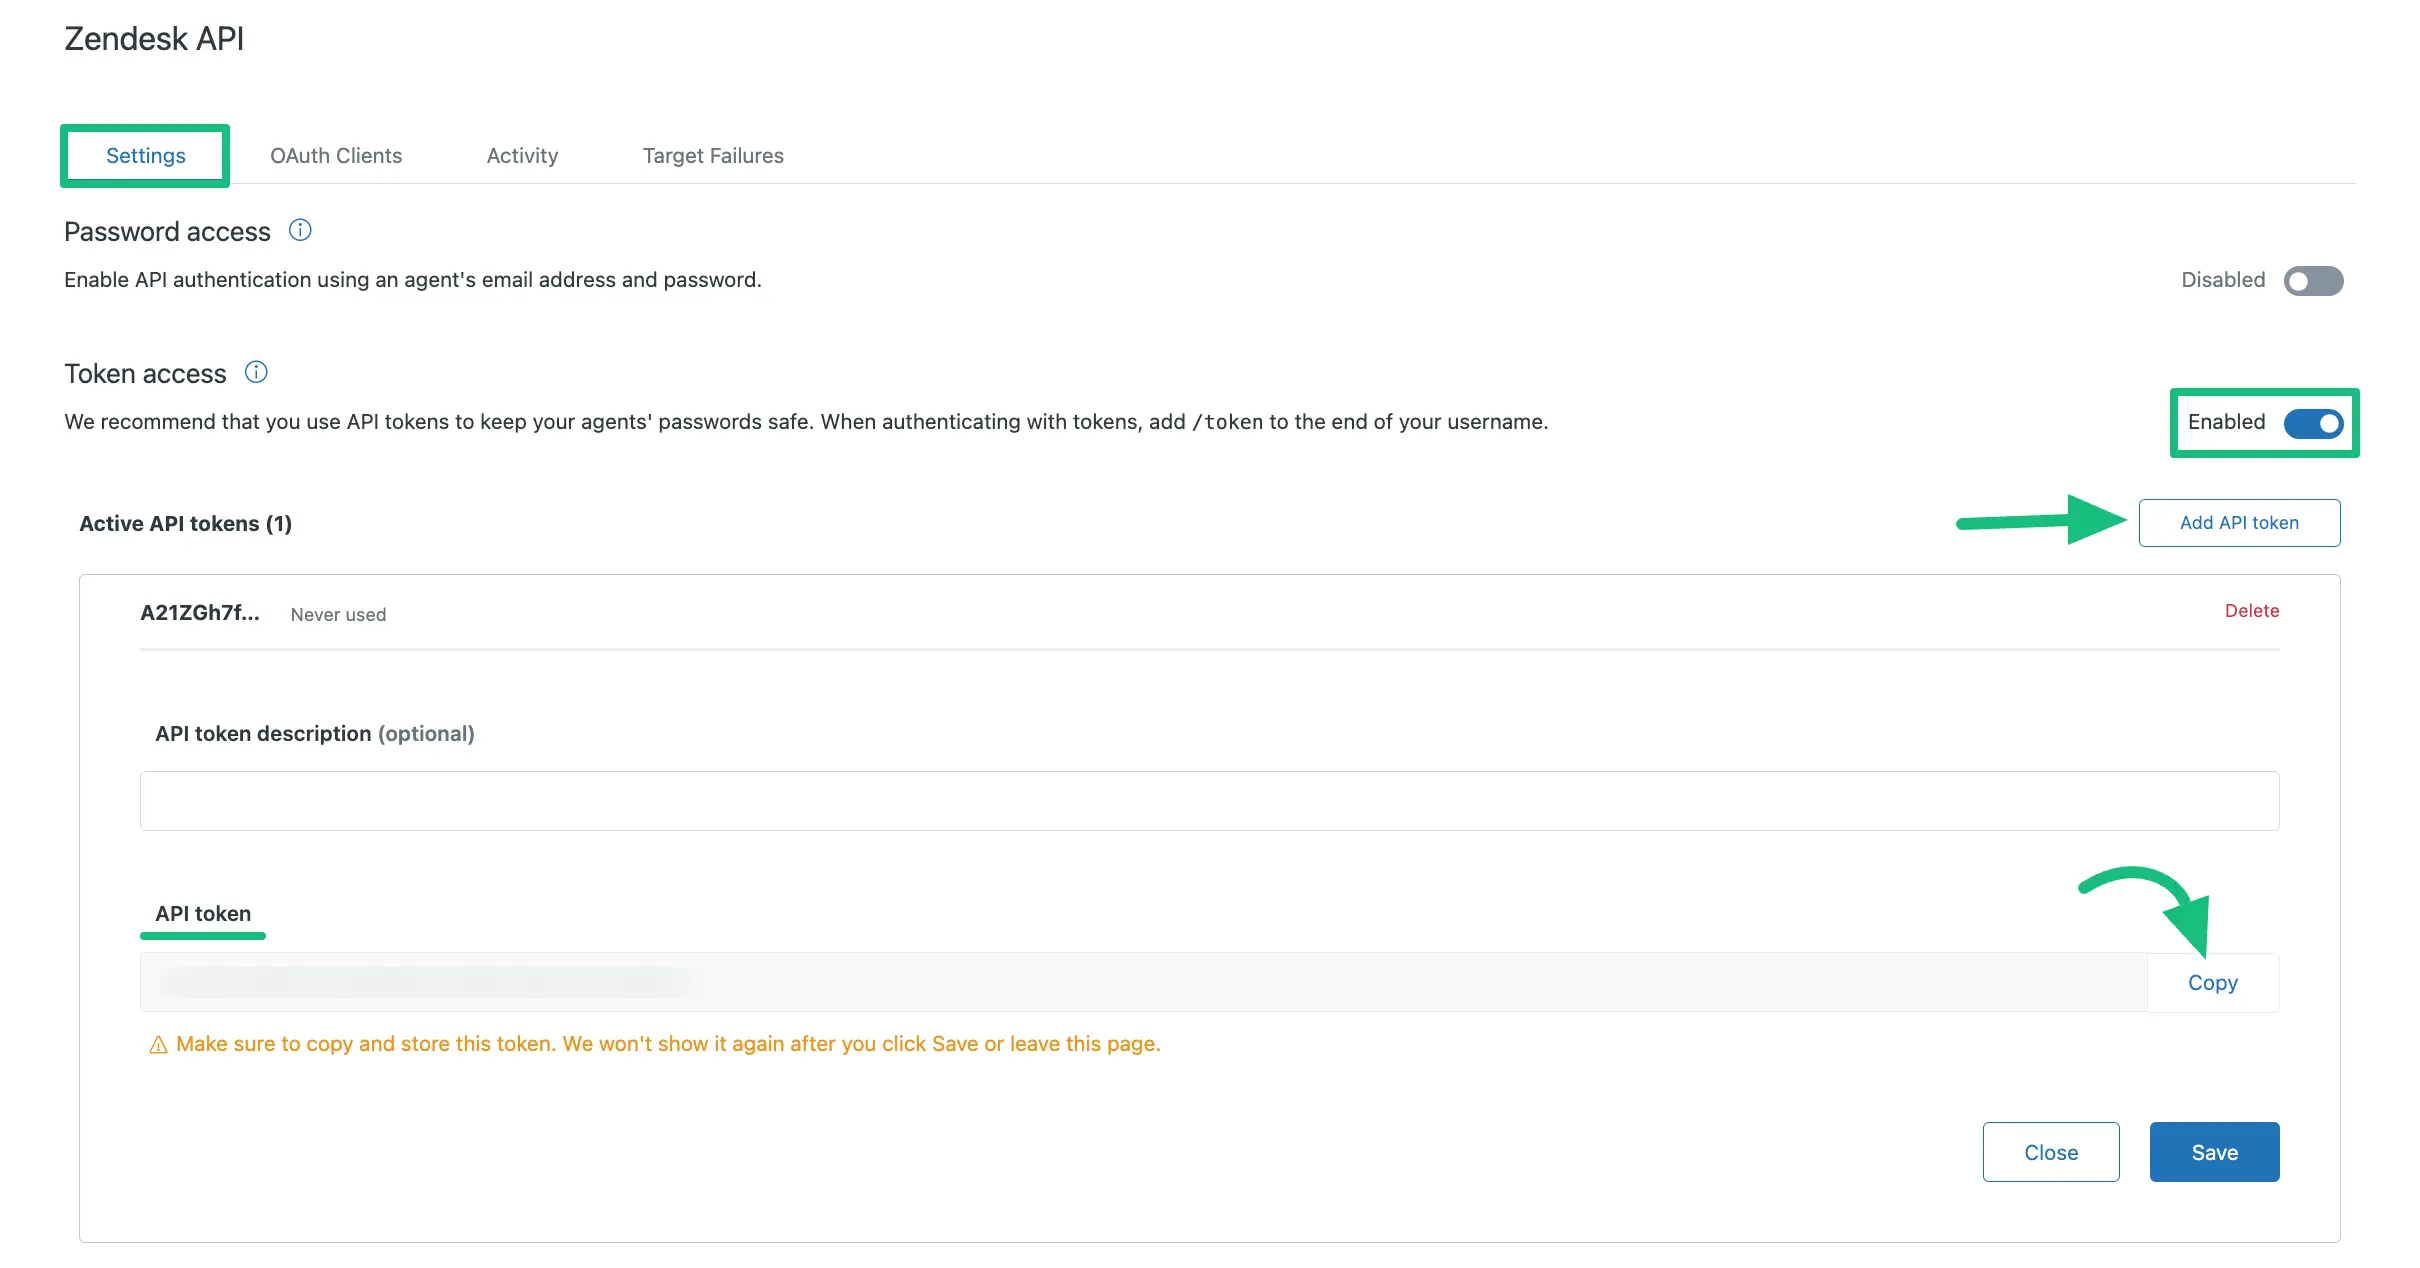
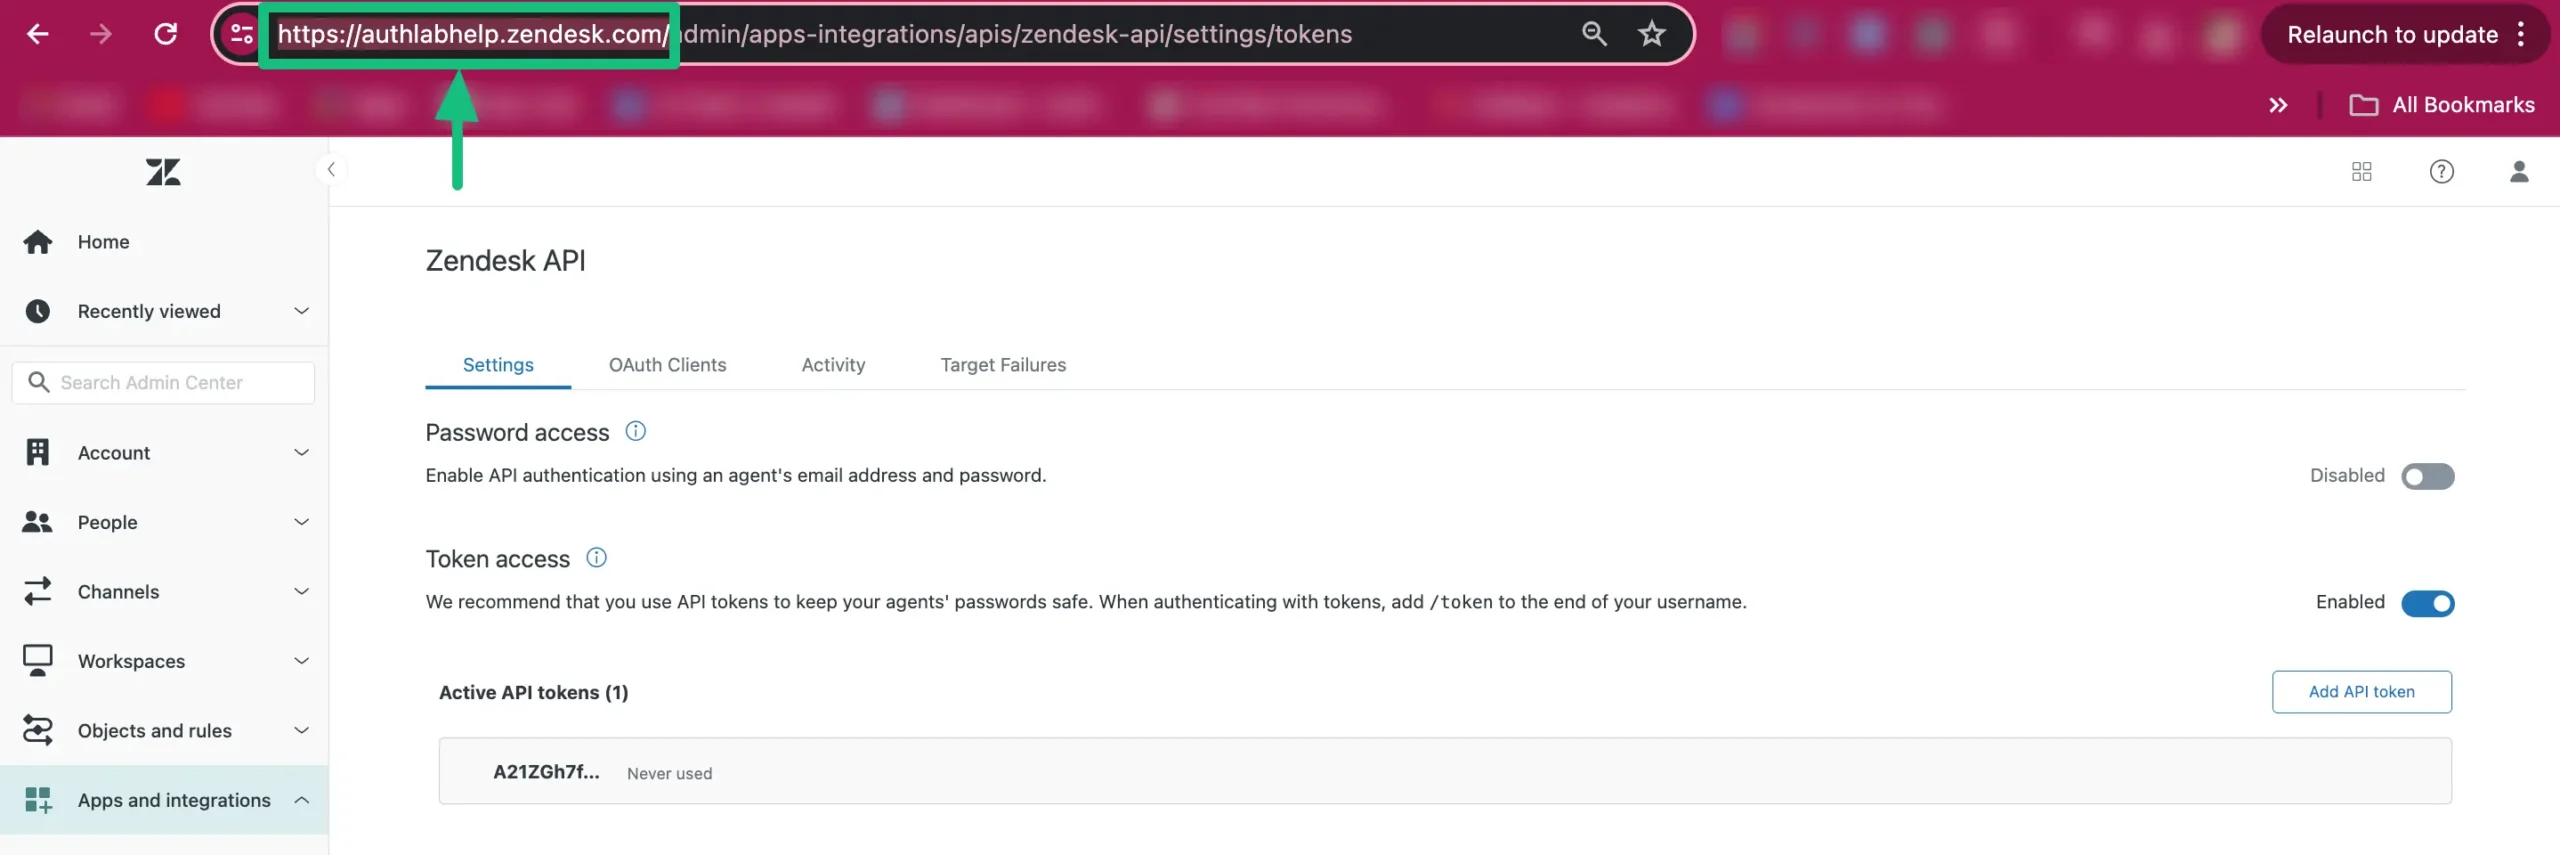
On the Zendesk API page, you need to enable Tocken Acess by clicking the toggle.
Then, press the Add API token button and an API will appear. Simply, copy the API and click on the Save button.
Also, copy Zendesk’s Domain URL from the URL section.
Return to the Zendesk popup page from the Fluent Support Dashboard.
Paste the Domain URL, Email (which you used to open your Zendesk account), and API Key (copied from your Zendesk account), into the desired fields. Finally, click on the Import Tickets button.

Congratulations, you are now ready to proceed! The importation of tickets will begin, and a notification will be sent once all your tickets have been successfully imported.
Here, you can see all the Tickets are Imported and the migration date & time are displayed as well.

This is how you can migrate your all tickets from Zendesk to Fluent Support!
If you have any further questions, concerns, or suggestions, please do not hesitate to contact our @support team. Thank you.


