FluentCart is a high-performance e-commerce plugin built for WordPress, designed to give you full control of your store while keeping things fast, scalable, and simple. The integration with Fluent Support allows agents to view the purchase history of any FluentCart user and enables customers to open tickets for issues related to specific FluentCart products or orders.
In this guide, you’ll learn how to integrate FluentCart with Fluent Support, access purchase details directly from the ticket sidebar, create custom fields for FluentCart products and orders, and automate workflows to enhance your support process.
FluentCart Integration With Fluent Support #
To integrate FluentCart into Fluent Support, follow the steps with screenshots below —
Note: You don’t need to perform any integration yourself. It will happen automatically if the FluentCart plugin is already installed on your site.
FluentCart Purchase Widget in Ticket Sidebar #
When a customer submits a ticket, the integration automatically displays a Purchases widget in the agent’s ticket view sidebar.
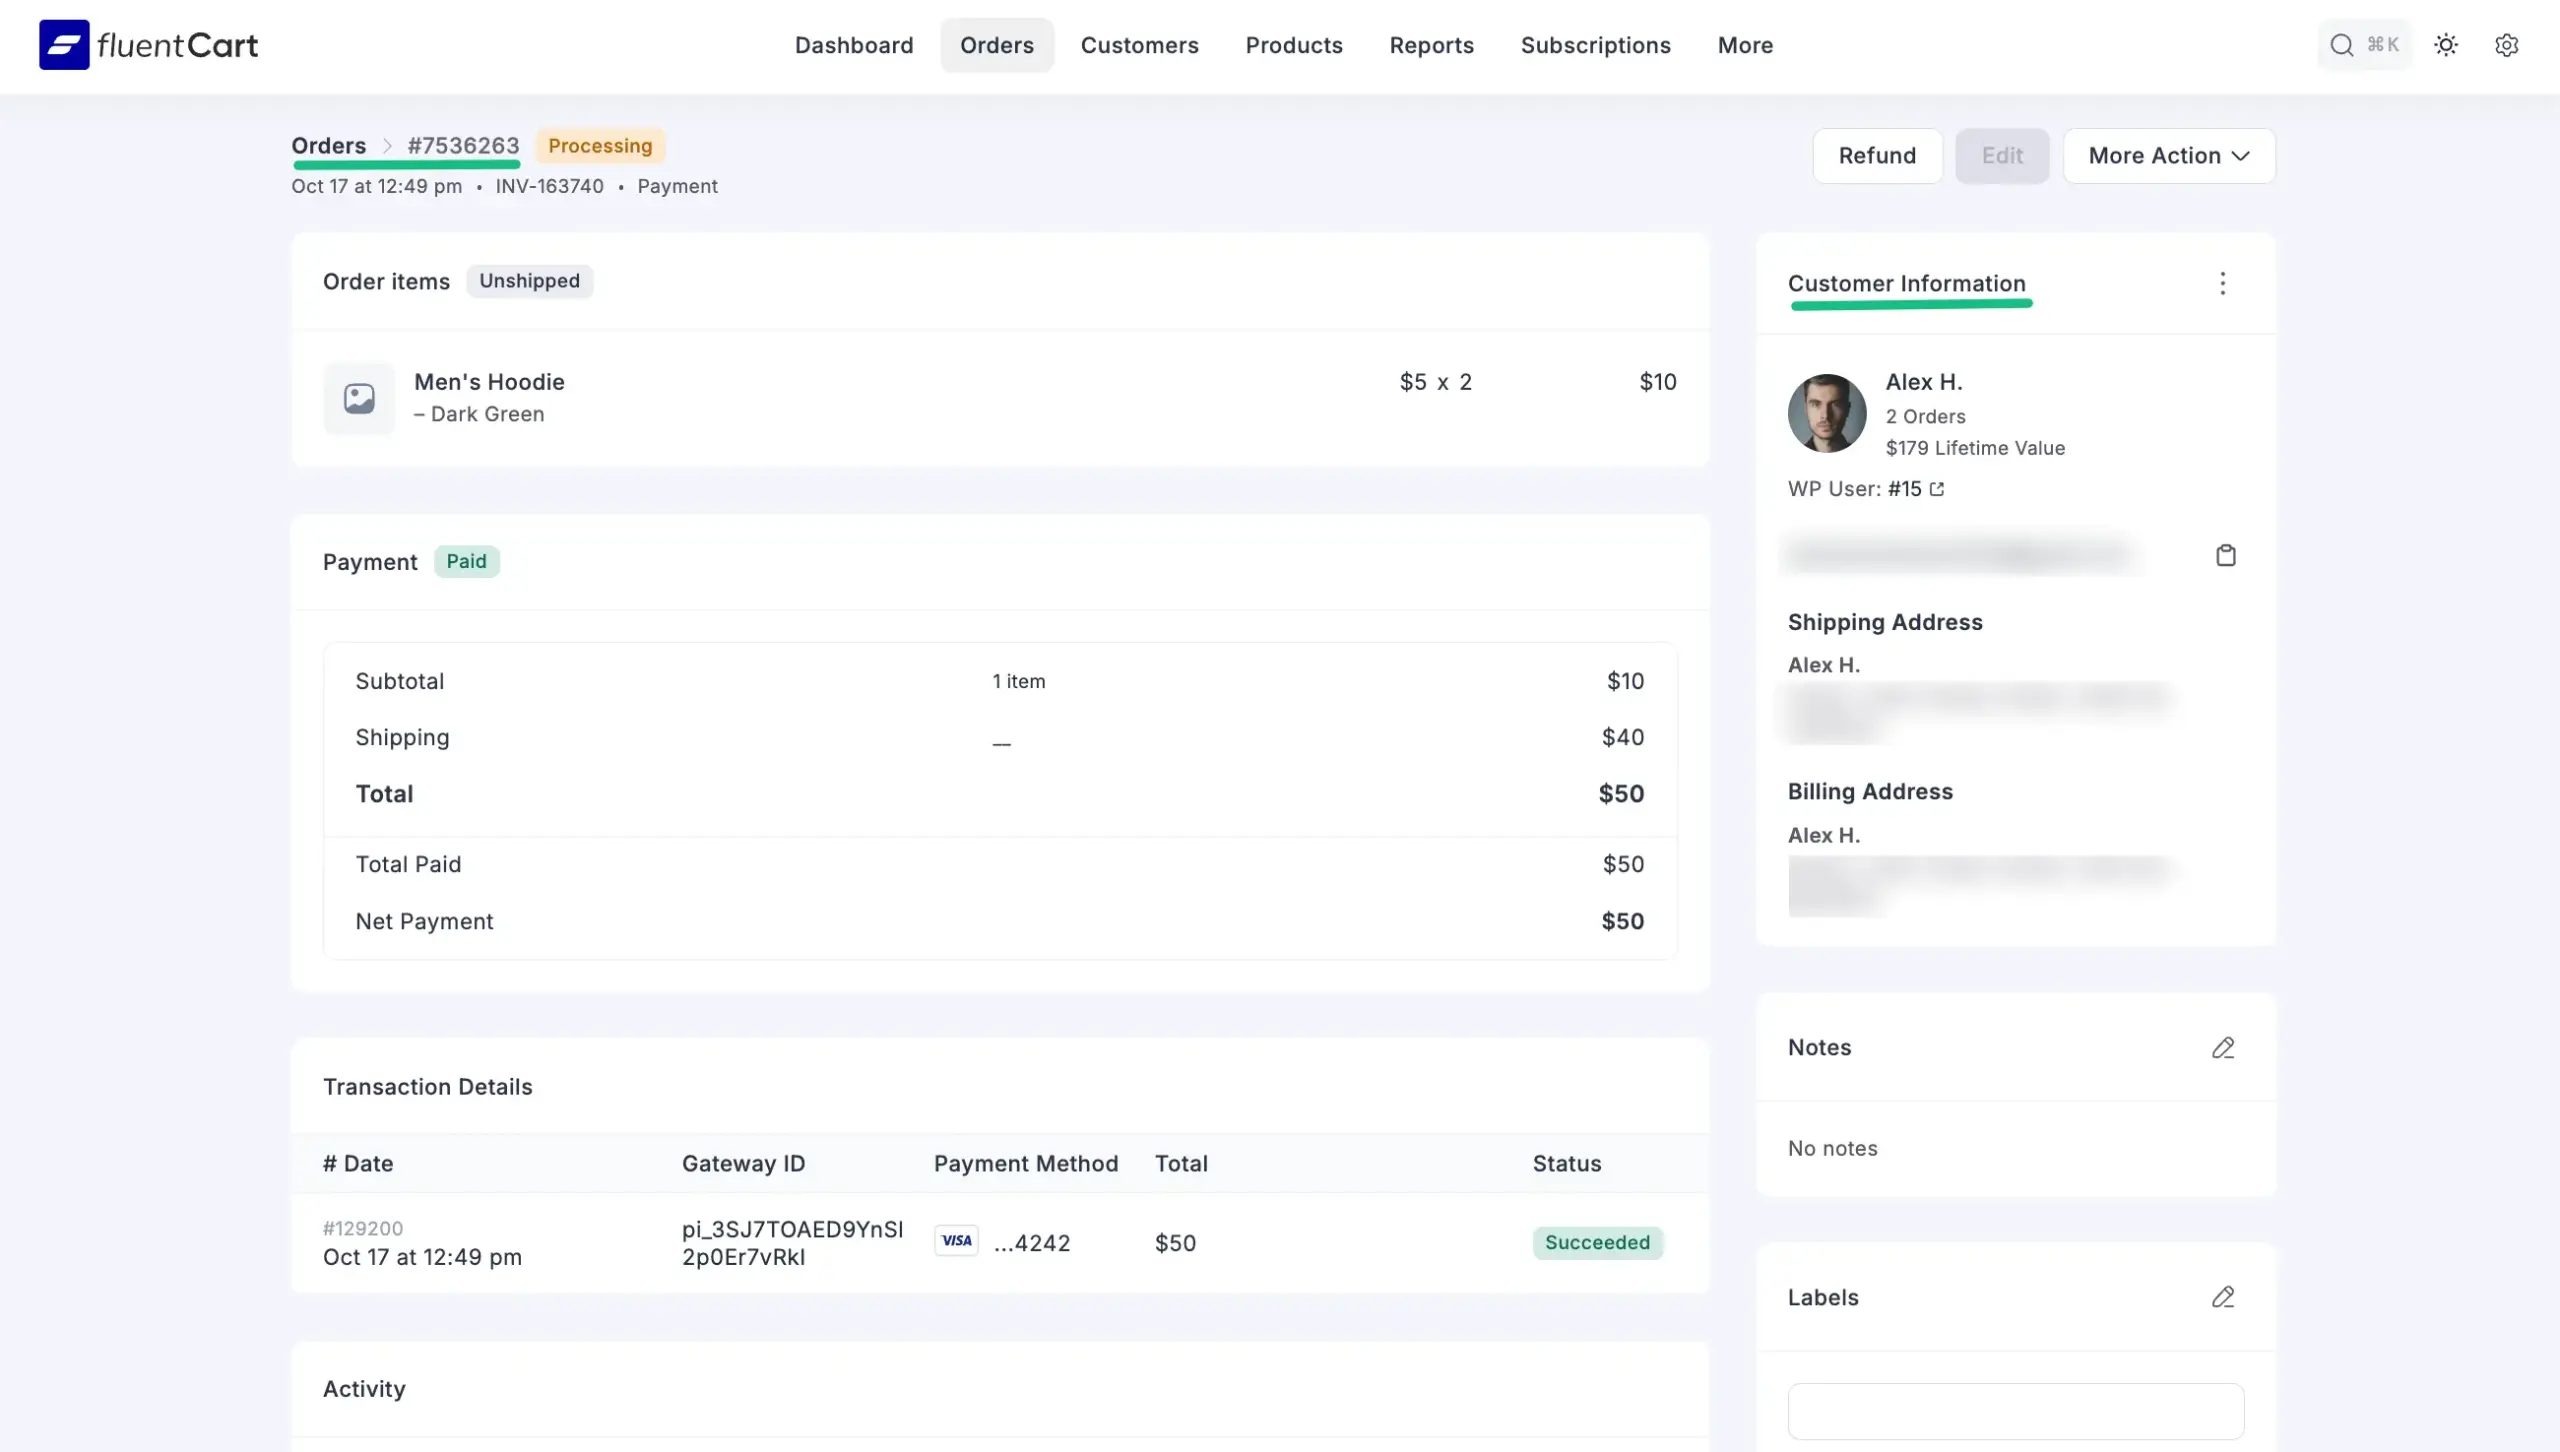
You can click on a specific order ID to be taken directly to the full order details page within FluentCart.
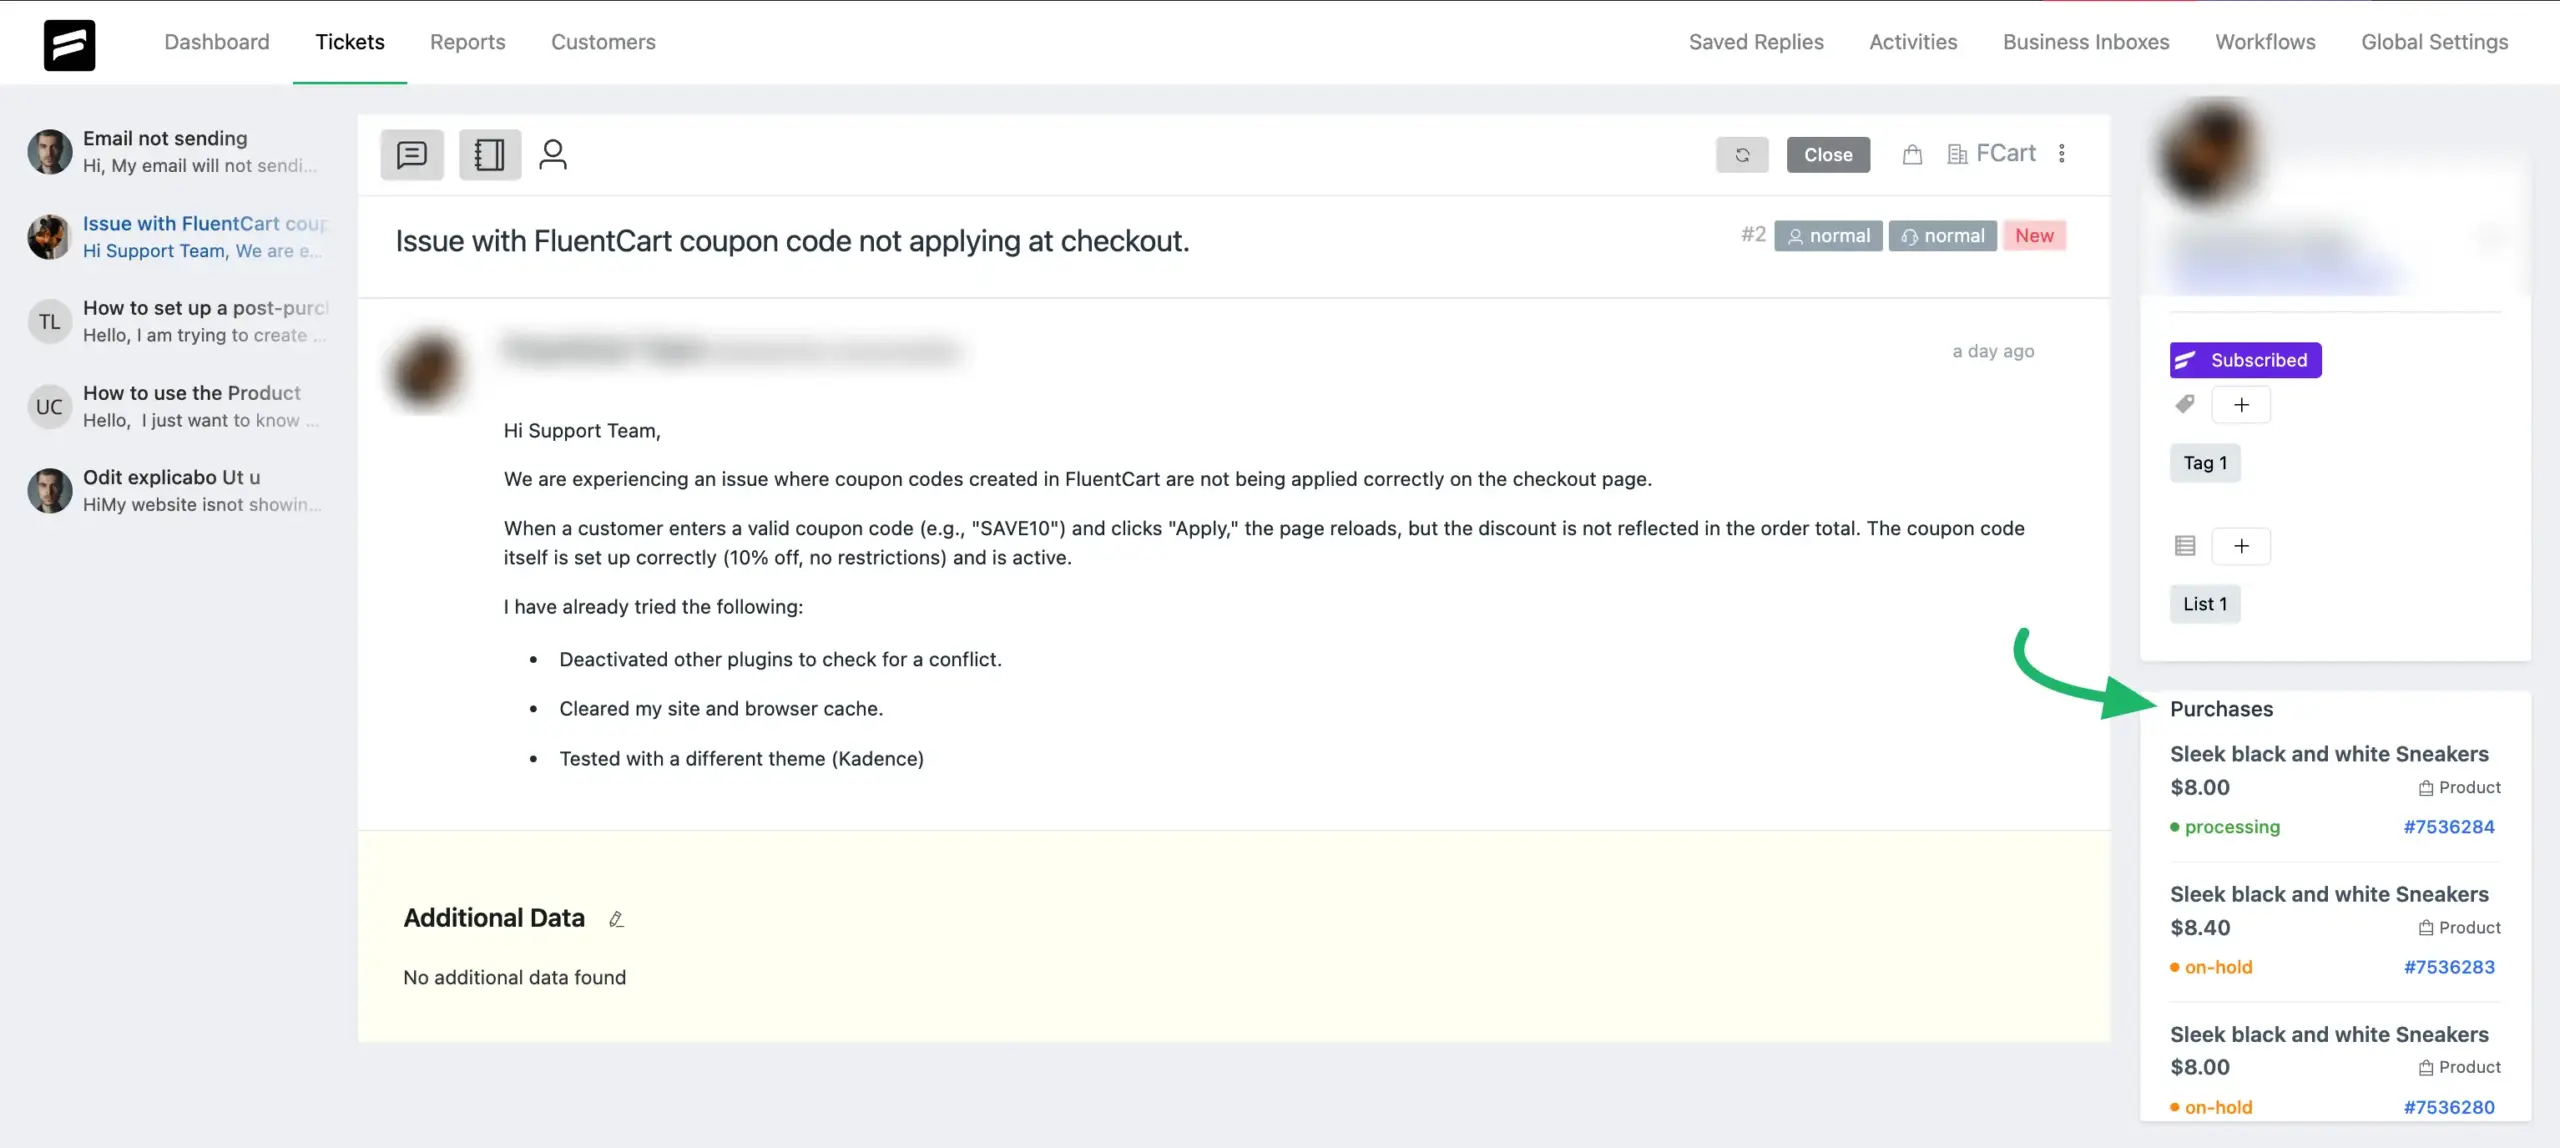
This widget shows the customer’s Lifetime Value, purchase count, and a list of their recent purchases from FluentCart.
Create Custom Fields for FluentCart #
Note: To allow customers to select specific orders or products when submitting a ticket, you must Create Custom Fields in your Fluent Support site for FluentCart.
This feature is essential for collecting detailed information from customers at the moment they submit a ticket. It lets you add a dropdown field to your support form, allowing customers to choose the specific FluentCart product or order they need assistance with.
This gives your support agents instant context and helps you create powerful automated workflows based on the customer’s selection.
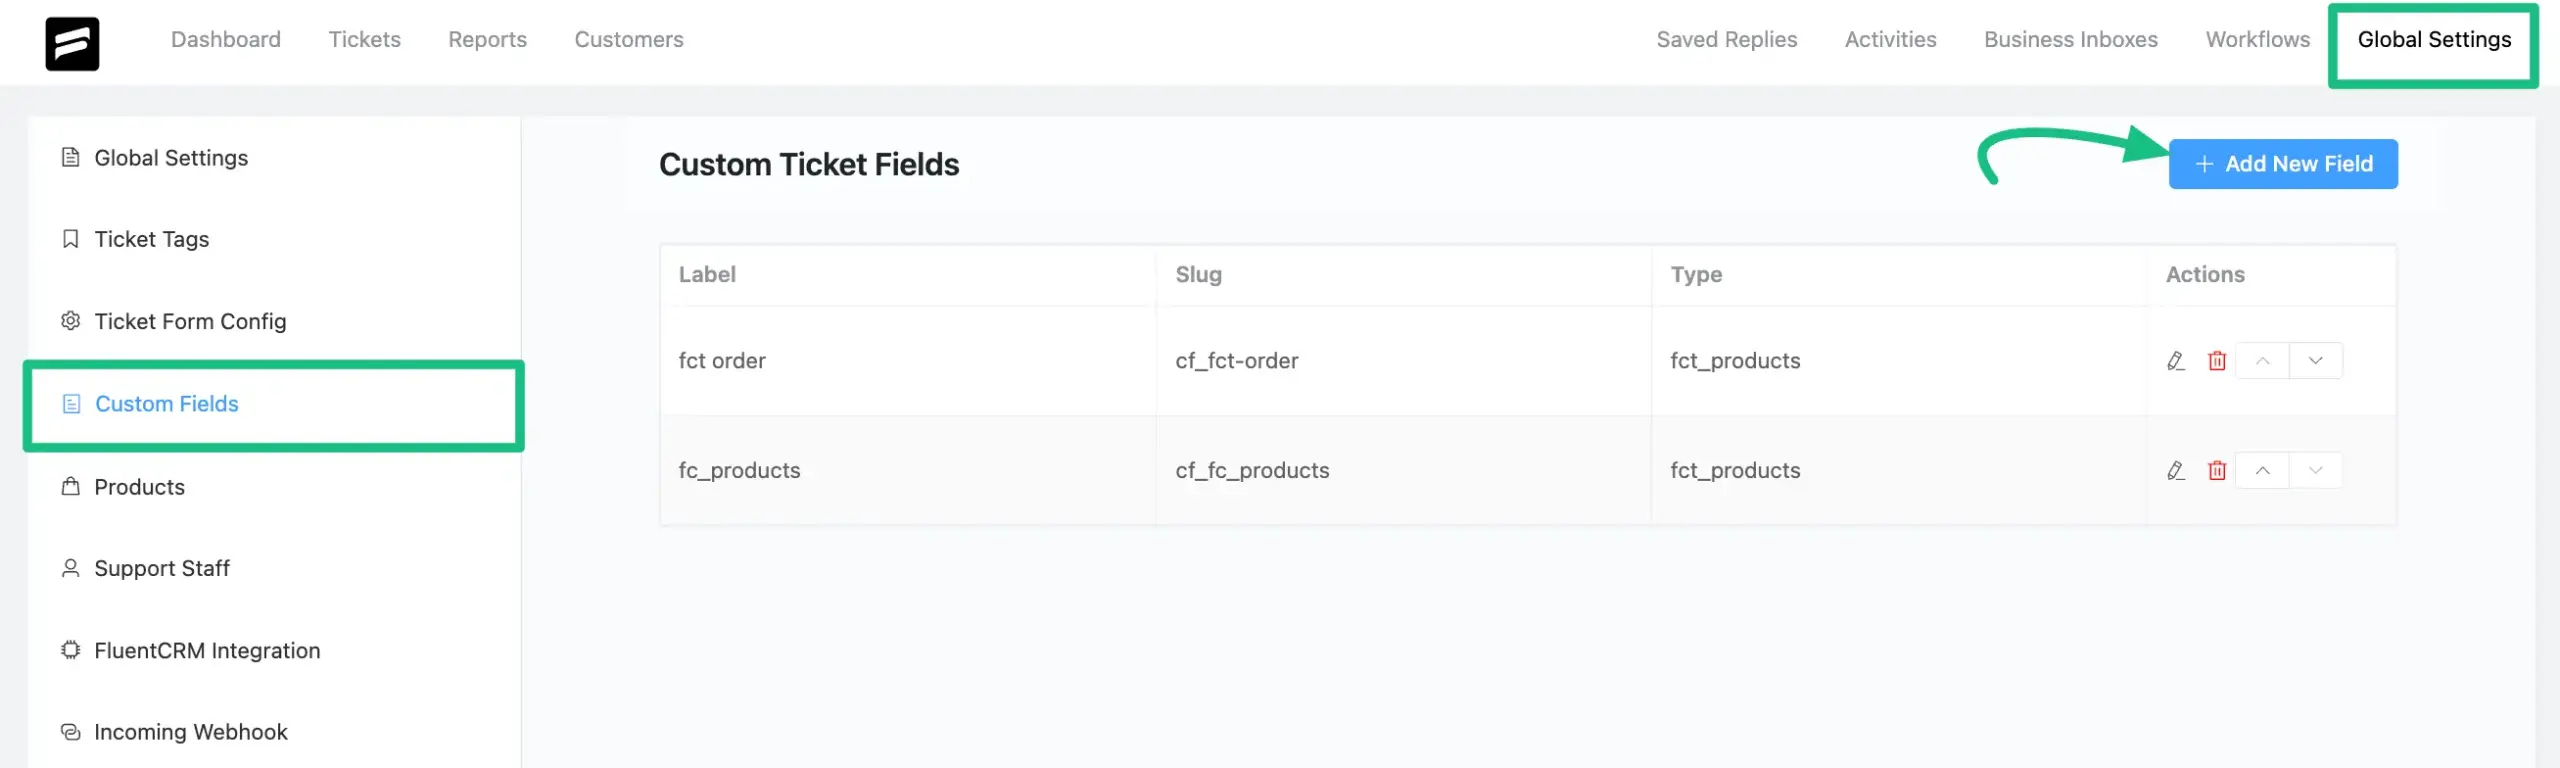
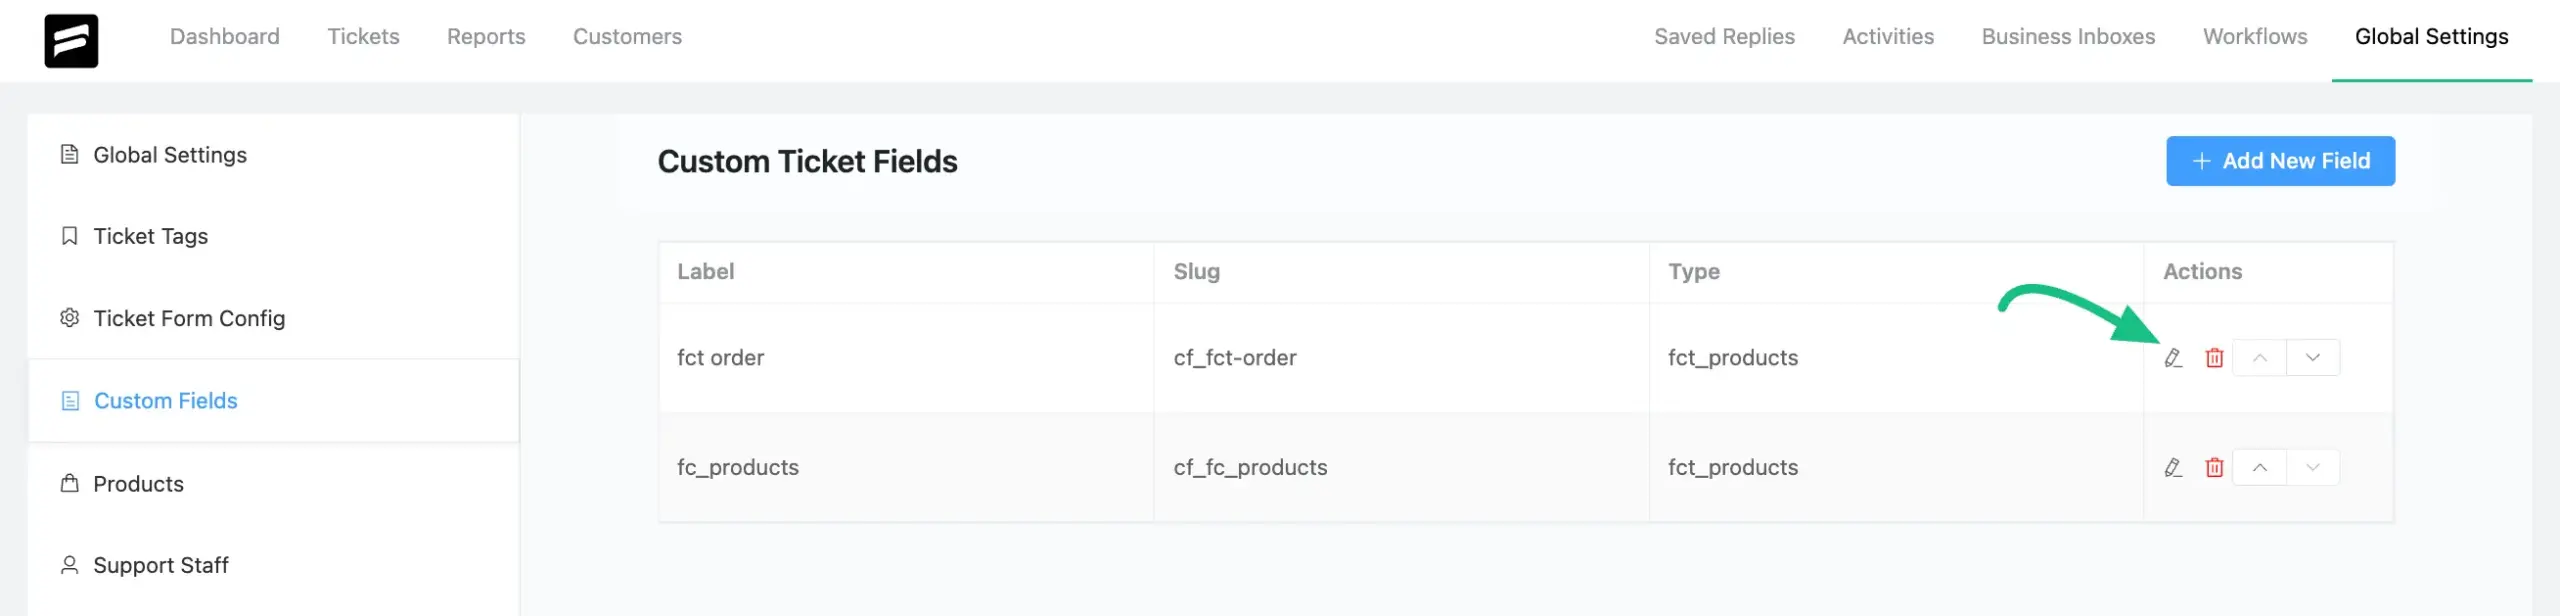
From the Fluent Support Dashboard, go to Global Settings, select Custom Fields, and click the + Add New Field button.
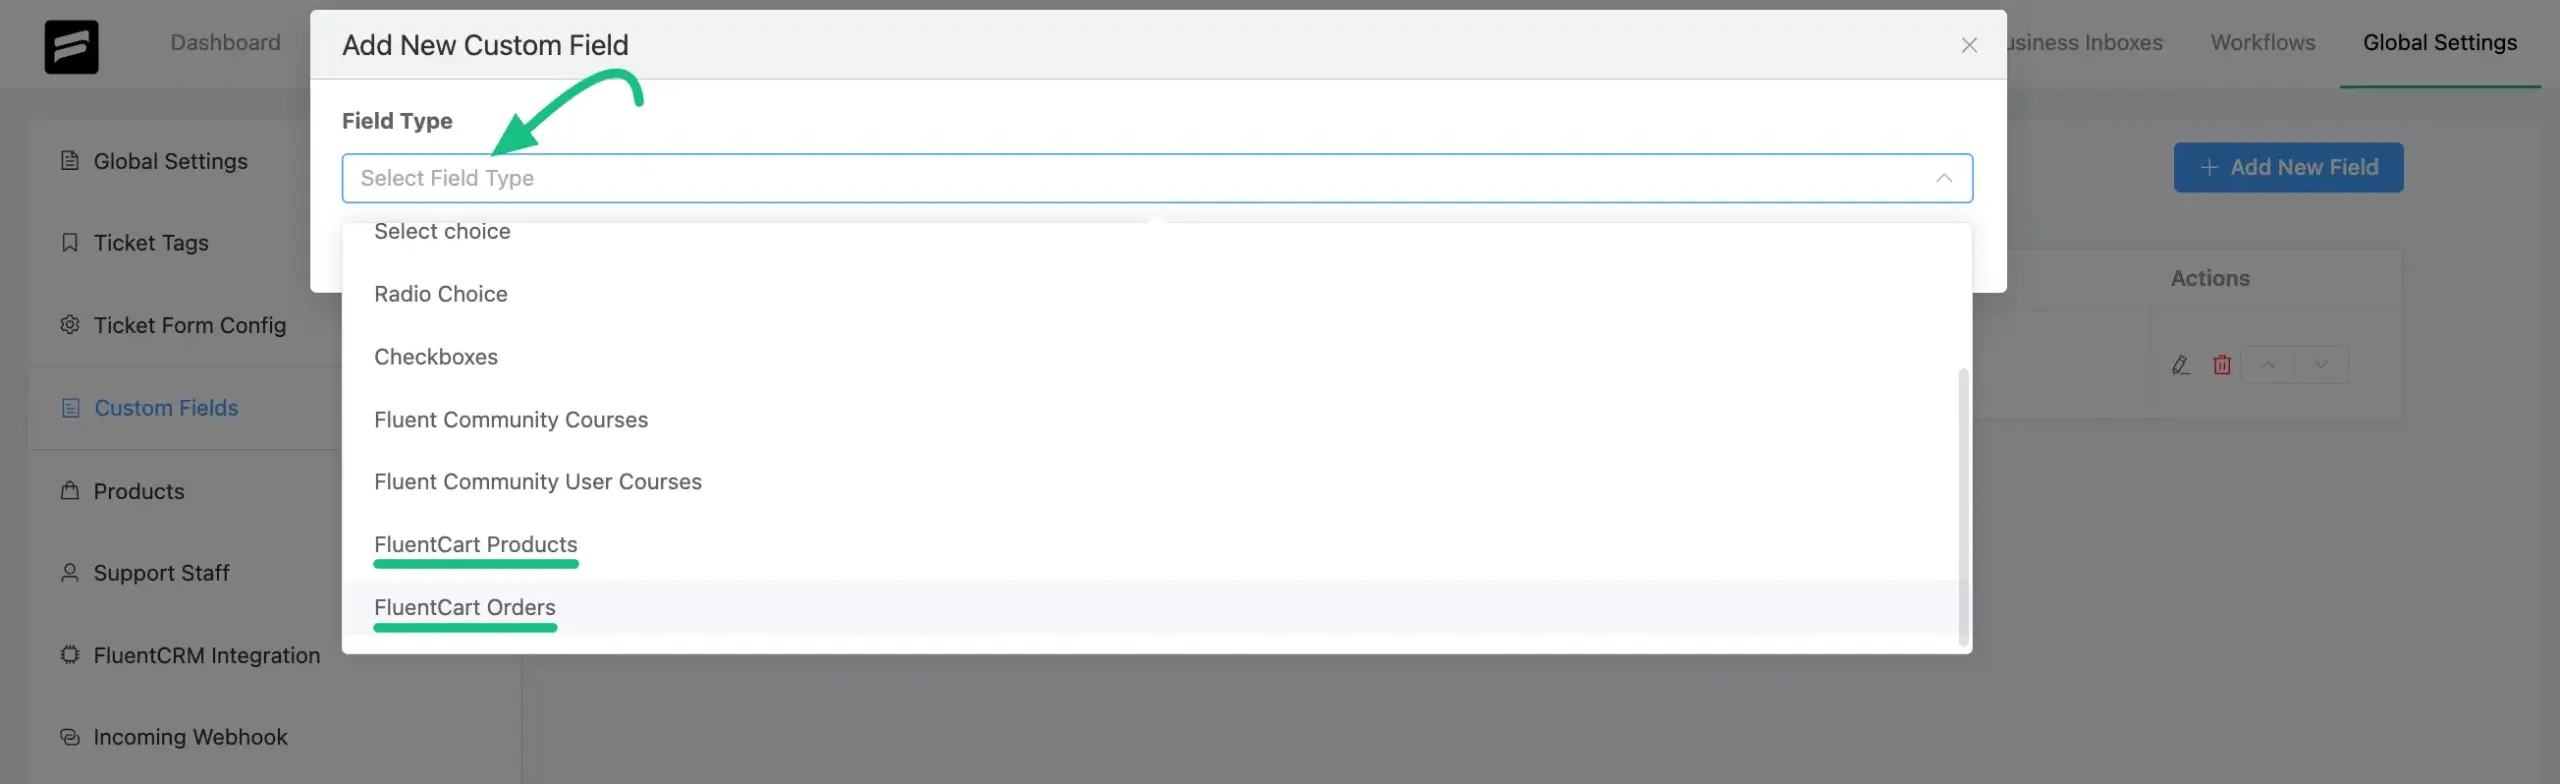
Choose the Field Type from the dropdown menu that suits your needs (FluentCart Products or FluentCart Orders) and click the Add button.
Note: Make sure your WordPress site has FluentCart installed and activated to proceed.
Give your Field Type a Public Label (e.g., “Select Your Product”) and configure additional fields as necessary. Also, you can enable Conditional logic if required. To save all the settings, click the Add button.

A successful confirmation message will appear. Now, you can edit or delete the custom ticket fields here.
Workflow Trigger and Actions for FluentCart #
You can create automatic workflows that trigger based on the FluentCart product or order selected in a custom field.
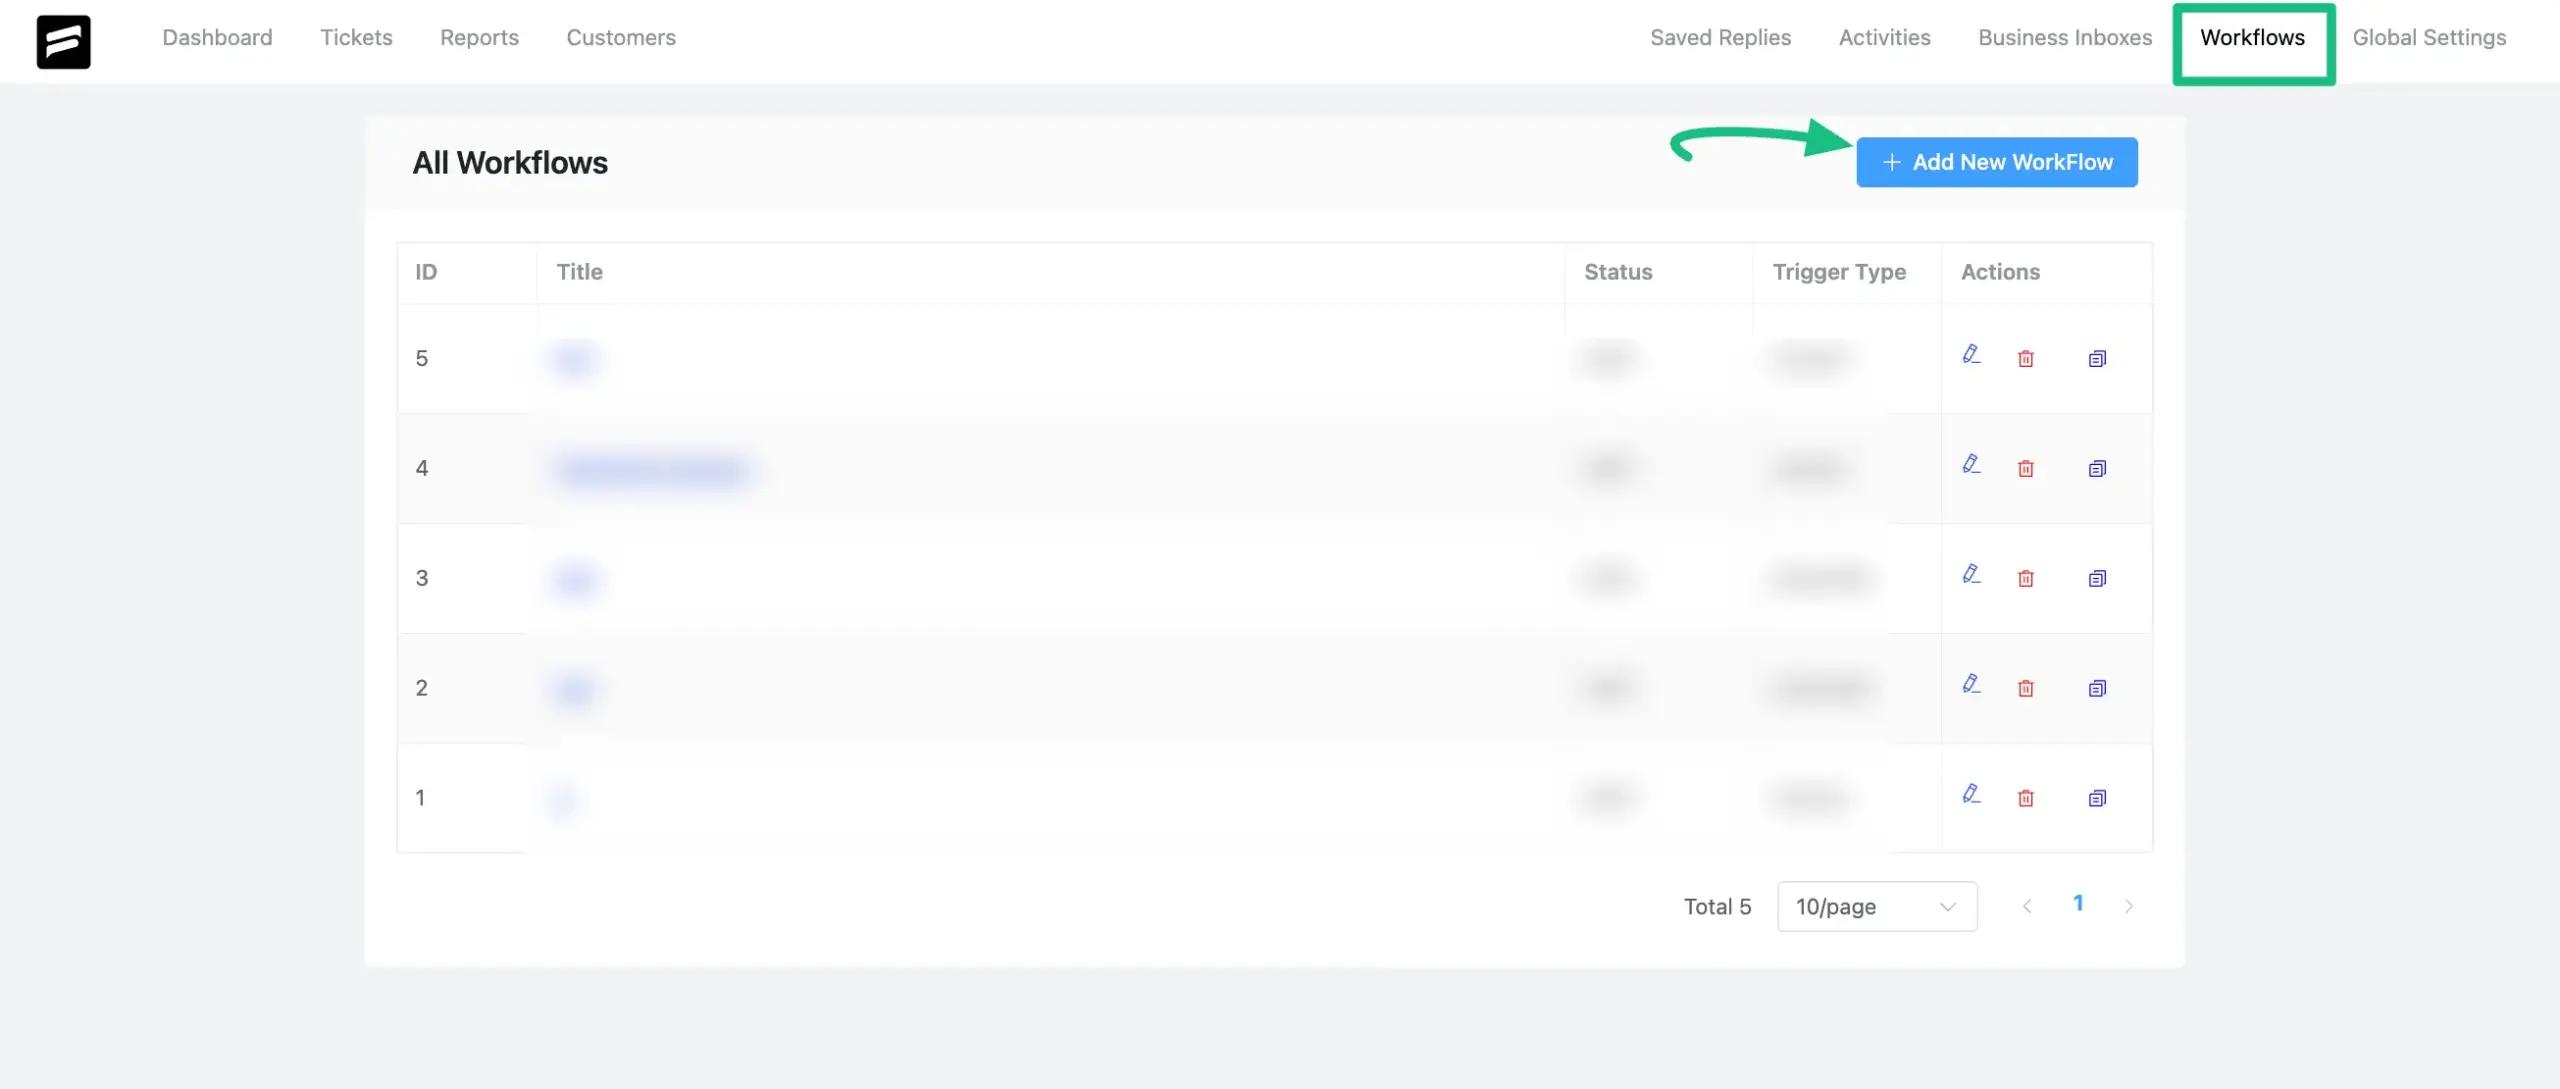
From the Fluent Support Dashboard, go to Workflows and click the + Add New Workflow button.
Give your workflow a name and select the Automatic Workflow Type. Automatic workflows run based on selected ticket events. Click Continue.
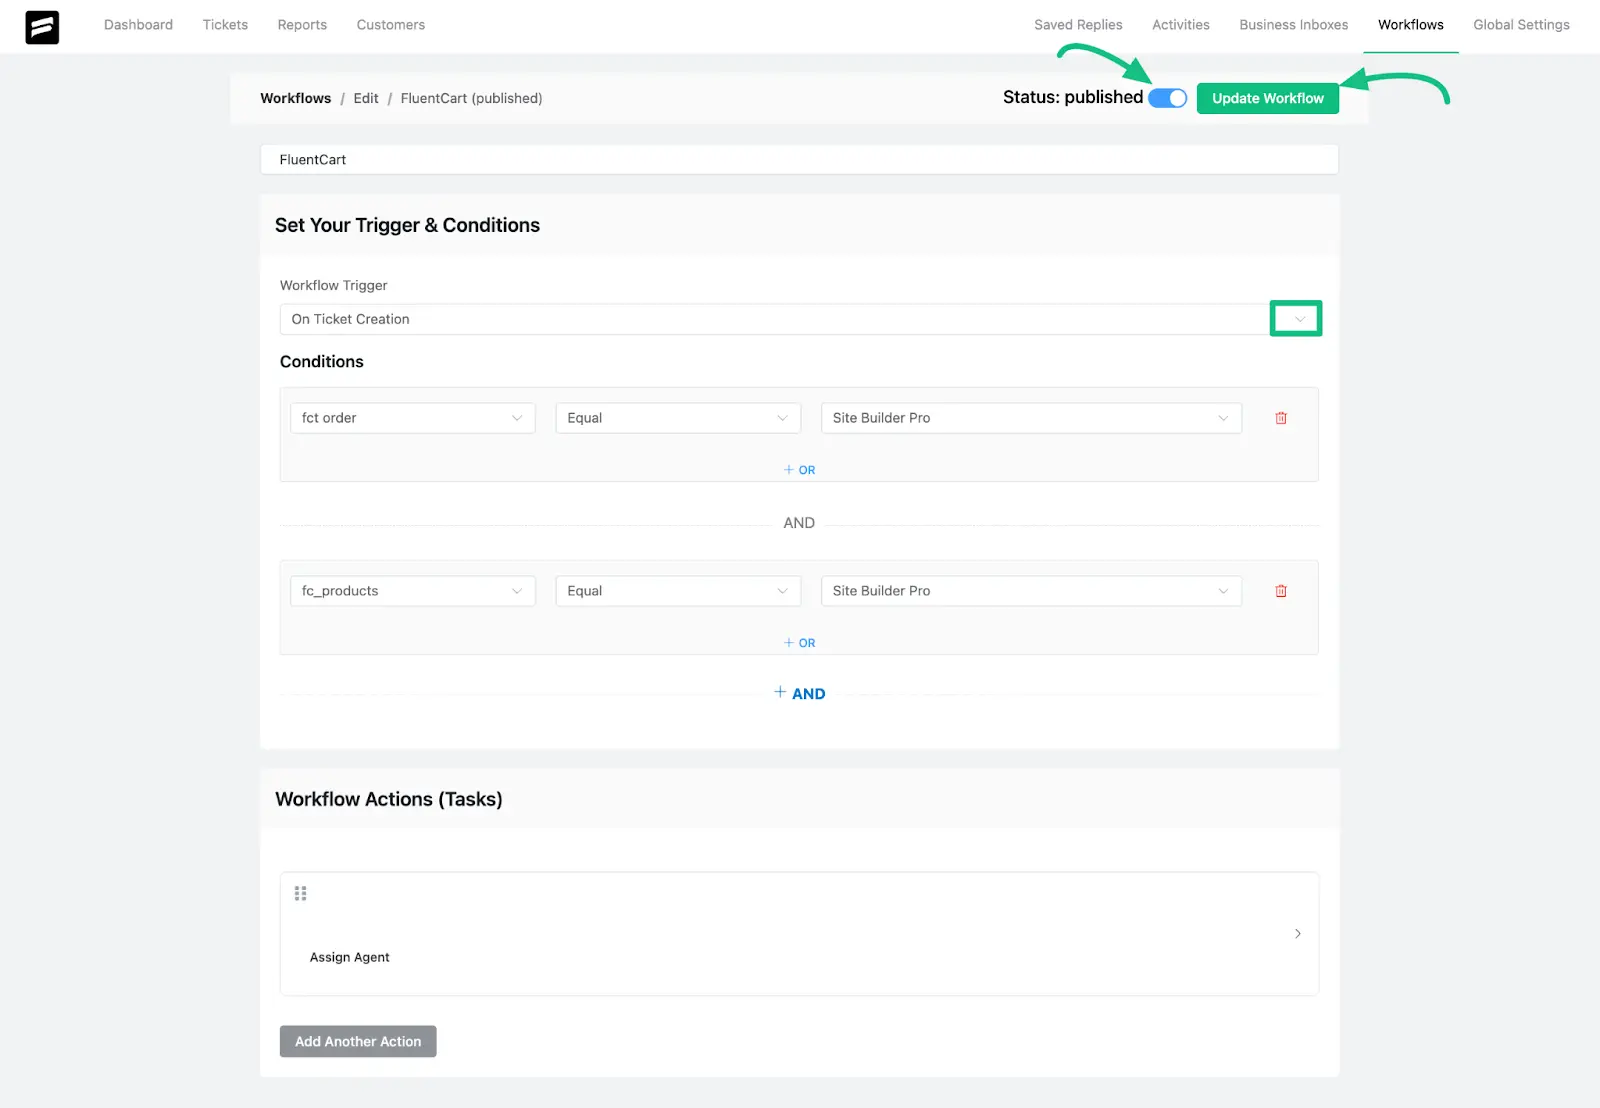
Under Set Your Trigger & Conditions, select a Workflow Trigger, such as On Ticket Creation, On Customer Response, or On Ticket Closed.
Next, set the Conditions. Select your FluentCart custom field (e.g., fc_products or fct_order) from the dropdown, choose an operator (like Equal), and select the specific product or order that should trigger this workflow.
Next, set the Conditions. Select your FluentCart custom field (e.g., fc_products or fct_order) from the dropdown, choose a conditional rule (like Equal), and select the specific product or order that should trigger this workflow.
Finally, under Workflow Actions (Tasks), define what should happen when the trigger and conditions are met (e.g., Assign Agent, Add Tag(s), or Add Response).
Click Update Workflow to save and activate your workflow. If you want to make your workflow actions live, be sure to toggle the Publish option to enable and publish it.
Integrate Customer Portal into FluentCart Dashboard #
You can also provide a seamless experience for your customers by adding a link to your support portal directly within their FluentCart customer dashboard.
From the Fluent Support Dashboard, go to Global Settings. Scroll down to the Agent Time Tracking section and find the option Add support link to Fluent Cart account navigation.
Enable this setting and click Save Settings.

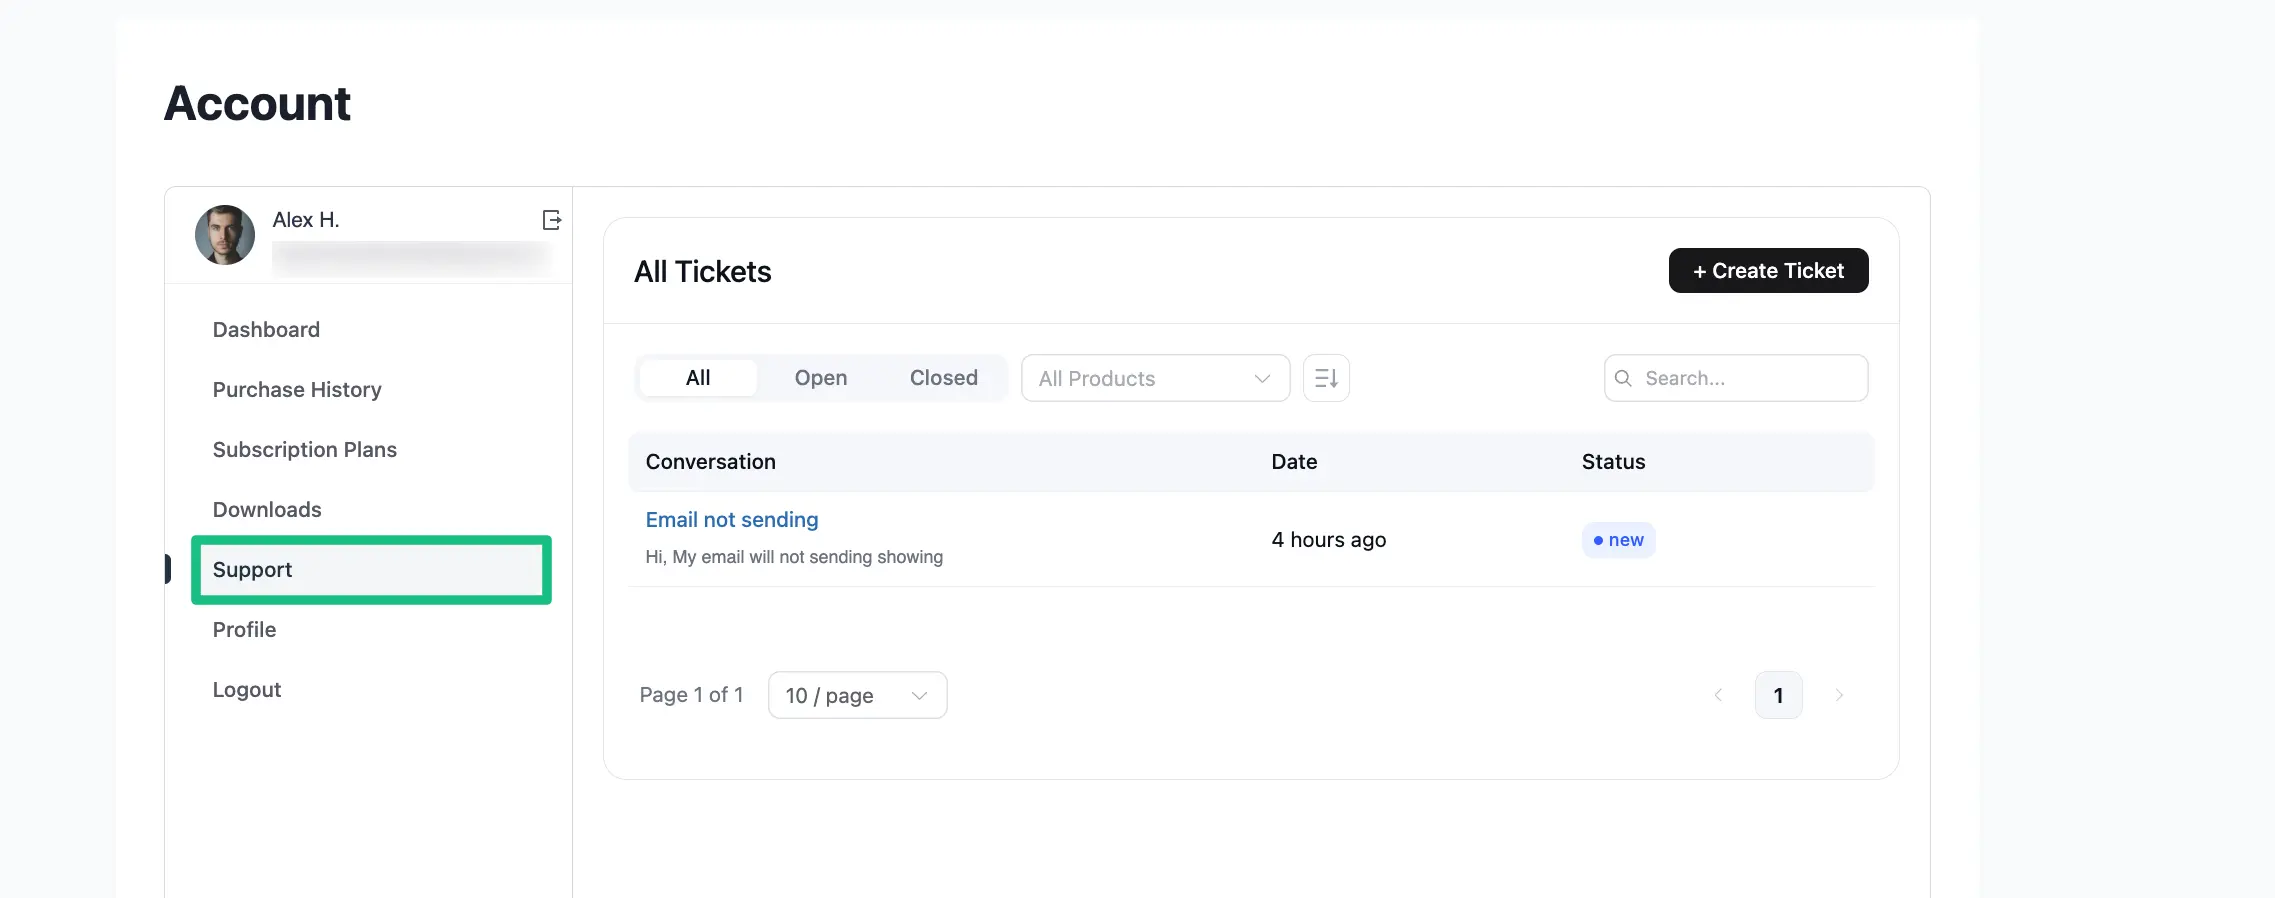
Once your custom fields are active and the portal is integrated, customers can navigate to the Support tab in their FluentCart account.
Product and Order Selection in Tickets #
Now, click to the Create Ticket button to create a new ticket.
On the “Submit a Support Ticket” form, they will now see the new custom fields you created (e.g., fct_order and fc_products). This allows them to select the specific product or order they need help with.

After the ticket is submitted, the selected product or order will be clearly displayed under “Additional Info” inside the ticket view. This gives both the customer and your support agents immediate context about the issue.
This is how the integration of FluentCart with Fluent Support works!
If you have any further questions, concerns, or suggestions, please do not hesitate to contact our support team. Thank you.


