The Customer Portal is intended for direct use by end-users where users can view & use the dashboard to submit tickets. This article will guide you through how the Customer Portal of Fluent Support can be used with all the available options.
Customer Portal #
To learn how you can use the customer portal with the help of its all available options, follow the steps with the screenshots below –
First, sign up or log in to the customer support portal and the Customer Portal Dashboard will open with all available options.
Remember, for sign-up, use a valid email as a verification code will be sent to the user email for confirmation, ensuring only valid emails can be used for sign-in.
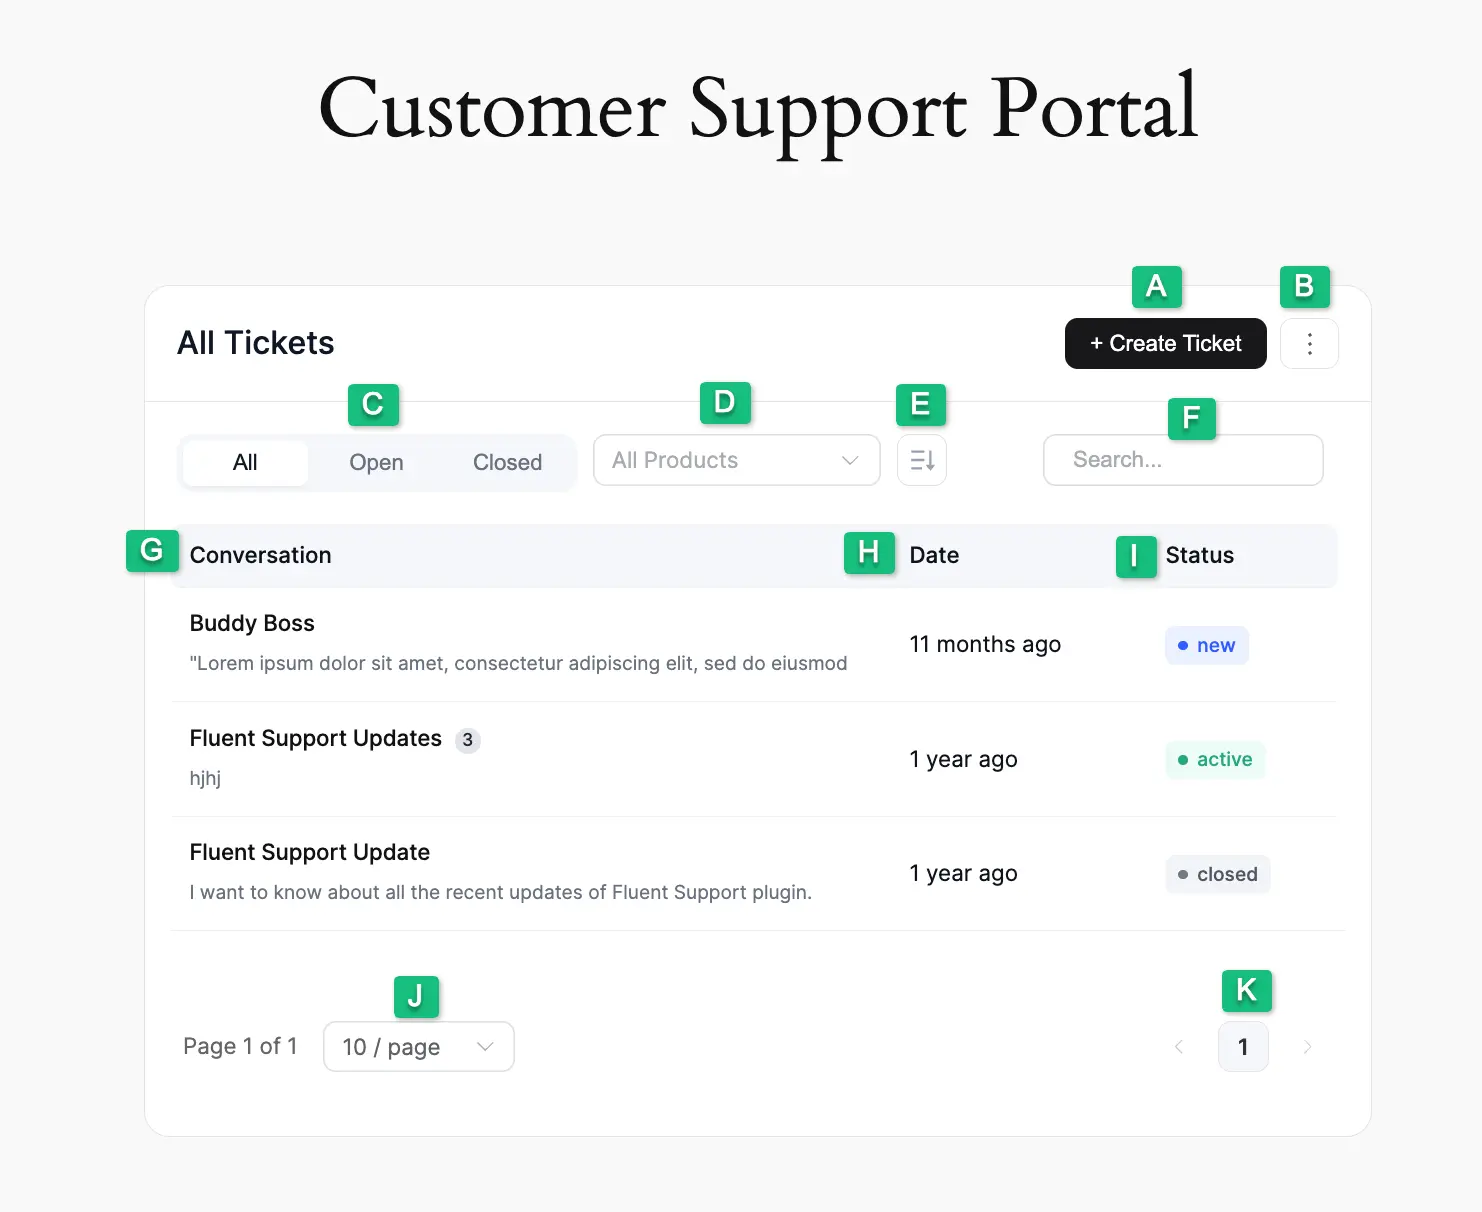
All the options of the Customer Portal Dashboard are explained below:
A. Create Ticket: Using this button, users can create and submit as many support tickets as they want.
B. Logout: Using this button, users can logout from their customer support portal dashboard at any time. Remember, you can get the logout option, in two different ways. These are:
- Use Gutenberg Block: To get the logout option, you need to add the Customer Support Portal to your WordPress Site (desired page/post) using the Gutenberg Block. To learn how to add a Customer Portal using Gutenberg Block, read this Documentation.
- Use Shortcode: The second way to get the logout option in the Customer Portal Dashboard is to add the following Shortcode to your WordPress Site (desired page/post). To learn more details about adding a Customer Portal using Shortcode, read this Documentation.
[fluent_support_portal show_logout = yes]C. Status Filter: Using this, users can filter which tickets they want to see in their dashboard based based on the available ticket stauses (e.g., All, Opened, or Closed tickets).
D. Product Filter: Using this dropdown option, users can filter their tickets based on the available Products.
E. Tickets Sorting: With this, users can Sort their tickets in Ascending or Descending order based on Ticket ID, Title, & Created At options.
F. Search Bar: Using this search bar, users can search for any of their desired tickets by putting its title in the box.
G. Conversation: Under this column, all tickets will be listed.
H. Date: Under this column, users can see the opening time of their tickets.
I. Status: Inside this column, users can see the ticket statuses (e.g., New, Active, and Closed) for each ticket.
J: Tickets Display Dropdown: Using the option, users can define per page how many tickets they want to see.
K: Pagination: Using this arrow option, users can scroll to different pages.
If you have any further questions, concerns, or suggestions, please do not hesitate to contact our @support team. Thank you.


