The features of OpenAI allow users to generate ticket responses, enhance their own writings, and summarize an entire conversation with users including their satisfaction status level, effortlessly with simple commands and AI-generated prompts. This article will help you learn in detail about using all AI features of OpenAI in a Ticket of Fluent Support.
OpenAI Features In a Ticket of Fluent Support #
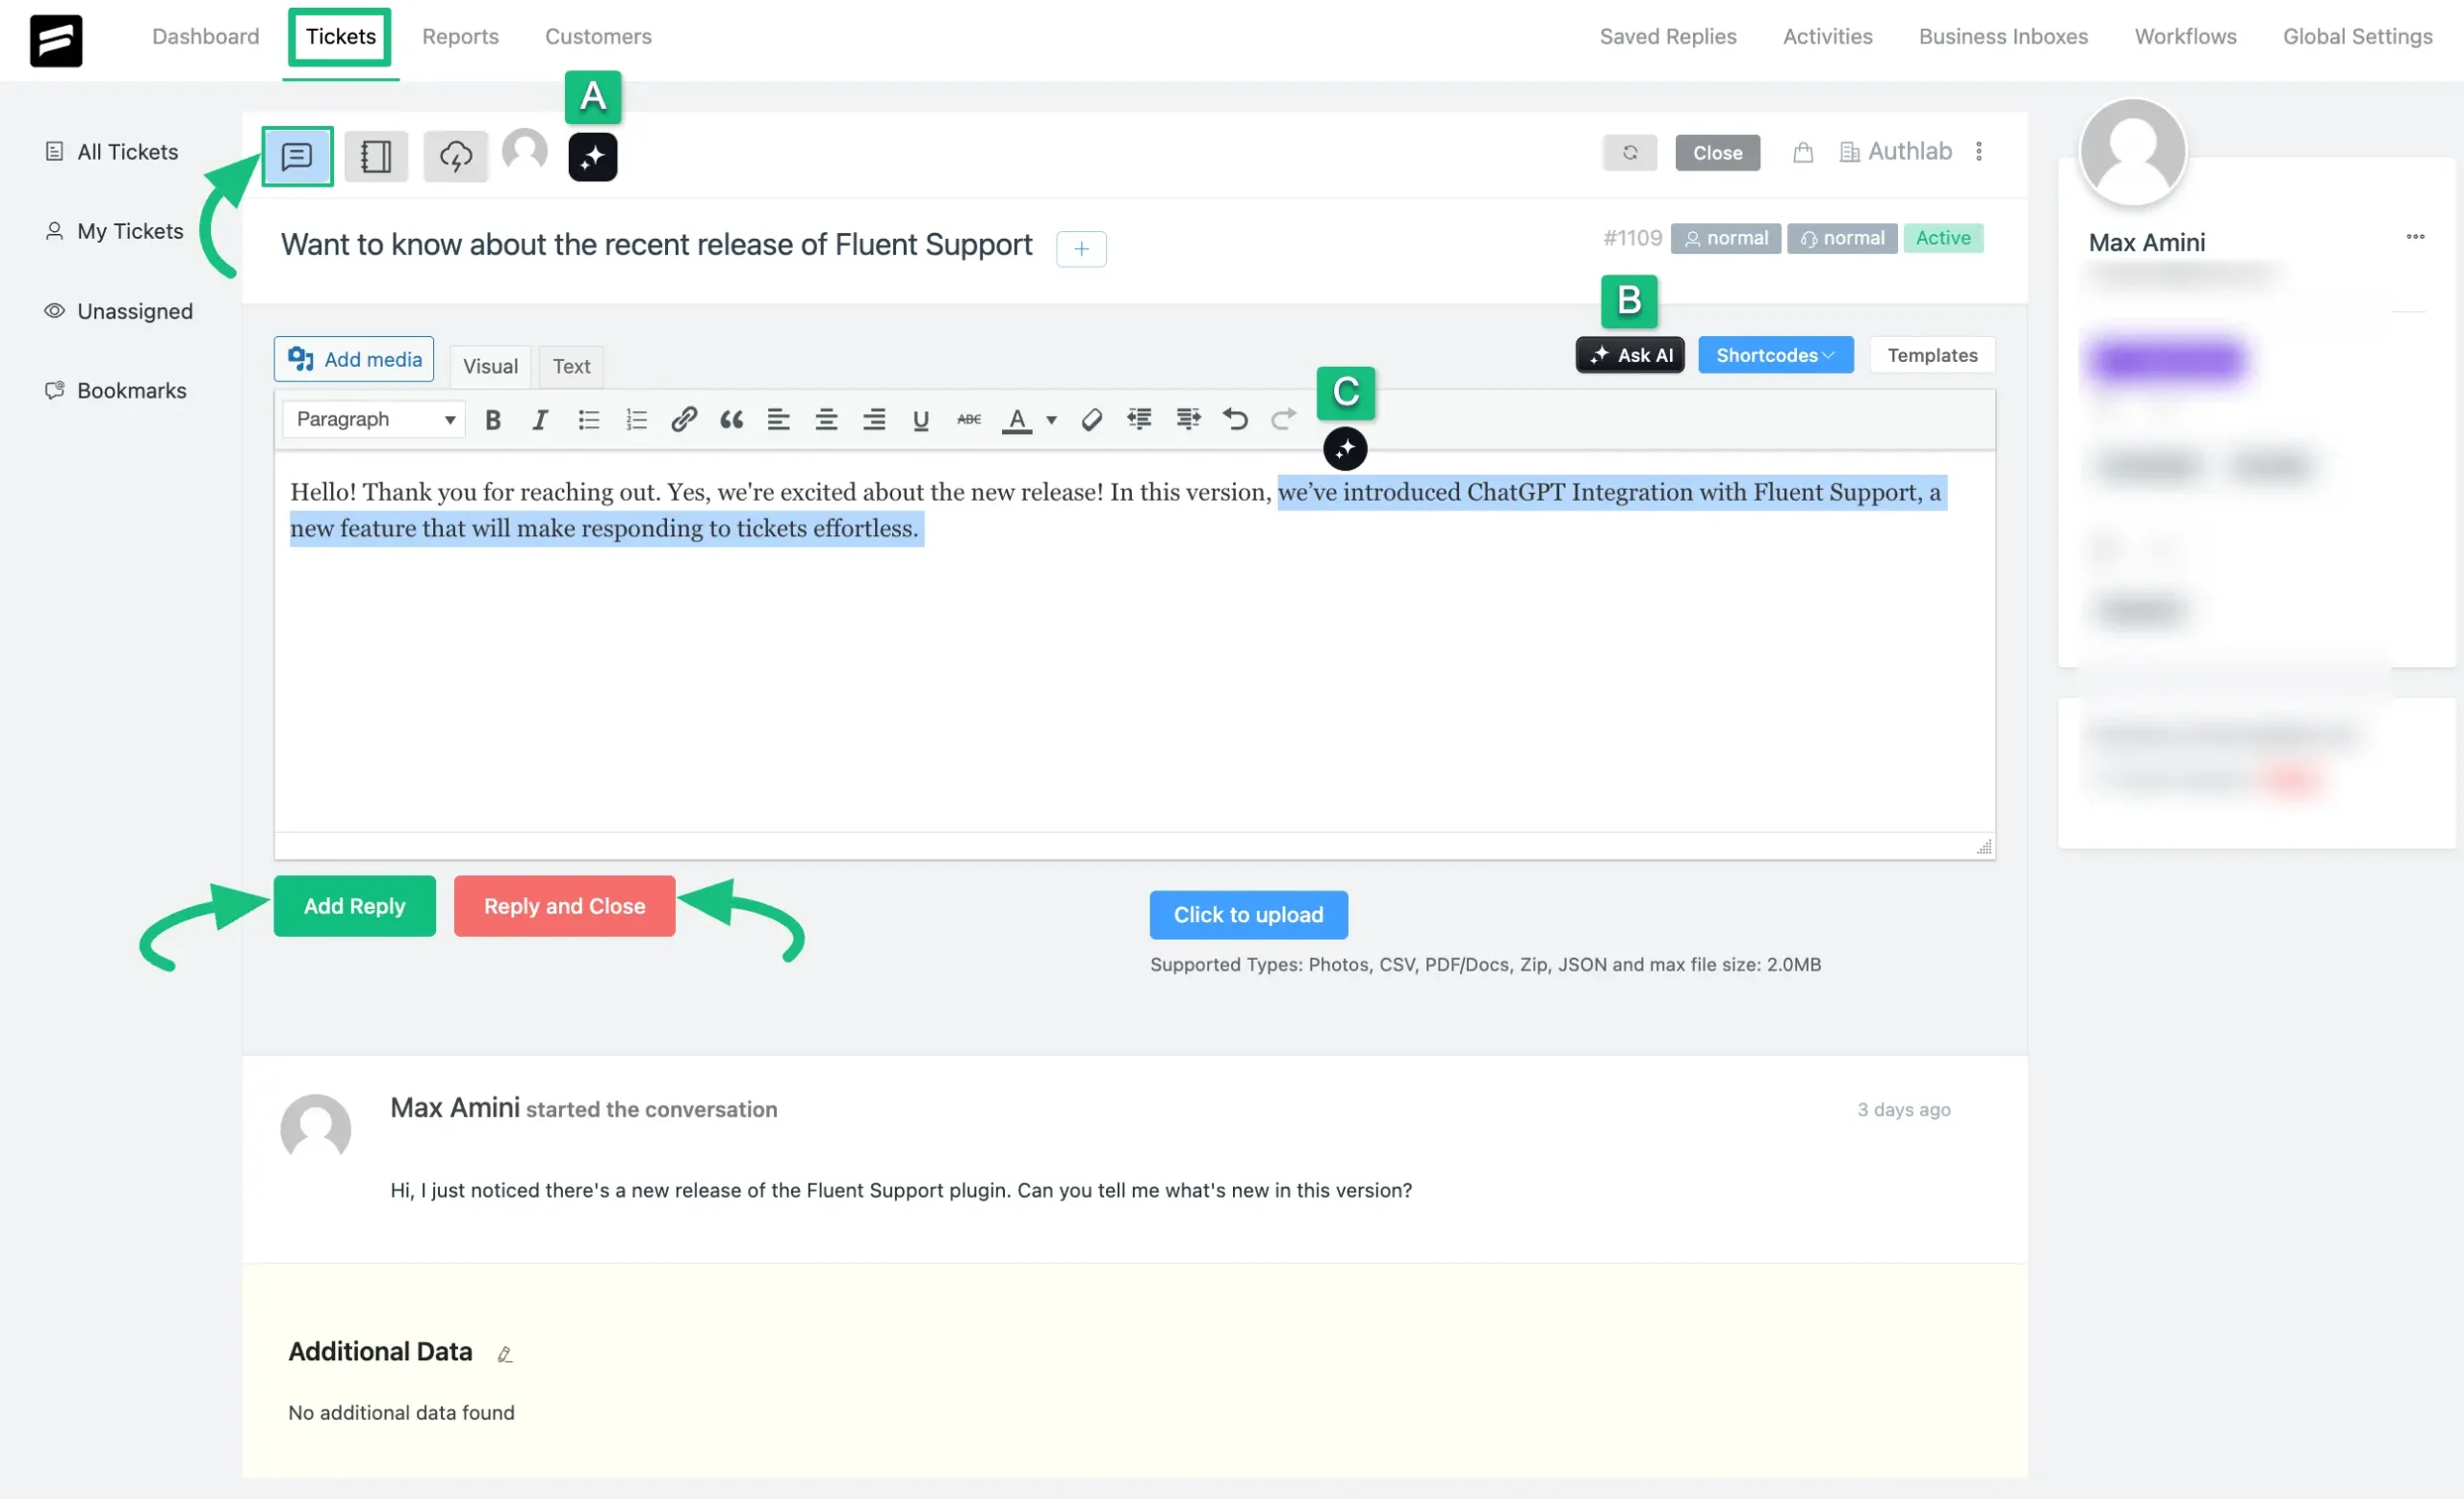
Within a specific ticket, you will find three key features of OpenAI designed to simplify ticket responses. To learn the detailed instructions for using these features within a specific ticket, refer to the steps with screenshots below –
Before starting the process, ensure you integrate your OpenAI account with your Fluent Support plugin in your WordPress Site. To learn how you can integrate the OpenAI with Fluent Support, read this Documentation.
First, go to Tickets from the Fleunt Support Dashboard, open your desired ticket, and you will get all your AI features. These are:
- AI Assistant: Once you open the ticket, you will get this AI at the top right corner of your ticket to summarize the information of your ticket.
- AI Assistant: Once you click the Reply button from the top left corner of your ticket, you will get this AI to generate efficient responses for your tickets.
- AI Assistant: Once you select any specific word/s or the full text of your reply, you will get this AI to refine ticket responses and enhance the clarity and precision of your writing.
Once you are done, click on the Add Reply or Reply and Close button, and your reply will be added to your ticket.
A detailed explanation of the Features of OpenAI mentioned above is given below:
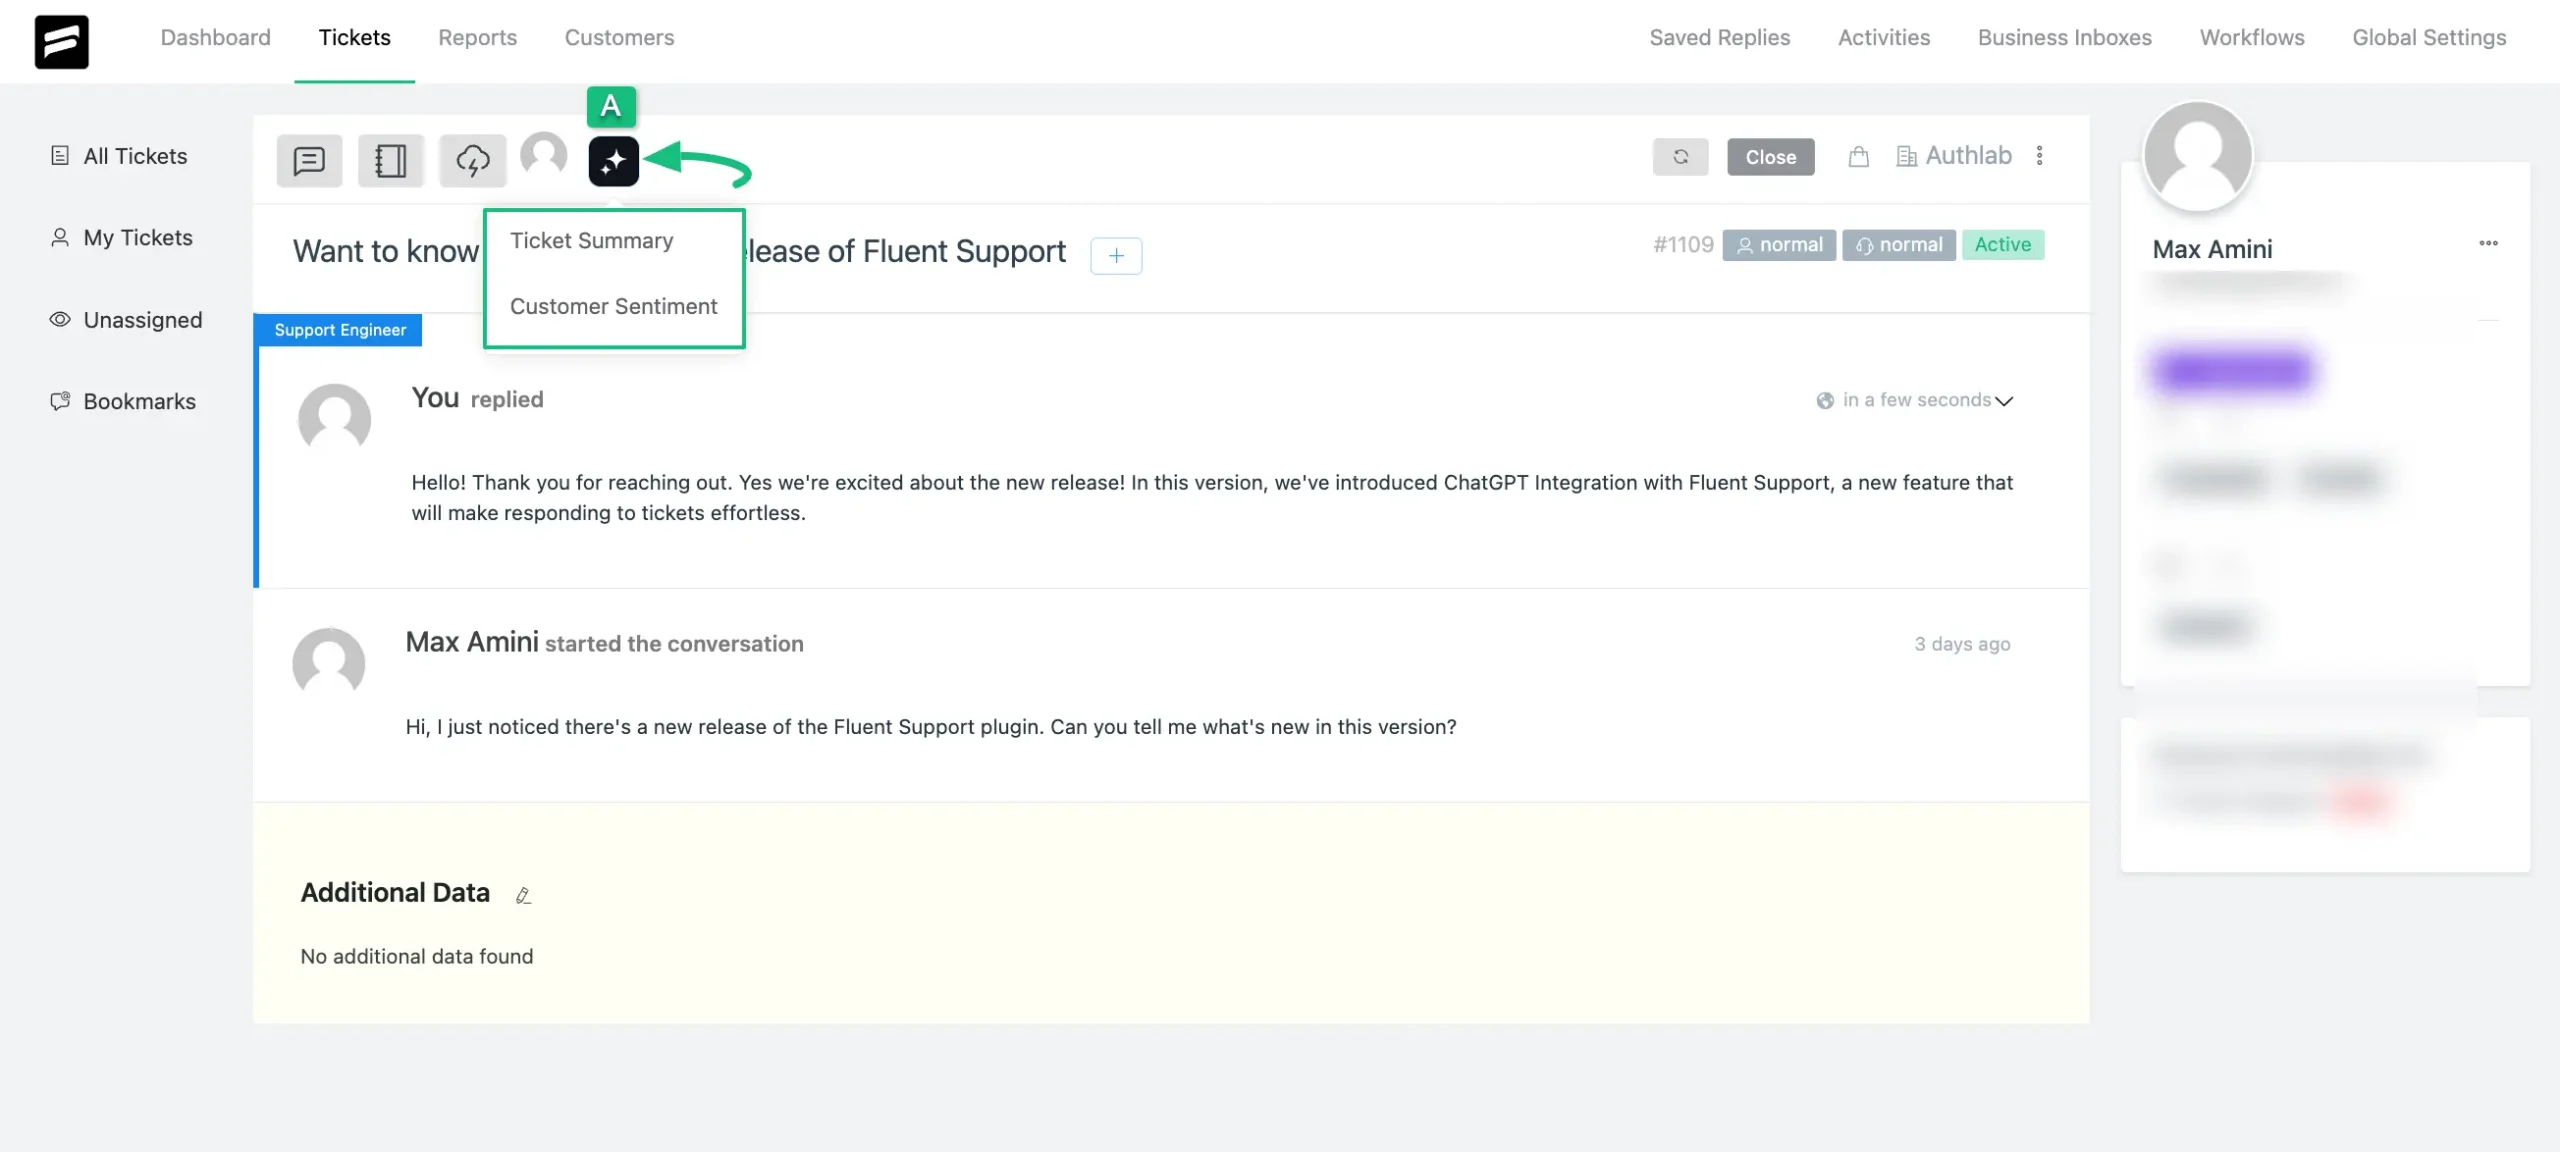
AI Assistant A: #
This AI assistant will give you two options for summarizing an entire ticket conversation including their satisfaction status level. These are:
- Ticket Summary
- Customer Sentiment
A brief explanation of the two AI options mentioned above is given below:
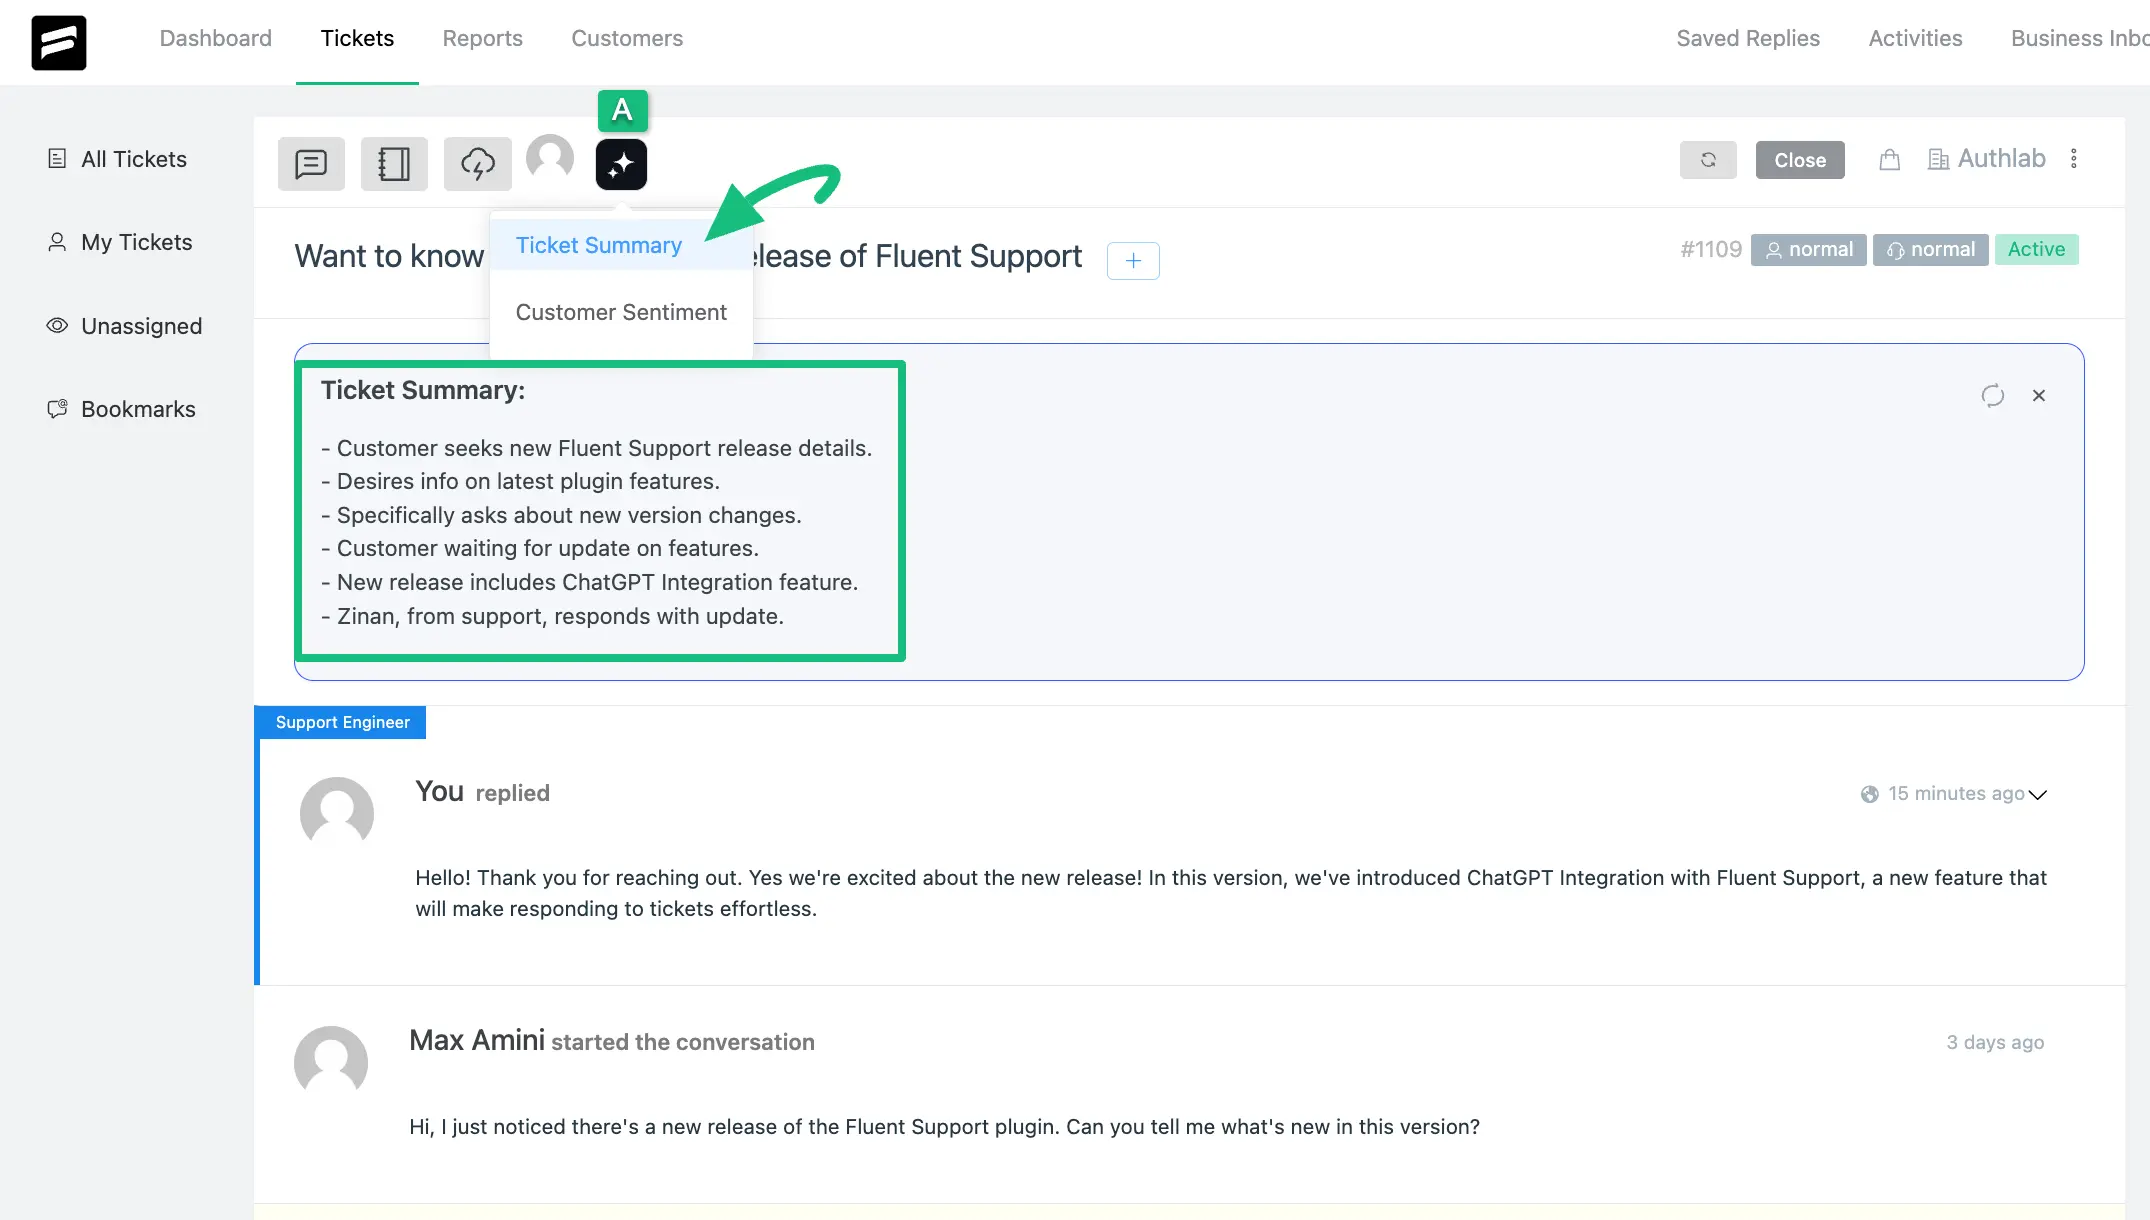
- Ticket Summary: Once you click this button, the AI will summarize the entire conversation you have in your ticket like the screenshot below.
- Customer Sentiment: Once you press this button, the AI will summarize the user’s satisfaction level with your responses in a statement with an emoji, as shown in the screenshot below.

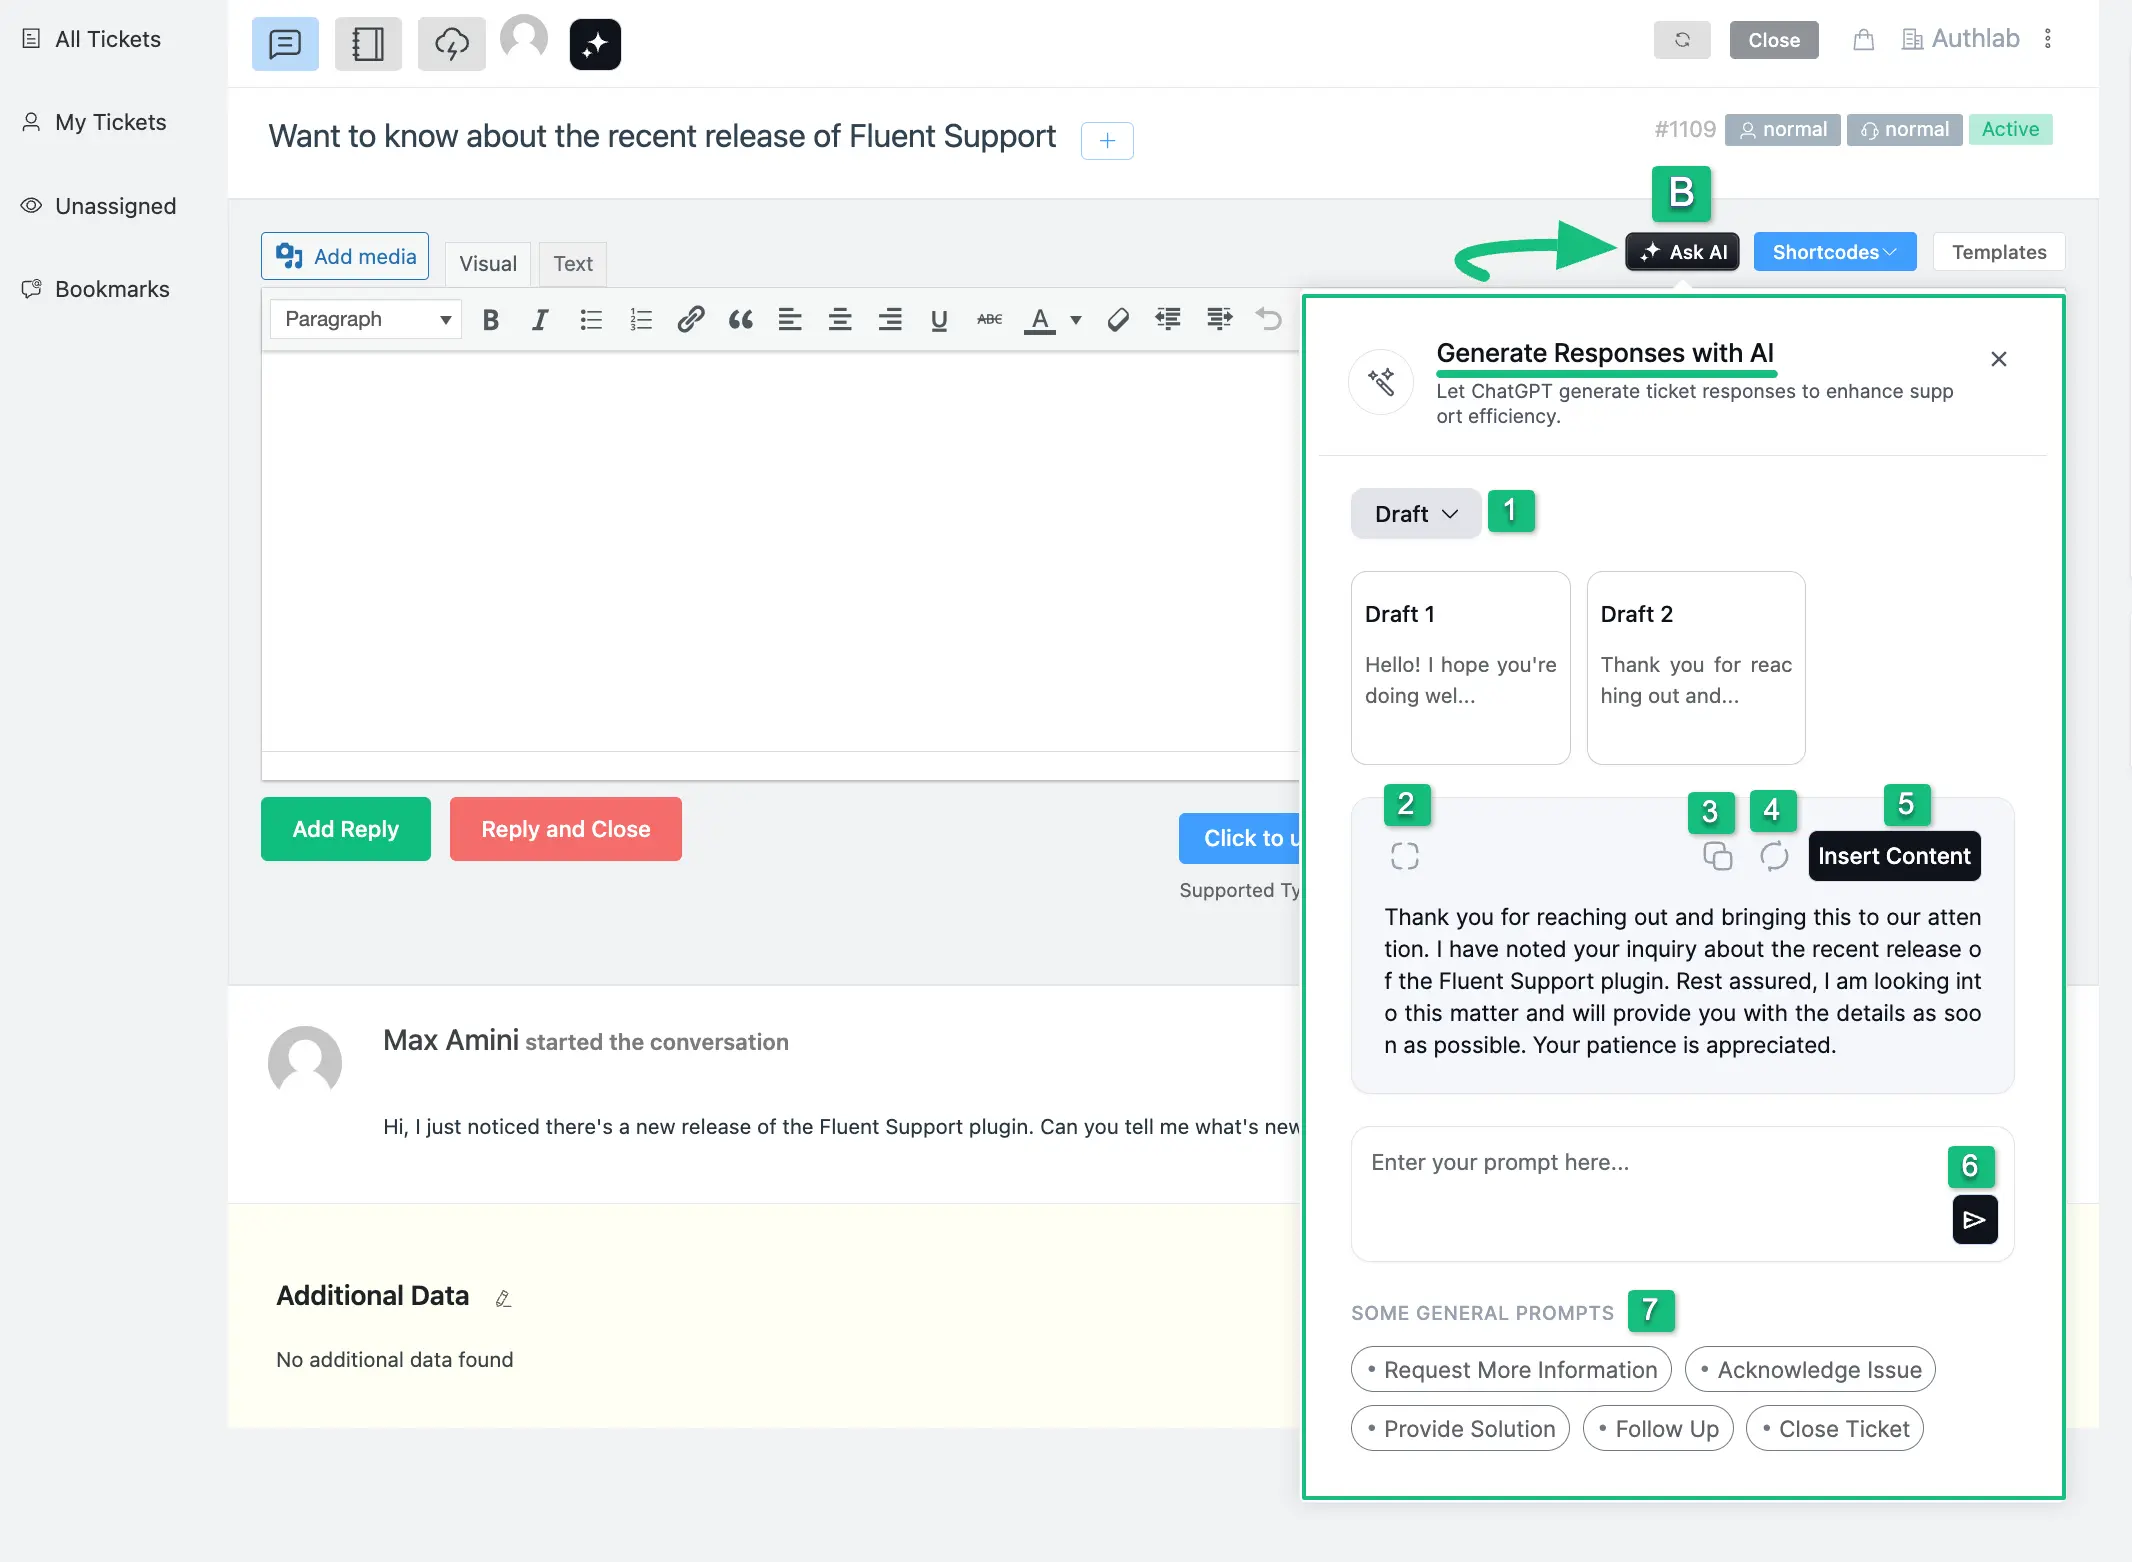
AI Assistant B: #
This AI assistant will help you to generate responses to make your responses efficient for your tickets.
A brief explanation of all the AI options mentioned above is given below:
- Draft: You will get this Draft Dropdown option only when you generate more than one response. But, in this dropdown, only the latest three responses will be available from where you can select the best one you prefer.
- Expand View: If you don’t want to scroll and see the whole response at a glance, click this button.
- Copy: Simply click this button and the whole content will be copied.
- Regenerate: If you don’t like the response that is Generated by the AI, you can regenerate it again by clicking this button.
- Insert Content: If you press this button, the whole response will be added automatically inside your reply box.
- Prompt Box: In this field, you can use your own prompts according to your needs for generating responses to your tickets. Then click the Arrow Icon and the response will be generated based on your prompts.
- Some General Prompts: You can find pre-built prompts here to generate your responses within less time and effort.
AI Assitant C: #
This AI assistant will help you modify your existing texts so that you can refine your ticket responses with to enhance clarity and precision.
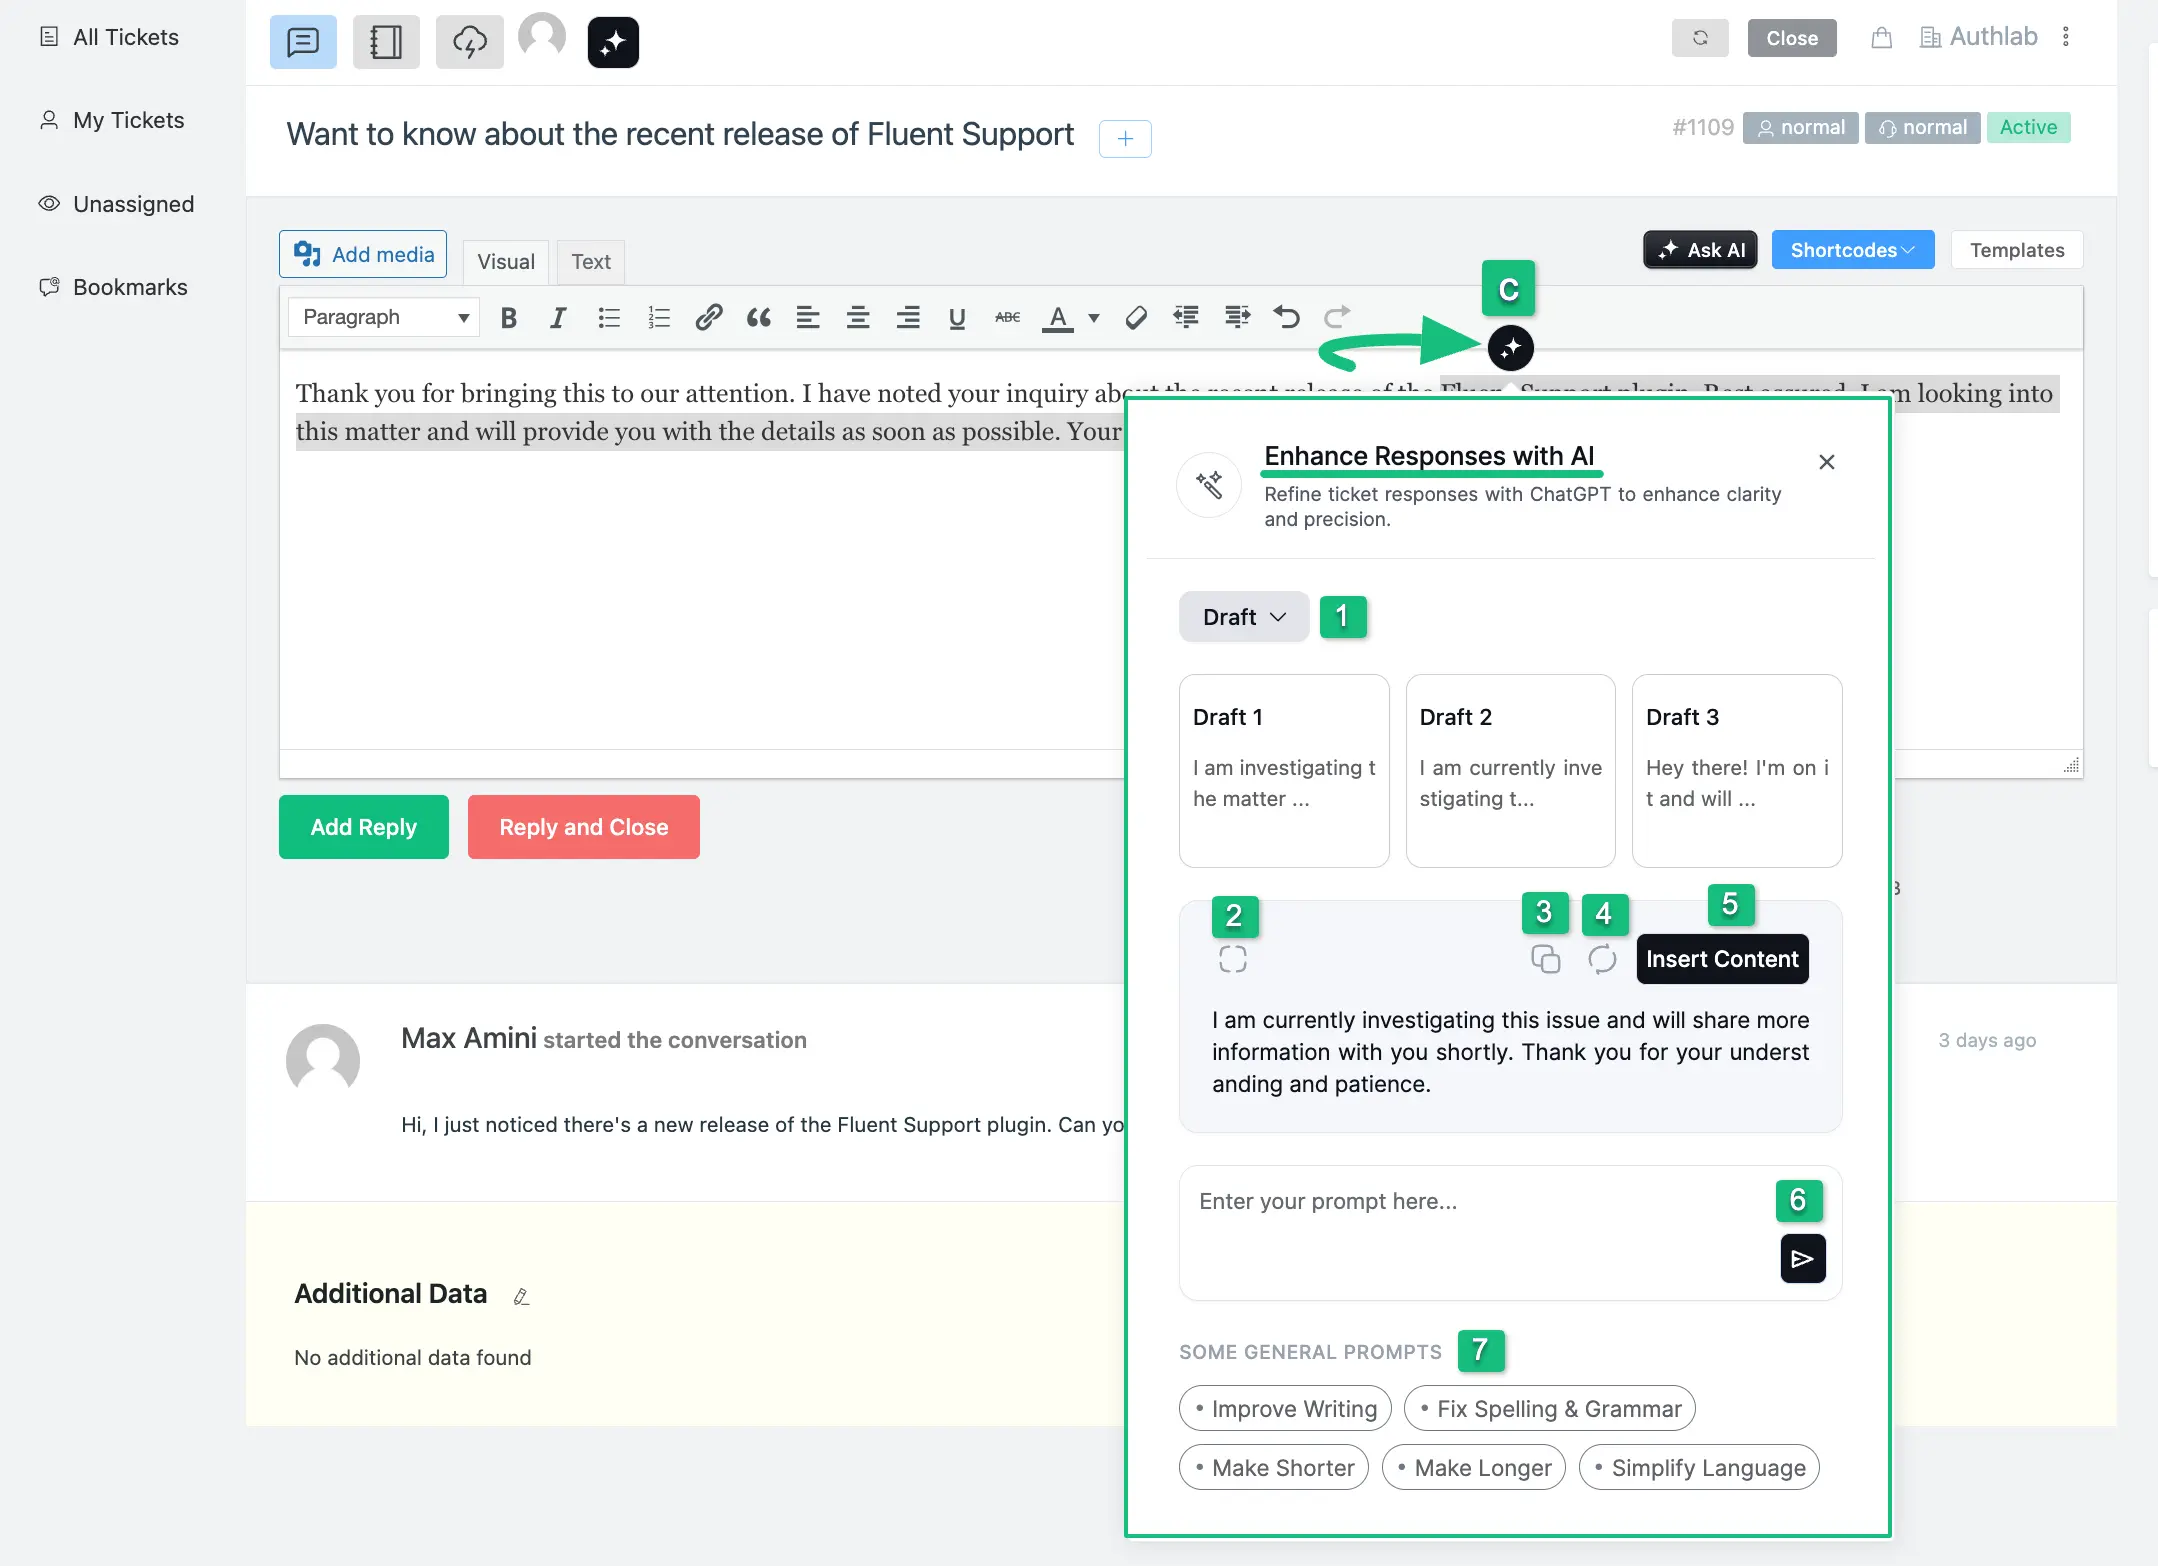
A brief explanation of all the AI options mentioned above is given below:
- Draft: You will get this Draft Dropdown option only when you generate more than one response. But, in this dropdown, only the latest three responses will be available from where you can select the best one you prefer.
- Expand View: If you don’t want to scroll and see the whole response at a glance, click this button.
- Copy: Simply click this button and the whole content will be copied.
- Regenerate: If you don’t like the response that is Generated by the AI, you can regenerate it again by clicking this button.
- Insert Content: If you press this button, the whole response will be added automatically inside your reply box.
- Prompt Box: In this field, you can use your own prompts according to your needs for generating responses to your tickets. Then click the Arrow Icon and the response will be generated based on your prompts.
- Some General Prompts: You can find pre-built prompts here to generate your responses within less time and effort.
Check Your All AI Activities #
To check your all AI-related activities in one place, follow the steps with screenshots below –
First, go to the Activities section from the Fluent Support Dashboard, click on the AI Activities tab, and you will get all the available options to manage your activities.
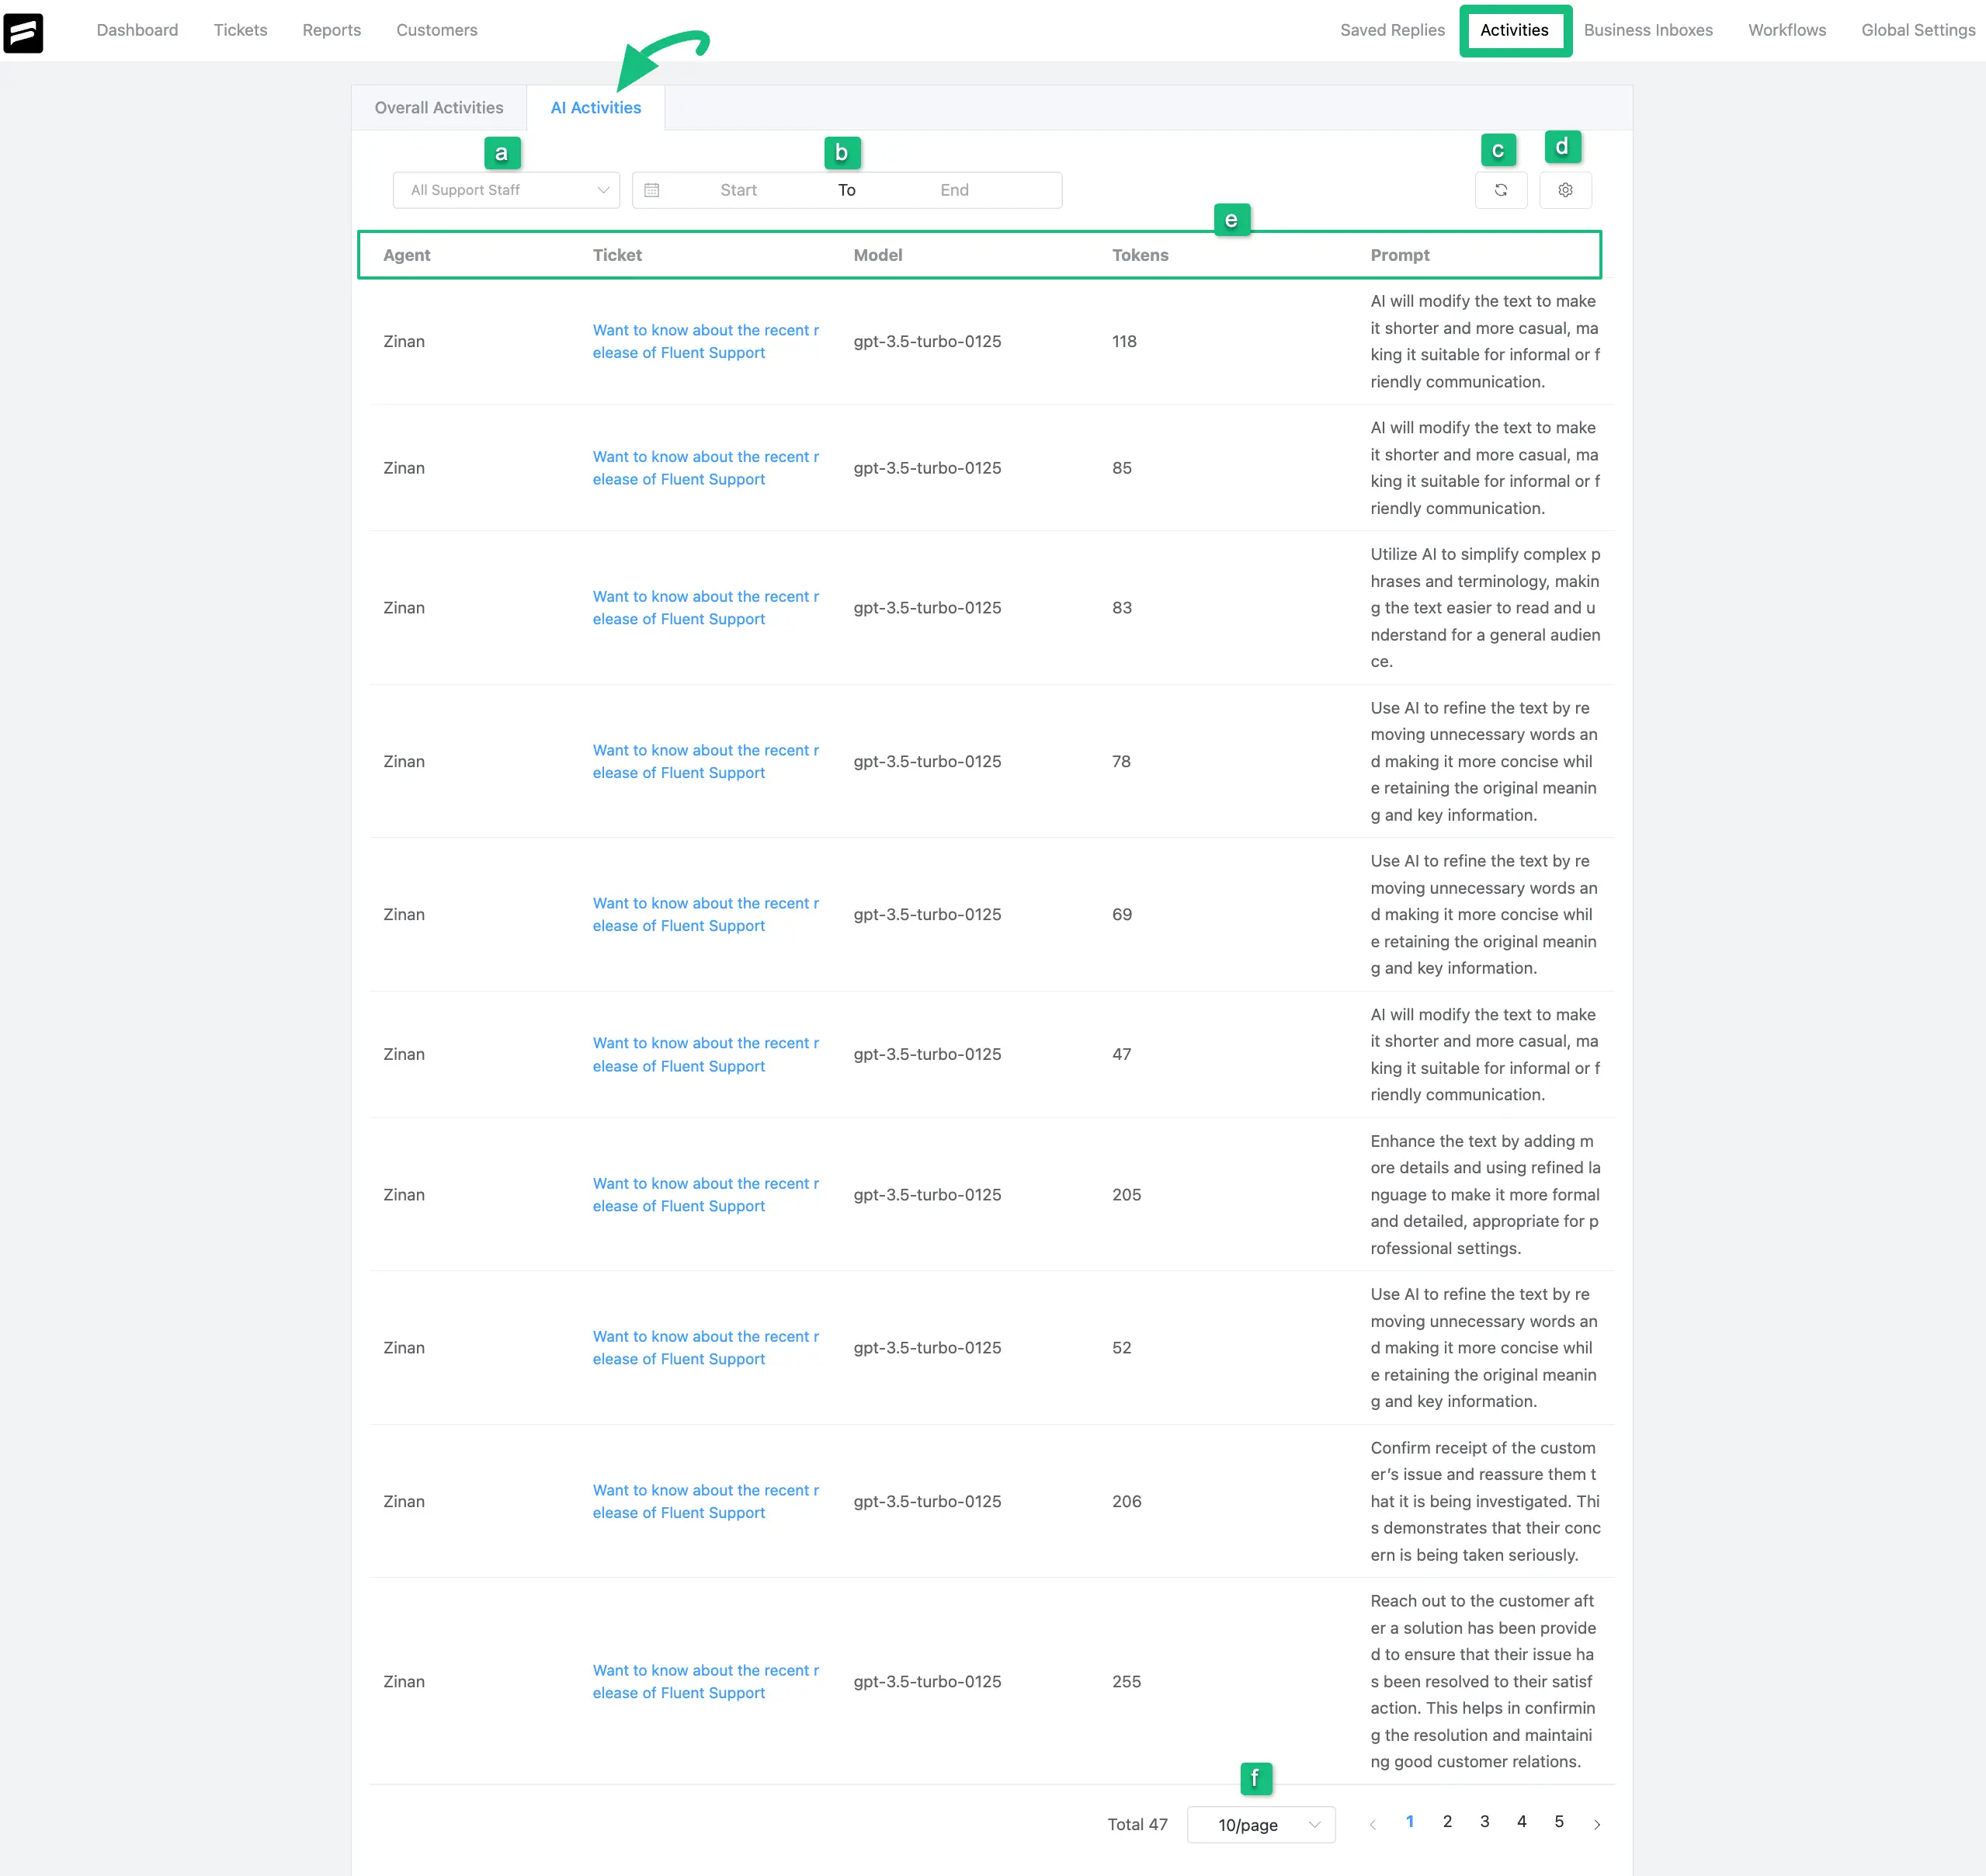
A brief explanation of all the above-mentioned options is given below:
- You can use the All Support Stuff filter to select the individual agent’s ticket statistics you want to view.
- You can utilize the Date filter to view ticket statistics for a specific timeline.
- You will find a Refresh icon in the top right corner, use it to update ticket activity.
- Through this Setting option, you can set the duration for automatically deleting activity logs. Also, you can Disable Activity Logs if you don’t want to track the activities of your support agents.
- Here, you will find five major columns for the activity table. These are:
- Agent: Here, you can see which ticket is responded to by whom (support agent).
- Ticket: Under this column, you will get the link to the tickets you responded to with AI.
- Model: Here, you can see which model of OpenAI you are using
- Tokens: Inside this column, you can see your total used tokens for every request.
- Prompt: Here, you can see what prompts you used in your tickets.
- With this Pagination option, you can set how many ticket activities you want to display per page.
If you have any further questions, concerns, or suggestions, please do not hesitate to contact our @support team.


