This article will guide you through the process required to customize the default Ticket Submission Form of Fluent Support (e.g., hiding or changing some text or field within the default form). Follow the instructions accordingly to know the whole process.
If you want, you can build a Ticket Form from scratch as well.
Ticket Form Configuration #
To learn where you can find all the customization settings of your Ticket Form provided by default from Fluent Support, follow the steps below —
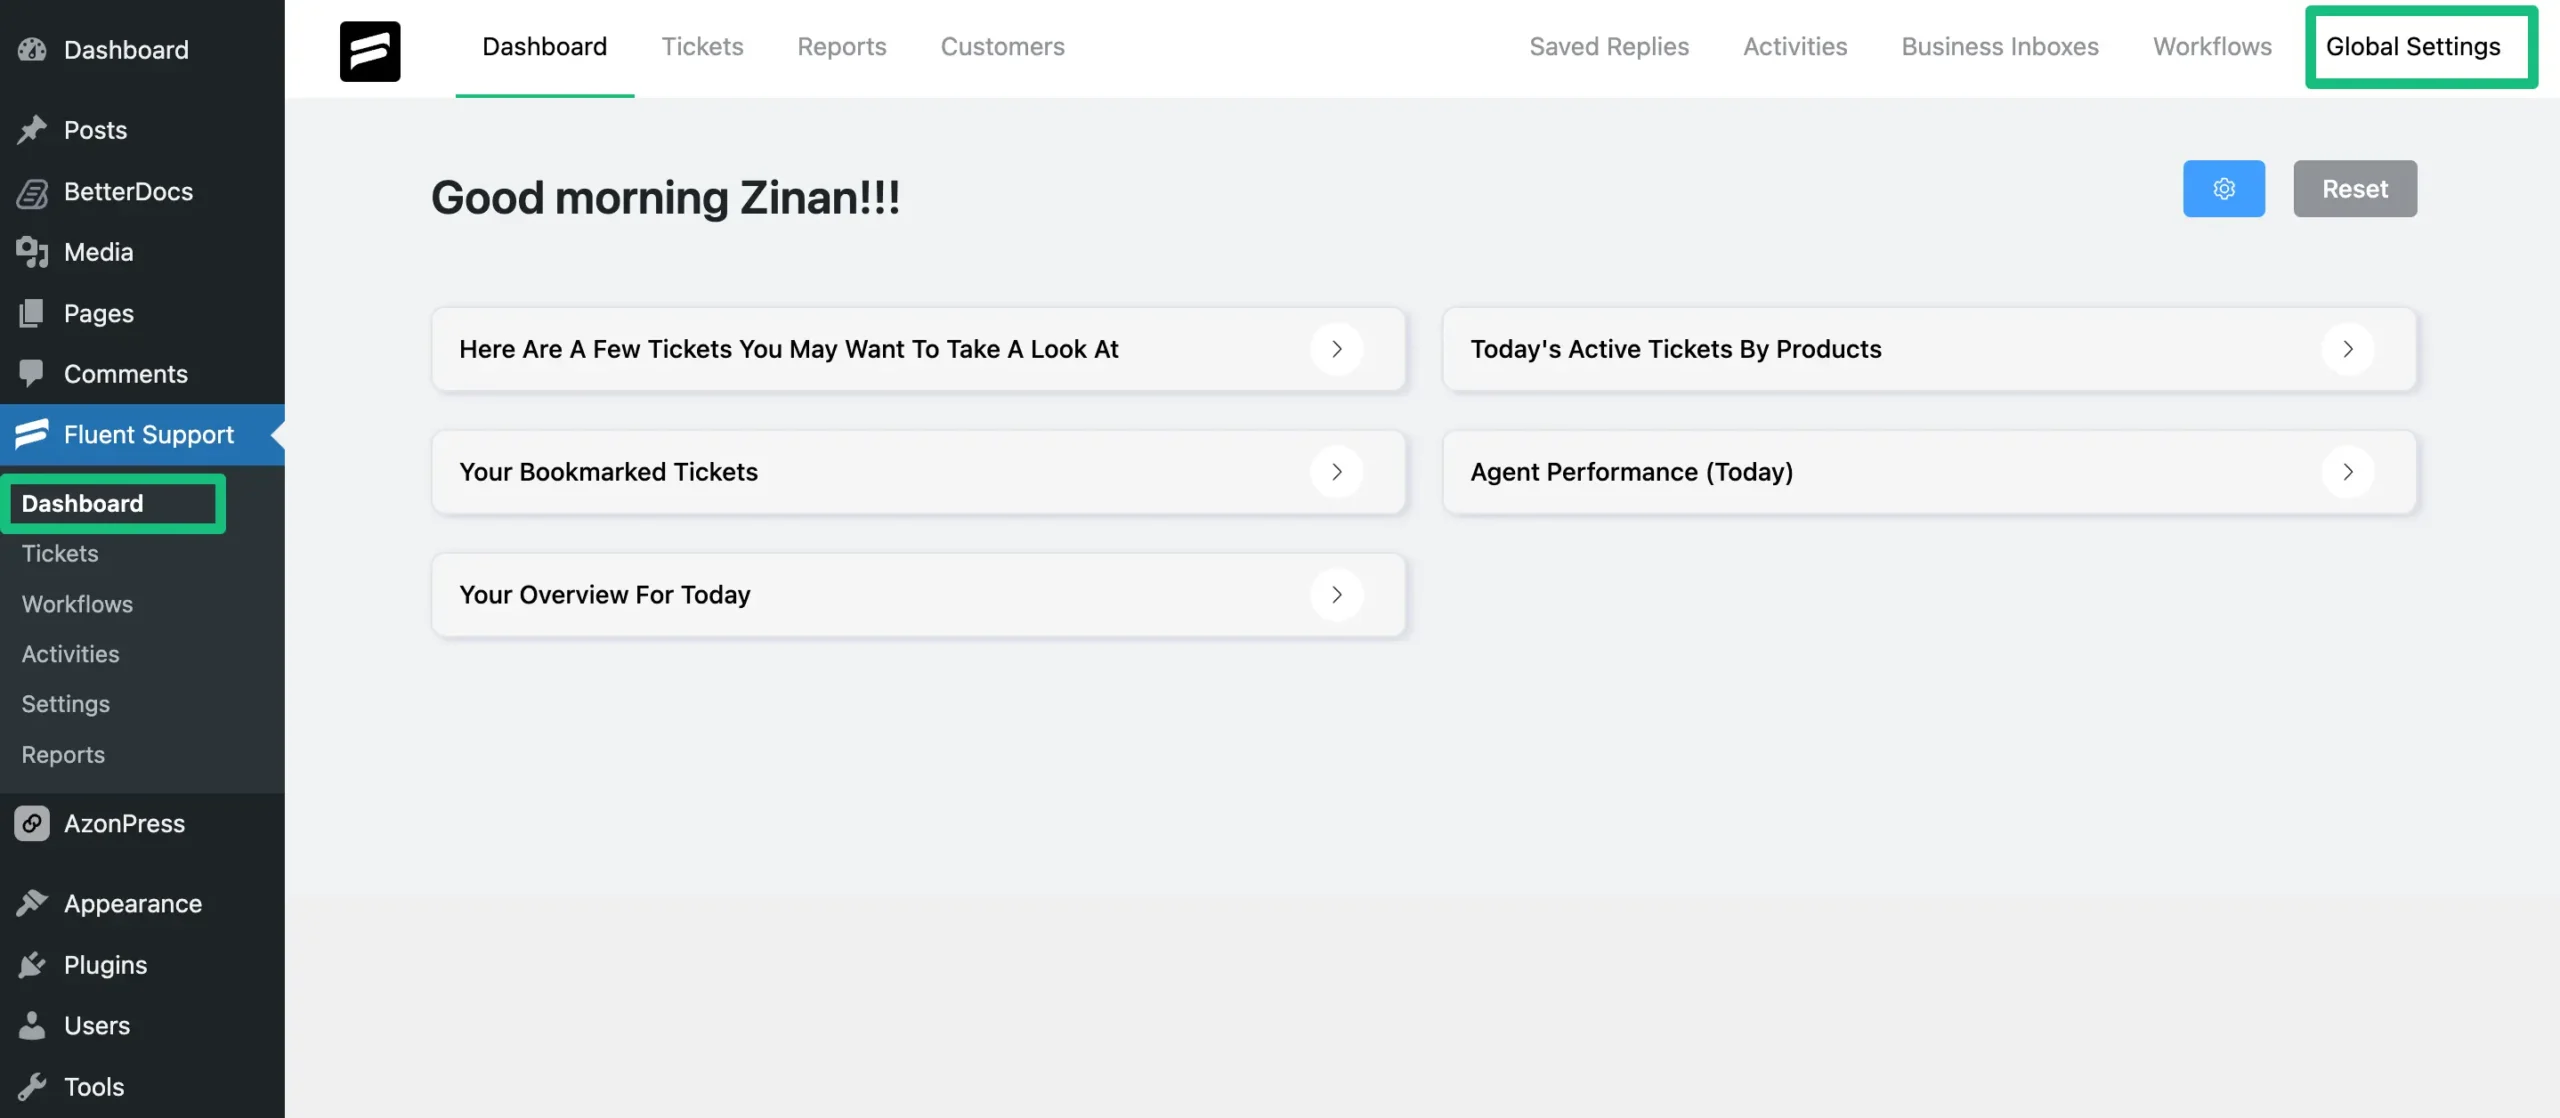
Go to Global Settings from your Fluent Support Dashboard.

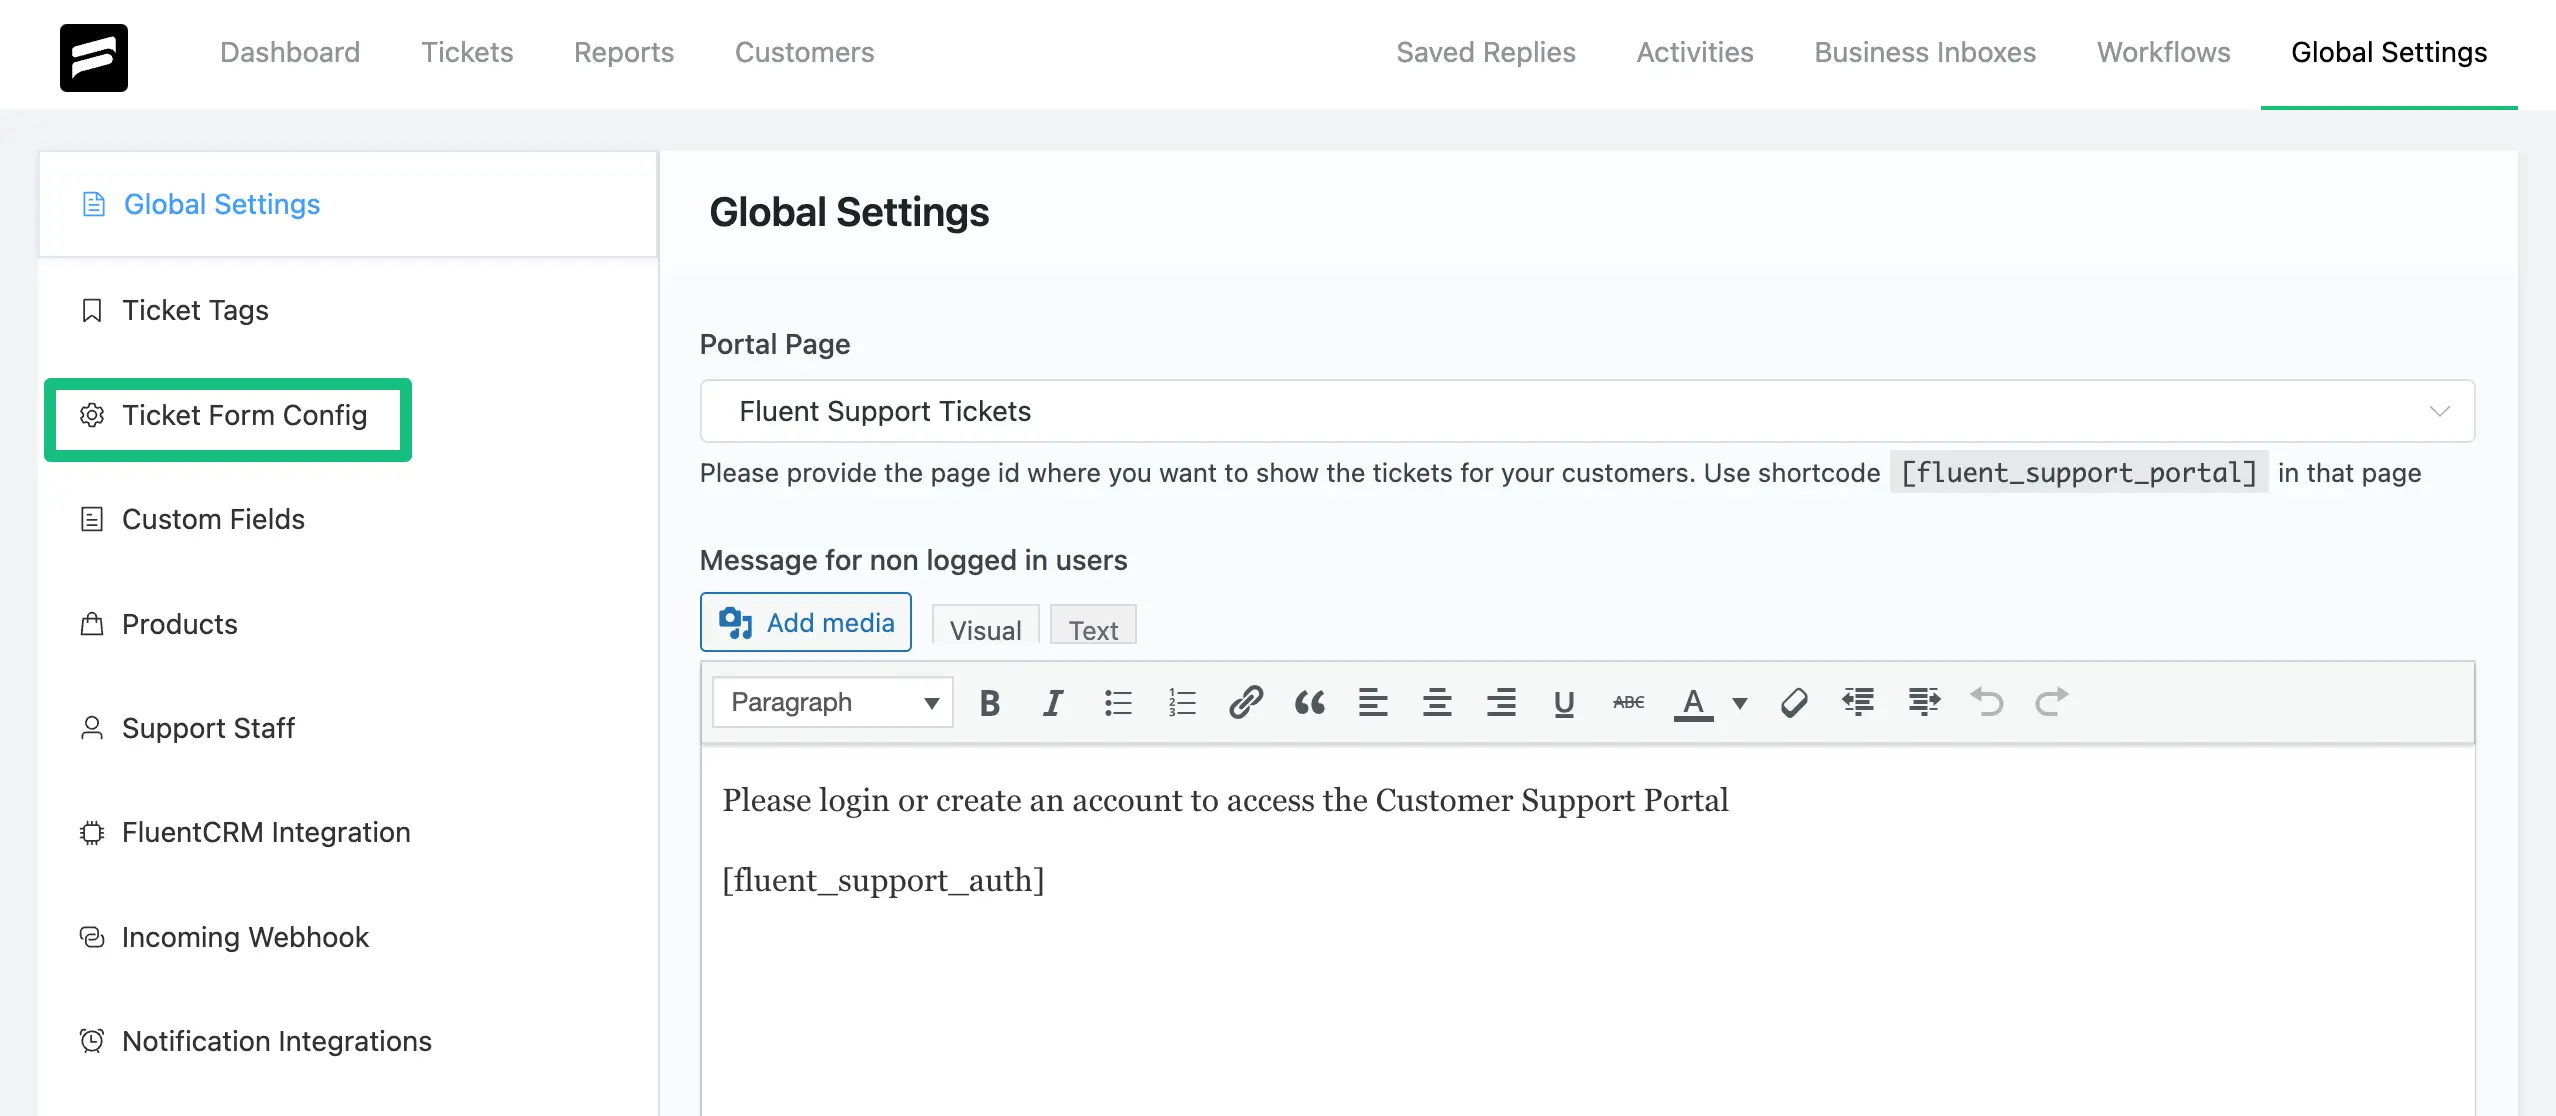
Click on Ticket Form Config from the left sidebar.

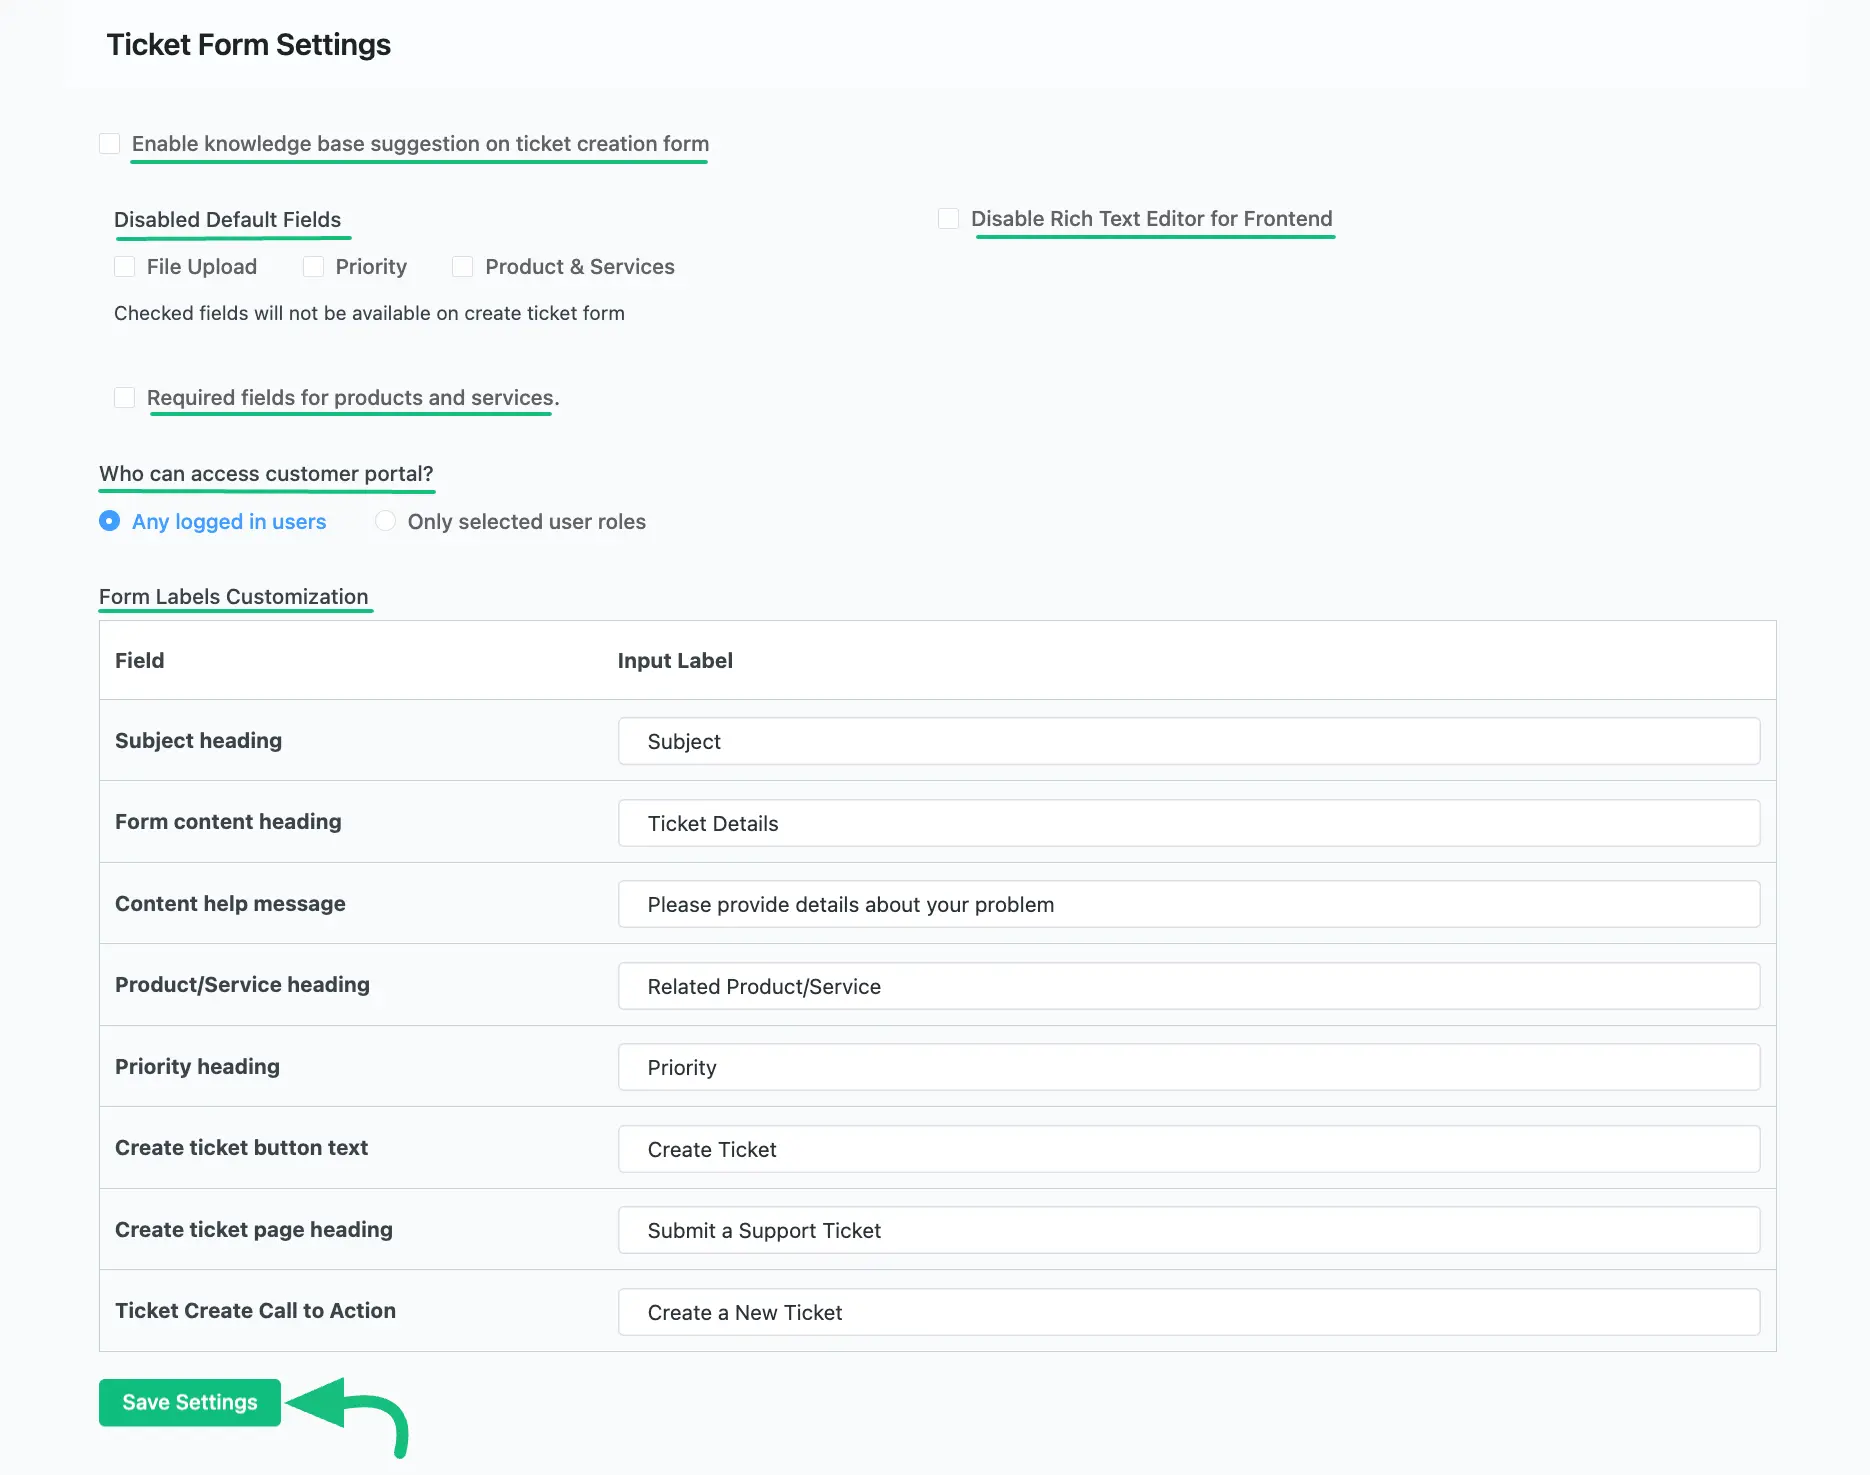
Here are all of the Settings of the Ticket Form which you can customize anytime.
Always press Save Settings after doing any customization in your Ticket Form Settings to save it, otherwise, the changes will not appear in your Ticket Form.

Ticket Form Settings #
You will find different settings options in Ticket Form Settings to customize your Ticket Form. These are —
- Enable Knowledge base suggestion on ticket creation form
- Disabled Default Fields
- Disable Rich Text Editor for Frontend
- Required fields for products and services
- Who can access customer portal?
- Form Labels Customization
To learn how to customize a Ticket Form with these settings, follow the steps below —
Enable Knowledge base suggestion on ticket creation form #
Enable this setting on your ticket form so that your customers can get instant solutions from related posts, docs, products, etc. exist on your website when they enter a subject. You can choose various options like Post, Attachment, Product, Docs, etc. based on your website content as suggestions. Also, you can set the limitations on how many articles you want to show.

Disabled Default Fields #
This setting allows you to disable any of the default fields that you do not want to show on your Ticket Form.

Disable Rich Text Editor for Frontend #
This setting allows you to disable the default Rich Text Editor option for the Frontend if you do not want to show it on your Ticket Form.

Required fields for products and services #
With this setting, you can now make your Product related fields “Required” for your customers on your Ticket Form.

Who can access customer portal? #
This setting gives you the option to select who can get access to your customer support portal. It provides two basic options and these are —
- Any logged in users: If you enable this option, any user can get access by logging into the customer portal.
- Only selected user roles: Here, you can specify which users can access your customer portal by selecting their roles (e.g., if you select Author, Contributor, and Customer roles, only they will have access).

Form Labels Customization #
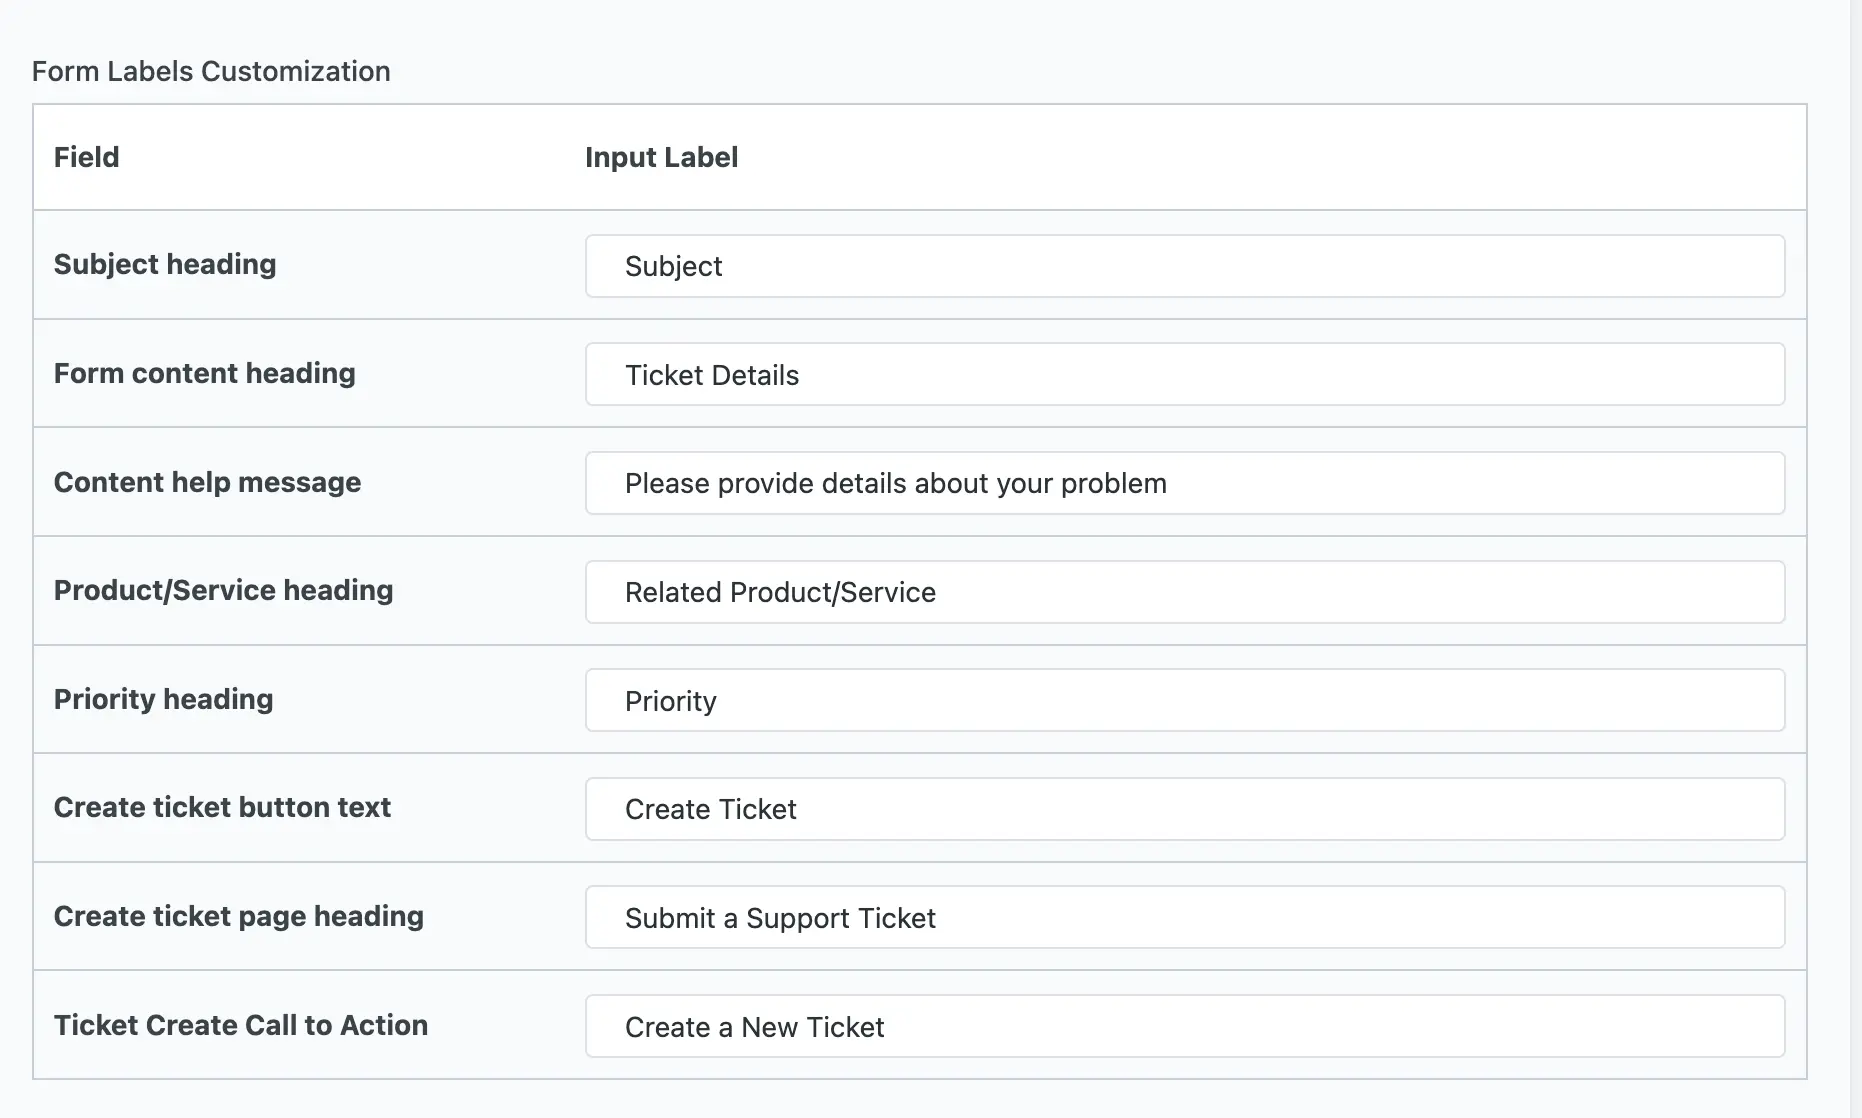
This setting allows you to customize the labels of your form fields (e.g., you can modify the label of the “Ticket Details” field to “Ticket Info“). Similarly, you can change the heading or text of any default fields as per your requirements.

Add Support Link to WooCommerce #
If you have already integrated Woocommerce with your Fluent Support, you will get the setting shown in below. Otherwise, this setting option will not appear in your Ticket Form Settings.
This setting allows WooCommerce users to easily create a support portal for their customers on the My Account page of the navigation menu, enabling customers to open support tickets directly from their WooCommerce account navigation.

If you have any further questions, concerns, or suggestions, please do not hesitate to contact our @support team. Thank you.


