FluentSupport makes it easy for agents to track time with the Agent Time Log feature. Agents can log the time they spend on tickets, and you can view a timesheet report to improve your workflow.
This article will show you, step by step, how to turn on the Time Tracker for your support agents.
Enable Time Tracker #
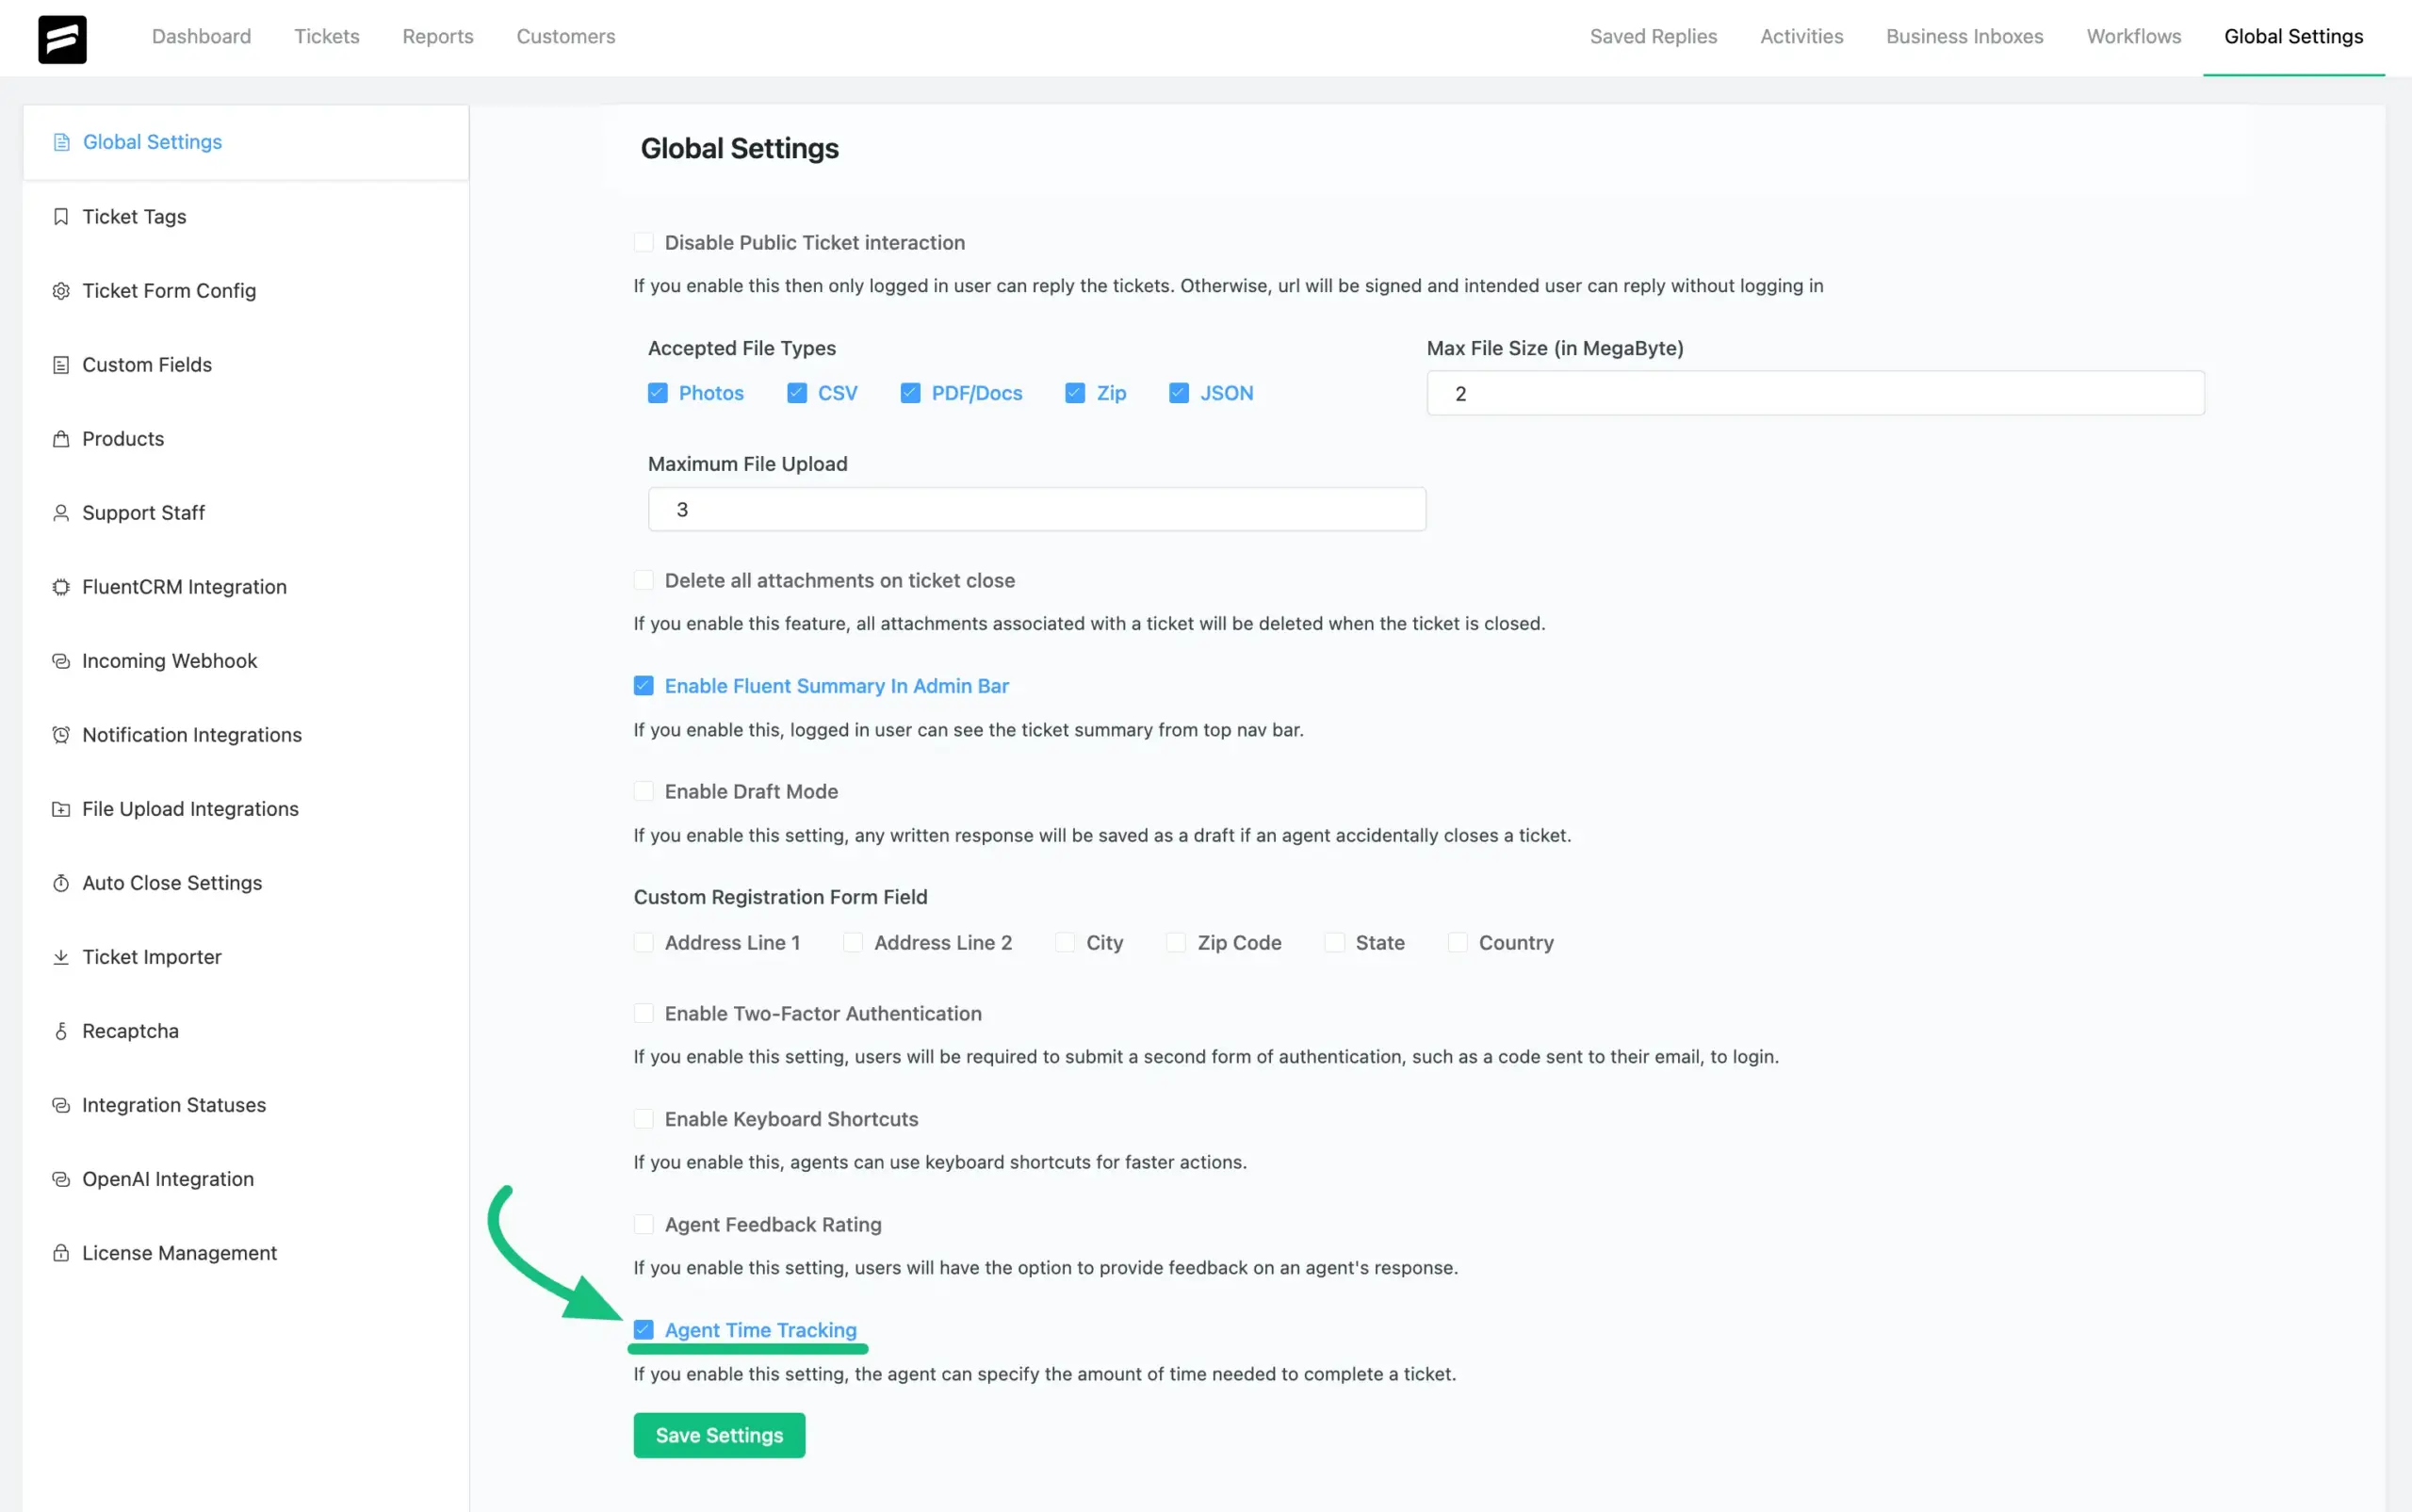
Go to FluentSupport’s Global Settings and scroll down to the Global Settings section. Look for the Agent Time Tracking option, check the box to enable Agent Time Tracking, and click the Save Settings button.

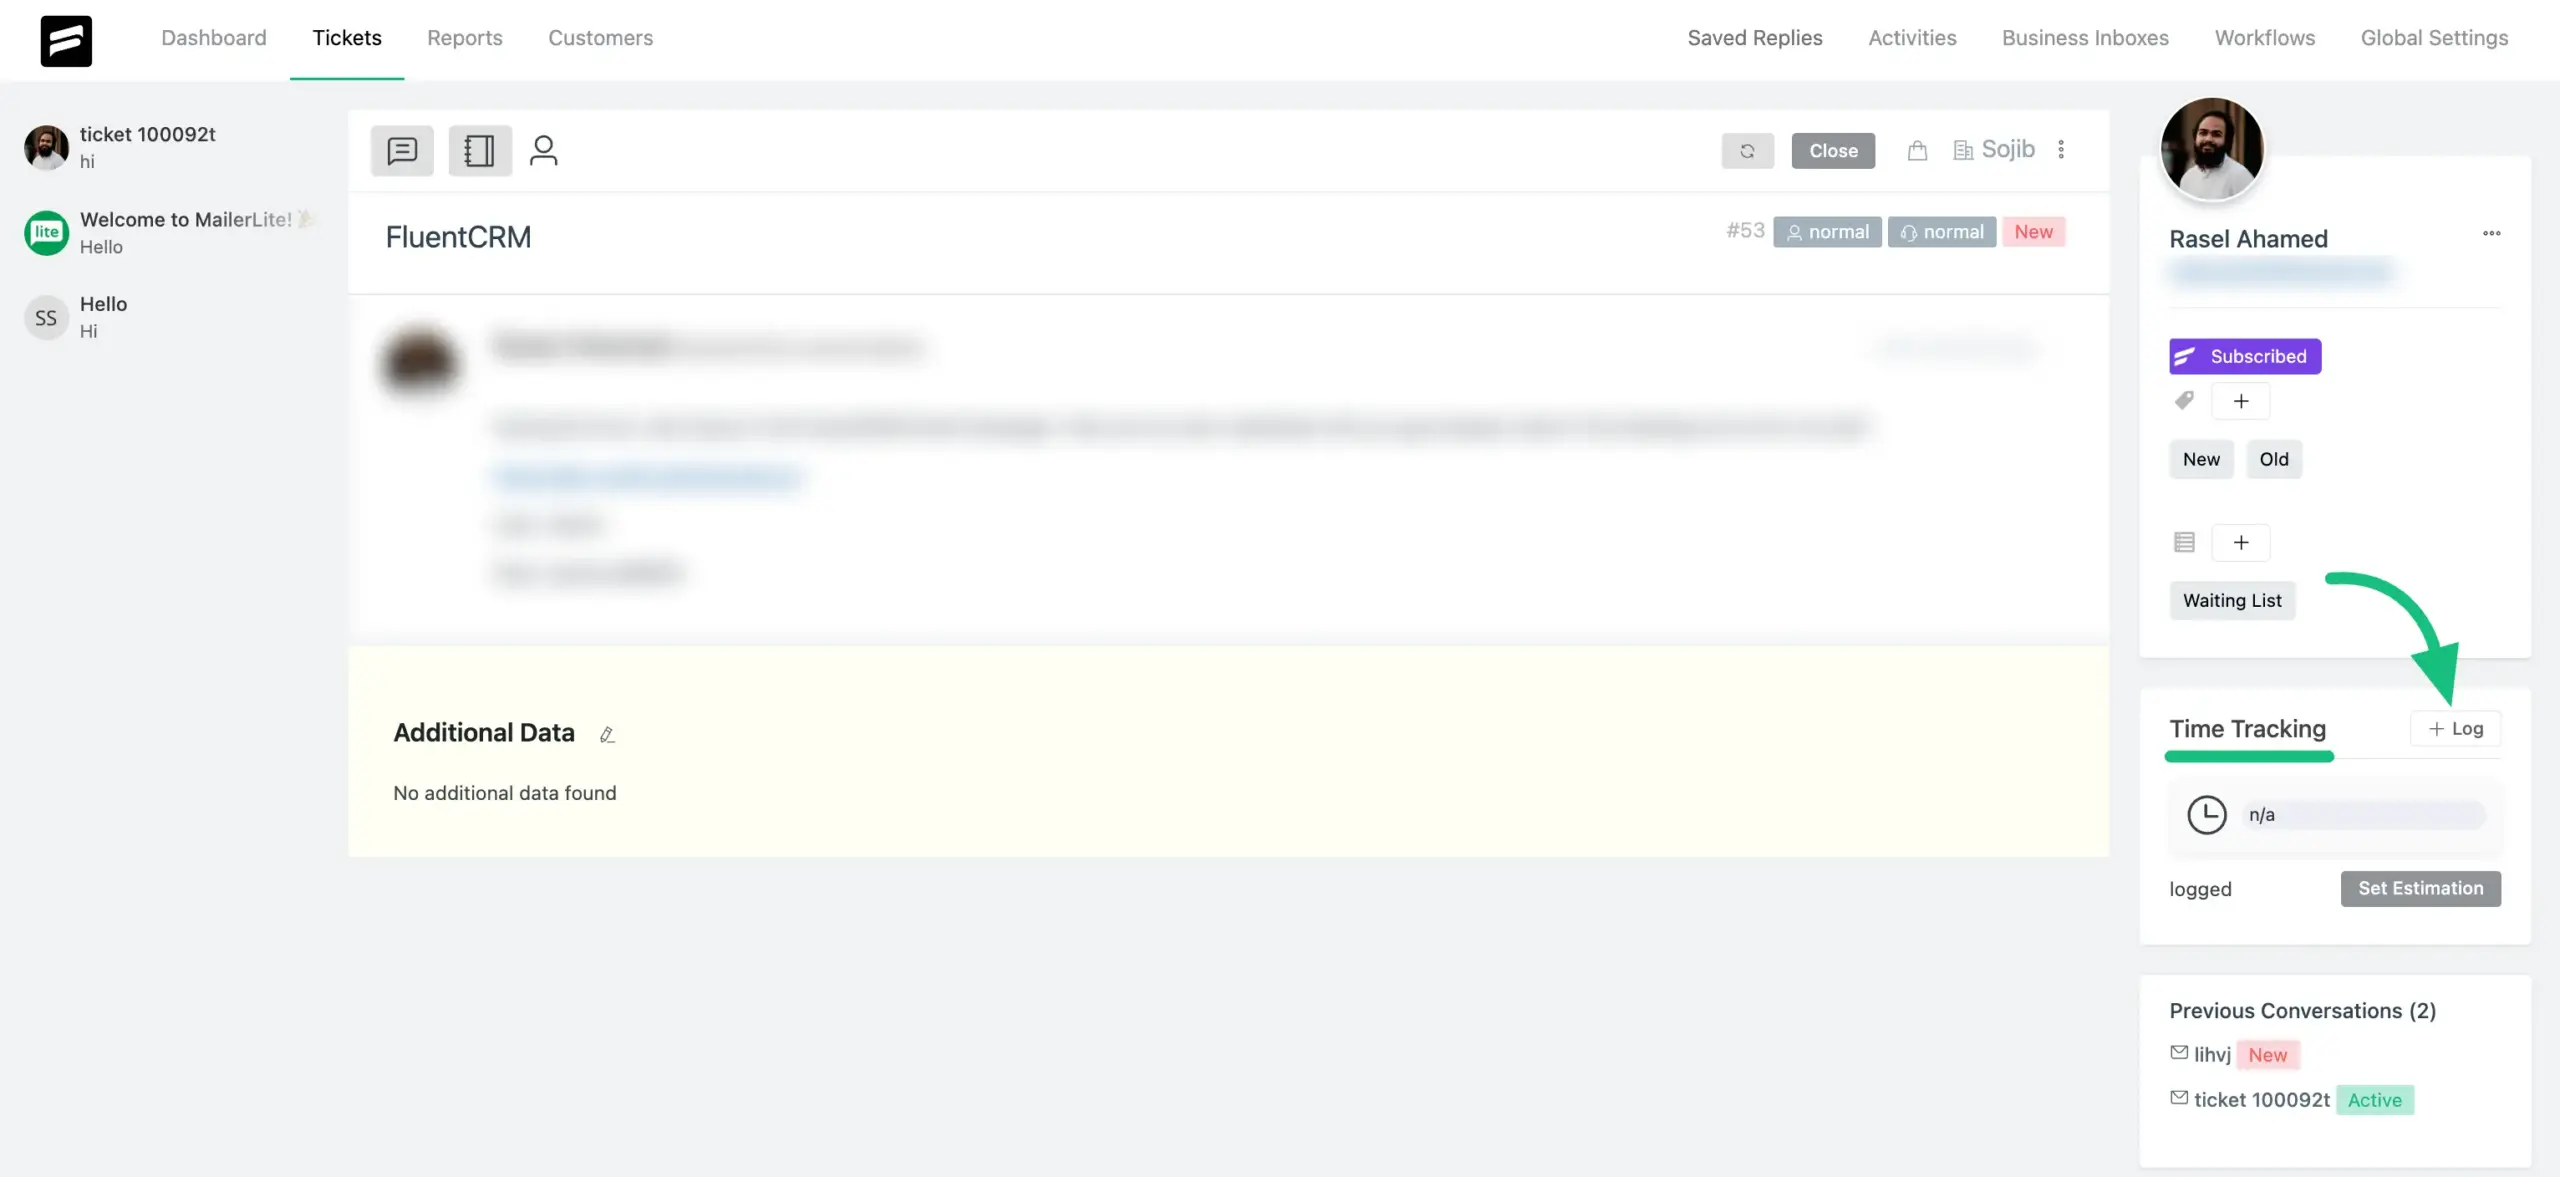
Go to the specific ticket where you want to use the Time Tracking. You’ll see the Time Tracking option like the below screenshot. Click the Log button to see the time-tracking options.

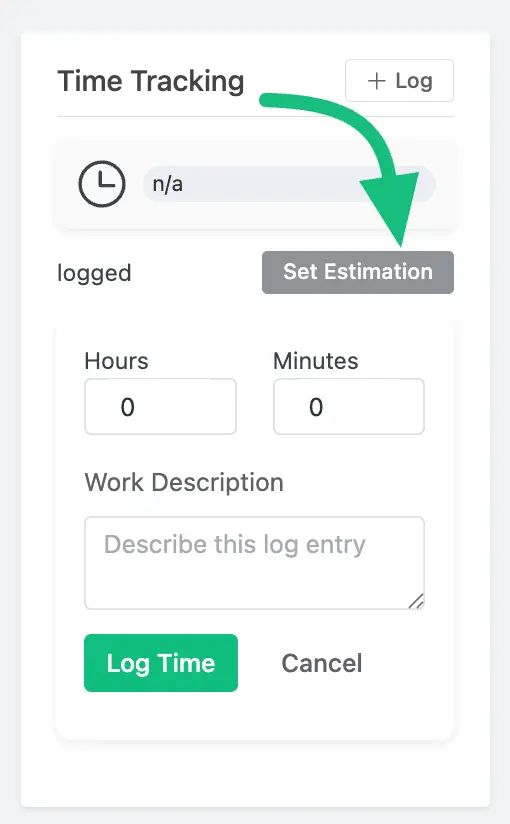
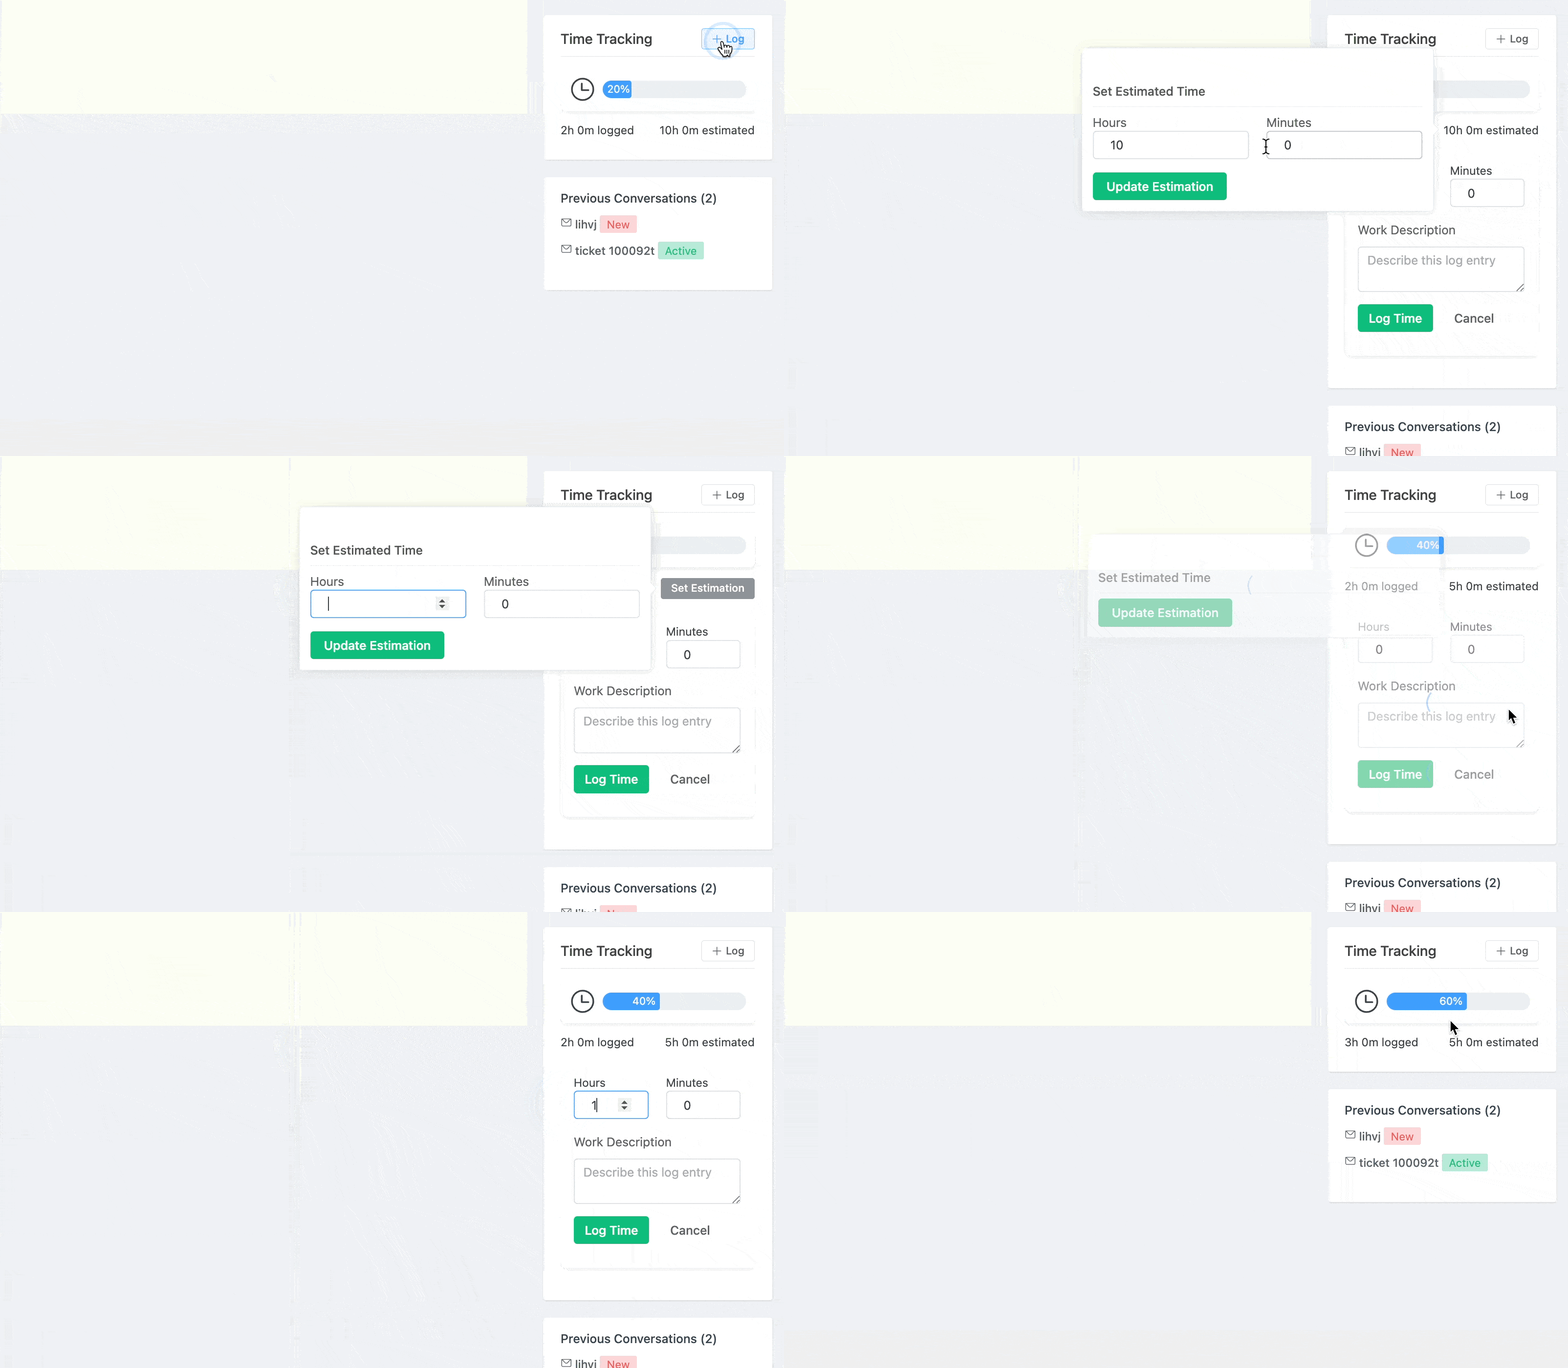
Set Estimation: Use this option to set the estimated time needed to resolve the ticket. Click the Set Estimation button and enter the hours and minutes for the ticket.
You’ll also find fields to log your work hours and minutes. You can add a description for this time log by typing it in the provided field.
When you’re done, click the Log Time button to save the time to your log.

The Time Tracker also shows Time Progress, giving you a clear view based on the logged time.

Time Tracker Report #
You can view a detailed report for Agent Time Tracking. To access it, go to Reports in the navigation bar and click on Timesheet.
Here, you’ll find the Time Tracking report, which you can filter by tickets, agents, or customers. You can also use the date filter to view reports for specific time periods.
From the Mailbox dropdown, you can select a specific mailbox to view the report for that mailbox only.
Export: To export your Timesheet Report, click the Export button in the top-right corner. The report will be downloaded as a CSV file.

If you have any questions or need further assistance, feel free to reach out to us.


